ASTM E2309/E2309M-20
(Practice)Standard Practices for Verification of Displacement Measuring Systems and Devices Used in Material Testing Machines
Standard Practices for Verification of Displacement Measuring Systems and Devices Used in Material Testing Machines
SIGNIFICANCE AND USE
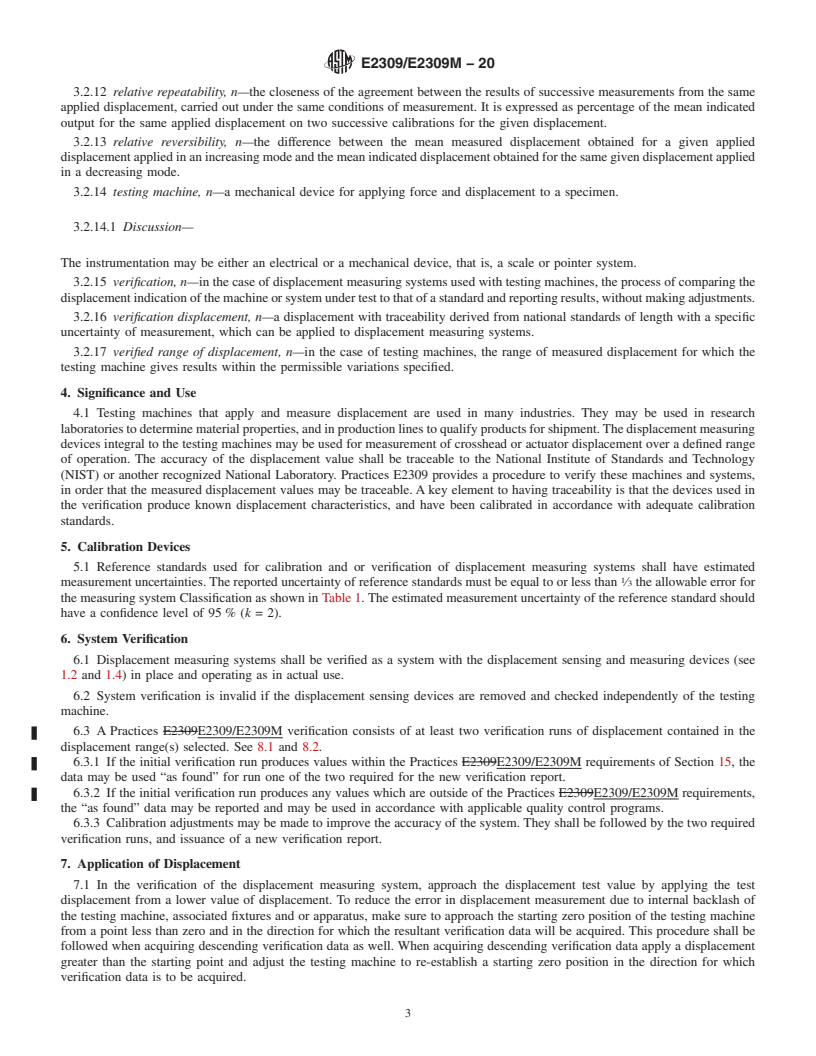
4.1 Testing machines that apply and measure displacement are used in many industries. They may be used in research laboratories to determine material properties, and in production lines to qualify products for shipment. The displacement measuring devices integral to the testing machines may be used for measurement of crosshead or actuator displacement over a defined range of operation. The accuracy of the displacement value shall be traceable to the National Institute of Standards and Technology (NIST) or another recognized National Laboratory. Practices E2309 provides a procedure to verify these machines and systems, in order that the measured displacement values may be traceable. A key element to having traceability is that the devices used in the verification produce known displacement characteristics, and have been calibrated in accordance with adequate calibration standards.
SCOPE
1.1 These practices cover procedures and requirements for the calibration and verification of displacement measuring systems by means of standard calibration devices for static and quasi-static testing machines. This practice is not intended to be complete purchase specifications for testing machines or displacement measuring systems. Displacement measuring systems are not intended to be used for the determination of strain. See Practice E83.
1.2 These procedures apply to the verification of the displacement measuring systems associated with the testing machine, such as a scale, dial, marked or unmarked recorder chart, digital display, etc. In all cases the buyer/owner/user must designate the displacement-measuring system(s) to be verified.
1.3 The values stated in either SI units or inch-pound units are to be regarded separately as standard. The values stated in each system may not be exact equivalents; therefore, each system shall be used independently of the other. Combining values from the two systems may result in non-conformance with the standard.
1.4 Displacement values indicated on displays/printouts of testing machine data systems—be they instantaneous, delayed, stored, or retransmitted—which are within the Classification criteria listed in Table 1, comply with Practices E2309/E2309M.
1.5 This standard does not purport to address all of the safety concerns, if any, associated with its use. It is the responsibility of the user of this standard to establish appropriate safety, health, and environmental practices and determine the applicability of regulatory limitations prior to use.
1.6 This international standard was developed in accordance with internationally recognized principles on standardization established in the Decision on Principles for the Development of International Standards, Guides and Recommendations issued by the World Trade Organization Technical Barriers to Trade (TBT) Committee.
General Information
Relations
Buy Standard
Standards Content (Sample)
This international standard was developed in accordance with internationally recognized principles on standardization established in the Decision on Principles for the
Development of International Standards, Guides and Recommendations issued by the World Trade Organization Technical Barriers to Trade (TBT) Committee.
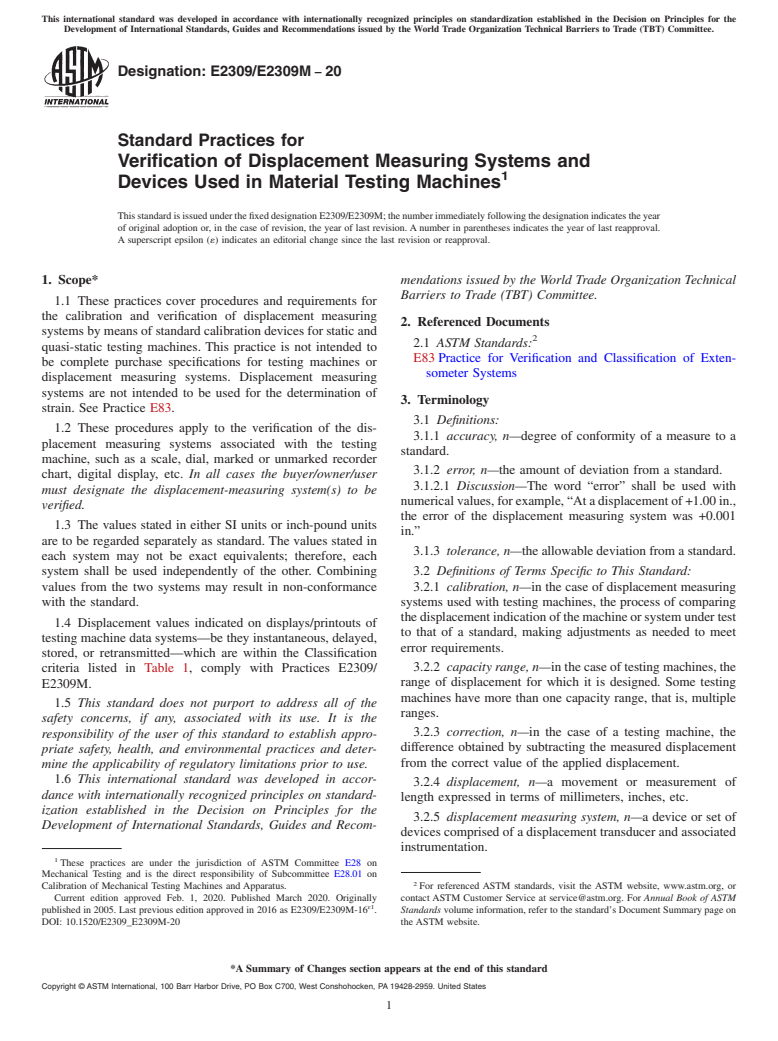
Designation:E2309/E2309M −20
Standard Practices for
Verification of Displacement Measuring Systems and
1
Devices Used in Material Testing Machines
ThisstandardisissuedunderthefixeddesignationE2309/E2309M;thenumberimmediatelyfollowingthedesignationindicatestheyear
of original adoption or, in the case of revision, the year of last revision.Anumber in parentheses indicates the year of last reapproval.
A superscript epsilon (´) indicates an editorial change since the last revision or reapproval.
1. Scope* mendations issued by the World Trade Organization Technical
Barriers to Trade (TBT) Committee.
1.1 These practices cover procedures and requirements for
the calibration and verification of displacement measuring
2. Referenced Documents
systemsbymeansofstandardcalibrationdevicesforstaticand
2
2.1 ASTM Standards:
quasi-static testing machines. This practice is not intended to
E83Practice for Verification and Classification of Exten-
be complete purchase specifications for testing machines or
someter Systems
displacement measuring systems. Displacement measuring
systems are not intended to be used for the determination of
3. Terminology
strain. See Practice E83.
3.1 Definitions:
1.2 These procedures apply to the verification of the dis-
3.1.1 accuracy, n—degree of conformity of a measure to a
placement measuring systems associated with the testing
standard.
machine, such as a scale, dial, marked or unmarked recorder
3.1.2 error, n—the amount of deviation from a standard.
chart, digital display, etc. In all cases the buyer/owner/user
3.1.2.1 Discussion—The word “error” shall be used with
must designate the displacement-measuring system(s) to be
numericalvalues,forexample,“Atadisplacementof+1.00in.,
verified.
the error of the displacement measuring system was +0.001
1.3 The values stated in either SI units or inch-pound units
in.”
are to be regarded separately as standard. The values stated in
3.1.3 tolerance, n—theallowabledeviationfromastandard.
each system may not be exact equivalents; therefore, each
system shall be used independently of the other. Combining 3.2 Definitions of Terms Specific to This Standard:
values from the two systems may result in non-conformance 3.2.1 calibration, n—in the case of displacement measuring
with the standard. systems used with testing machines, the process of comparing
thedisplacementindicationofthemachineorsystemundertest
1.4 Displacement values indicated on displays/printouts of
to that of a standard, making adjustments as needed to meet
testing machine data systems—be they instantaneous, delayed,
error requirements.
stored, or retransmitted—which are within the Classification
3.2.2 capacity range, n—inthecaseoftestingmachines,the
criteria listed in Table 1, comply with Practices E2309/
range of displacement for which it is designed. Some testing
E2309M.
machines have more than one capacity range, that is, multiple
1.5 This standard does not purport to address all of the
ranges.
safety concerns, if any, associated with its use. It is the
3.2.3 correction, n—in the case of a testing machine, the
responsibility of the user of this standard to establish appro-
difference obtained by subtracting the measured displacement
priate safety, health, and environmental practices and deter-
from the correct value of the applied displacement.
mine the applicability of regulatory limitations prior to use.
1.6 This international standard was developed in accor-
3.2.4 displacement, n—a movement or measurement of
dance with internationally recognized principles on standard-
length expressed in terms of millimeters, inches, etc.
ization established in the Decision on Principles for the
3.2.5 displacement measuring system, n—a device or set of
Development of International Standards, Guides and Recom-
devicescomprisedofadisplacementtransducerandassociated
instrumentation.
1
These practices are under the jurisdiction of ASTM Committee E28 on
Mechanical Testing and is the direct responsibility of Subcommittee E28.01 on
2
Calibration of Mechanical Testing Machines and Apparatus. For referenced ASTM standards, visit the ASTM website, www.astm.org, or
Current edition approved Feb. 1, 2020. Published March 2020. Originally contact ASTM Customer Service at service@astm.org. For Annual Book of ASTM
ɛ1
published in 2005. Last previous edition approved in 2016 as E2309/E2309M-16 . Standards volume information, refer to the standard’s Document Summary page on
DOI: 10.1520/E2309_E2309M-20 the ASTM website.
*A Summary of Changes section appears at the end of this standard
Copyright © ASTM International, 100 Barr Harbor Drive, PO Box C700, West Conshohocken, PA 19428-2959. United States
1
----------------
...
This document is not an ASTM standard and is intended only to provide the user of an ASTM standard an indication of what changes have been made to the previous version. Because
it may not be technically possible to adequately depict all changes accurately, ASTM recommends that users consult prior editions as appropriate. In all cases only the current version
of the standard as published by ASTM is to be considered the official document.
Designation: E2309/E2309M − 16 E2309/E2309M − 20
Standard Practices for
Verification of Displacement Measuring Systems and
1
Devices Used in Material Testing Machines
This standard is issued under the fixed designation E2309/E2309M; the number immediately following the designation indicates the year
of original adoption or, in the case of revision, the year of last revision. A number in parentheses indicates the year of last reapproval.
A superscript epsilon (´) indicates an editorial change since the last revision or reapproval.
1. Scope*
1.1 These practices cover procedures and requirements for the calibration and verification of displacement measuring systems
by means of standard calibration devices for static and quasi-static testing machines. This practice is not intended to be complete
purchase specifications for testing machines or displacement measuring systems. Displacement measuring systems are not intended
to be used for the determination of strain. See Practice E83.
1.2 These procedures apply to the verification of the displacement measuring systems associated with the testing machine, such
as a scale, dial, marked or unmarked recorder chart, digital display, etc. In all cases the buyer/owner/user must designate the
displacement-measuring system(s) to be verified.
1.3 The values stated in either SI units or inch-pound units are to be regarded separately as standard. The values stated in each
system may not be exact equivalents; therefore, each system shall be used independently of the other. Combining values from the
two systems may result in non-conformance with the standard.
1.4 Displacement values indicated on displays/printouts of testing machine data systems—be they instantaneous, delayed,
stored, or retransmitted—which are within the Classification criteria listed in Table 1, comply with Practices E2309/E2309M.
1.5 This standard does not purport to address all of the safety concerns, if any, associated with its use. It is the responsibility
of the user of this standard to establish appropriate safety safety, health, and healthenvironmental practices and determine the
applicability of regulatory limitations prior to use.
1.6 This international standard was developed in accordance with internationally recognized principles on standardization
established in the Decision on Principles for the Development of International Standards, Guides and Recommendations issued
by the World Trade Organization Technical Barriers to Trade (TBT) Committee.
2. Referenced Documents
2
2.1 ASTM Standards:
E83 Practice for Verification and Classification of Extensometer Systems
3. Terminology
3.1 Definitions:
3.1.1 accuracy, n—degree of conformity of a measure to a standard.
3.1.2 error, n—the amount of deviation from a standard.
3.1.2.1 Discussion—
The word “error” shall be used with numerical values, for example, “At a displacement of +1.00 in., the error of the displacement
measuring system was +0.001 in.”
3.1.3 tolerance, n—the allowable deviation from a standard.
3.2 Definitions of Terms Specific to This Standard:
1
These practices are under the jurisdiction of ASTM Committee E28 on Mechanical Testing and is the direct responsibility of Subcommittee E28.01 on Calibration of
Mechanical Testing Machines and Apparatus.
Current edition approved Jan. 1, 2016Feb. 1, 2020. Published February 2016March 2020. Originally published in 2005. Last previous edition approved in 20112016 as
ɛ1
E2309/E2309M-05(2011)E2309/E2309M-16 . DOI: 10.1520/E2309_E2309M-1610.1520/E2309_E2309M-20
2
For referenced ASTM standards, visit the ASTM website, www.astm.org, or contact ASTM Customer Service at service@astm.org. For Annual Book of ASTM Standards
volume information, refer to the standard’s Document Summary page on the ASTM website.
*A Summary of Changes section appears at the end of this standard
Copyright © ASTM International, 100 Barr Harbor Drive, PO Box C700, West Conshohocken, PA 19428-2959. United States
1
---------------------- Page: 1 ----------------------
E2309/E2309M − 20
TABLE 1 Classification of Displacement Measuring Systems
Resolution not to Error not to Repeatability not to
Exceed the Greater of: Exceed the Greater of: Exceed the Greater of:
Classification
Fixed Error, Fixed Error, Relative Error Fixed Relative
% of Reading
mm [in.] mm [in.] (% of Displacement) mm [in] (% of Displacement)
Class A 0.013 [0.0005] ±0.25 ±0.025 [0.001] ±0.5 0.025 [0.001] 0.5
Class B 0.038 [0.0015] ±0.5 ±0.075 [0.003] ±1.0 0.075 [0.003] 1.0
Class C 0.064 [0.0025] ±1.0 ±0.125 [0.005] ±2.0 0.125 [0.005] 2.0
Class D 0
...


Questions, Comments and Discussion
Ask us and Technical Secretary will try to provide an answer. You can facilitate discussion about the standard in here.