ASTM D6267-98
(Test Method)Test Method for Apparent Viscosity of Hydrocarbon Resins at Elevated Temperatures
Test Method for Apparent Viscosity of Hydrocarbon Resins at Elevated Temperatures
SCOPE
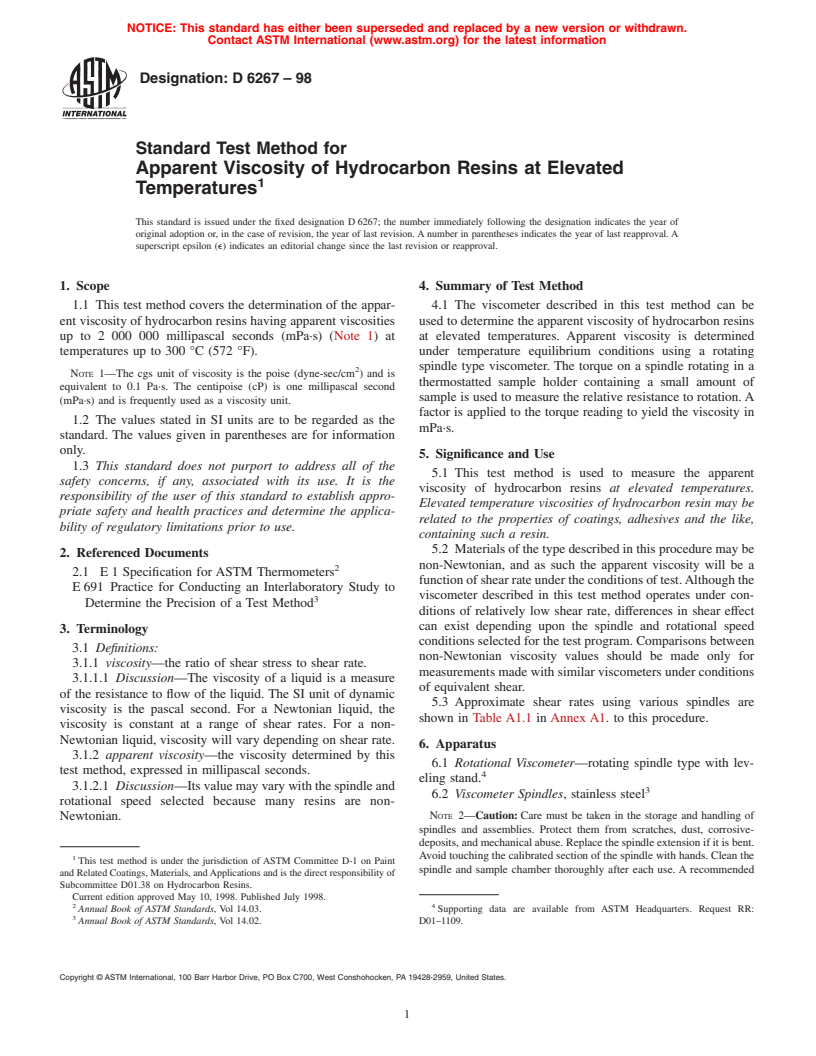
1.1 This test method covers the determination of the apparent viscosity of hydrocarbon resins having apparent viscosities up to 2 000 000 millipascal seconds (mPa s) (Note 1) at temperatures up to 300 °C (572 °F).
Note 1-The cgs unit of viscosity is the poise (dyne-sec/cm2) and is equivalent to 0.1 Pa s. The centipoise (cP) is one mullipascal second (mPa s) and is frequently used as a viscosity unit.
1.2 The values stated in SI units are to be regarded as the standard. The values given in parentheses are for information only.
1.3 This standard does not purport to address all of the safety concerns, if any, associated with its use. It is the responsibility of the user of this standard to establish appropriate safety and health practices and determine the applicability of regulatory limitations prior to use.
General Information
Relations
Standards Content (Sample)
NOTICE: This standard has either been superseded and replaced by a new version or withdrawn.
Contact ASTM International (www.astm.org) for the latest information
Designation:D6267–98
Standard Test Method for
Apparent Viscosity of Hydrocarbon Resins at Elevated
Temperatures
This standard is issued under the fixed designation D 6267; the number immediately following the designation indicates the year of
original adoption or, in the case of revision, the year of last revision. A number in parentheses indicates the year of last reapproval. A
superscript epsilon (e) indicates an editorial change since the last revision or reapproval.
1. Scope 4. Summary of Test Method
1.1 This test method covers the determination of the appar- 4.1 The viscometer described in this test method can be
ent viscosity of hydrocarbon resins having apparent viscosities used to determine the apparent viscosity of hydrocarbon resins
up to 2 000 000 millipascal seconds (mPa·s) (Note 1)at at elevated temperatures. Apparent viscosity is determined
temperatures up to 300 °C (572 °F). under temperature equilibrium conditions using a rotating
spindle type viscometer. The torque on a spindle rotating in a
NOTE 1—The cgs unit of viscosity is the poise (dyne-sec/cm ) and is
thermostatted sample holder containing a small amount of
equivalent to 0.1 Pa·s. The centipoise (cP) is one millipascal second
sample is used to measure the relative resistance to rotation.A
(mPa·s) and is frequently used as a viscosity unit.
factor is applied to the torque reading to yield the viscosity in
1.2 The values stated in SI units are to be regarded as the
mPa·s.
standard. The values given in parentheses are for information
only.
5. Significance and Use
1.3 This standard does not purport to address all of the
5.1 This test method is used to measure the apparent
safety concerns, if any, associated with its use. It is the
viscosity of hydrocarbon resins at elevated temperatures.
responsibility of the user of this standard to establish appro-
Elevated temperature viscosities of hydrocarbon resin may be
priate safety and health practices and determine the applica-
related to the properties of coatings, adhesives and the like,
bility of regulatory limitations prior to use.
containing such a resin.
5.2 Materials of the type described in this procedure may be
2. Referenced Documents
non-Newtonian, and as such the apparent viscosity will be a
2.1 E 1 Specification for ASTM Thermometers
function of shear rate under the conditions of test.Although the
E 691 Practice for Conducting an Interlaboratory Study to
viscometer described in this test method operates under con-
Determine the Precision of a Test Method
ditions of relatively low shear rate, differences in shear effect
can exist depending upon the spindle and rotational speed
3. Terminology
conditions selected for the test program. Comparisons between
3.1 Definitions:
non-Newtonian viscosity values should be made only for
3.1.1 viscosity—the ratio of shear stress to shear rate.
measurements made with similar viscometers under conditions
3.1.1.1 Discussion—The viscosity of a liquid is a measure
of equivalent shear.
of the resistance to flow of the liquid. The SI unit of dynamic
5.3 Approximate shear rates using various spindles are
viscosity is the pascal second. For a Newtonian liquid, the
shown in Table A1.1 in Annex A1. to this procedure.
viscosity is constant at a range of shear rates. For a non-
Newtonian liquid, viscosity will vary depending on shear rate.
6. Apparatus
3.1.2 apparent viscosity—the viscosity determined by this
6.1 Rotational Viscometer—rotating spindle type with lev-
test method, expressed in millipascal seconds.
eling stand.
3.1.2.1 Discussion—Its value may vary with the spindle and
6.2 Viscometer Spindles, stainless steel
rotational speed selected because many resins are non-
NOTE 2—Caution: Care must be taken in the storage and handling of
Newtonian.
spindles and assemblies. Protect them from scratches, dust, corrosive-
deposits, and mechanical abuse. Replace the spindle extension if it is bent.
1 Avoid touching the calibrated section of the spindle with hands. Clean the
This test method is under the jurisdiction of ASTM Committee D-1 on Paint
spindle and sample chamber thoroughly after each use. A recommended
and Related Coatings, Materials, andApplications and is the direct responsibility of
Subcommittee D01.38 on Hydrocarbon Resins.
Current edition approved May 10, 1998. Published July 1998.
2 4
Annual Book of ASTM Standards, Vol 14.03. Supporting data are available from ASTM Headquarters. Request RR:
Annual Book of ASTM Standards, Vol 14.02. D01–1109.
Copyright © ASTM International, 100 Barr Harbor Drive, PO Box C700, West Conshohocken, PA 19428-2959, United States.
D6267–98
cleaning procedure is included in the procedure. TABLE 1 Suitable ASTM Thermometers
Scale ASTM
6.3 Temperature Controller Thermocontainer, and Sample Temperature Immersion
Error, Thermometer
Range mm
Chamber, designed for use with the viscometer in 6.1, com-
max Number
plete with locating ring, leveling screws, safety guard, spindle
90°C - 170°C 51 0.2°C 35C-62
94°F - 338°F 51 0.5°F 35F-62
extension, insulating cap, upright rod, cooling plug (optional)
145°C - 206°C 76 0.4°C 100C-68
and extracting tool. The precision temperature controller pro-
vides control accuracy of 61.0°C or better through the range
from 100 to 150°C (212 to 302°F) and 6 2.0°C or better
TABLE 2 Sample Size Guideline
through the range from 150 to 300°C (302 to 572°F).
Approximate Approximate Sample
Spindle
Volume, mL Weight, g
7. Assembly of Apparatus
SC 4-18 8.0 6.4
SC 4-21 8.0 6.4
7.1 Assemble the apparatus according to the manufacturer’s
SC 4-27 10.5 6.4
instructions.
SC 4-28 11.5 9.2
SC 4-29 13.0 10.4
SC 4-31 10.0 8.0
8. Calibration
SC 4-34 9.5 7.6
8.1 For dial reading viscometers, no zero adjustment is
provided since experience has shown that the zero point will
TABLE 3 Interlaboratory Precision Study Results
not vary due to changes in the spring. A digital viscometer
should be zeroed according to the manufacturer’s instructions. Material Average, cP Sr SR r R
The viscometer and spindles are precision equipment and
Standard Oil 4657.3 23.0 58.2 64.4 162.9
Resin A, Temperature 1 9657.6 191.6 925.9 536.4 2592.6
should be kept from undue shock and mishandling. Physical
Resin A, Temperature 2 764.8 12.8 64.2 35.8 179.8
damage to the instrument will often reveal itself as erratic or no
Resin B, Temperature 1 1513.4 26.2 94.8 73.3 654.4
oscillation of the pointer (dial reading models) when the
Resin B, Temperature 2 480.2 6.6 31.5 18.4 88.3
Resin C, Temperature 1 4420.0 58.6 172.8 164.2 438.8
instrument, with or without the spindle in place, is operated in
Resin C, Temperature 2 149.1 4.5 7.10 12.6 19.9
air. When operating normally, the reading will be stable and
have free oscillation about the zero point in air.
8.2 The calibration of the instrument may be verified using
point to provide the desired temperature. Repeat this procedure
standard reference fluids. Suitable fluids are available in
for any test temperature desired within the scope of this
nominal viscosities up to 15 000 mPa·s at 149°C (300°F). The
procedure.
procedure for instrument calibration using standard reference
9. Procedure
fluidsisthatencompassedbythistestmethod.Resultsobtained
using standard reference fluids should not deviate from the
9.1 Selection of Spindle—From the estimated viscosity of
nominal viscosity by more than the following amount:
the sample and TableA1.1,AnnexA1; select a viscometer and
spindle combination that will produce readings in the desired
2 2
=a 1 b (1)
range.
where “a” is 1 % of the full measurement range under the
NOTE 4—Use only spindles shown to be appropriate for the viscometer
conditions of the test, and “b” is 1 % of the nominal viscosity
to be used.
of the calibration fluid. If results deviate by more than this
9.1.1 Where more than one spindle is available for the range
value, the instrument should be removed from use and re-
selected, choose the spindle that produces a dial or display
paired.
reading between 10 and 100 % of full scale. The goal is to
8.3 The temperature controller is factory calibrated and has
select a combination whose range brackets the estimated
control capability of 6 0.5 % of the control point (6 1.0°C at
viscosity of the sample.
175°C).Tocheckthecontrollerandverifythecalibrationofthe
controller settings, use the procedure in 8.3.1. NOTE 5—Accuracy improves as the reading approaches 100 % of full
scale.Ifthereadingisover100 % of full scale,selectalowerspeedand/or
8.3.1 Place a sufficient quantity of silicone oil in the sample
a smaller spindle. If the reading is under 10 % of full scale, select a higher
container to permit immersion of the appropriate ASTM
speed or a larger spindle, or both. Whenever possible, when conducting
thermometer to the proper depth. See Specification E 1. Insert
multiple comparative tests, the same spindle/speed combination should be
the thermometer into the oil and hold it in place at the point
used for all tests. When a test must be performed at several speeds, select
required for proper immersion depth. Do not permit the a spindle that produces on-scale readings at all required speeds. This may
necessitate using a dial or display reading less than 10 % of full scale,
thermometerbulbtorestonthebottomofthesamplecontainer.
which is acceptable as long as the reduced accuracy of such a readin
...


Questions, Comments and Discussion
Ask us and Technical Secretary will try to provide an answer. You can facilitate discussion about the standard in here.