ISO/TR 15969:2001
(Main)Surface chemical analysis — Depth profiling — Measurement of sputtered depth
Surface chemical analysis — Depth profiling — Measurement of sputtered depth
This Technical Report gives guidelines for measuring the sputtered depth in sputtered depth profiling. The methods of sputtered depth measurement described in this Technical Report are applicable to techniques of surface chemical analysis when used in combination with ion bombardment for the removal of a part of a solid sample to a typical sputtered depth of up to severalmicrometres.
Analyse chimique des surfaces — Profilage d'épaisseur — Mesurage de l'épaisseur bombardée
General Information
- Status
- Withdrawn
- Publication Date
- 30-May-2001
- Withdrawal Date
- 30-May-2001
- Technical Committee
- ISO/TC 201/SC 4 - Depth profiling
- Drafting Committee
- ISO/TC 201/SC 4 - Depth profiling
- Current Stage
- 9599 - Withdrawal of International Standard
- Start Date
- 17-Mar-2021
- Completion Date
- 14-Feb-2026
Relations
- Revised
ISO/TR 15969:2021 - Surface chemical analysis — Depth profiling — Measurement of sputtered depth - Effective Date
- 23-Apr-2020
Get Certified
Connect with accredited certification bodies for this standard

ECOCERT
Organic and sustainability certification.

Eurofins Food Testing Global
Global leader in food, environment, and pharmaceutical product testing.

Intertek Bangladesh
Intertek certification and testing services in Bangladesh.
Sponsored listings
Frequently Asked Questions
ISO/TR 15969:2001 is a technical report published by the International Organization for Standardization (ISO). Its full title is "Surface chemical analysis — Depth profiling — Measurement of sputtered depth". This standard covers: This Technical Report gives guidelines for measuring the sputtered depth in sputtered depth profiling. The methods of sputtered depth measurement described in this Technical Report are applicable to techniques of surface chemical analysis when used in combination with ion bombardment for the removal of a part of a solid sample to a typical sputtered depth of up to severalmicrometres.
This Technical Report gives guidelines for measuring the sputtered depth in sputtered depth profiling. The methods of sputtered depth measurement described in this Technical Report are applicable to techniques of surface chemical analysis when used in combination with ion bombardment for the removal of a part of a solid sample to a typical sputtered depth of up to severalmicrometres.
ISO/TR 15969:2001 is classified under the following ICS (International Classification for Standards) categories: 71.040.40 - Chemical analysis. The ICS classification helps identify the subject area and facilitates finding related standards.
ISO/TR 15969:2001 has the following relationships with other standards: It is inter standard links to ISO/TR 15969:2021. Understanding these relationships helps ensure you are using the most current and applicable version of the standard.
ISO/TR 15969:2001 is available in PDF format for immediate download after purchase. The document can be added to your cart and obtained through the secure checkout process. Digital delivery ensures instant access to the complete standard document.
Standards Content (Sample)
TECHNICAL ISO/TR
REPORT 15969
First edition
2001-06-01
Surface chemical analysis — Depth
profiling — Measurement of sputtered
depth
Analyse chimique des surfaces — Profilage d'épaisseur — Mesurage de
l'épaisseur bombardée
Reference number
©
ISO 2001
PDF disclaimer
This PDF file may contain embedded typefaces. In accordance with Adobe's licensing policy, this file may be printed or viewed but shall not
be edited unless the typefaces which are embedded are licensed to and installed on the computer performing the editing. In downloading this
file, parties accept therein the responsibility of not infringing Adobe's licensing policy. The ISO Central Secretariat accepts no liability in this
area.
Adobe is a trademark of Adobe Systems Incorporated.
Details of the software products used to create this PDF file can be found in the General Info relative to the file; the PDF-creation parameters
were optimized for printing. Every care has been taken to ensure that the file is suitable for use by ISO member bodies. In the unlikely event
that a problem relating to it is found, please inform the Central Secretariat at the address given below.
All rights reserved. Unless otherwise specified, no part of this publication may be reproduced or utilized in any form or by any means, electronic
or mechanical, including photocopying and microfilm, without permission in writing from either ISO at the address below or ISO's member body
in the country of the requester.
ISO copyright office
Case postale 56 � CH-1211 Geneva 20
Tel. + 41 22 749 01 11
Fax + 41 22 749 09 47
E-mail copyright@iso.ch
Web www.iso.ch
Printed in Switzerland
ii © ISO 2001 – All rights reserved
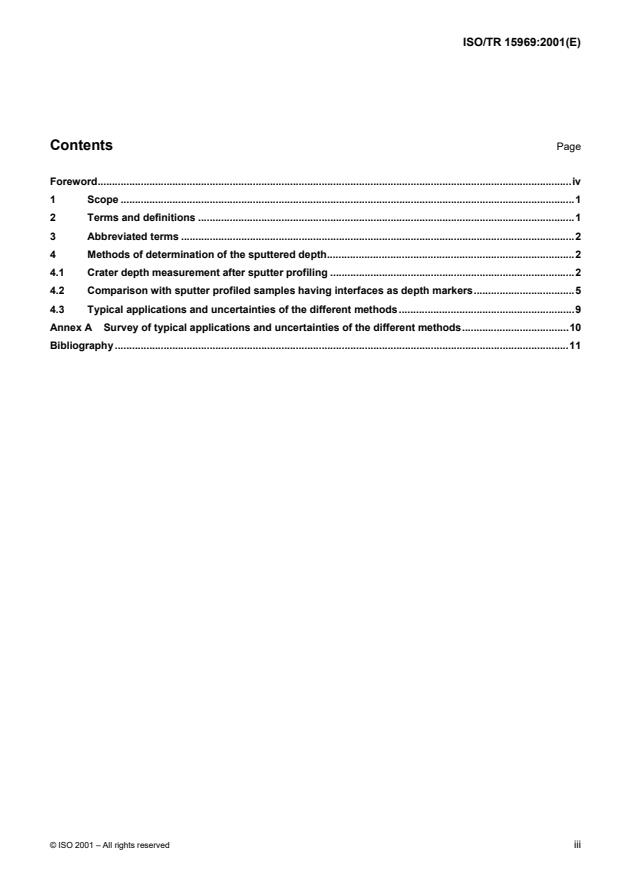
Contents Page
Foreword.iv
1 Scope .1
2 Terms and definitions .1
3 Abbreviated terms .2
4 Methods of determination of the sputtered depth.2
4.1 Crater depth measurement after sputter profiling .2
4.2 Comparison with sputter profiled samples having interfaces as depth markers.5
4.3 Typical applications and uncertainties of the different methods.9
Annex A Survey of typical applications and uncertainties of the different methods.10
Bibliography.11
Foreword
ISO (the International Organization for Standardization) is a worldwide federation of national standards bodies (ISO
member bodies). The work of preparing International Standards is normally carried out through ISO technical
committees. Each member body interested in a subject for which a technical committee has been established has
the right to be represented on that committee. International organizations, governmental and non-governmental, in
liaison with ISO, also take part in the work. ISO collaborates closely with the International Electrotechnical
Commission (IEC) on all matters of electrotechnical standardization.
International Standards are drafted in accordance with the rules given in the ISO/IEC Directives, Part 3.
The main task of technical committees is to prepare International Standards. Draft International Standards adopted
by the technical committees are circulated to the member bodies for voting. Publication as an International
Standard requires approval by at least 75 % of the member bodies casting a vote.
In exceptional circumstances, when a technical committee has collected data of a different kind from that which is
normally published as an International Standard ("state of the art", for example), it may decide by a simple majority
vote of its participating members to publish a Technical Report. A Technical Report is entirely informative in nature
and does not have to be reviewed until the data it provides are considered to be no longer valid or useful.
Attention is drawn to the possibility that some of the elements of this Technical Report may be the subject of patent
rights. ISO shall not be held responsible for identifying any or all such patent rights.
ISO/TR 15969 was prepared by Technical Committee ISO/TC 201, Surface chemical analysis, Subcommittee
SC 4, Depth profiling.
iv © ISO 2001 – All rights reserved
Introduction
This Technical Report is intended to be used as follows:
a) For the determination of the depth scale in sputter depth profiling where signal intensity is obtained as a
function of sputtering time (or ion dose density). The sputtered depth per sputtering time is the sputtering rate
(typically reported in nm/s).
b) To enhance the comparability of depth profiling data obtained with different instruments and to increase the
reliability and use of depth profiling in industrial applications.
c) To serve as the basis for the development of International Standards on the measurement of sputtered depth.
TECHNICAL REPORT ISO/TR 15969:2001(E)
Surface chemical analysis — Depth profiling — Measurement of
sputtered depth
1 Scope
This Technical Report gives guidelines for measuring the sputtered depth in sputtered depth profiling. The methods
of sputtered depth measurement described in this Technical Report are applicable to techniques of surface
chemical analysis when used in combination with ion bombardment for the removal of a part of a solid sample to a
typicalsputtereddepthof uptoseveralmicrometres.
2 Terms and definitions
For the purposes of this Technical Report, the following terms and definitions apply.
[1]
NOTE The terms used in this Technical Report follow basically the definitions in ASTM E 673-95c . These definitions are
to be modified to conform to those being developed by ISO/TC 201/SC 1 on Terminology. See also [2] and [3].
2.1
sputtered depth
distance z (m) (perpendicular to the surface) between the original surface and the analysed sample surface after
removal of a measurable amount of matter as a result of sputter profiling, which is given by
m
z � (1)
A��
where
m is the removed sample mass (kg);
A is thesputteredarea(m );
� is the density of the sample (kg/m )
2.2
crater depth
average distance (perpendicular to the surface) between the original surface and the region of a crater bottom from
which the measured signal is derived
NOTE The crater depth is equal to the sputtered depth if primary-ion implantation and retention, which may cause
[5]
enlargement (“swelling”) of the sample in the direction perpendicular to the surface, is negligible . If the sputtered depth is
measured by crater depth measurement outside the analysis chamber, surface reactions (e.g. oxidation) may add to the
swelling of the crater bottom, i.e. the crater depth is generally measured as being less than the sputtered depth.
3 Abbreviated terms
AES Auger electron spectroscopy
AFM Atomic force microscopy
EDS Energy dispersive spectrometry
EPMA Electron probe microanalysis
FIB Focused ion beam
GIXR Grazing incidence X-ray reflectivity
MEIS Medium energy ion scattering
RBS Rutherford backscattering spectrometry
SAM Scanning Auger microscopy
SEM Scanning electron microscopy
SIMS Secondary-ion mass spectrometry
TEM Transmission electron microscopy
XPS X-ray photoelectron spectroscopy
XRF X-ray fluorescence
4 Methods of determination of the sputtered depth
4.1 Crater depth measurement after sputter profiling
4.1.1 General description
Usually, the result of sputter profiling is a signal intensity as a function of the sputtering time. The total sputtering
time corresponds to the crater depth and the average sputtering rate is obtained by dividing the crater depth by the
[6]
sputtering time. Crater depth measurements are usually performed by mechanical stylus profilometry or, less
commonly in use, by optical interferometry. Optical instruments and scanned-probe microscopes give a two-
dimensional view of the crater and its non-uniformities.
4.1.2 Mechanical stylus crater depth measurement
Mechanical stylus profilometers convert the deflection of a stylus in mechanical contact with the surface into a
voltage that is amplified and then displayed directly on a strip chart, or digitized and processed in a computer. In
some instruments, the stylus is scanned across the sample containing the crater, and in others the sample is
scanned under the stylus. Profilometers typically produce one-dimensional line scans, though some modern
instruments and scanned probe microscopes are capable of producing two-dimensional scans by making an
automated series of closely spaced one-dimensional scans.
Stylus profilometry is appropriate for measuring the depths of craters in which the roughness of the original surface
and that of the crater bottom are small compared to the crater depth. It is commonly used for craters made in
semiconductors during SIMS depth profiling. The minimum depth that can be measured successfully depends on
the acoustic and electronic noise of the profilometer as well as the surface roughness. In modern instruments the
minimum depth may be as small as 10 nm, and the maximum may be as great as 100 �m.
To perform a crater depth measurement with a one-dimensional profilometer, a scan is made through the centre of
the crater and over a sufficient distance of the unsputtered top surface on either side to establish an accurate
2 © ISO 2001 – All rights reserved
baseline, as shown in Figure 1. Multiple scans are made over different traces through the crater centre to
determine the repeatability of the crater depth measurement. The depth is measured on a computerized
profilometer by determining the average height difference between a region in the centre of the crater at A and two
regions of the reference surface on opposite sides at B and C. Figure 1 shows an example of a computerized
profilometer trace of a sputtered crater in single crystal silicon approximately 0,5 �m indepth. The threepairs of
vertical cursor lines indicate the regions over which the depth is averaged.
Figure 1 — Exampleof stylusprofilometrytraceof a0,5����m deep crater in silicon
The depth scale of the stylus profilometer is calibrated with standard step-heights or grooves that are traceable to
fundamental length standards (wavelength of light). A typical calibration uncertainty is 1 % for a 1 �m standard
gauge. The uncertainty of a crater depth measurement is a combination of calibration uncertainty and profilometer
noise. In a recent round-robin experiment on craters in silicon, uncertainties ranged from � 1,3 % for a 2 �mcrater
[6]
to � 4,7 % for a 0,1 �mcrater .
NOTE For the purposes of this Technical Report, typical uncertainties are given as one-standard-deviation uncertainties.
Advantages of stylus profilometry for crater depth measurements are that it is rapid, requires no sample
preparation, and reveals the size, shape, and flatness of the crater bottom which are measures of the ion beam
current density. A disadvantage is that corrections may be necessary to convert crater depth to sputtered depth in
the case of non-negligible swelling or oxidation. In the case of layered structures with different sputtering rates,
separate craters must be made for each interface so that the individual sputtering rates can be determined.
Otherwise only an average sputtering rate is obtained.
4.1.3 Optical interferometry crater depth measurement
Optical interferometry is a simple and convenient non-contact method of crater depth measurement for which the
equipment is relatively cheap to buy and easy to use.
This method utilizes a metallurgical microscope equipped with an interference attachment (Mireau or Michelson
objective, sample tilting stage and monochromatic light source/interference filter) and is only applicable to smooth
flat samples, for example flat glass, coatings on glass and semiconductor wafers. Generally, metal samples are too
rough for this method to be suitable.
The crater to be measured is placed on the microscope sample stage, which usually is capable of producing a
controlled tilting movement of the sample as well as the usual x-y translation. Using the interference objective or a
normal objective, the crater of interest is located and placed at the centre of the field of view. This operation can be
done with white light illumination. If a normal objective has been used, the interference objective is then put in place
and the sample height adjusted to give white light interference fringes across the crater. The interference filter is
put in place and the sample illuminated with monochromatic light. Using the tilting adjustment of the sample stage,
the sample is tilted to spread the fringes to a suitable separation and/or to rotate them so that they produce a
suitable contour map of the crater. Take care to ensure that there are no other craters on the sample near to the
crater of interest that cause displacements of the fringes on either side of the crater that are to be used for the
measurement. Produce a hard copy of the image.
Figure 2 shows an example: Using a straight-edged ruler draw two lines (A and B) through the centres of two
adjacent fringes and measure the separation between them. Preferably one of these lines (A) should cross the
crater. Draw a third line through the centre of a fringe running through the centre of the crater (C). Count the
number of fringes intersected by the line (A) crossing the crater and estimate the fraction of a fringe spacing
between that line and the line through the fringe in the crater (C). In the case of Figure 2, this fraction will be equal
to the ratio of separation of lines B and C to that of A and B. Multiply this result by the half-wavelength of the light
used for illumination to determine the crater depth.
This method is generally applicable to crater depths in the range 0,2 �mto 5 �m although, at the greater depths,
surface roughening during profiling can cause problems. The errors associated with the measurement are: (a) the
ability to count the fringes — getting this wrong usually produces an obvious error, (b) the uncertainty in estimating
the fraction of a fringe — this should be less than 1/20 of the wavelength of the light used, and (c) the uncertainty in
the wavelength of light used.
NOTE The greatest uncertainty comes from the estimation of the fractional fringe. This is an absolute amount, not a
percentage. Consequently the percentage uncertainty is greatest for shallow craters and decreases with increasing depth. A
total of 13 measurements by an experienced user on the crater shown in Figure 2 gave a crater depth of 325 nm and a standard
deviation of 9 nm.
The optical image is also useful for showing the uniformity and any defects of the crater. Another optical method is
confocal laser depth determination.
Figure 2 — Example photogragh of optical interferometry crater depth measurement
4 © ISO 2001 – All rights reserved
4.2 Comparison with sputter profiled samples having interfaces as depth markers
4.2.1 General description
A known depth of an interface or the depths of several interfaces can be used to determine the sputtered depth by
comparison with the location of the 50 % drop of the plateau value on the sputtering time scale in the sputter
profile. Errors involved are (a) the initial change of the sputtering rate (generally an initially slower sputtering rate is
expected, caused by primary-ion implantation and the usual surface contamination layer, leading to typical errors of
the order of 1 nm to 2 nm), and (b) a systematic shift of the 50 % plateau intensity (sputter profile interface location)
[5]
to apparently lower depth as compared to the correct interface location . This error is of the order of the signal
escape depth [electron (AES, XPS) or ion escape depth (SIMS)] or the atomic mixing length, depending on the
larger value. Under typical profiling conditions, the shift is of the order of 1 nm to 2 nm. Under favorable conditions,
(a) and (b) may compensate and a linear relation between sputtering time and depth without a zero point shift is
obtained. In multilayer profiling, both effects are similar at every interface and therefore always cancel in a first
order approximation.
4.2.2 Reference materials
Any sample with one or several layers of known thickness can be used to determine the time needed to proceed
from one interface to the other during a sputter profiling experiment with preset conditions for ion beam species,
[7]
energy, incidence angle and ion formation chamber parameters determining the ion beam current density .The
latter can be given directly if the sputter yield for the sample material for the respective ion energy and incidence
[8, 9]
angle is known. For example, the certified reference material Ta O /Ta (BCR No. 261R) , with certified oxide
2 5
thickness z(Ta O ) of 30 nm and of 100 nm, yields immediately an “equivalent” thickness for the analysed layer if
2 5
the sputtering time for the 50 % drop of the plateau intensity is used as a marker. By knowledge of the sputtering
� � �
rate z =dz/dt of the analysed material M, z (M), relative to that of Ta O , z (Ta O ), for the same ion beam
2 5 2 5
conditions, the analysed layer thickness z is determined by the following relation:
�
tz�MM�
� �
zz��Ta O � (2)
��
tzTa O � Ta O
����
25 2 5
where t(M) and t(Ta O ) are the sputtering times for the analysed layer and for the reference layer, respectively.
2 5
Owing to the build-up of the steady-state altered layer at the beginning of sputter
...


Questions, Comments and Discussion
Ask us and Technical Secretary will try to provide an answer. You can facilitate discussion about the standard in here.
Loading comments...