Geographic information -- Calibration and validation of remote sensing imagery sensors and data -- Part 2: Lidar

This part of ISO/TS 19159 defines the data capture method, the relationships between the coordinate
reference systems and their parameters, as well as the calibration of airborne lidar (light detection and
ranging) sensors.
This part of ISO/TS 19159 also standardizes the service metadata for the data capture method, the
relationships between the coordinate reference systems and their parameters and the calibration
procedures of airborne lidar systems as well as the associated data types and code lists that have not
been defined in other ISO geographic information international standards.

Information géographique Calibration et validation de capteurs de télédétection -- Partie 2: Lidar

Geografske informacije - Kalibracija in validacija oddaljenih posnetkov senzorjev zaznavanja in podatkov - 2. del: Lidar

Ta del standarda ISO/TS 19159 določa metodo zajemanja podatkov, razmerje med koordinatnimi referenčnimi sistemi in njihovimi parametri ter kalibracijo senzorjev lidar v zraku (zaznavanje svetlobe in oddaljenosti).
Ta del standarda ISO/TS 19159 standardizira tudi metapodatke storitve za metodo zajemanja podatkov, razmerje med koordinatnimi referenčnimi sistemi in njihovimi parametri ter postopke kalibracije senzorjev lidar v zraku, kot tudi povezanih vrst podatkov in seznamov kod, ki niso opredeljeni v drugih mednarodnih standardih ISO glede geografskih informacij.

General Information

Status
Published
Public Enquiry End Date
30-Mar-2017
Publication Date
18-May-2017
Technical Committee
Current Stage
6060 - National Implementation/Publication (Adopted Project)
Start Date
06-Apr-2017
Due Date
11-Jun-2017
Completion Date
19-May-2017

Buy Standard

Technical specification
ISO/TS 19159-2:2016 - Geographic information -- Calibration and validation of remote sensing imagery sensors and data
English language
32 pages
sale 15% off
Preview
sale 15% off
Preview
Technical specification
TS ISO/TS 19159-2:2017
English language
37 pages
sale 10% off
Preview
sale 10% off
Preview
e-Library read for
1 day

Standards Content (Sample)

TECHNICAL ISO/TS
SPECIFICATION 19159-2
First edition
2016-04-15
Geographic information — Calibration
and validation of remote sensing
imagery sensors and data —
Part 2:
Lidar
Information géographique – Calibration et validation de capteurs de
télédétection —
Partie 2: Lidar
Reference number
ISO/TS 19159-2:2016(E)
©
ISO 2016

---------------------- Page: 1 ----------------------
ISO/TS 19159-2:2016(E)

COPYRIGHT PROTECTED DOCUMENT
© ISO 2016, Published in Switzerland
All rights reserved. Unless otherwise specified, no part of this publication may be reproduced or utilized otherwise in any form
or by any means, electronic or mechanical, including photocopying, or posting on the internet or an intranet, without prior
written permission. Permission can be requested from either ISO at the address below or ISO’s member body in the country of
the requester.
ISO copyright office
Ch. de Blandonnet 8 • CP 401
CH-1214 Vernier, Geneva, Switzerland
Tel. +41 22 749 01 11
Fax +41 22 749 09 47
copyright@iso.org
www.iso.org
ii © ISO 2016 – All rights reserved

---------------------- Page: 2 ----------------------
ISO/TS 19159-2:2016(E)

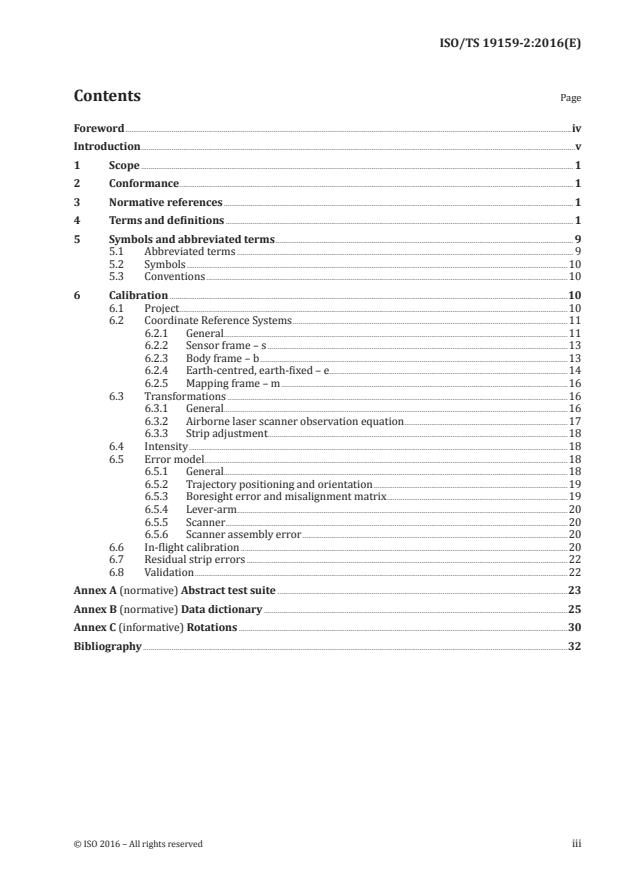
Contents Page
Foreword .iv
Introduction .v
1 Scope . 1
2 Conformance . 1
3 Normative references . 1
4 Terms and definitions . 1
5 Symbols and abbreviated terms . 9
5.1 Abbreviated terms . 9
5.2 Symbols .10
5.3 Conventions .10
6 Calibration .10
6.1 Project .10
6.2 Coordinate Reference Systems .11
6.2.1 General.11
6.2.2 Sensor frame – s .13
6.2.3 Body frame – b .13
6.2.4 Earth-centred, earth-fixed – e .14
6.2.5 Mapping frame – m .16
6.3 Transformations .16
6.3.1 General.16
6.3.2 Airborne laser scanner observation equation .17
6.3.3 Strip adjustment . .18
6.4 Intensity .18
6.5 Error model.18
6.5.1 General.18
6.5.2 Trajectory positioning and orientation .19
6.5.3 Boresight error and misalignment matrix .19
6.5.4 Lever-arm . .20
6.5.5 Scanner .20
6.5.6 Scanner assembly error .20
6.6 In-flight calibration .20
6.7 Residual strip errors .22
6.8 Validation .22
Annex A (normative) Abstract test suite .23
Annex B (normative) Data dictionary .25
Annex C (informative) Rotations .30
Bibliography .32
© ISO 2016 – All rights reserved iii

---------------------- Page: 3 ----------------------
ISO/TS 19159-2:2016(E)

Foreword
ISO (the International Organization for Standardization) is a worldwide federation of national standards
bodies (ISO member bodies). The work of preparing International Standards is normally carried out
through ISO technical committees. Each member body interested in a subject for which a technical
committee has been established has the right to be represented on that committee. International
organizations, governmental and non-governmental, in liaison with ISO, also take part in the work.
ISO collaborates closely with the International Electrotechnical Commission (IEC) on all matters of
electrotechnical standardization.
The procedures used to develop this document and those intended for its further maintenance are
described in the ISO/IEC Directives, Part 1. In particular the different approval criteria needed for the
different types of ISO documents should be noted. This document was drafted in accordance with the
editorial rules of the ISO/IEC Directives, Part 2 (see www.iso.org/directives).
Attention is drawn to the possibility that some of the elements of this document may be the subject of
patent rights. ISO shall not be held responsible for identifying any or all such patent rights. Details of
any patent rights identified during the development of the document will be in the Introduction and/or
on the ISO list of patent declarations received (see www.iso.org/patents).
Any trade name used in this document is information given for the convenience of users and does not
constitute an endorsement.
For an explanation on the meaning of ISO specific terms and expressions related to conformity
assessment, as well as information about ISO’s adherence to the WTO principles in the Technical
Barriers to Trade (TBT) see the following URL: Foreword - Supplementary information
The committee responsible for this document is ISO/TC 211 Geographic information/Geomatics.
ISO/TS 19159 consists of the following parts, under the general title Geographic information —
Calibration and validation of remote sensing imagery sensors and data:
— Part 1: Optical sensors [Technical Specification]
— Part 2: Lidar [Technical Specification]
The following parts are planned:
— Part 3: SAR/InSAR
— Part 4: SONAR
iv © ISO 2016 – All rights reserved

---------------------- Page: 4 ----------------------
ISO/TS 19159-2:2016(E)

Introduction
Imaging sensors are one of the major data sources for geographic information. The image data capture
spatial and spectral measurements are applied for numerous applications ranging from road/town
planning to geological mapping. Typical spatial outcomes of the production process are vector maps,
Digital Elevation Models, and 3-dimensional city models. There are typically two streams of spectral
analysis data, i.e. the statistical method, which includes image segmentation and the physics-based
method which relies on characterisation of specific spectral absorption features.
In each of the cases the quality of the end products fully depends on the quality of the measuring
instruments that has originally sensed the data. The quality of measuring instruments is determined
and documented by calibration.
A calibration is often a costly and time consuming process. Therefore, a number of different strategies
are in place that combine longer time intervals between subsequent calibrations with simplified
intermediate calibration procedures that bridge the time gap and still guarantee a traceable level of
quality. Those intermediate calibrations are called validations in this part of ISO/TS 19159.
The ISO 19159 series standardizes the calibration of remote sensing imagery sensors and the validation
of the calibration information and procedures. It does not address the validation of the data and the
derived products.
Many types of imagery sensors exist for remote sensing tasks. Apart from the different technologies the
need for a standardization of the various sensor types has different levels of priority. In order to meet
those requirements, the ISO 19159 series has been split into more than one part.
This part of ISO/TS 19159 covers the airborne land lidar sensor (light detection and ranging). It includes
the data capture and the calibration. The result of a lidar data capture is a lidar cloud according to the
ISO 19156:2011. The bathymetric lidar is not included in the ISO 19159 series.
ISO 19159-3 and ISO 19159-4 are planned to cover RADAR (Radio detection and ranging) with the
subtopics SAR (Synthetic Aperture RADAR) and InSAR (Interferometric SAR) as well as SONAR (Sound
detection and ranging) that is applied in hydrography.
© ISO 2016 – All rights reserved v

---------------------- Page: 5 ----------------------
TECHNICAL SPECIFICATION ISO/TS 19159-2:2016(E)
Geographic information — Calibration and validation of
remote sensing imagery sensors and data —
Part 2:
Lidar
1 Scope
This part of ISO/TS 19159 defines the data capture method, the relationships between the coordinate
reference systems and their parameters, as well as the calibration of airborne lidar (light detection and
ranging) sensors.
This part of ISO/TS 19159 also standardizes the service metadata for the data capture method, the
relationships between the coordinate reference systems and their parameters and the calibration
procedures of airborne lidar systems as well as the associated data types and code lists that have not
been defined in other ISO geographic information international standards.
2 Conformance
This part of ISO/TS 19159 standardizes the metadata for the data recording and the calibration
procedures of airborne lidar systems as well as the associated data types and code lists. Therefore
conformance depends on the type of entity declaring conformance.
Mechanisms for the transfer of data are conformant to this part of ISO/TS 19159 if they can be
considered to consist of transfer record and type definitions that implement or extend a consistent
subset of the object types described within this part of ISO/TS 19159.
Details of the conformance classes are given in the Abstract test suite in Annex A.
3 Normative references
The following documents, in whole or in part, are normatively referenced in this document and are
indispensable for its application. For dated references, only the edition cited applies. For undated
references, the latest edition of the referenced document (including any amendments) applies.
ISO/TS 19130:2010, Geographic information - Imagery sensor models for geopositioning
ISO 19157:2013, Geographic information — Data quality
4 Terms and definitions
4.1
absolute accuracy
closeness of reported coordinate values to values accepted as or being true
Note 1 to entry: Absolute accuracy is stated with respect to a defined datum (4.11) or reference system.
Note 2 to entry: Absolute accuracy is also termed “external accuracy”.
© ISO 2016 – All rights reserved 1

---------------------- Page: 6 ----------------------
ISO/TS 19159-2:2016(E)

4.2
attitude
orientation of a body, described by the angles between the axes of that body’s coordinate system and
the axes of an external coordinate system
Note 1 to entry: In photogrammetry, the attitude is the angular orientation of a camera (roll, pitch, yaw), or
of the photograph taken with that camera, with respect to some external reference system. With lidar (4.19)
and Interferometric Synthetic Aperature Radar (IFSAR), the attitude is normally defined as the roll, pitch and
heading of the instrument at the instant an active pulse is emitted from the sensor (4.39).
[SOURCE: ISO 19116:2004, 4.2, modified — Note 1 to entry has been added.]
4.3
bare earth elevation
height (4.16) of the natural terrain free from vegetation as well as buildings and other man-made
structures
4.4
boresight
calibration (4.6) of a lidar (4.19) sensor (4.36) system, equipped with an Inertial Measurement (4.20) Unit
(IMU) and a Global Navigation Satellite System (GNSS), to accurately determine or establish its position
and orientation
Note 1 to entry: The position of the lidar sensor system (x, y, z) is determined with respect to the GNSS antenna. The
orientation (roll, pitch, heading) of the lidar sensor system is determined with respect to straight and level flight.
4.5
breakline
linear feature that describes a change in the smoothness or continuity of a surface
Note 1 to entry: A soft breakline ensures that known z-values along a linear feature are maintained (for example,
elevations along a pipeline, road centreline or drainage ditch), and ensures that linear features and polygon
edges are maintained in a Triangulated Irregular Network (TIN) (4.39) surface model, by enforcing the breaklines
as TIN edges. They are generally synonymous with 3-D breaklines because they are depicted with series of x/y/z
coordinates. Somewhat rounded ridges or the trough of a drain may be collected using soft breaklines.
Note 2 to entry: A hard breakline defines interruptions in surface smoothness, for example, to define streams,
shorelines, dams, ridges, building footprints, and other locations with abrupt surface changes.
4.6
calibration
process of quantitatively defining a system’s responses to known, controlled signal inputs
Note 1 to entry: A calibration is an operation that, under specified conditions, in a first step, establishes a relation
between indications[with associated measurement (4.20) uncertainties] and the physical quantity (4.30) values
(with measurement uncertainties) provided by measurement standards.
Note 2 to entry: Determining the systematic errors in a measuring device by comparing its measurements with
the markings or measurements of a device that is considered correct. Airborne sensors (4.36) can be calibrated
geometrically and radiometrically.
Note 3 to entry: An instrument calibration means the factory calibration includes radiometric and geometric
calibration unique to each manufacturer’s hardware and tuned to meet the performance specifications for the
model being calibrated. Instrument calibration can only be assessed and corrected by the factory.
Note 4 to entry: The data calibration includes the lever-arm and boresight (4.4) calibration. It determines the
sensor-to-GNSS-antenna offset vector (lever arm) (4.18) components relative to the antenna phase centre.
The offset vector components are re-determined each time the sensor or aircraft GNSS antenna is moved or
repositioned in any way. Because normal aircraft operations can induce slight variations in component mounting,
field calibration is normally performed for each project, or even daily, to determine corrections (4.9) to the roll,
pitch, yaw, instrument mounting alignment error and scale calibration parameters.
[SOURCE: ISO/TS 19101-2:2008, 4.2, modified — Notes 1 through 4 to entry have been added.]
2 © ISO 2016 – All rights reserved

---------------------- Page: 7 ----------------------
ISO/TS 19159-2:2016(E)

4.7
calibration validation
process of assessing the validity of parameters
Note 1 to entry: With respect to the general definition of validation (4.41) the “dataset validation” only refers to a
small set of parameters (attribute values) such as the result of a sensor (4.36) calibration (4.6).
[SOURCE: ISO/TS 19159-1:2014, 4.4]
4.8
check point
checkpoint
point in object space (ground) used to estimate the positional accuracy (4.29) of a geospatial dataset
against an independent source of greater accuracy
4.9
correction
compensation for an estimated systematic effect
Note 1 to entry: See ISO/IEC Guide 98-3:2008, 3.2.3, for an explanation of ‘systematic effect’.
Note 2 to entry: The compensation can take different forms, such as an addend or a factor, or can be deduced
from a table.
[SOURCE: ISO/IEC Guide 99:2007, 2.53]
4.10
datum
parameter or set of parameters that define the position of the origin, the scale, and the orientation of a
coordinate system
[SOURCE: ISO 19111:2007, 4.14]
4.11
digital elevation model
DEM
dataset of elevation values that are assigned algorithmically to 2-dimensional coordinates
[SOURCE: ISO/TS 19101-2:2008, 4.5]
4.12
digital surface model
DSM
digital elevation model (DEM) (4.11) that depicts the elevations of the top surfaces of buildings, trees,
towers, and other features elevated above the bare earth
Note 1 to entry: DSMs are especially relevant for telecommunications management, air safety, forest management,
and 3-D modelling and simulation.
4.13
digital terrain model
DTM
digital elevation model (DEM) (4.11) that incorporates the elevation of important topographic features
on the land.
Note 1 to entry: DTMs are comprised of mass points and breaklines (4.5) that are irregularly spaced to better
characterize the true shape of the bare-earth terrain. The net result of DTMs is that the distinctive terrain
features are more clearly defined and precisely located, and contours generated from DTMs more closely
approximate the real shape of the terrain.
© ISO 2016 – All rights reserved 3

---------------------- Page: 8 ----------------------
ISO/TS 19159-2:2016(E)

4.14
field of view
FOV
instantaneous region seen by a sensor (4.36), provided in angular measure
Note 1 to entry: In the airborne case, this would be swath (4.38) width for a linear array, ground footprint for an
area array, and for a whiskbroom scanner it refers to the swath width.
Note 2 to entry: To avoid confusion, a typical airborne lidar (4.19) sensor with a field of view of 30 degrees is
commonly depicted as ±15 degrees on either side of nadir (4.26).
[SOURCE: ISO/TS 19130-2:2014, 4.20 modified, — Note 2 to entry has been added.]
4.15
geographic information system
information system dealing with information concerning phenomena associated with location relative
to the Earth
[SOURCE: ISO 19101-1:2014, 4.1.20]
4.16
height
h, H
distance of a point from a chosen reference surface measured upward along a line perpendicular to
that surface
Note 1 to entry: A height below the reference surface will have a negative value.
Note 2 to entry: The terms elevation and height are synonyms.
[SOURCE: ISO 19111:2007, 4.29, modified – Note 2 to entry have been added.]
4.17
horizontal accuracy
positional accuracy (4.29) of a dataset with respect to a horizontal datum (4.10)
4.18
lever arm
relative position vector of one sensor (4.36) with respect to another in a direct georeferencing system
Note 1 to entry: For example, with aerial mapping cameras, there are lever arms between the inertial centre of
the Inertial Measurement (4.20) Unit (IMU) and the phase centre of the Global Navigation Satellite System (GNSS)
antenna, each with respect to the camera perspective centre within the lens of the camera.
4.19
lidar
light detection and ranging
system consisting of 1) a photon source (frequently, but not necessarily, a laser), 2) a photon detection
system, 3) a timing circuit, and 4) optics for both the source and the receiver that uses emitted laser
light to measure ranges to and/or properties of solid objects, gases, or particulates in the atmosphere
Note 1 to entry: Time of flight (TOF) lidars use short laser pulses and precisely record the time each laser
pulse was emitted and the time each reflected return(s) is received in order to calculate the distance(s) to the
scatterer(s) encountered by the emitted pulse. For topographic lidar , these time-of-flight measurements are then
combined with precise platform location/attitude data along with pointing data to produce a three dimensional
product of the illuminated scene of interest.
[SOURCE: ISO/TS 19130-2:2014, 4.40]
4 © ISO 2016 – All rights reserved

---------------------- Page: 9 ----------------------
ISO/TS 19159-2:2016(E)

4.20
measurement
set of operations having the object of determining the value of a quantity (4.30)
[SOURCE: ISO/TS 19101-2:2008, 4.20]
4.21
measurement accuracy
accuracy of measurement
accuracy
closeness of agreement between a test result or measurement (4.20) result and the true value
Note 1 to entry: The concept ‘measurement accuracy’ is not a quantity (4.30) and is not given a numerical quantity
(4.30) value. A measurement is said to be more accurate when it offers a smaller measurement error (4.22).
Note 2 to entry: The term ‘measurement accuracy’ should not be used for measurement trueness and the term
measurement precision (4.23) should not be used for ‘measurement accuracy’, which, however, is related to both
these concepts.
Note 3 to entry: ‘Measurement accuracy’ is sometimes understood as closeness of agreement between measured
quantity values that are being attributed to the measurand.
Note 4 to entry: In this part of ISO/TS 19159, the true value can be a reference value that is accepted as true.
Note 5 to entry: With the exception of Continuously Operating Reference Stations (CORS), assumed to be known
with zero errors relative to established datums (4.10), the true locations of 3-D spatial coordinates of other points
are not truly known, but only estimated; therefore, the accuracy of other coordinate information is unknown and
can only be estimated.
Note 6 to entry: Accuracy is not a quantity and is not given a numerical quantity value.
[SOURCE: ISO 3534-2:2006, 3.3.1, modified, — Notes 1 through 6 to entry have been added.]
4.22
measurement error
error of measurement
error
measured quantity (4.30) value minus a reference quantity value
Note 1 to entry: The concept of ‘measurement error’ can be used both
a) when there is a single reference quantity (4.30) value to refer to, which occurs if a calibration (4.6) is made
by means of a measurement (4.20) standard with a measured quantity value having a negligible measurement
uncertainty (4.40) or if a conventional quantity value is given, in which case the measurement error is known, and
b) if a measurand is supposed to be represented by a unique true quantity value or a set of true quantity values of
negligible range, in which case the measurement error is not known.
Note 2 to entry: Measurement error should not be confused with production error or mistake.
[SOURCE: ISO/IEC Guide 99:2007, 2.16]
4.23
measurement precision
precision
closeness of agreement between indications or measured quantity (4.30) values obtained by replicate
measurements (4.20) on the same or similar objects under specified conditions
Note 1 to entry: Measurement precision is usually expressed numerically by measures of imprecision, such as
standard deviation, variance, or coefficient of variation under the specified conditions of measurement.
Note 2 to entry: The ‘specified conditions’ can be, for example, repeatability conditions of measurement,
intermediate precision conditions of measurement, or reproducibility conditions of measurement (see
ISO 5725-3:1994).
© ISO 2016 – All rights reserved 5

---------------------- Page: 10 ----------------------
ISO/TS 19159-2:2016(E)

Note 3 to entry: Measurement precision is used to define measurement repeatability, intermediate measurement
precision, and measurement reproducibility.
Note 4 to entry: Sometimes ‘measurement precision’ is erroneously used to mean measurement accuracy (4.21).
[SOURCE: ISO/IEC Guide 99:2007, 2.15]
4.24
metadata
information about a resource
[SOURCE: ISO 19115-1:2014, 4.10]
4.25
metric traceability
property of the result of a measurement (4.20) or the value of a standard whereby it can be related
to stated references, usually national or international standards, through an unbroken chain of
comparisons all having stated uncertainties
[SOURCE: ISO/TS 19101-2:2008, 4.23]
4.26
nadir
point directly beneath a position
4.27
noise
unwanted signal which can corrupt the measurement (4.20)
Note 1 to entry: Noise is a random fluctuation in a signal disturbing the recognition of a carried information.
[SOURCE: ISO 12718:2008, 2.26, modified, — Note 1 to entry has been added.]
4.28
point cloud
collection of data points in 3D space
Note 1 to entry: The distance between points is generally non-uniform and hence all three coordinates (Cartesian
or spherical) for each point must be specifically encoded.
Note 2 to entry: As a basic geographic information system (GIS) data type, a point cloud is differentiated from a
typical point dataset in several key ways:
• Point clouds are almost always 3D,
• Point clouds have an order of magnitude more features than point datasets, and
• Individual point features in point clouds do not typically possess individually meaningful attributes;
the informational value in a point cloud is derived from the relations among large numbers of features
[SOURCE: ISO/TS 19130-2:2014, 4.51, modified – Note 2 to entry has been added.]
4.29
positional accuracy
closeness of coordinate value to the true or accepted value in a specified reference system
Note 1 to entry: The positional accuracy consists of the data quality elements absolute, relative, and gridded data
accuracy.
[SOURCE: ISO 19116:2004, 4.20, modified, — Note 1 to entry has been added.]
6 © ISO 2016 – All rights reserved

---------------------- Page: 11 ----------------------
ISO/TS 19159-2:2016(E)

4.30
quantity
property of a phenomenon, body, or substance, where the property has a magnitude that can be
expressed as a number and a reference
Note 1 to entry: A reference can be a measurement (4.20) unit, a measurement procedure, a reference materi
...

SLOVENSKI STANDARD
SIST-TS ISO/TS 19159-2:2017
01-junij-2017
Geografske informacije - Kalibracija in validacija oddaljenih posnetkov senzorjev
zaznavanja in podatkov - 2. del: Lidar
Geographic information -- Calibration and validation of remote sensing imagery sensors
and data -- Part 2: Lidar
Information géographique Calibration et validation de capteurs de télédétection -- Partie
2: Lidar
Ta slovenski standard je istoveten z: ISO/TS 19159-2:2016
ICS:
07.040 Astronomija. Geodezija. Astronomy. Geodesy.
Geografija Geography
35.240.70 Uporabniške rešitve IT v IT applications in science
znanosti
SIST-TS ISO/TS 19159-2:2017 en,fr,de
2003-01.Slovenski inštitut za standardizacijo. Razmnoževanje celote ali delov tega standarda ni dovoljeno.

---------------------- Page: 1 ----------------------

SIST-TS ISO/TS 19159-2:2017

---------------------- Page: 2 ----------------------

SIST-TS ISO/TS 19159-2:2017
TECHNICAL ISO/TS
SPECIFICATION 19159-2
First edition
2016-04-15
Geographic information — Calibration
and validation of remote sensing
imagery sensors and data —
Part 2:
Lidar
Information géographique – Calibration et validation de capteurs de
télédétection —
Partie 2: Lidar
Reference number
ISO/TS 19159-2:2016(E)
©
ISO 2016

---------------------- Page: 3 ----------------------

SIST-TS ISO/TS 19159-2:2017
ISO/TS 19159-2:2016(E)

COPYRIGHT PROTECTED DOCUMENT
© ISO 2016, Published in Switzerland
All rights reserved. Unless otherwise specified, no part of this publication may be reproduced or utilized otherwise in any form
or by any means, electronic or mechanical, including photocopying, or posting on the internet or an intranet, without prior
written permission. Permission can be requested from either ISO at the address below or ISO’s member body in the country of
the requester.
ISO copyright office
Ch. de Blandonnet 8 • CP 401
CH-1214 Vernier, Geneva, Switzerland
Tel. +41 22 749 01 11
Fax +41 22 749 09 47
copyright@iso.org
www.iso.org
ii © ISO 2016 – All rights reserved

---------------------- Page: 4 ----------------------

SIST-TS ISO/TS 19159-2:2017
ISO/TS 19159-2:2016(E)

Contents Page
Foreword .iv
Introduction .v
1 Scope . 1
2 Conformance . 1
3 Normative references . 1
4 Terms and definitions . 1
5 Symbols and abbreviated terms . 9
5.1 Abbreviated terms . 9
5.2 Symbols .10
5.3 Conventions .10
6 Calibration .10
6.1 Project .10
6.2 Coordinate Reference Systems .11
6.2.1 General.11
6.2.2 Sensor frame – s .13
6.2.3 Body frame – b .13
6.2.4 Earth-centred, earth-fixed – e .14
6.2.5 Mapping frame – m .16
6.3 Transformations .16
6.3.1 General.16
6.3.2 Airborne laser scanner observation equation .17
6.3.3 Strip adjustment . .18
6.4 Intensity .18
6.5 Error model.18
6.5.1 General.18
6.5.2 Trajectory positioning and orientation .19
6.5.3 Boresight error and misalignment matrix .19
6.5.4 Lever-arm . .20
6.5.5 Scanner .20
6.5.6 Scanner assembly error .20
6.6 In-flight calibration .20
6.7 Residual strip errors .22
6.8 Validation .22
Annex A (normative) Abstract test suite .23
Annex B (normative) Data dictionary .25
Annex C (informative) Rotations .30
Bibliography .32
© ISO 2016 – All rights reserved iii

---------------------- Page: 5 ----------------------

SIST-TS ISO/TS 19159-2:2017
ISO/TS 19159-2:2016(E)

Foreword
ISO (the International Organization for Standardization) is a worldwide federation of national standards
bodies (ISO member bodies). The work of preparing International Standards is normally carried out
through ISO technical committees. Each member body interested in a subject for which a technical
committee has been established has the right to be represented on that committee. International
organizations, governmental and non-governmental, in liaison with ISO, also take part in the work.
ISO collaborates closely with the International Electrotechnical Commission (IEC) on all matters of
electrotechnical standardization.
The procedures used to develop this document and those intended for its further maintenance are
described in the ISO/IEC Directives, Part 1. In particular the different approval criteria needed for the
different types of ISO documents should be noted. This document was drafted in accordance with the
editorial rules of the ISO/IEC Directives, Part 2 (see www.iso.org/directives).
Attention is drawn to the possibility that some of the elements of this document may be the subject of
patent rights. ISO shall not be held responsible for identifying any or all such patent rights. Details of
any patent rights identified during the development of the document will be in the Introduction and/or
on the ISO list of patent declarations received (see www.iso.org/patents).
Any trade name used in this document is information given for the convenience of users and does not
constitute an endorsement.
For an explanation on the meaning of ISO specific terms and expressions related to conformity
assessment, as well as information about ISO’s adherence to the WTO principles in the Technical
Barriers to Trade (TBT) see the following URL: Foreword - Supplementary information
The committee responsible for this document is ISO/TC 211 Geographic information/Geomatics.
ISO/TS 19159 consists of the following parts, under the general title Geographic information —
Calibration and validation of remote sensing imagery sensors and data:
— Part 1: Optical sensors [Technical Specification]
— Part 2: Lidar [Technical Specification]
The following parts are planned:
— Part 3: SAR/InSAR
— Part 4: SONAR
iv © ISO 2016 – All rights reserved

---------------------- Page: 6 ----------------------

SIST-TS ISO/TS 19159-2:2017
ISO/TS 19159-2:2016(E)

Introduction
Imaging sensors are one of the major data sources for geographic information. The image data capture
spatial and spectral measurements are applied for numerous applications ranging from road/town
planning to geological mapping. Typical spatial outcomes of the production process are vector maps,
Digital Elevation Models, and 3-dimensional city models. There are typically two streams of spectral
analysis data, i.e. the statistical method, which includes image segmentation and the physics-based
method which relies on characterisation of specific spectral absorption features.
In each of the cases the quality of the end products fully depends on the quality of the measuring
instruments that has originally sensed the data. The quality of measuring instruments is determined
and documented by calibration.
A calibration is often a costly and time consuming process. Therefore, a number of different strategies
are in place that combine longer time intervals between subsequent calibrations with simplified
intermediate calibration procedures that bridge the time gap and still guarantee a traceable level of
quality. Those intermediate calibrations are called validations in this part of ISO/TS 19159.
The ISO 19159 series standardizes the calibration of remote sensing imagery sensors and the validation
of the calibration information and procedures. It does not address the validation of the data and the
derived products.
Many types of imagery sensors exist for remote sensing tasks. Apart from the different technologies the
need for a standardization of the various sensor types has different levels of priority. In order to meet
those requirements, the ISO 19159 series has been split into more than one part.
This part of ISO/TS 19159 covers the airborne land lidar sensor (light detection and ranging). It includes
the data capture and the calibration. The result of a lidar data capture is a lidar cloud according to the
ISO 19156:2011. The bathymetric lidar is not included in the ISO 19159 series.
ISO 19159-3 and ISO 19159-4 are planned to cover RADAR (Radio detection and ranging) with the
subtopics SAR (Synthetic Aperture RADAR) and InSAR (Interferometric SAR) as well as SONAR (Sound
detection and ranging) that is applied in hydrography.
© ISO 2016 – All rights reserved v

---------------------- Page: 7 ----------------------

SIST-TS ISO/TS 19159-2:2017

---------------------- Page: 8 ----------------------

SIST-TS ISO/TS 19159-2:2017
TECHNICAL SPECIFICATION ISO/TS 19159-2:2016(E)
Geographic information — Calibration and validation of
remote sensing imagery sensors and data —
Part 2:
Lidar
1 Scope
This part of ISO/TS 19159 defines the data capture method, the relationships between the coordinate
reference systems and their parameters, as well as the calibration of airborne lidar (light detection and
ranging) sensors.
This part of ISO/TS 19159 also standardizes the service metadata for the data capture method, the
relationships between the coordinate reference systems and their parameters and the calibration
procedures of airborne lidar systems as well as the associated data types and code lists that have not
been defined in other ISO geographic information international standards.
2 Conformance
This part of ISO/TS 19159 standardizes the metadata for the data recording and the calibration
procedures of airborne lidar systems as well as the associated data types and code lists. Therefore
conformance depends on the type of entity declaring conformance.
Mechanisms for the transfer of data are conformant to this part of ISO/TS 19159 if they can be
considered to consist of transfer record and type definitions that implement or extend a consistent
subset of the object types described within this part of ISO/TS 19159.
Details of the conformance classes are given in the Abstract test suite in Annex A.
3 Normative references
The following documents, in whole or in part, are normatively referenced in this document and are
indispensable for its application. For dated references, only the edition cited applies. For undated
references, the latest edition of the referenced document (including any amendments) applies.
ISO/TS 19130:2010, Geographic information - Imagery sensor models for geopositioning
ISO 19157:2013, Geographic information — Data quality
4 Terms and definitions
4.1
absolute accuracy
closeness of reported coordinate values to values accepted as or being true
Note 1 to entry: Absolute accuracy is stated with respect to a defined datum (4.11) or reference system.
Note 2 to entry: Absolute accuracy is also termed “external accuracy”.
© ISO 2016 – All rights reserved 1

---------------------- Page: 9 ----------------------

SIST-TS ISO/TS 19159-2:2017
ISO/TS 19159-2:2016(E)

4.2
attitude
orientation of a body, described by the angles between the axes of that body’s coordinate system and
the axes of an external coordinate system
Note 1 to entry: In photogrammetry, the attitude is the angular orientation of a camera (roll, pitch, yaw), or
of the photograph taken with that camera, with respect to some external reference system. With lidar (4.19)
and Interferometric Synthetic Aperature Radar (IFSAR), the attitude is normally defined as the roll, pitch and
heading of the instrument at the instant an active pulse is emitted from the sensor (4.39).
[SOURCE: ISO 19116:2004, 4.2, modified — Note 1 to entry has been added.]
4.3
bare earth elevation
height (4.16) of the natural terrain free from vegetation as well as buildings and other man-made
structures
4.4
boresight
calibration (4.6) of a lidar (4.19) sensor (4.36) system, equipped with an Inertial Measurement (4.20) Unit
(IMU) and a Global Navigation Satellite System (GNSS), to accurately determine or establish its position
and orientation
Note 1 to entry: The position of the lidar sensor system (x, y, z) is determined with respect to the GNSS antenna. The
orientation (roll, pitch, heading) of the lidar sensor system is determined with respect to straight and level flight.
4.5
breakline
linear feature that describes a change in the smoothness or continuity of a surface
Note 1 to entry: A soft breakline ensures that known z-values along a linear feature are maintained (for example,
elevations along a pipeline, road centreline or drainage ditch), and ensures that linear features and polygon
edges are maintained in a Triangulated Irregular Network (TIN) (4.39) surface model, by enforcing the breaklines
as TIN edges. They are generally synonymous with 3-D breaklines because they are depicted with series of x/y/z
coordinates. Somewhat rounded ridges or the trough of a drain may be collected using soft breaklines.
Note 2 to entry: A hard breakline defines interruptions in surface smoothness, for example, to define streams,
shorelines, dams, ridges, building footprints, and other locations with abrupt surface changes.
4.6
calibration
process of quantitatively defining a system’s responses to known, controlled signal inputs
Note 1 to entry: A calibration is an operation that, under specified conditions, in a first step, establishes a relation
between indications[with associated measurement (4.20) uncertainties] and the physical quantity (4.30) values
(with measurement uncertainties) provided by measurement standards.
Note 2 to entry: Determining the systematic errors in a measuring device by comparing its measurements with
the markings or measurements of a device that is considered correct. Airborne sensors (4.36) can be calibrated
geometrically and radiometrically.
Note 3 to entry: An instrument calibration means the factory calibration includes radiometric and geometric
calibration unique to each manufacturer’s hardware and tuned to meet the performance specifications for the
model being calibrated. Instrument calibration can only be assessed and corrected by the factory.
Note 4 to entry: The data calibration includes the lever-arm and boresight (4.4) calibration. It determines the
sensor-to-GNSS-antenna offset vector (lever arm) (4.18) components relative to the antenna phase centre.
The offset vector components are re-determined each time the sensor or aircraft GNSS antenna is moved or
repositioned in any way. Because normal aircraft operations can induce slight variations in component mounting,
field calibration is normally performed for each project, or even daily, to determine corrections (4.9) to the roll,
pitch, yaw, instrument mounting alignment error and scale calibration parameters.
[SOURCE: ISO/TS 19101-2:2008, 4.2, modified — Notes 1 through 4 to entry have been added.]
2 © ISO 2016 – All rights reserved

---------------------- Page: 10 ----------------------

SIST-TS ISO/TS 19159-2:2017
ISO/TS 19159-2:2016(E)

4.7
calibration validation
process of assessing the validity of parameters
Note 1 to entry: With respect to the general definition of validation (4.41) the “dataset validation” only refers to a
small set of parameters (attribute values) such as the result of a sensor (4.36) calibration (4.6).
[SOURCE: ISO/TS 19159-1:2014, 4.4]
4.8
check point
checkpoint
point in object space (ground) used to estimate the positional accuracy (4.29) of a geospatial dataset
against an independent source of greater accuracy
4.9
correction
compensation for an estimated systematic effect
Note 1 to entry: See ISO/IEC Guide 98-3:2008, 3.2.3, for an explanation of ‘systematic effect’.
Note 2 to entry: The compensation can take different forms, such as an addend or a factor, or can be deduced
from a table.
[SOURCE: ISO/IEC Guide 99:2007, 2.53]
4.10
datum
parameter or set of parameters that define the position of the origin, the scale, and the orientation of a
coordinate system
[SOURCE: ISO 19111:2007, 4.14]
4.11
digital elevation model
DEM
dataset of elevation values that are assigned algorithmically to 2-dimensional coordinates
[SOURCE: ISO/TS 19101-2:2008, 4.5]
4.12
digital surface model
DSM
digital elevation model (DEM) (4.11) that depicts the elevations of the top surfaces of buildings, trees,
towers, and other features elevated above the bare earth
Note 1 to entry: DSMs are especially relevant for telecommunications management, air safety, forest management,
and 3-D modelling and simulation.
4.13
digital terrain model
DTM
digital elevation model (DEM) (4.11) that incorporates the elevation of important topographic features
on the land.
Note 1 to entry: DTMs are comprised of mass points and breaklines (4.5) that are irregularly spaced to better
characterize the true shape of the bare-earth terrain. The net result of DTMs is that the distinctive terrain
features are more clearly defined and precisely located, and contours generated from DTMs more closely
approximate the real shape of the terrain.
© ISO 2016 – All rights reserved 3

---------------------- Page: 11 ----------------------

SIST-TS ISO/TS 19159-2:2017
ISO/TS 19159-2:2016(E)

4.14
field of view
FOV
instantaneous region seen by a sensor (4.36), provided in angular measure
Note 1 to entry: In the airborne case, this would be swath (4.38) width for a linear array, ground footprint for an
area array, and for a whiskbroom scanner it refers to the swath width.
Note 2 to entry: To avoid confusion, a typical airborne lidar (4.19) sensor with a field of view of 30 degrees is
commonly depicted as ±15 degrees on either side of nadir (4.26).
[SOURCE: ISO/TS 19130-2:2014, 4.20 modified, — Note 2 to entry has been added.]
4.15
geographic information system
information system dealing with information concerning phenomena associated with location relative
to the Earth
[SOURCE: ISO 19101-1:2014, 4.1.20]
4.16
height
h, H
distance of a point from a chosen reference surface measured upward along a line perpendicular to
that surface
Note 1 to entry: A height below the reference surface will have a negative value.
Note 2 to entry: The terms elevation and height are synonyms.
[SOURCE: ISO 19111:2007, 4.29, modified – Note 2 to entry have been added.]
4.17
horizontal accuracy
positional accuracy (4.29) of a dataset with respect to a horizontal datum (4.10)
4.18
lever arm
relative position vector of one sensor (4.36) with respect to another in a direct georeferencing system
Note 1 to entry: For example, with aerial mapping cameras, there are lever arms between the inertial centre of
the Inertial Measurement (4.20) Unit (IMU) and the phase centre of the Global Navigation Satellite System (GNSS)
antenna, each with respect to the camera perspective centre within the lens of the camera.
4.19
lidar
light detection and ranging
system consisting of 1) a photon source (frequently, but not necessarily, a laser), 2) a photon detection
system, 3) a timing circuit, and 4) optics for both the source and the receiver that uses emitted laser
light to measure ranges to and/or properties of solid objects, gases, or particulates in the atmosphere
Note 1 to entry: Time of flight (TOF) lidars use short laser pulses and precisely record the time each laser
pulse was emitted and the time each reflected return(s) is received in order to calculate the distance(s) to the
scatterer(s) encountered by the emitted pulse. For topographic lidar , these time-of-flight measurements are then
combined with precise platform location/attitude data along with pointing data to produce a three dimensional
product of the illuminated scene of interest.
[SOURCE: ISO/TS 19130-2:2014, 4.40]
4 © ISO 2016 – All rights reserved

---------------------- Page: 12 ----------------------

SIST-TS ISO/TS 19159-2:2017
ISO/TS 19159-2:2016(E)

4.20
measurement
set of operations having the object of determining the value of a quantity (4.30)
[SOURCE: ISO/TS 19101-2:2008, 4.20]
4.21
measurement accuracy
accuracy of measurement
accuracy
closeness of agreement between a test result or measurement (4.20) result and the true value
Note 1 to entry: The concept ‘measurement accuracy’ is not a quantity (4.30) and is not given a numerical quantity
(4.30) value. A measurement is said to be more accurate when it offers a smaller measurement error (4.22).
Note 2 to entry: The term ‘measurement accuracy’ should not be used for measurement trueness and the term
measurement precision (4.23) should not be used for ‘measurement accuracy’, which, however, is related to both
these concepts.
Note 3 to entry: ‘Measurement accuracy’ is sometimes understood as closeness of agreement between measured
quantity values that are being attributed to the measurand.
Note 4 to entry: In this part of ISO/TS 19159, the true value can be a reference value that is accepted as true.
Note 5 to entry: With the exception of Continuously Operating Reference Stations (CORS), assumed to be known
with zero errors relative to established datums (4.10), the true locations of 3-D spatial coordinates of other points
are not truly known, but only estimated; therefore, the accuracy of other coordinate information is unknown and
can only be estimated.
Note 6 to entry: Accuracy is not a quantity and is not given a numerical quantity value.
[SOURCE: ISO 3534-2:2006, 3.3.1, modified, — Notes 1 through 6 to entry have been added.]
4.22
measurement error
error of measurement
error
measured quantity (4.30) value minus a reference quantity value
Note 1 to entry: The concept of ‘measurement error’ can be used both
a) when there is a single reference quantity (4.30) value to refer to, which occurs if a calibration (4.6) is made
by means of a measurement (4.20) standard with a measured quantity value having a negligible measurement
uncertainty (4.40) or if a conventional quantity value is given, in which case the measurement error is known, and
b) if a measurand is supposed to be represented by a unique true quantity value or a set of true quantity values of
negligible range, in which case the measurement error is not known.
Note 2 to entry: Measurement error should not be confused with production error or mistake.
[SOURCE: ISO/IEC Guide 99:2007, 2.16]
4.23
measurement precision
precision
closeness of agreement between indications or measured quantity (4.30) values obtained by replicate
measurements (4.20) on the same or similar objects under specified conditions
Note 1 to entry: Measurement precision is usually expressed numerically by measures of imprecision, such as
standard deviation, variance, or coefficient of variation under the specified conditions of measurement.
Note 2 to entry: The ‘specified conditions’ can be, for example, repeatability conditions of measurement,
intermediate precision conditions of measurement, or reproducibility conditions of measurement (see
ISO 5725-3:1994).
© ISO 2016 – All rights reserved 5

---------------------- Page: 13 ----------------------

SIST-TS ISO/TS 19159-2:2017
ISO/TS 19159-2:2016(E)

Note 3 to entry: Measurement precision is used to define measurement repeatability, intermediate measurement
precision, and measurement reproducibility.
Note 4 to entry: Sometimes ‘measurement precision’ is erroneously used to mean measurement accuracy (4.21).
[SOURCE: ISO/IEC Guide 99:2007, 2.15]
4.24
metadata
information about a resource
[SOURCE: ISO 19115-1:2014, 4.10]
4.25
metric traceability
property of the result of a measurement (4.20) or the value of a standard whereby it can be related
to stated references, usually national or international standards, through an unbroken chain of
comparisons all having stated uncertainties
[SOURCE: ISO/TS 19101-2:2008, 4.23]
4.26
nadir
point directly beneath a position
4.27
noise
unwanted signal which can corrupt the measurement (4.20)
Note 1 to entry: Noise is a random fluctuation in a signal disturbing the recognition of a carried information.
[SOURCE: ISO 12718:2008, 2.26, modified, — Note 1 to entry has been added.]
4.28
point cloud
collection of data points in 3D space
Note 1 to entry: The distance between points is generally non-uniform and hence all three coordinates (Cartesian
...

Questions, Comments and Discussion

Ask us and Technical Secretary will try to provide an answer. You can facilitate discussion about the standard in here.