ASTM B276-91(1996)e1
(Test Method)Standard Test Method for Apparent Porosity in Cemented Carbides
Standard Test Method for Apparent Porosity in Cemented Carbides
SCOPE
1.1 This test method specifies procedures for the metallographic determination of apparent porosity in cemented carbides.
Note 1--The term "apparent porosity" is construed to mean all microstructures observed on a properly prepared, unetched surface, including structures resulting from uncombined carbon, non-metallic inclusions, etc., as well as true, inherent porosity.
1.2 This standard does not purport to address all of the safety problems, if any, associated with its use. It is the responsibility of the user of this standard to establish appropriate safety and health practices and determine the applicability of regulatory limitations prior to use.
General Information
Relations
Standards Content (Sample)
NOTICE: This standard has either been superseded and replaced by a new version or discontinued.
Contact ASTM International (www.astm.org) for the latest information.
e1
Designation: B 276 – 91 (Reapproved 1996)
Standard Test Method for
Apparent Porosity in Cemented Carbides
This standard is issued under the fixed designation B 276; the number immediately following the designation indicates the year of
original adoption or, in the case of revision, the year of last revision. A number in parentheses indicates the year of last reapproval. A
superscript epsilon (e) indicates an editorial change since the last revision or reapproval.
e NOTE—Additional keywords were added editorially in September 1996.
1. Scope 5. Interferences
1.1 This test method specifies procedures for the metallo- 5.1 Lack of adequate pressure on the specimen during
graphic determination of apparent porosity in cemented car- polishing may result in material being torn from the surface of
bides. the specimen. This condition may be erroneously interpreted as
porosity.
NOTE 1—The term “apparent porosity” is construed to mean all
microstructures observed on a properly prepared, unetched surface,
6. Apparatus
including structures resulting from uncombined carbon, non-metallic
6.1 Ordinary laboratory apparatus.
inclusions, etc., as well as true, inherent porosity.
6.2 A metallographic microscope permitting observation
1.2 This standard does not purport to address all of the
and measurement up to a magnification of 200 diameters.
safety concerns, if any, associated with its use. It is the
6.3 Equipment for the metallographic preparation of test
responsibility of the user of this standard to establish appro-
specimens.
priate safety and health practices and determine the applica-
bility of regulatory limitations prior to use.
7. Specimen Preparation
7.1 Where possible, specimens should be metallographi-
2. Referenced Documents
cally mounted in a plastic material, so that they can be polished
2.1 ASTM Standards:
without rounding the edges. Larger specimens may be polished
B 243 Terminology of Powder Metallurgy
without mounting. When the specimens are too large, they
B 665 Practice for Metallographic Sample Preparation of
2 shall be sectioned using a diamond cut-off wheel or by
Cemented Tungsten Carbides
fracturing (appropriate safety precautions shall be utilized
2.2 ISO Standard:
when fracturing a specimen). The area selected for examina-
ISO 4505 Hardmetals—Metallographic Determination of
tion shall represent, as nearly as possible, the entire cross
Porosity and Uncombined Carbon
section.
7.2 The specimen shall be prepared for metallographic
3. Terminology
examination. The surface to be examined shall be unetched and
3.1 Definitions—Definition of powder metallurgy terms can
free of grinding and polishing marks.
be found in Terminology B 243.
NOTE 2—A suitable procedure is described in Practice B 665.
4. Significance and Use
8. Procedure
4.1 Cemented carbide materials may contain small voids
that, depending on the application, may affect the performance
8.1 Pore size shall be defined as the maximum dimension of
of the product. To assist users in specifying the maximum the pore. Make special reference to the presence of cracks and
acceptable level of porosity, this test method illustrates a broad
slits, as well as nonmetallic inclusions.
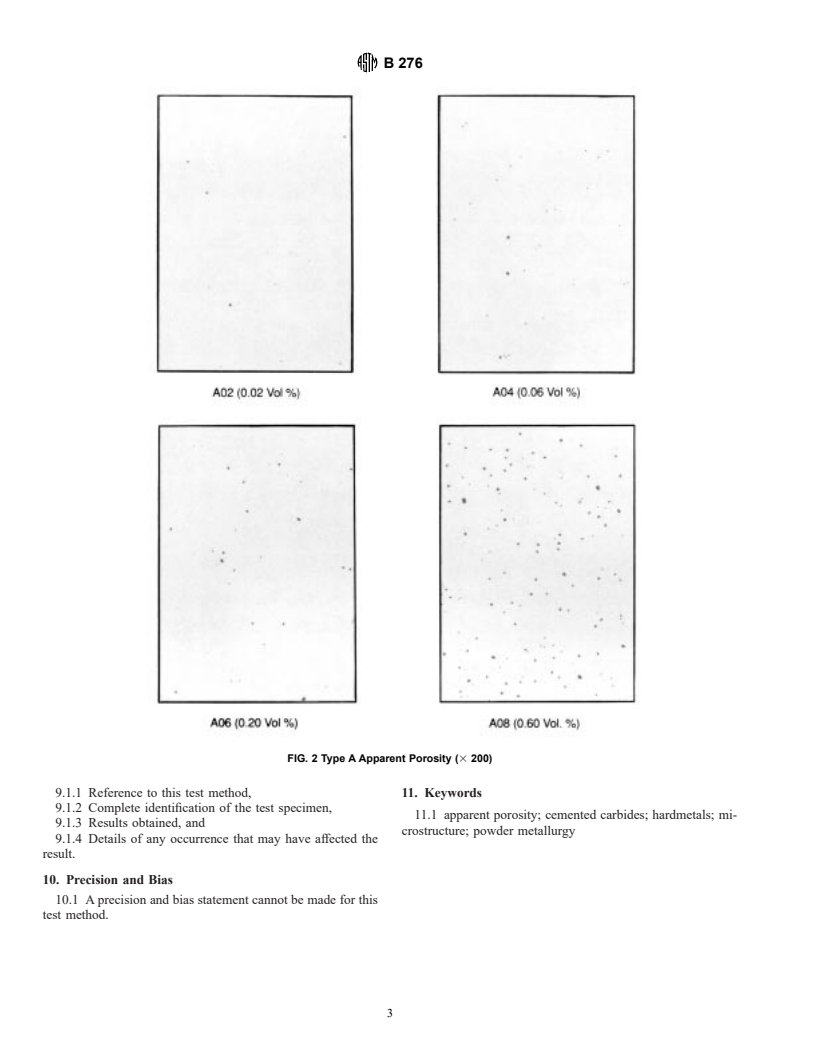
range of porosity levels for each of three porosity types. This 8.2 Classification of apparent porosity is based entirely on
test method is not intended to be used as a specification, but the
comparison of the microstructures found with the photomicro-
levels shown here may be cited in specifications written by graphs in Figs. 1-5. This can be accomplished by scanning the
producers and users of cemented carbides.
specimen surface under the microscope at the appropriate
magnification, and noting which of the photomicrographs most
nearly represents the fields observed. Choose an area fully
This test method is under the jurisdiction of ASTM Committee B-9 on Metal
Powders and Metal Powder Products and is the direct responsibility of Subcom-
representative of the specimen surface for comparison with th
...


Questions, Comments and Discussion
Ask us and Technical Secretary will try to provide an answer. You can facilitate discussion about the standard in here.