ASTM A327-91(1997)
(Test Method)Standard Test Methods for Impact Testing of Cast Irons
Standard Test Methods for Impact Testing of Cast Irons
SCOPE
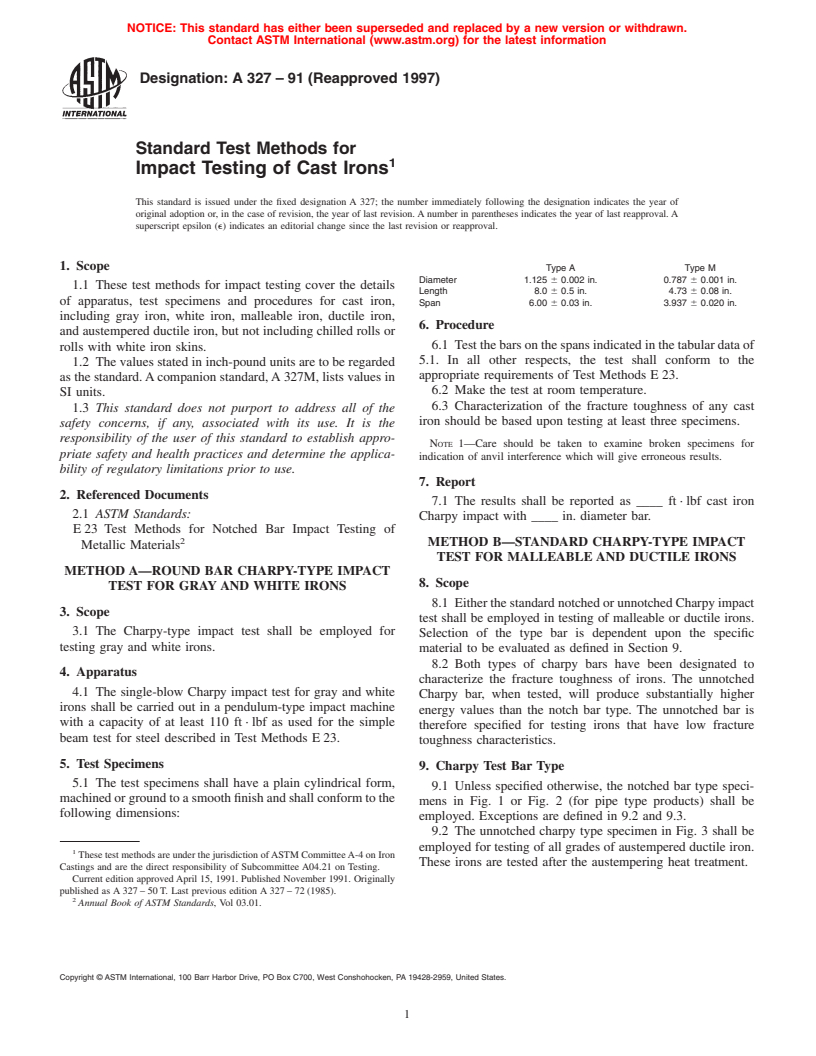
1.1 These test methods for impact testing cover the details of apparatus, test specimens and procedures for cast iron including gray iron, white iron, malleable iron, ductile iron, and austempered ductile iron, but not including chilled rolls or rolls with white iron skins.
1.2 The values stated in inch-pound units are to be regarded as the standard. A companion standard, A 327M, lists values in SI units.
1.3 This standard does not purport to address all of the safety concerns, if any, associated with its use. It is the responsibility of the user of this standard to establish appropriate safety and health practices and determine the applicability of regulatory limitations prior to use.
General Information
Relations
Standards Content (Sample)
NOTICE: This standard has either been superseded and replaced by a new version or withdrawn.
Contact ASTM International (www.astm.org) for the latest information
Designation:A 327–91(Reapproved 1997)
Standard Test Methods for
Impact Testing of Cast Irons
This standard is issued under the fixed designation A 327; the number immediately following the designation indicates the year of
original adoption or, in the case of revision, the year of last revision. A number in parentheses indicates the year of last reapproval. A
superscript epsilon (e) indicates an editorial change since the last revision or reapproval.
1. Scope
Type A Type M
Diameter 1.125 6 0.002 in. 0.787 6 0.001 in.
1.1 These test methods for impact testing cover the details
Length 8.0 6 0.5 in. 4.73 6 0.08 in.
of apparatus, test specimens and procedures for cast iron,
Span 6.00 6 0.03 in. 3.937 6 0.020 in.
including gray iron, white iron, malleable iron, ductile iron,
6. Procedure
and austempered ductile iron, but not including chilled rolls or
6.1 Test the bars on the spans indicated in the tabular data of
rolls with white iron skins.
5.1. In all other respects, the test shall conform to the
1.2 The values stated in inch-pound units are to be regarded
appropriate requirements of Test Methods E 23.
as the standard.Acompanion standard,A 327M, lists values in
6.2 Make the test at room temperature.
SI units.
6.3 Characterization of the fracture toughness of any cast
1.3 This standard does not purport to address all of the
iron should be based upon testing at least three specimens.
safety concerns, if any, associated with its use. It is the
responsibility of the user of this standard to establish appro-
NOTE 1—Care should be taken to examine broken specimens for
priate safety and health practices and determine the applica-
indication of anvil interference which will give erroneous results.
bility of regulatory limitations prior to use.
7. Report
2. Referenced Documents
7.1 The results shall be reported as ____ ft · lbf cast iron
2.1 ASTM Standards:
Charpy impact with ____ in. diameter bar.
E 23 Test Methods for Notched Bar Impact Testing of
METHOD B—STANDARD CHARPY-TYPE IMPACT
Metallic Materials
TEST FOR MALLEABLEAND DUCTILE IRONS
METHODA—ROUND BAR CHARPY-TYPE IMPACT
8. Scope
TEST FOR GRAYAND WHITE IRONS
8.1 Either the standard notched or unnotched Charpy impact
3. Scope
test shall be employed in testing of malleable or ductile irons.
3.1 The Charpy-type impact test shall be employed for
Selection of the type bar is dependent upon the specific
testing gray and white irons.
material to be evaluated as defined in Section 9.
8.2 Both types of charpy bars have been designated to
4. Apparatus
characterize the fracture toughness of irons. The unnotched
4.1 The single-blow Charpy impact test for gray and white
Charpy bar, when tested, will produce substantially higher
irons shall be carried out in a pendulum-type impact machine
energy values than the notch bar type. The unnotched bar is
with a capacity of at least 110 ft · lbf as used for the simple
therefore specified for testing irons that have low fracture
beam test for steel described in Test Methods E 23.
toughness characteristics.
5. Test Specimens
9. Charpy Test Bar Type
5.1 The test specimens shall have a plain cylindrical form,
9.1 Unless specified otherwise, the notched bar type speci-
machined or ground to a smooth finish and shall conform to the
mens in Fig. 1 or Fig. 2 (for pipe type products) shall be
following dimensions:
employed. Exceptions are defined in 9.2 and 9.3.
9.2 The unnotched charpy type specimen in Fig. 3 shall be
employed for testing of all grades of austempered ductile iron.
These test methods are under the jurisdiction ofASTM CommitteeA-4 on Iron
These irons are tested after the austempering heat treatment.
Castings and are the direct responsibility of Subcommittee A04.21 on Testing.
Current edition approved April 15, 1991. Published November 1991. Originally
published as A 327 – 50 T. Last previous edition A 327 – 72 (1985).
Annual Book of ASTM Standards, Vol 03.01.
Copyright © ASTM International, 100 Barr Harbor Drive, PO Box C700, West Conshohocken, PA 19428-2959, United States.
A 327–91 (1997)
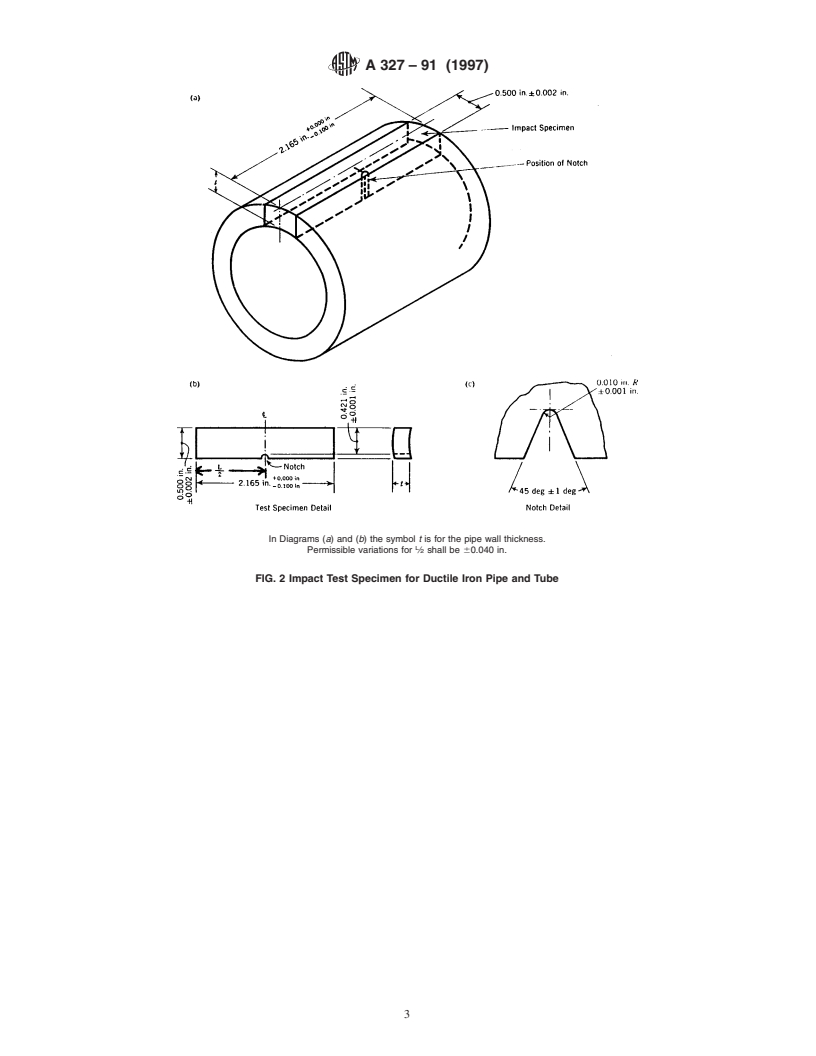
11.3 Test specimens taken from ductile iron pipe shall be
0.500 in. wide, measured from the notched face. The thickness
of the notched face shall be equal to the full wall thickness of
the pipe (t), except that specimens in which the pipe wall
specimen thickness exceeds the maximum height accommo-
dated by the impact test machine shall be machined to a
thickness that can be accommodated by the machine. Speci-
mens shall be machined in accordance with Fig. 2.
12. Procedure
12.1 Test the specimen in accordance with the procedures
set forth in Test Methods E 23.
12.2 Unless otherwise specified, the test shall be performed
at 70 6 10°F.
12.3 For testing at other than room temperature, accuracy of
NOTE—Permissible variations shall be as follows:
results is ensured by following the procedure outlined in Test
Methods E 23.
Adjacent side
...


Questions, Comments and Discussion
Ask us and Technical Secretary will try to provide an answer. You can facilitate discussion about the standard in here.