ASTM D3916-08
(Test Method)Standard Test Method for Tensile Properties of Pultruded Glass-Fiber-Reinforced Plastic Rod
Standard Test Method for Tensile Properties of Pultruded Glass-Fiber-Reinforced Plastic Rod
SIGNIFICANCE AND USE
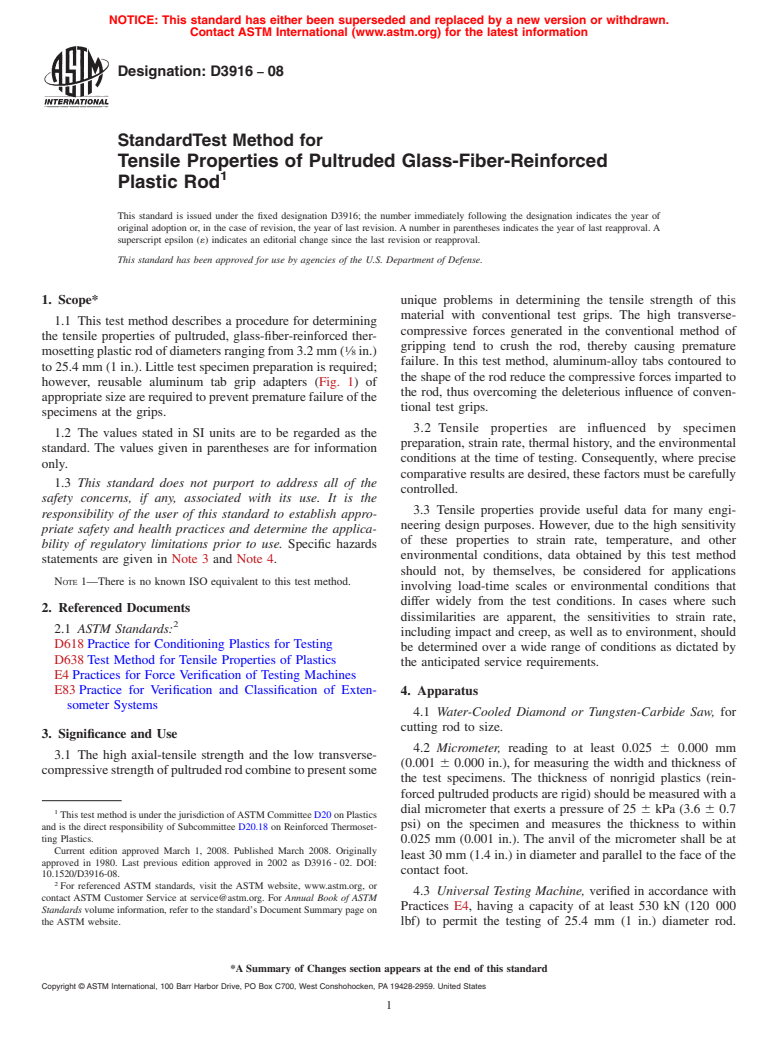
The high axial-tensile strength and the low transverse-compressive strength of pultruded rod combine to present some unique problems in determining the tensile strength of this material with conventional test grips. The high transverse-compressive forces generated in the conventional method of gripping tend to crush the rod, thereby causing premature failure. In this test method, aluminum-alloy tabs contoured to the shape of the rod reduce the compressive forces imparted to the rod, thus overcoming the deleterious influence of conventional test grips.
Tensile properties are influenced by specimen preparation, strain rate, thermal history, and the environmental conditions at the time of testing. Consequently, where precise comparative results are desired, these factors must be carefully controlled.
Tensile properties provide useful data for many engineering design purposes. However, due to the high sensitivity of these properties to strain rate, temperature, and other environmental conditions, data obtained by this test method should not, by themselves, be considered for applications involving load-time scales or environmental conditions that differ widely from the test conditions. In cases where such dissimilarities are apparent, the sensitivities to strain rate, including impact and creep, as well as to environment, should be determined over a wide range of conditions as dictated by the anticipated service requirements.
SCOPE
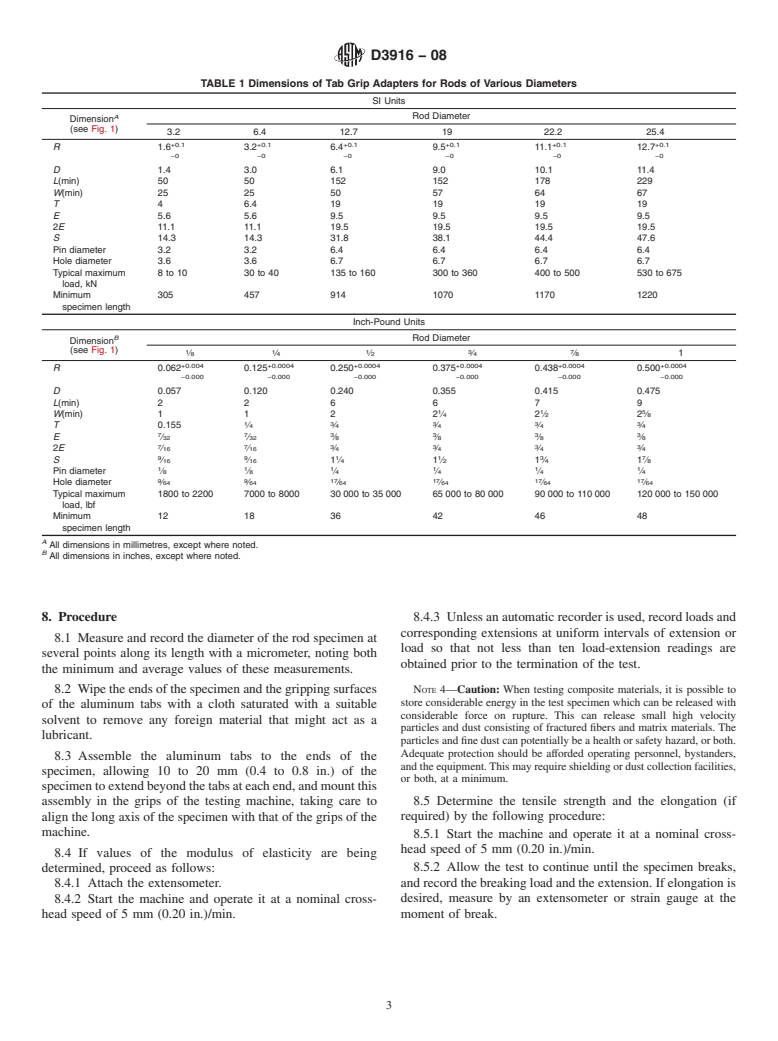
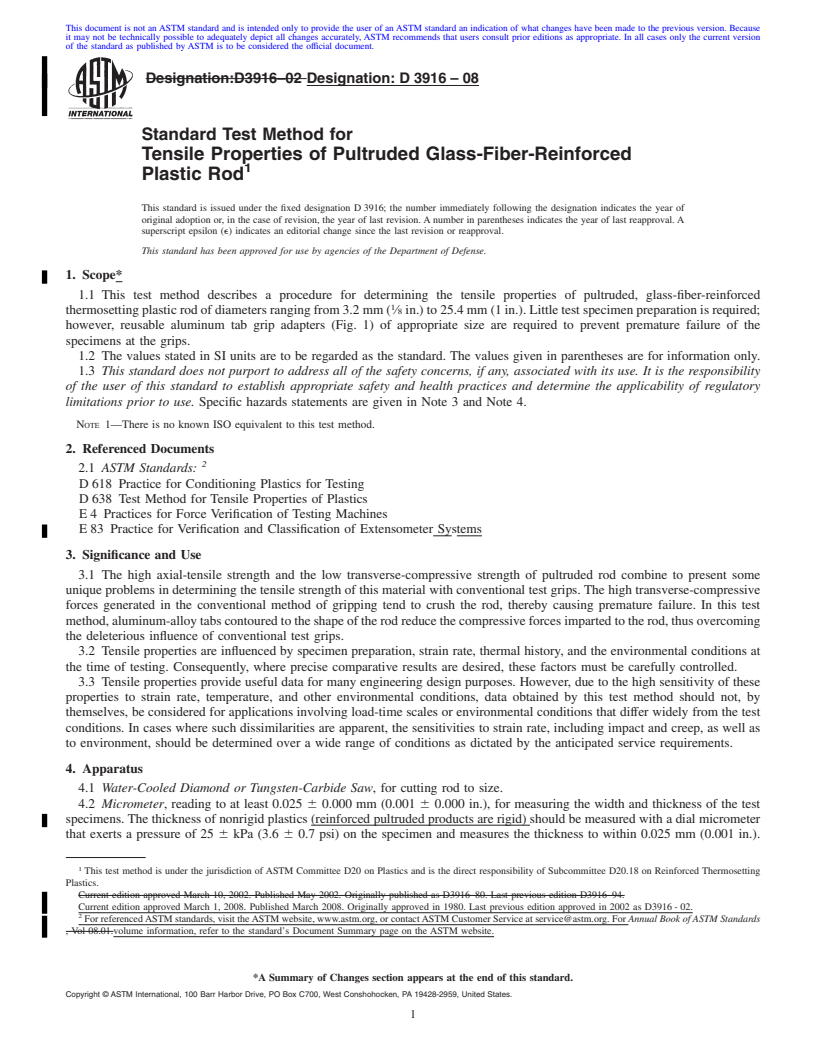
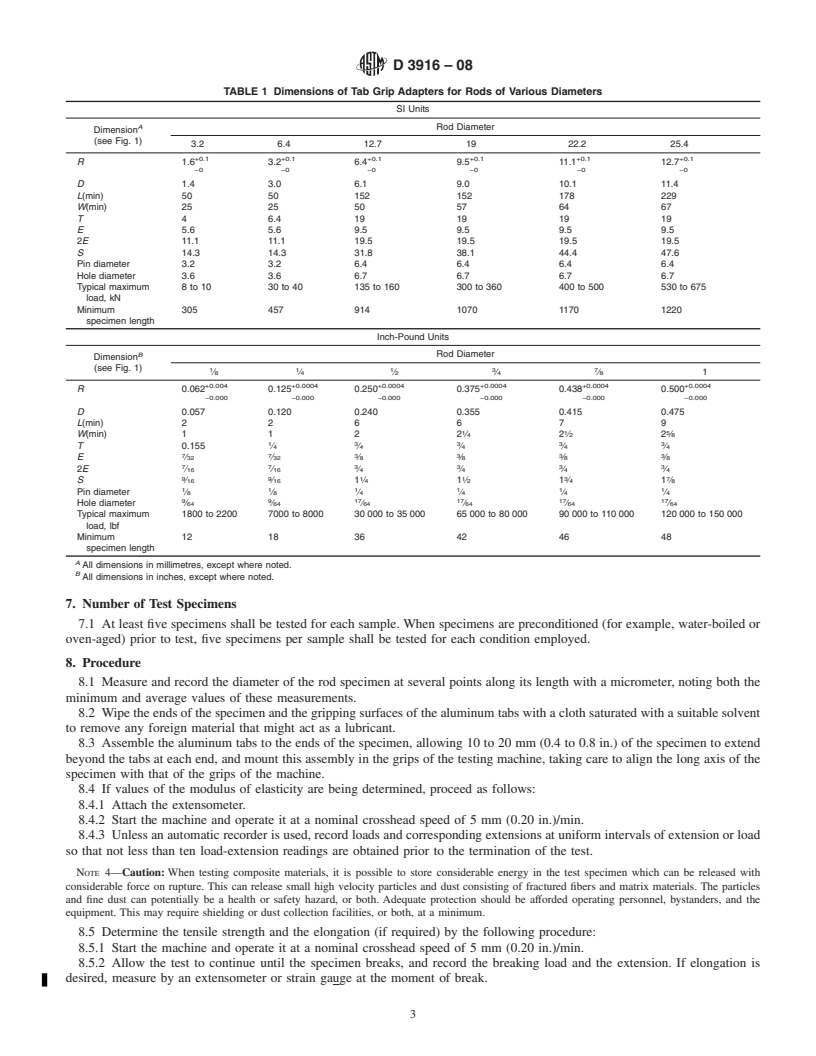
1.1 This test method describes a procedure for determining the tensile properties of pultruded, glass-fiber-reinforced thermosetting plastic rod of diameters ranging from 3.2 mm (1/8 in.) to 25.4 mm (1 in.). Little test specimen preparation is required; however, reusable aluminum tab grip adapters (Fig. 1) of appropriate size are required to prevent premature failure of the specimens at the grips.
1.2 The values stated in SI units are to be regarded as the standard. The values given in parentheses are for information only.
1.3 This standard does not purport to address all of the safety concerns, if any, associated with its use. It is the responsibility of the user of this standard to establish appropriate safety and health practices and determine the applicability of regulatory limitations prior to use. Specific hazards statements are given in Note 3 and Note 4.
Note 1—There is no known ISO equivalent to this test method.
General Information
Relations
Buy Standard
Standards Content (Sample)
NOTICE: This standard has either been superseded and replaced by a new version or withdrawn.
Contact ASTM International (www.astm.org) for the latest information
Designation: D3916 − 08
StandardTest Method for
Tensile Properties of Pultruded Glass-Fiber-Reinforced
1
Plastic Rod
This standard is issued under the fixed designation D3916; the number immediately following the designation indicates the year of
original adoption or, in the case of revision, the year of last revision.Anumber in parentheses indicates the year of last reapproval.A
superscript epsilon (´) indicates an editorial change since the last revision or reapproval.
This standard has been approved for use by agencies of the U.S. Department of Defense.
1. Scope* unique problems in determining the tensile strength of this
material with conventional test grips. The high transverse-
1.1 This test method describes a procedure for determining
compressive forces generated in the conventional method of
the tensile properties of pultruded, glass-fiber-reinforced ther-
gripping tend to crush the rod, thereby causing premature
1
mosettingplasticrodofdiametersrangingfrom3.2mm( ⁄8in.)
failure. In this test method, aluminum-alloy tabs contoured to
to25.4mm(1in.).Littletestspecimenpreparationisrequired;
the shape of the rod reduce the compressive forces imparted to
however, reusable aluminum tab grip adapters (Fig. 1)of
the rod, thus overcoming the deleterious influence of conven-
appropriatesizearerequiredtopreventprematurefailureofthe
tional test grips.
specimens at the grips.
3.2 Tensile properties are influenced by specimen
1.2 The values stated in SI units are to be regarded as the
preparation, strain rate, thermal history, and the environmental
standard. The values given in parentheses are for information
conditions at the time of testing. Consequently, where precise
only.
comparative results are desired, these factors must be carefully
1.3 This standard does not purport to address all of the
controlled.
safety concerns, if any, associated with its use. It is the
3.3 Tensile properties provide useful data for many engi-
responsibility of the user of this standard to establish appro-
neering design purposes. However, due to the high sensitivity
priate safety and health practices and determine the applica-
of these properties to strain rate, temperature, and other
bility of regulatory limitations prior to use. Specific hazards
environmental conditions, data obtained by this test method
statements are given in Note 3 and Note 4.
should not, by themselves, be considered for applications
NOTE 1—There is no known ISO equivalent to this test method.
involving load-time scales or environmental conditions that
differ widely from the test conditions. In cases where such
2. Referenced Documents
dissimilarities are apparent, the sensitivities to strain rate,
2
2.1 ASTM Standards:
including impact and creep, as well as to environment, should
D618Practice for Conditioning Plastics for Testing
be determined over a wide range of conditions as dictated by
D638Test Method for Tensile Properties of Plastics
the anticipated service requirements.
E4Practices for Force Verification of Testing Machines
E83Practice for Verification and Classification of Exten-
4. Apparatus
someter Systems
4.1 Water-Cooled Diamond or Tungsten-Carbide Saw, for
cutting rod to size.
3. Significance and Use
4.2 Micrometer, reading to at least 0.025 6 0.000 mm
3.1 The high axial-tensile strength and the low transverse-
(0.001 6 0.000 in.), for measuring the width and thickness of
compressivestrengthofpultrudedrodcombinetopresentsome
the test specimens. The thickness of nonrigid plastics (rein-
forcedpultrudedproductsarerigid)shouldbemeasuredwitha
dial micrometer that exerts a pressure of 25 6 kPa (3.6 6 0.7
1
ThistestmethodisunderthejurisdictionofASTMCommitteeD20onPlastics
psi) on the specimen and measures the thickness to within
and is the direct responsibility of Subcommittee D20.18 on Reinforced Thermoset-
ting Plastics.
0.025 mm (0.001 in.). The anvil of the micrometer shall be at
Current edition approved March 1, 2008. Published March 2008. Originally
least 30 mm (1.4 in.) in diameter and parallel to the face of the
approved in 1980. Last previous edition approved in 2002 as D3916-02. DOI:
contact foot.
10.1520/D3916-08.
2
For referenced ASTM standards, visit the ASTM website, www.astm.org, or
4.3 Universal Testing Machine, verified in accordance with
contact ASTM Customer Service at service@astm.org. For Annual Book of ASTM
Practices E4, having a capacity of at least 530 kN (120 000
Standards volume information, refer to the standard’s Document Summary page on
the ASTM website. lbf) to permit the testing of 25.4 mm (1 in.) diameter rod.
*A Summary of Changes section appears at the end of this standard
Copyright © ASTM International, 100 Barr Harbor Drive, PO Box C700, West Conshohocken, PA 19428-2959. United States
1
---------------------- Page: 1 ----------------------
D3916 − 08
NOTE 1—Sandblast
...
This document is not an ASTM standard and is intended only to provide the user of an ASTM standard an indication of what changes have been made to the previous version. Because
it may not be technically possible to adequately depict all changes accurately, ASTM recommends that users consult prior editions as appropriate. In all cases only the current version
of the standard as published by ASTM is to be considered the official document.
Designation:D3916–02 Designation:D3916–08
Standard Test Method for
Tensile Properties of Pultruded Glass-Fiber-Reinforced
1
Plastic Rod
This standard is issued under the fixed designation D 3916; the number immediately following the designation indicates the year of
original adoption or, in the case of revision, the year of last revision. A number in parentheses indicates the year of last reapproval. A
superscript epsilon (e) indicates an editorial change since the last revision or reapproval.
This standard has been approved for use by agencies of the Department of Defense.
1. Scope*
1.1 This test method describes a procedure for determining the tensile properties of pultruded, glass-fiber-reinforced
1
thermosetting plastic rod of diameters ranging from 3.2 mm ( ⁄8 in.) to 25.4 mm (1 in.). Little test specimen preparation is required;
however, reusable aluminum tab grip adapters (Fig. 1) of appropriate size are required to prevent premature failure of the
specimens at the grips.
1.2 The values stated in SI units are to be regarded as the standard. The values given in parentheses are for information only.
1.3 This standard does not purport to address all of the safety concerns, if any, associated with its use. It is the responsibility
of the user of this standard to establish appropriate safety and health practices and determine the applicability of regulatory
limitations prior to use. Specific hazards statements are given in Note 3 and Note 4.
NOTE 1—There is no known ISO equivalent to this test method.
2. Referenced Documents
2
2.1 ASTM Standards:
D 618 Practice for Conditioning Plastics for Testing
D 638 Test Method for Tensile Properties of Plastics
E 4 Practices for Force Verification of Testing Machines
E 83 Practice for Verification and Classification of Extensometer Systems
3. Significance and Use
3.1 The high axial-tensile strength and the low transverse-compressive strength of pultruded rod combine to present some
unique problems in determining the tensile strength of this material with conventional test grips. The high transverse-compressive
forces generated in the conventional method of gripping tend to crush the rod, thereby causing premature failure. In this test
method,aluminum-alloytabscontouredtotheshapeoftherodreducethecompressiveforcesimpartedtotherod,thusovercoming
the deleterious influence of conventional test grips.
3.2 Tensile properties are influenced by specimen preparation, strain rate, thermal history, and the environmental conditions at
the time of testing. Consequently, where precise comparative results are desired, these factors must be carefully controlled.
3.3 Tensile properties provide useful data for many engineering design purposes. However, due to the high sensitivity of these
properties to strain rate, temperature, and other environmental conditions, data obtained by this test method should not, by
themselves, be considered for applications involving load-time scales or environmental conditions that differ widely from the test
conditions. In cases where such dissimilarities are apparent, the sensitivities to strain rate, including impact and creep, as well as
to environment, should be determined over a wide range of conditions as dictated by the anticipated service requirements.
4. Apparatus
4.1 Water-Cooled Diamond or Tungsten-Carbide Saw, for cutting rod to size.
4.2 Micrometer, reading to at least 0.025 6 0.000 mm (0.001 6 0.000 in.), for measuring the width and thickness of the test
specimens. The thickness of nonrigid plastics (reinforced pultruded products are rigid) should be measured with a dial micrometer
that exerts a pressure of 25 6 kPa (3.6 6 0.7 psi) on the specimen and measures the thickness to within 0.025 mm (0.001 in.).
1
This test method is under the jurisdiction of ASTM Committee D20 on Plastics and is the direct responsibility of Subcommittee D20.18 on Reinforced Thermosetting
Plastics.
Current edition approved March 10, 2002. Published May 2002. Originally published as D3916–80. Last previous edition D3916–94.
Current edition approved March 1, 2008. Published March 2008. Originally approved in 1980. Last previous edition approved in 2002 as D3916 - 02.
2
For referencedASTM standards, visit theASTM website, www.astm.org, or contactASTM Customer Service at service@astm.org. For Annual Book of ASTM Standards
, Vol 08.01.volume information, refer to the standard’s Document Summary page on the ASTM website.
*A Summary of Changes section appears at the end of this standard.
Copyright © ASTM International, 100 Barr Harbor Drive, PO
...


Questions, Comments and Discussion
Ask us and Technical Secretary will try to provide an answer. You can facilitate discussion about the standard in here.