ASTM C1651-11(2018)
(Test Method)Standard Test Method for Measurement of Roll Wave Optical Distortion in Heat-Treated Flat Glass
Standard Test Method for Measurement of Roll Wave Optical Distortion in Heat-Treated Flat Glass
SIGNIFICANCE AND USE
5.1 This test method is a procedure for determining the peak-to-valley depth and the wavelength of roll wave in flat glass and then calculating the optical distortion resulting from that roll wave. Peak-to-valley measurements provide a means of monitoring the roll wave distortion in a heat processed glass product.
5.2 Measured peak-to-valley depth provides information required by some specifiers of heat-treated glass products.
5.3 Roll wave is inherent in flat glass which has been heat treated in a furnace in which rollers are used to convey the glass.
5.4 Consult Specifications C1036 and C1048 for additional glass characteristics and quality information.
SCOPE
1.1 This test method is applicable to the determination of the peak-to-valley depth and peak-to-peak distances of the out-of-plane deformation referred to as roll wave which occurs in flat, heat-treated architectural glass substrates processed in a heat processing continuous or oscillating conveyance oven.
1.2 This test method does not address other flatness issues like edge kink, ream, pocket distortion, bow, or other distortions outside of roll wave as defined in this test method.
1.3 The values stated in inch-pound units are to be regarded as standard. The values given in parentheses are mathematical conversions to SI units that are provided for information only and are not considered standard.
1.4 This standard does not purport to address all of the safety concerns, if any, associated with its use. It is the responsibility of the user of this standard to establish appropriate safety, health, and environmental practices and determine the applicability of regulatory limitations prior to use.
1.5 This international standard was developed in accordance with internationally recognized principles on standardization established in the Decision on Principles for the Development of International Standards, Guides and Recommendations issued by the World Trade Organization Technical Barriers to Trade (TBT) Committee.
General Information
- Status
- Published
- Publication Date
- 31-Jul-2018
- Technical Committee
- C14 - Glass and Glass Products
- Drafting Committee
- C14.11 - Optical Properties
Relations
- Effective Date
- 01-Aug-2018
- Effective Date
- 01-Oct-2023
- Effective Date
- 01-Oct-2018
- Effective Date
- 01-Nov-2015
- Effective Date
- 15-Mar-2012
- Effective Date
- 15-Mar-2012
- Effective Date
- 01-Oct-2011
- Effective Date
- 01-Oct-2011
- Effective Date
- 15-Oct-2006
- Effective Date
- 01-Oct-2005
- Effective Date
- 01-Oct-2005
- Effective Date
- 01-Jun-2004
- Effective Date
- 01-Jan-2004
- Effective Date
- 10-Jul-2003
- Effective Date
- 10-Jun-2001
Overview
ASTM C1651-11(2018) is the internationally recognized standard for the Measurement of Roll Wave Optical Distortion in Heat-Treated Flat Glass. Published by ASTM International, this standard provides a detailed test method to determine the peak-to-valley depth and the wavelength of roll wave distortions in heat-treated flat glass products. Measuring roll wave optical distortion is essential for assessing the visual and structural quality of architectural glass used in modern construction. This standard supports manufacturers, quality assurance professionals, and specifiers in ensuring that glass products meet stringent requirements for flatness and optical performance.
Key Topics
- Roll Wave Optical Distortion: The standard focuses on quantifying roll wave, a repetitive, wave-like deformation that occurs during the heat treatment of glass in roller hearth furnaces. Roll waves manifest visually as distortion due to out-of-plane deformation.
- Peak-to-Valley Depth and Wavelength: The main parameters measured are the characteristic depth (peak-to-valley) and the wavelength (peak-to-peak or valley-to-valley distance) of the roll wave distortion.
- Calculation of Optical Distortion: The procedure includes converting physical measurements into optical distortion values, expressed in diopters or millidiopters.
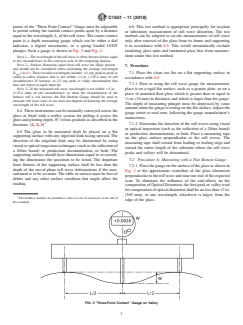
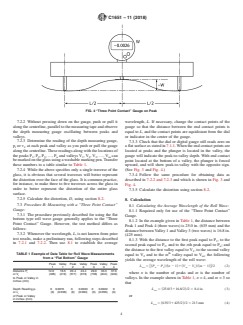
- Apparatus: Two primary measurement tools are described - the Flat Bottom Gauge and the Three Point Contact Gauge. Both are designed to accurately capture the shape and magnitude of roll wave.
- Reporting Requirements: Detailed documentation is required, including type of instrument used, operator name, specimen ID, and a summary of distortion values calculated.
Applications
- Quality Control in Glass Manufacturing: By implementing ASTM C1651-11(2018), manufacturers can monitor and control roll wave optical distortion during production of heat-treated flat or architectural glass. Monitoring ensures finished products meet customer and regulatory expectations.
- Assessment for Architectural Projects: Architects and engineers rely on precise measurements of roll wave distortion to ensure large glass panels have minimal visual distortion, crucial for building transparency and aesthetics.
- Specification and Compliance: The test method provides meaningful data required by certain building specifications or glass buyers, supporting procurement decisions and compliance with industry standards.
- Research and Product Development: The standard supports laboratories and R&D teams by providing methods to evaluate and reduce optical distortion in new glass products.
Related Standards
- ASTM C1036 – Specification for Flat Glass: Reference for general characteristics and quality requirements of flat glass used in building and other applications.
- ASTM C1048 – Specification for Heat-Strengthened and Fully Tempered Flat Glass: Complements C1651 by detailing performance requirements for heat-treated glass types.
- ASTM C162 – Terminology of Glass and Glass Products: Provides definitions for terms used across glass standards.
- ISO 3538 – Road Vehicles-Safety Glazing Materials-Test Methods for Optical Properties: Offers international perspectives on similar test methods for glass used in automotive applications.
Keywords: roll wave, optical distortion, heat-treated flat glass, glass quality, ASTM C1651, flatness, architectural glass, peak-to-valley, wavelength measurement, roller hearth furnace.
Buy Documents
ASTM C1651-11(2018) - Standard Test Method for Measurement of Roll Wave Optical Distortion in Heat-Treated Flat Glass
Frequently Asked Questions
ASTM C1651-11(2018) is a standard published by ASTM International. Its full title is "Standard Test Method for Measurement of Roll Wave Optical Distortion in Heat-Treated Flat Glass". This standard covers: SIGNIFICANCE AND USE 5.1 This test method is a procedure for determining the peak-to-valley depth and the wavelength of roll wave in flat glass and then calculating the optical distortion resulting from that roll wave. Peak-to-valley measurements provide a means of monitoring the roll wave distortion in a heat processed glass product. 5.2 Measured peak-to-valley depth provides information required by some specifiers of heat-treated glass products. 5.3 Roll wave is inherent in flat glass which has been heat treated in a furnace in which rollers are used to convey the glass. 5.4 Consult Specifications C1036 and C1048 for additional glass characteristics and quality information. SCOPE 1.1 This test method is applicable to the determination of the peak-to-valley depth and peak-to-peak distances of the out-of-plane deformation referred to as roll wave which occurs in flat, heat-treated architectural glass substrates processed in a heat processing continuous or oscillating conveyance oven. 1.2 This test method does not address other flatness issues like edge kink, ream, pocket distortion, bow, or other distortions outside of roll wave as defined in this test method. 1.3 The values stated in inch-pound units are to be regarded as standard. The values given in parentheses are mathematical conversions to SI units that are provided for information only and are not considered standard. 1.4 This standard does not purport to address all of the safety concerns, if any, associated with its use. It is the responsibility of the user of this standard to establish appropriate safety, health, and environmental practices and determine the applicability of regulatory limitations prior to use. 1.5 This international standard was developed in accordance with internationally recognized principles on standardization established in the Decision on Principles for the Development of International Standards, Guides and Recommendations issued by the World Trade Organization Technical Barriers to Trade (TBT) Committee.
SIGNIFICANCE AND USE 5.1 This test method is a procedure for determining the peak-to-valley depth and the wavelength of roll wave in flat glass and then calculating the optical distortion resulting from that roll wave. Peak-to-valley measurements provide a means of monitoring the roll wave distortion in a heat processed glass product. 5.2 Measured peak-to-valley depth provides information required by some specifiers of heat-treated glass products. 5.3 Roll wave is inherent in flat glass which has been heat treated in a furnace in which rollers are used to convey the glass. 5.4 Consult Specifications C1036 and C1048 for additional glass characteristics and quality information. SCOPE 1.1 This test method is applicable to the determination of the peak-to-valley depth and peak-to-peak distances of the out-of-plane deformation referred to as roll wave which occurs in flat, heat-treated architectural glass substrates processed in a heat processing continuous or oscillating conveyance oven. 1.2 This test method does not address other flatness issues like edge kink, ream, pocket distortion, bow, or other distortions outside of roll wave as defined in this test method. 1.3 The values stated in inch-pound units are to be regarded as standard. The values given in parentheses are mathematical conversions to SI units that are provided for information only and are not considered standard. 1.4 This standard does not purport to address all of the safety concerns, if any, associated with its use. It is the responsibility of the user of this standard to establish appropriate safety, health, and environmental practices and determine the applicability of regulatory limitations prior to use. 1.5 This international standard was developed in accordance with internationally recognized principles on standardization established in the Decision on Principles for the Development of International Standards, Guides and Recommendations issued by the World Trade Organization Technical Barriers to Trade (TBT) Committee.
ASTM C1651-11(2018) is classified under the following ICS (International Classification for Standards) categories: 81.040.20 - Glass in building. The ICS classification helps identify the subject area and facilitates finding related standards.
ASTM C1651-11(2018) has the following relationships with other standards: It is inter standard links to ASTM C1651-11, ASTM C162-23, ASTM C1048-18, ASTM C162-05(2015), ASTM C1048-12e1, ASTM C1048-12, ASTM C1036-11, ASTM C1036-11e1, ASTM C1036-06, ASTM C162-05, ASTM C162-05(2010), ASTM C162-04, ASTM C1048-04, ASTM C162-03, ASTM C1036-01. Understanding these relationships helps ensure you are using the most current and applicable version of the standard.
ASTM C1651-11(2018) is available in PDF format for immediate download after purchase. The document can be added to your cart and obtained through the secure checkout process. Digital delivery ensures instant access to the complete standard document.
Standards Content (Sample)
This international standard was developed in accordance with internationally recognized principles on standardization established in the Decision on Principles for the
Development of International Standards, Guides and Recommendations issued by the World Trade Organization Technical Barriers to Trade (TBT) Committee.
Designation: C1651 − 11 (Reapproved 2018)
Standard Test Method for
Measurement of Roll Wave Optical Distortion in Heat-
Treated Flat Glass
This standard is issued under the fixed designation C1651; the number immediately following the designation indicates the year of
original adoption or, in the case of revision, the year of last revision. A number in parentheses indicates the year of last reapproval. A
superscript epsilon (´) indicates an editorial change since the last revision or reapproval.
1. Scope C1036 Specification for Flat Glass
C1048 Specification for Heat-Strengthened and Fully Tem-
1.1 This test method is applicable to the determination of
pered Flat Glass
the peak-to-valley depth and peak-to-peak distances of the
out-of-plane deformation referred to as roll wave which occurs
3. Terminology
in flat, heat-treated architectural glass substrates processed in a
heat processing continuous or oscillating conveyance oven.
3.1 Definitions of Terms Specific to This Standard:
3.1.1 peak-to-valley depth of roll wave—characteristic
1.2 This test method does not address other flatness issues
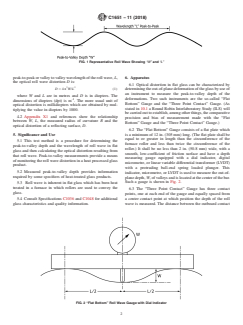
depth, W, of roll wave as illustrated in Fig. 1.
like edge kink, ream, pocket distortion, bow, or other distor-
3.1.2 peak-to-peak wavelength of roll wave—characteristic
tions outside of roll wave as defined in this test method.
length, L, of roll wave shown as a sine-wave representing the
1.3 The values stated in inch-pound units are to be regarded
deformed surface section as illustrated in Fig. 1.
as standard. The values given in parentheses are mathematical
3.1.3 roll wave—A repetitive wave-like departure from
conversions to SI units that are provided for information only
flatness in glass that results from heat treating the glass in a
and are not considered standard.
horizontal roller hearth furnace. Roll wave excludes edge
1.4 This standard does not purport to address all of the
effectssuchasedgekinkanddistortioninfluencedbyassembly
safety concerns, if any, associated with its use. It is the
or installation.
responsibility of the user of this standard to establish appro-
3.1.4 roll wave optical distortion—visual distortion, D, that
priate safety, health, and environmental practices and deter-
results from roll wave and expressed as lens power as in Eq 1.
mine the applicability of regulatory limitations prior to use.
1.5 This international standard was developed in accor-
3.1.5 valley-to-valley wavelength of roll wave—
dance with internationally recognized principles on standard-
characteristic length, L, of roll wave shown as a sine-wave
ization established in the Decision on Principles for the
representing the deformed surface section as illustrated in Fig.
Development of International Standards, Guides and Recom-
1.
mendations issued by the World Trade Organization Technical
Barriers to Trade (TBT) Committee.
4. Summary of Test Method
4.1 This test consists of moving an instrument across the
2. Referenced Documents
glass surface in a direction parallel to the direction that the
2.1 Reference to these documents shall be the latest issue
glass substrate traveled during heat processing. The instrument
unless otherwise specified by the authority applying this test
will primarily measure the out-of-plane deformation of the
method.
glass surface which is characteristic of the glass and known as
“roll wave”. The peak-to-valley depths of the roll waves, W,
2.2 ASTM Standards:
C162 Terminology of Glass and Glass Products and the peak-to-peak distances, L, are measured. (See Fig. 1.)
4.1.1 Other out-of-plane deformations of the glass surface
may also be present which do not have the same peak and
This test method is under the jurisdiction of ASTM Committee C14 on Glass valley wave character of the roll wave, but which also result in
and Glass Products and is the direct responsibility of Subcommittee C14.11 on
the appearance of optical distortion in the glass.
Optical Properties.
4.1.2 The optical distortion due to the out-of-plane defor-
Current edition approved Aug. 1, 2018. Published August 2018. Originally
mation of the surface is measured as an optical power, similar
approved in 2008. Last previous edition approved in 2011 as C1651 – 11. DOI:
10.1520/C1651-11R18.
to the optical power of a cylindrical mirror or lens.
For referenced ASTM standards, visit the ASTM website, www.astm.org, or
4.1.3 For those deformations that do have a wave character,
contact ASTM Customer Service at service@astm.org. For Annual Book of ASTM
the distortion can be calculated using the following formula.
Standards volume information, refer to the standard’s Document Summary page on
the ASTM website. From the measured roll wave depth, W and the measured
Copyright © ASTM International, 100 Barr Harbor Drive, PO Box C700, West Conshohocken, PA 19428-2959. United States
C1651 − 11 (2018)
FIG. 1 Representative Roll Wave Showing “W” and “L”
peak-to-peakorvalleytovalleywavelengthoftherollwave, L, 6. Apparatus
the optical roll wave distortion D is:
6.1 Optical distortion in flat glass can be characterized by
2 2
D 5 4π W/L (1)
determiningtheout-of-planedeformationoftheglassbyuseof
an instrument to measure the peak-to-valley depth of the
where W and L are in metres and D is in diopters. The
-1 deformations. Two such instruments are the so-called “Flat
dimensions of diopters (dpt) is m . The more usual unit of
Bottom” Gauge and the “Three Point Contact” Gauge. (As
optical distortion is millidiopters which are obtained by mul-
stated in 10.1 a Round Robin Interlaboratory Study (ILS) will
tiplying the value in diopters by 1000.
becarriedouttoestablish,amongotherthings,thecomparative
4.2 Appendix X1 and references show the relationship
precision and bias of measurement made with the “Flat
between W, L, the measured radius of curvature R and the
Bottom” Gauge and the “Three Point Contact” Gauge.)
optical distortion of a reflecting surface, D.
6.2 The “Flat Bottom” Gauge consists of a flat plate which
is a minimum of 12 in. (305 mm) long. (The flat plate shall be
5. Significance and Use
equal to or greater in length than the circumference of the
5.1 This test method is a procedure for determining the
furnace roller and less than twice the circumference of the
peak-to-valley depth and the wavelength of roll wave in flat
roller.) It shall be no less than 2 in. (50.8 mm) wide, with a
glass and then calculating the optical distortion resulting from
smooth, low-coefficient of friction surface and have a depth
that roll wave. Peak-to-valley measurements provide a means
measuring gauge equipped with a dial indicator, digital
of monitoring the roll wave distortion in a heat processed glass
micrometre, or linear variable differential transformer (LVDT)
product.
with a protruding ball-end spring loaded plunger. This
5.2 Measured peak-to-valley depth provides information
indicator, micrometre, or LVDT is used to measure the out-of-
required by some specifiers of heat-treated glass products.
planedepth,W,ofvalleysandislocatedatthecenterofthebar.
Such a gauge is shown in Fig. 2.
5.3 Roll wave is inherent in flat glass which has been heat
treated in a furnace in which rollers are used to convey the
6.3 The “Three Point Contact” Gauge has three contact
glass.
points, one at each end of the gauge and equally spaced from
5.4 Consult Specifications C1036 and C1048 for additional a center contact point at which position the depth of the roll
glass characteristics and quality information. wave is measured. The distance between the outboard contact
FIG. 2 “Flat Bottom” Roll Wave Gauge with Dial Indicator
C1651 − 11 (2018)
points of the “Three Point Contact” Gauge must be adjustable 6.6 This test method is appropriate principally for in-plant
to permit setting the outside contact points apart by a distance or laboratory measurement of roll wave distortion. The test
equal to the wavelength, L, of the roll wave.The center contact
method can be adapted to on-site measurements of roll wave
point is a depth measuring gauge which can be either a dial
only after removal of the glass from its frame and supporting
indicator, a digital micrometre, or a spring loaded LVDT
it in accordance with 6.5. This would automatically exclude
plunger. Such a gauge is shown in Fig. 3 and Fig. 4.
insulating glass units and laminated glass lites from measure-
ment under this test method.
NOTE1—Thewavelengthoftherollwaveisoften,butnotalwaysequal
to the circumference of the conveyor rolls in the tempering furnace.
NOTE 2—Surface distortions apart from roll wave are likely present
7. Procedure
and should not be considered when calculating the average wavelength
(L )in 8.1. These invalid wavelengths include: (1) any peak-to-peak or 7.1 Place the clean test lite on a flat supporting surface in
ave
valley-to-valley distance that is not within 61 in. (625.4 mm) of roll
accordance with 6.5.
circumference (if known), or (2) any peak or valley measurement that
7.1.1 Prior to using the roll wave gauge for measurement,
does not repeat at equal intervals.
NOTE 3—If the measured roll wave wavelength is not within 61 in. place it on a rigid flat surface, such as a granite plate, or on a
(625.4 mm) of roll circumference, or when the circumference of the
piece of annealed float glass which is greater than or equal to
furnace roll is not known, the Flat Bottom Gauge should be used to
⁄8 in. (10 mm) in thickness and which is larger than the gauge.
measure roll wave since its use does not depend on knowing the average
The depth of measuring plunger must be depressed by some
wavelength of the roll wave.
amountwhenthegaugeisrestingontheflatsurface.Adjustthe
6.4 These instruments can be manually conveyed across the
gauge meter to read zero, following the gauge manufacturer’s
glass or fitted with a trolley system for pulling it across the
instructions.
glass and plotting depth, W, versus position as described in the
7.1.2 Determine the direction of the roll waves using visual
literature. (1, 2, 3)
or optical inspection (such as the reflection of a Zebra board)
6.5 The glass to be measured shall be placed on a flat
or production documentation, or both. Place a measuring tape
supporting surface with any edge/end kink facing upward. The
on the glass surface perpendicular to the roll waves. The
direction of the edge/end kink may be determined by using
measuring tape shall extend from leading or trailing edge and
visualoropticalinspectiontechniques(suchasthereflectionof
extend the entire length of the substrate where the roll wave
a Zebra board) or production documentation, or both. The
peaks and valleys will be determined.
supporting surface should have dimensions equal to or exceed-
ing the dimensions the specimen to be tested. The departure 7.2 Procedure A: Measuring with a Flat Bottom Gauge:
from flatness of the supporting surface shall be less than the
7.2.1 Placethegaugeonthesurfaceoftheglassasshownin
depth of the out-of-plane roll wave deformations if the mea-
Fig. 2 at the approximate centerline of the glass dimension
surement is to be accura
...


Questions, Comments and Discussion
Ask us and Technical Secretary will try to provide an answer. You can facilitate discussion about the standard in here.
Loading comments...