ASTM E433-71(2008)
(Specification)Standard Reference Photographs for Liquid Penetrant Inspection
Standard Reference Photographs for Liquid Penetrant Inspection
SCOPE
1.1 These reference photographs are supplied as a means of establishing types and characteristics of surface discontinuities detectable by the penetrant examination methods. They may be used as a reference for acceptance standards, specifications and drawings.
1.2 Actual dimensions including maximum length of indications and number of indications per unit area must be specified by the users of this document. No attempt has been made to establish limits of acceptability or the metallurgical cause of a discontinuity.
Note 1—Examples of these reference photographs are shown in Figs. 1-8.
FIG. 1 Example of Type I, Class A, Indication
FIG. 2 Example of Type I, Class B, Indication
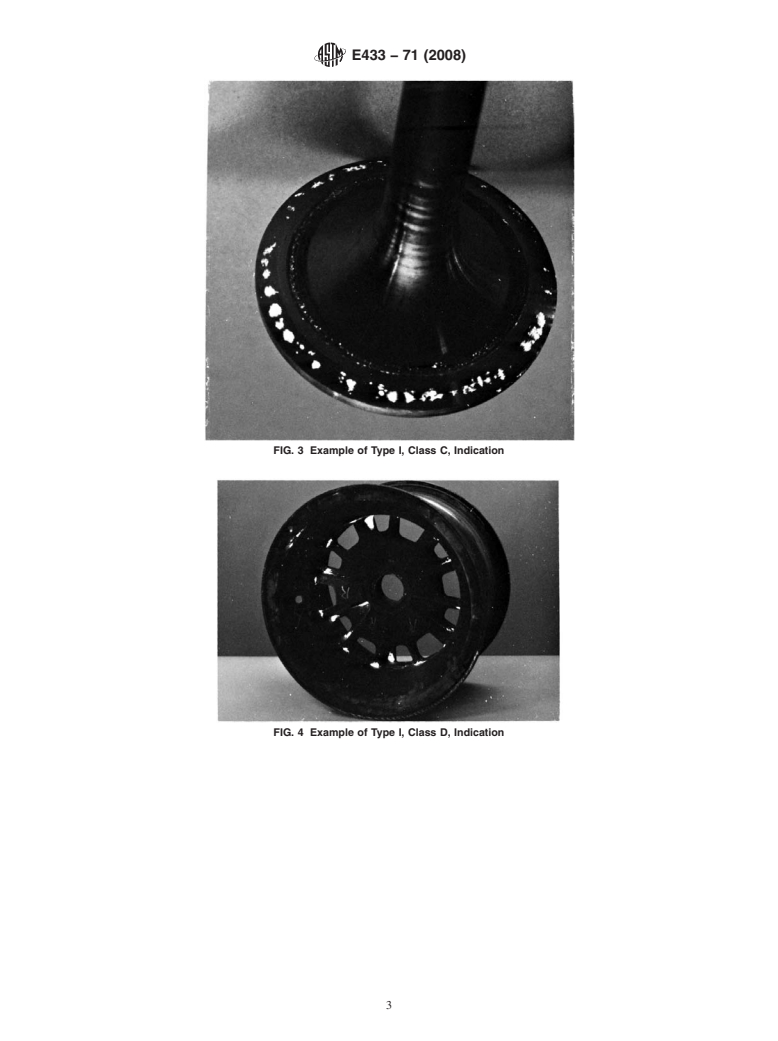
FIG. 3 Example of Type I, Class C, Indication
FIG. 4 Example of Type I, Class D, Indication
FIG. 5 Example of Type II, Class A, Indication
FIG. 6 Example of Type II, Class B, Indication
FIG. 7 Example of Type II, Class C, Indication
FIG. 8 Example of Type II, Class D, Indication
General Information
Relations
Standards Content (Sample)
NOTICE: This standard has either been superseded and replaced by a new version or withdrawn.
Contact ASTM International (www.astm.org) for the latest information
Designation: E433 − 71(Reapproved 2008)
Standard Reference Photographs for
1
Liquid Penetrant Inspection
This standard is issued under the fixed designation E433; the number immediately following the designation indicates the year of
original adoption or, in the case of revision, the year of last revision. A number in parentheses indicates the year of last reapproval. A
superscript epsilon (´) indicates an editorial change since the last revision or reapproval.
1. Scope C. Multiple aligned
D. Intersection of surfaces (threads, corners, fillets, etc.)
1.1 These reference photographs are supplied as a means of
establishing types and characteristics of surface discontinuities
4. Identification
detectable by the penetrant examination methods.They may be
used as a reference for acceptance standards, specifications and
4.1 The types of discontinuity indications covered by these
drawings.
reference photographs are listed and described in Table 1. Each
1.2 Actual dimensions including maximum length of indi- type of discontinuity indication is designated by a Roman
cations and number of indications per unit area must be
numeral. The class of indication is designated by the letters A
specified by the users of this document. No attempt has been through D. Individual photographs within type and class are
made to establish limits of acceptability or the metallurgical
identified by numbers. Each reference photograph is, therefore,
cause of a discontinuity.
identified with the proper Roman numeral, letter, and number.
NOTE 1—Examples of these reference photographs are shown in Figs.
5. Method of Preparation
1-8.
5.1 The reference photographs were reproduced from mas-
2. Referenced Documents
ter photographs which are the property of ASTM. The photo-
2
2.1 ASTM Standards:
graphs retain the original photographic contrast.
E165 Practice for Liquid Penetrant Examination for General
Industry
6. Basis for Use of Reference Photographs
2.2 ASTM Adjuncts:
3
6.1 These reference photographs are intended for use when
Reference Photographs for Penetrant Inspection
specified in the inquiry, contract, order material specification,
3. Classifications or applicable code, and when the severity is mutually agreed
upon between the manufacturer and the purchaser. It is
3.1 Types—For the purposes of this standard there are two
recognized that it is impossible to rigidly interpret indications
types of indications, which are defined as follows:
from a set of photographic references. Consequently, there is a
3.1.1 Type I Indications—Those in which neither of the
need for close cooperation between manufacturer and pur-
measurable dimensions is greater than three times the other.
chaser.
3.1.2 Type II Indications—Those in which one of the mea-
surable dimensions is at least three times greater than the other.
6.2 Zones of inspection and severity levels in each zone
3.2 Classes—For purposes of this standard there are four shall be shown on applicable drawings or otherwise specified.
classes of indications which are defined as follows: Unless otherwise specified all accessible surfaces shall be
A. Single examined.
B. Multiple unaligned
6.3 These reference photographs are intended to depict
penetrant indications of surface discontinuities. They are not
1 intended to indicate the depth of such discontinuities.
These reference photographs are under the jurisdiction of ASTM Committee
E07 on Nondestructive Testing and are the direct respons
...


Questions, Comments and Discussion
Ask us and Technical Secretary will try to provide an answer. You can facilitate discussion about the standard in here.