ASTM E2448-11e1
(Test Method)Standard Test Method for Determining the Superplastic Properties of Metallic Sheet Materials
Standard Test Method for Determining the Superplastic Properties of Metallic Sheet Materials
SIGNIFICANCE AND USE
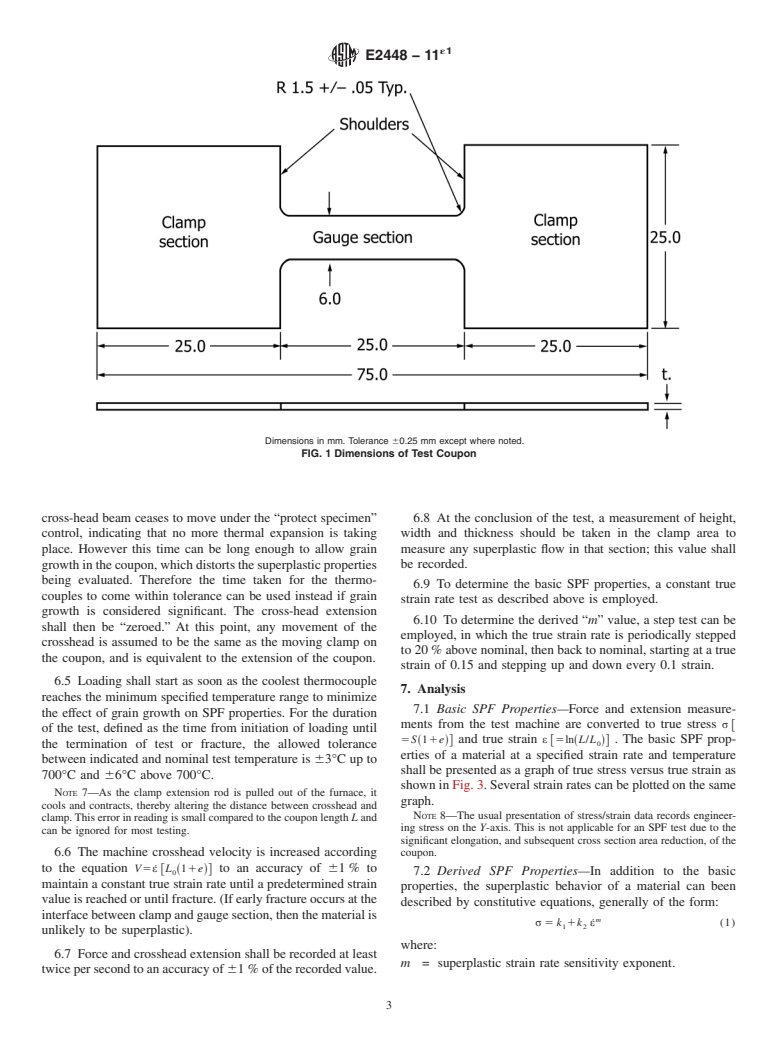
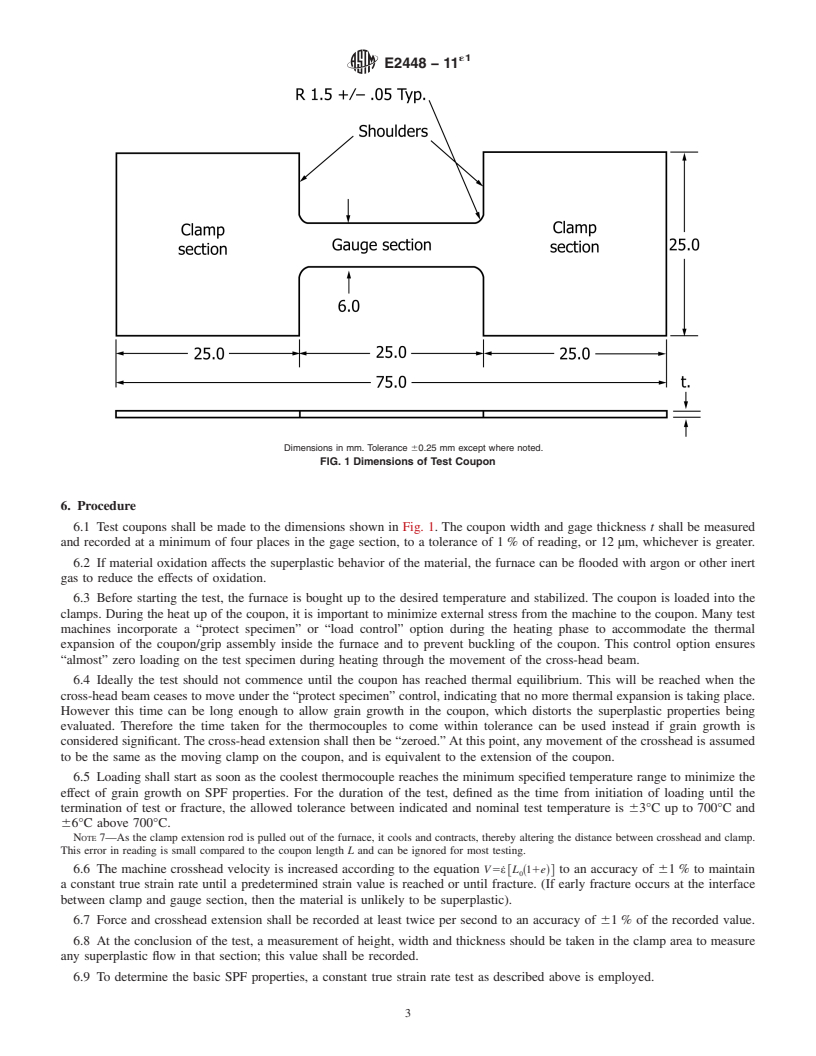
4.1 The determination of the superplastic properties of a metallic sheet material is important for the observation, development and comparison of superplastic materials. It is also necessary to predict the correct forming parameters during an SPF process. SPF tensile testing has peculiar characteristics compared to conventional mechanical testing, which distort the true values of stress, strain, strain hardening, and strain rate at the very large elongations encountered in an SPF pull test, consequently conventional mechanical test methods cannot be used. This test method addresses those characteristics by optimizing the shape of the test coupon and specifying a new test procedure.
4.2 The evaluation of a superplastic material can be divided into two parts. Firstly, the basic superplastic-forming (SPF) properties of the material are measured using the four parameters of stress, temperature, strain, and strain rate. These are obtained using conversions from the raw data of a tensile test. Secondly, derived properties useful to define an SPF material are obtained from the basic properties using specific equations.
SCOPE
1.1 This test method describes the procedure for determining the superplastic forming properties (SPF) of a metallic sheet material. It includes tests both for the basic SPF properties and also for derived SPF properties. The test for basic properties encompasses effects due to strain hardening or softening.
1.2 This test method covers sheet materials with thicknesses of at least 0.5 mm but not greater than 6 mm. It characterizes the material under a uni-axial tensile stress condition.
Note 1: Most industrial applications of superplastic forming involve a multi-axial stress condition in a sheet; however it is more convenient to characterize a material under a uni-axial tensile stress condition. Tests should be performed in different orientations to the rolling direction of the sheet to ascertain initial anisotropy.
1.3 This method has been used successfully between strain rates of 10-5 to 10-1 per second.
1.4 This method has been used successfully on Aluminum and Titanium alloys. The use of the method with other metals should be verified.
1.5 The values stated in SI units are to be regarded as standard. No other units of measurement are included in this standard.
1.6 This standard does not purport to address all of the safety concerns, if any, associated with its use. It is the responsibility of the user of this standard to establish appropriate safety and health practices and determine the applicability of regulatory limitations prior to use.
General Information
Relations
Buy Standard
Standards Content (Sample)
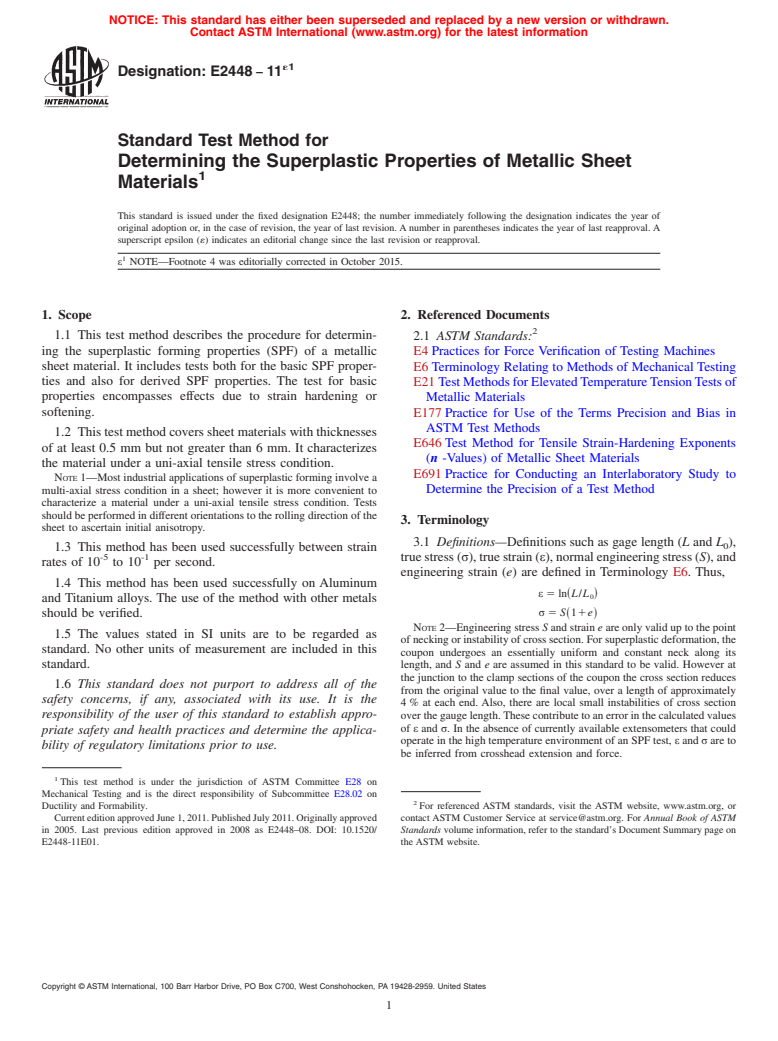
NOTICE: This standard has either been superseded and replaced by a new version or withdrawn.
Contact ASTM International (www.astm.org) for the latest information
´1
Designation: E2448 − 11
Standard Test Method for
Determining the Superplastic Properties of Metallic Sheet
1
Materials
This standard is issued under the fixed designation E2448; the number immediately following the designation indicates the year of
original adoption or, in the case of revision, the year of last revision. A number in parentheses indicates the year of last reapproval. A
superscript epsilon (´) indicates an editorial change since the last revision or reapproval.
1
ε NOTE—Footnote 4 was editorially corrected in October 2015.
1. Scope 2. Referenced Documents
2
1.1 This test method describes the procedure for determin-
2.1 ASTM Standards:
ing the superplastic forming properties (SPF) of a metallic E4 Practices for Force Verification of Testing Machines
sheet material. It includes tests both for the basic SPF proper-
E6 Terminology Relating to Methods of Mechanical Testing
ties and also for derived SPF properties. The test for basic E21 TestMethodsforElevatedTemperatureTensionTestsof
properties encompasses effects due to strain hardening or
Metallic Materials
softening. E177 Practice for Use of the Terms Precision and Bias in
ASTM Test Methods
1.2 This test method covers sheet materials with thicknesses
E646 Test Method for Tensile Strain-Hardening Exponents
of at least 0.5 mm but not greater than 6 mm. It characterizes
(n -Values) of Metallic Sheet Materials
the material under a uni-axial tensile stress condition.
E691 Practice for Conducting an Interlaboratory Study to
NOTE 1—Most industrial applications of superplastic forming involve a
multi-axial stress condition in a sheet; however it is more convenient to Determine the Precision of a Test Method
characterize a material under a uni-axial tensile stress condition. Tests
should be performed in different orientations to the rolling direction of the
3. Terminology
sheet to ascertain initial anisotropy.
3.1 Definitions—Definitions such as gage length (L and L ),
0
1.3 This method has been used successfully between strain
-5 -1
truestress(σ),truestrain(ε),normalengineeringstress(S),and
rates of 10 to 10 per second.
engineering strain (e) are defined in Terminology E6. Thus,
1.4 This method has been used successfully on Aluminum
ε 5 ln L/L
~ !
0
and Titanium alloys. The use of the method with other metals
σ 5 S 11e
should be verified. ~ !
NOTE 2—Engineering stress S and strain e are only valid up to the point
1.5 The values stated in SI units are to be regarded as
ofneckingorinstabilityofcrosssection.Forsuperplasticdeformation,the
standard. No other units of measurement are included in this
coupon undergoes an essentially uniform and constant neck along its
standard. length, and S and e are assumed in this standard to be valid. However at
the junction to the clamp sections of the coupon the cross section reduces
1.6 This standard does not purport to address all of the
from the original value to the final value, over a length of approximately
safety concerns, if any, associated with its use. It is the
4 % at each end. Also, there are local small instabilities of cross section
responsibility of the user of this standard to establish appro- overthegaugelength.Thesecontributetoanerrorinthecalculatedvalues
of ε and σ. In the absence of currently available extensometers that could
priate safety and health practices and determine the applica-
operate in the high temperature environment of an SPF test,ε andσ are to
bility of regulatory limitations prior to use.
be inferred from crosshead extension and force.
1
This test method is under the jurisdiction of ASTM Committee E28 on
Mechanical Testing and is the direct responsibility of Subcommittee E28.02 on
2
Ductility and Formability. For referenced ASTM standards, visit the ASTM website, www.astm.org, or
CurrenteditionapprovedJune1,2011.PublishedJuly2011.Originallyapproved contact ASTM Customer Service at service@astm.org. For Annual Book of ASTM
in 2005. Last previous edition approved in 2008 as E2448–08. DOI: 10.1520/ Standards volume information, refer to the standard’s Document Summary page on
E2448-11E01. the ASTM website.
Copyright © ASTM International, 100 Barr Harbor Drive, PO Box C700, West Conshohocken, PA 19428-2959. United States
1
---------------------- Page: 1 ----------------------
´1
E2448 − 11
3.2 Symbols Specific To This Standard: V = machine cross- 5. Apparatus
head velocity, the velocity of the traveling member of the test
5.1 The accuracy of the testing machine shall be within the
machine to which one of the coupon clamps is attached
permissible variation specified in Practices E4.
ε˙ = strain rate, measured as: V/@L ~11e!#
0
5.2 The apparatus shall be calibrated according to appropri-
NOTE 3—This is an operational definition of strain rate.
ate standards or manufacturer instructions.
m = strain rate sensitivity, defined as (ln∆σ)/
...
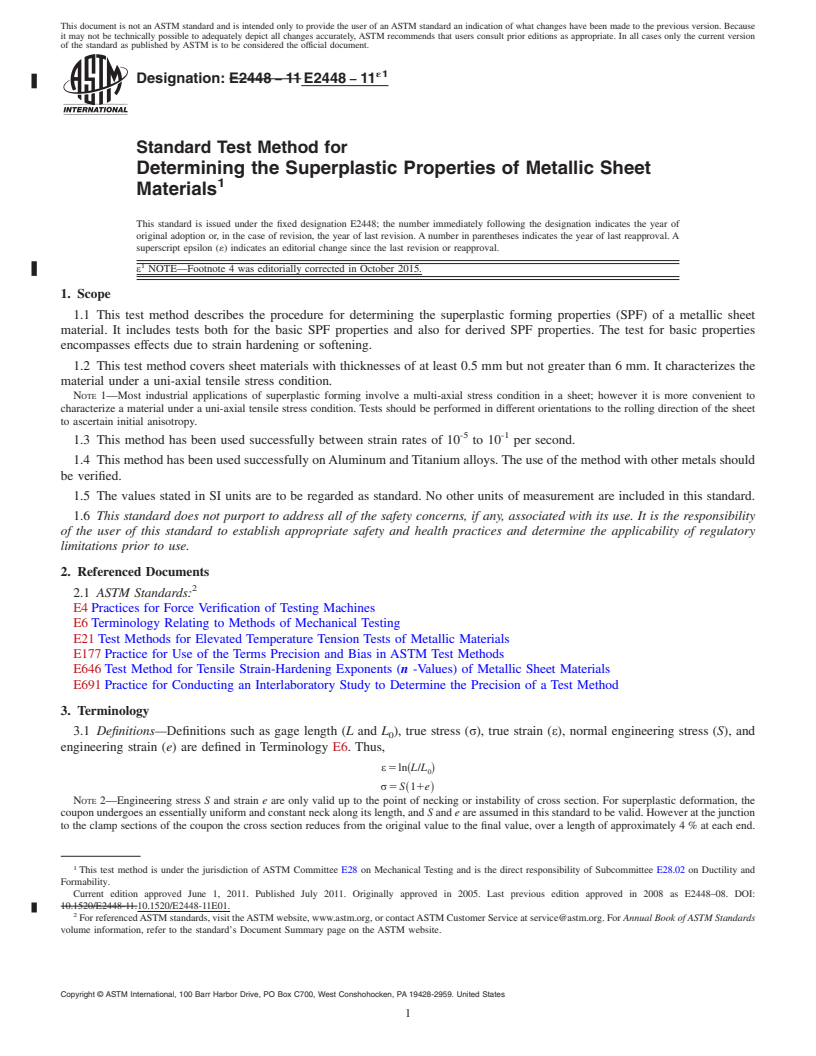
This document is not an ASTM standard and is intended only to provide the user of an ASTM standard an indication of what changes have been made to the previous version. Because
it may not be technically possible to adequately depict all changes accurately, ASTM recommends that users consult prior editions as appropriate. In all cases only the current version
of the standard as published by ASTM is to be considered the official document.
´1
Designation: E2448 − 11 E2448 − 11
Standard Test Method for
Determining the Superplastic Properties of Metallic Sheet
1
Materials
This standard is issued under the fixed designation E2448; the number immediately following the designation indicates the year of
original adoption or, in the case of revision, the year of last revision. A number in parentheses indicates the year of last reapproval. A
superscript epsilon (´) indicates an editorial change since the last revision or reapproval.
1
ε NOTE—Footnote 4 was editorially corrected in October 2015.
1. Scope
1.1 This test method describes the procedure for determining the superplastic forming properties (SPF) of a metallic sheet
material. It includes tests both for the basic SPF properties and also for derived SPF properties. The test for basic properties
encompasses effects due to strain hardening or softening.
1.2 This test method covers sheet materials with thicknesses of at least 0.5 mm but not greater than 6 mm. It characterizes the
material under a uni-axial tensile stress condition.
NOTE 1—Most industrial applications of superplastic forming involve a multi-axial stress condition in a sheet; however it is more convenient to
characterize a material under a uni-axial tensile stress condition. Tests should be performed in different orientations to the rolling direction of the sheet
to ascertain initial anisotropy.
-5 -1
1.3 This method has been used successfully between strain rates of 10 to 10 per second.
1.4 This method has been used successfully on Aluminum and Titanium alloys. The use of the method with other metals should
be verified.
1.5 The values stated in SI units are to be regarded as standard. No other units of measurement are included in this standard.
1.6 This standard does not purport to address all of the safety concerns, if any, associated with its use. It is the responsibility
of the user of this standard to establish appropriate safety and health practices and determine the applicability of regulatory
limitations prior to use.
2. Referenced Documents
2
2.1 ASTM Standards:
E4 Practices for Force Verification of Testing Machines
E6 Terminology Relating to Methods of Mechanical Testing
E21 Test Methods for Elevated Temperature Tension Tests of Metallic Materials
E177 Practice for Use of the Terms Precision and Bias in ASTM Test Methods
E646 Test Method for Tensile Strain-Hardening Exponents (n -Values) of Metallic Sheet Materials
E691 Practice for Conducting an Interlaboratory Study to Determine the Precision of a Test Method
3. Terminology
3.1 Definitions—Definitions such as gage length (L and L ), true stress (σ), true strain (ε), normal engineering stress (S), and
0
engineering strain (e) are defined in Terminology E6. Thus,
ε5 ln~L/L !
0
σ5 S 11e
~ !
NOTE 2—Engineering stress S and strain e are only valid up to the point of necking or instability of cross section. For superplastic deformation, the
coupon undergoes an essentially uniform and constant neck along its length, and S and e are assumed in this standard to be valid. However at the junction
to the clamp sections of the coupon the cross section reduces from the original value to the final value, over a length of approximately 4 % at each end.
1
This test method is under the jurisdiction of ASTM Committee E28 on Mechanical Testing and is the direct responsibility of Subcommittee E28.02 on Ductility and
Formability.
Current edition approved June 1, 2011. Published July 2011. Originally approved in 2005. Last previous edition approved in 2008 as E2448–08. DOI:
10.1520/E2448-11.10.1520/E2448-11E01.
2
For referenced ASTM standards, visit the ASTM website, www.astm.org, or contact ASTM Customer Service at service@astm.org. For Annual Book of ASTM Standards
volume information, refer to the standard’s Document Summary page on the ASTM website.
Copyright © ASTM International, 100 Barr Harbor Drive, PO Box C700, West Conshohocken, PA 19428-2959. United States
1
---------------------- Page: 1 ----------------------
´1
E2448 − 11
Also, there are local small instabilities of cross section over the gauge length. These contribute to an error in the calculated values of ε and σ. In the
absence of currently available extensometers that could operate in the high temperature environment of an SPF test, ε and σ are to be inferred from
crosshead extension and force.
3.2 Symbols Specific To This Standard: V = machine crosshead velocity, the velocity of the traveling member of the test machine
to which one of the coupon clamps is attached
ε˙ = strain rate, measured as:
...


Questions, Comments and Discussion
Ask us and Technical Secretary will try to provide an answer. You can facilitate discussion about the standard in here.