ASTM A799/A799M-10(2015)
(Practice)Standard Practice for Steel Castings, Stainless, Instrument Calibration, for Estimating Ferrite Content
Standard Practice for Steel Castings, Stainless, Instrument Calibration, for Estimating Ferrite Content
SIGNIFICANCE AND USE
4.1 The amount of ferrite present in an austenitic stainless steel has been shown to influence the strength, toughness and corrosion resistance of this type of cast alloy. The amount of ferrite present tends to correlate well with the magnetic permeability of the steel. The methods described in this standard cover calibration practice for estimating ferrite by the magnetic permeability of the steel. The practice is inexpensive to use over large areas of the cast part and is non-destructive.
4.2 This practice has been used for research, alloy development, quality control, and manufacturing control.
4.2.1 Many instruments are available having different designs, and different principles of operation. When the probe is placed on the material being investigated, a closed magnetic circuit is formed allowing measurement of the magnetic permeability. When calibrated with standards having known ferrite content, this permeability indicates the ferrite content of the material being analyzed. The estimated ferrite content is read from a calibrated dial or from a digital-readout dial. Follow the manufacturer's instructions for proper calibration of the instrument.
4.3 Since this practice measures magnetic attraction and not ferrite directly, it is subject to all of the variables that affect magnetic permeability, such as the shape, size, orientation, and composition of the ferrite phase. These in turn are affected by thermal history. Ferrite measurements by magnetic methods have also been found to be affected by the surface finish of the material being analyzed.
4.4 Magnetic methods should not be used for arbitration of conflicts on ferrite content except when agreed upon between manufacturer and purchaser.
SCOPE
1.1 This practice covers the procedure for calibration of instruments to be used for estimating the ferrite content of the microstructure of cast stainless steels by magnetic response or measurement of permeability. This procedure covers both primary and secondary instruments.
1.1.1 A primary instrument is one that has been calibrated using National Institute of Standards and Technology-Standard Reference Material (NIST-SRM) thickness coating standards. It is a laboratory tool to be used with test specimens. Some primary instruments may be used to directly measure the ferrite content of castings.
1.1.2 A secondary instrument is one that has been calibrated by the use of secondary standards that have been measured by a calibrated primary instrument. Secondary instruments are to be used to directly measure the ferrite content of castings.
1.2 The values stated in either SI units or inch-pound units are to be regarded separately as standard. The values stated in each system may not be exact equivalents; therefore, each system shall be used independently of the other. Combining values from the two systems may result in non-conformance with the standard.
1.2.1 Within the text, the SI units are shown in brackets.
1.3 This standard does not purport to address all of the safety concerns, if any, associated with its use. It is the responsibility of the user of this standard to establish appropriate safety and health practices and determine the applicability of regulatory limitations prior to use.
General Information
Relations
Buy Standard
Standards Content (Sample)
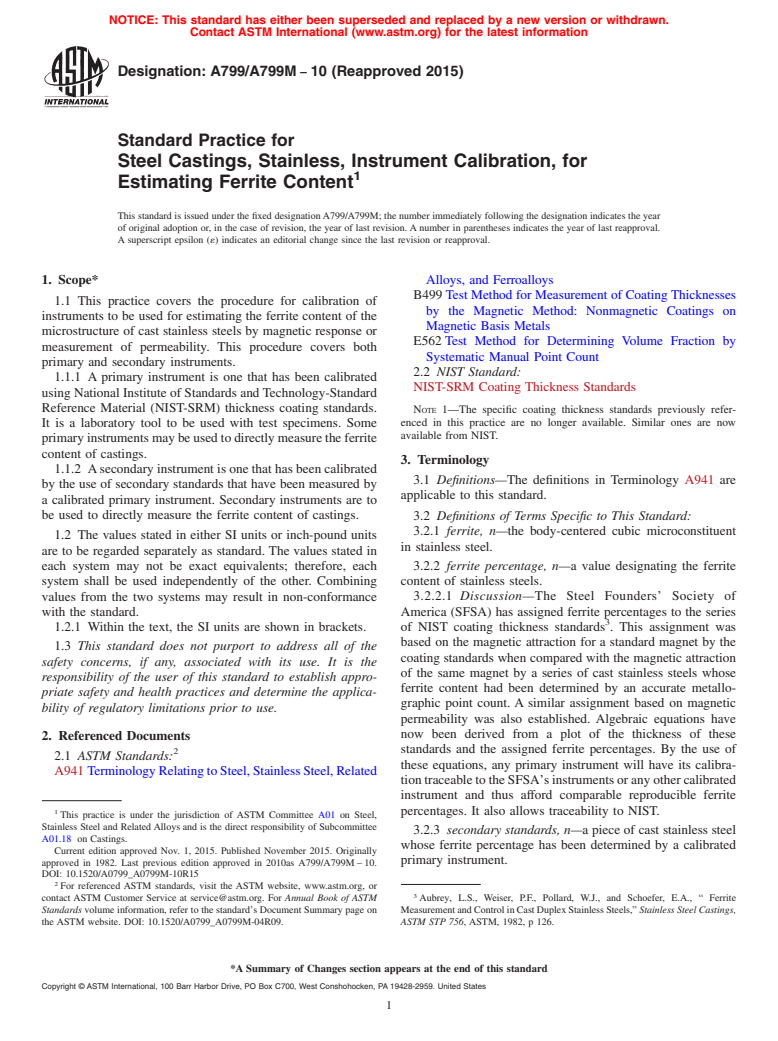
NOTICE: This standard has either been superseded and replaced by a new version or withdrawn.
Contact ASTM International (www.astm.org) for the latest information
Designation: A799/A799M − 10 (Reapproved 2015)
Standard Practice for
Steel Castings, Stainless, Instrument Calibration, for
Estimating Ferrite Content
This standard is issued under the fixed designationA799/A799M; the number immediately following the designation indicates the year
of original adoption or, in the case of revision, the year of last revision. A number in parentheses indicates the year of last reapproval.
A superscript epsilon (´) indicates an editorial change since the last revision or reapproval.
1. Scope* Alloys, and Ferroalloys
B499 Test Method for Measurement of Coating Thicknesses
1.1 This practice covers the procedure for calibration of
by the Magnetic Method: Nonmagnetic Coatings on
instruments to be used for estimating the ferrite content of the
Magnetic Basis Metals
microstructure of cast stainless steels by magnetic response or
E562 Test Method for Determining Volume Fraction by
measurement of permeability. This procedure covers both
Systematic Manual Point Count
primary and secondary instruments.
2.2 NIST Standard:
1.1.1 A primary instrument is one that has been calibrated
NIST-SRM Coating Thickness Standards
using National Institute of Standards andTechnology-Standard
Reference Material (NIST-SRM) thickness coating standards.
NOTE 1—The specific coating thickness standards previously refer-
enced in this practice are no longer available. Similar ones are now
It is a laboratory tool to be used with test specimens. Some
available from NIST.
primaryinstrumentsmaybeusedtodirectlymeasuretheferrite
content of castings.
3. Terminology
1.1.2 Asecondary instrument is one that has been calibrated
3.1 Definitions—The definitions in Terminology A941 are
by the use of secondary standards that have been measured by
applicable to this standard.
a calibrated primary instrument. Secondary instruments are to
be used to directly measure the ferrite content of castings.
3.2 Definitions of Terms Specific to This Standard:
3.2.1 ferrite, n—the body-centered cubic microconstituent
1.2 The values stated in either SI units or inch-pound units
in stainless steel.
are to be regarded separately as standard. The values stated in
3.2.2 ferrite percentage, n—a value designating the ferrite
each system may not be exact equivalents; therefore, each
system shall be used independently of the other. Combining content of stainless steels.
values from the two systems may result in non-conformance 3.2.2.1 Discussion—The Steel Founders’ Society of
with the standard. America (SFSA) has assigned ferrite percentages to the series
1.2.1 Within the text, the SI units are shown in brackets. of NIST coating thickness standards . This assignment was
based on the magnetic attraction for a standard magnet by the
1.3 This standard does not purport to address all of the
coating standards when compared with the magnetic attraction
safety concerns, if any, associated with its use. It is the
of the same magnet by a series of cast stainless steels whose
responsibility of the user of this standard to establish appro-
ferrite content had been determined by an accurate metallo-
priate safety and health practices and determine the applica-
graphic point count. A similar assignment based on magnetic
bility of regulatory limitations prior to use.
permeability was also established. Algebraic equations have
now been derived from a plot of the thickness of these
2. Referenced Documents
standards and the assigned ferrite percentages. By the use of
2.1 ASTM Standards:
these equations, any primary instrument will have its calibra-
A941 TerminologyRelatingtoSteel,StainlessSteel,Related
tiontraceabletotheSFSA’sinstrumentsoranyothercalibrated
instrument and thus afford comparable reproducible ferrite
1 percentages. It also allows traceability to NIST.
This practice is under the jurisdiction of ASTM Committee A01 on Steel,
Stainless Steel and Related Alloys and is the direct responsibility of Subcommittee
3.2.3 secondary standards, n—a piece of cast stainless steel
A01.18 on Castings.
whose ferrite percentage has been determined by a calibrated
Current edition approved Nov. 1, 2015. Published November 2015. Originally
primary instrument.
approved in 1982. Last previous edition approved in 2010as A799/A799M – 10.
DOI: 10.1520/A0799_A0799M-10R15
For referenced ASTM standards, visit the ASTM website, www.astm.org, or
contact ASTM Customer Service at service@astm.org. For Annual Book of ASTM Aubrey, L.S., Weiser, P.F., Pollard, W.J., and Schoefer, E.A., “ Ferrite
Standards volume information, refer to the standard’s Document Summary page on MeasurementandControlinCastDuplexStainlessSteels,” Stainless Steel Castings,
the ASTM website. DOI: 10.1520/A0799_A0799M-04R09. ASTM STP 756, ASTM, 1982, p 126.
*A Summary of Changes section appears at the end of this standard
Copyright © ASTM International, 100 Barr Harbor Drive, PO Box C700, West Conshohocken, PA 19428-2959. United States
A799/A799M − 10 (2015)
3.2.3.1 Discussion—Secondary statements are used to cali- 5.2 When using a Feritscope, follow the manufacturer’s
brate secondary instruments (see Calibration of Secondary instructions for calibration. When traceability is required,
Instruments). confirm the calibration using the appropriate NIST standards.
5.2.1 Newer versions of this instrument have a single-point
4. Significance and Use
probe while older versions have a two-point probe as the
sensingdevice.Whenthisprobeisplacedonthematerialbeing
4.1 The amount of ferrite present in an austenitic stainless
investigated, a closed magnetic circuit is formed and energized
steel has been shown to influence the strength, toughness and
by a low-frequency magnetic field. The voltage induced in the
corrosion resistance of this type of cast alloy. The amount of
probe coil by this field is a measure of the permeability. When
ferrite present tends to correlate well with the magnetic
calibrated with standards having known ferrite content, this
permeability of the steel. The methods described in this
permeability indicates the ferrite content of the material being
standard cover calibration practice for estimating ferrite by the
analyzed. The estimated ferrite content is read from a cali-
magnetic permeability of the steel. The practice is inexpensive
brated dial or from a digital-readout dial.
to use over large areas of the cast part and is non-destructive.
5.3 One secondary instrument consists of a balance arm that
4.2 This practice has been used for research, alloy
has a rod-shaped magnet attached to one end. The opposite
development, quality control, and manufacturing control.
end is counterweighted to balance the magnet.
4.2.1 Many instruments are available having different
5.3.1 This arm with its magnet and counterweight is en-
designs, and different principles of operation. When the probe
closed in a transparent box. The top face of this container has
is placed on the material being investigated, a closed magnetic
a threaded hole directly over the magnet. Marked inserts that
circuit is formed allowing measurement of the magnetic
have metal plates on their bottom faces are screwed into this
permeability. When calibrated with standards having known
hole. These plates have different strengths of attraction for the
ferrite content, this permeability indicates the ferrite content of
magnet.
the material being analyzed. The estimated ferrite content is
5.3.2 In use, the bottom end of the magnet is touched to the
read from a calibrated dial or from a digital-readout dial.
material being investigated. The other end of the magnet is in
Followthemanufacturer’sinstructionsforpropercalibrationof
contact with the metal plate on the bottom of the insert. The
the instrument.
container is then raised. If the material being measured has a
4.3 Since this practice measures magnetic attraction and not
greater attraction for the magnet than does the plate on the
ferrite directly, it is subject to all of the variables that affect
bottom of the insert, the magnet will be pulled away from the
magnetic permeability, such as the shape, size, orientation, and
insert.Ifnot,themagnetwillpullawayfromthematerialbeing
composition of the ferrite phase. These in turn are affected by
measured. The inserts are changed and the test repeated until
thermal history. Ferrite measurements by magnetic methods
the inserts that are just weaker and just stronger than the
have also been found to be affected by the surface finish of the
material being investigated are found.
material being analyzed.
5.3.3 The results of a measurement with this instrument are
4.4 Magnetic methods should not be used for arbitration of
reported as less than A and greater than B.
conflicts on ferrite content except when agreed upon between
5.4 NIST-SRM Coating Thickness Standards. These are
manufacturer and purchaser.
mild steel plates that are covered by an electroplated copper
layerwhichinturniscoveredbyaflashcoatofchromium.The
5. Apparatus
thickness of the copper coat varies from standard to standard
5.1 One primary instrument that uses magnetic attraction
and is certified by NIST. The strength of the magnetic
consists of a spring-loaded balance arm from which a rod-
attraction of each standard varies with the thickness of the
shaped magnet is suspended. The opposite end of the balance
coating. These are primary standards for calibration.
arm from the magnet has counterweights that balance most but
5.5 Other instruments such as the Elcometer may be used.
not all of the weight of the magnet.
5.1.1 When this instrument is used, the spring load is
6. Calibration
relaxed sufficiently to allow the magnet to make contact with
6.1 Calibrate primary instruments that use magnetic attrac-
the material being tested.
tion as criterion as follows:
5.1.2 The spring is then wound until the force of the coiled
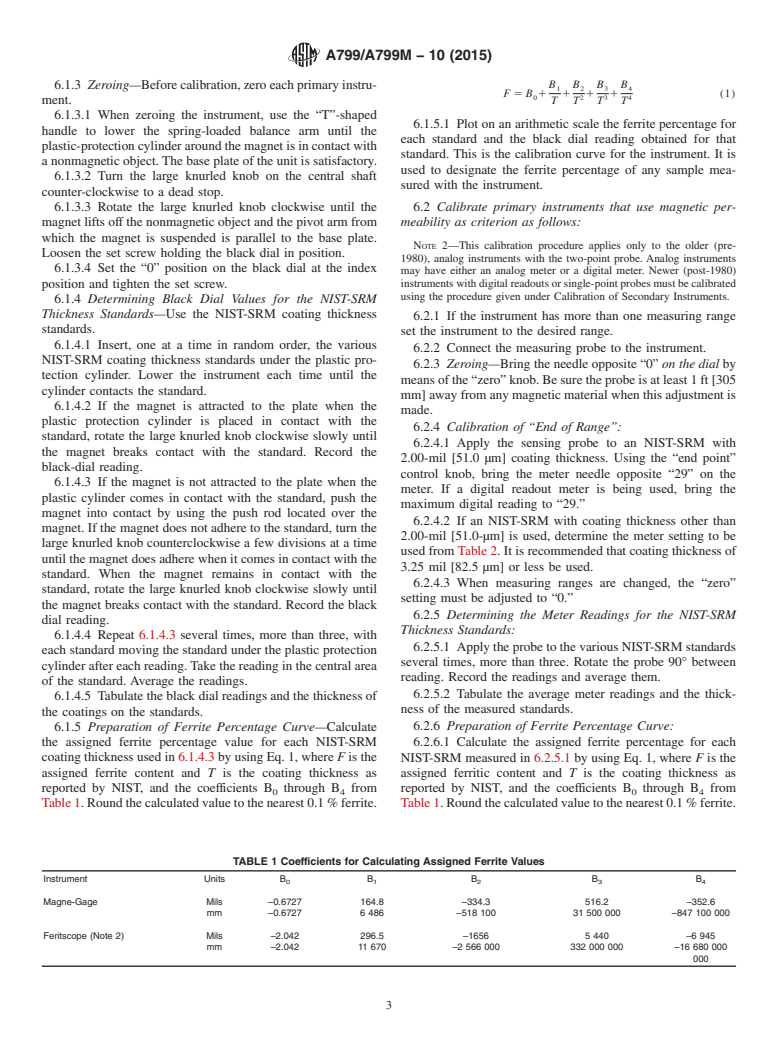
6.1.1 When calibrating magnetic instruments, make sure
spring overcomes the magnetic attraction of the magnet for the
there is no magnetic material within the area that could affect
material being tested, causing the magnet to break contact and
the calibration. This includes beneath the surface on which the
the lever arm to rise.
instrument rests.
5.1.3 The amount of force that the coiled spring has
6.1.2 Magnet—Use weighted standard No. 2 magnet for
developed is determined from a marked dial securely attached
measurement of ferrite content of cast stainless steel.
to the shaft that is used to coil or uncoil the spring.
5.1.3.1 A weighted number 2 magnet (catalog number
Feritscope, produced by Fischer Technology, Inc., 750 Marshall Phelps Road,
J5-0664W) is used with this instrument.
Windsor,
...
This document is not an ASTM standard and is intended only to provide the user of an ASTM standard an indication of what changes have been made to the previous version. Because
it may not be technically possible to adequately depict all changes accurately, ASTM recommends that users consult prior editions as appropriate. In all cases only the current version
of the standard as published by ASTM is to be considered the official document.
Designation: A799/A799M − 10 A799/A799M − 10 (Reapproved 2015)
Standard Practice for
Steel Castings, Stainless, Instrument Calibration, for
Estimating Ferrite Content
This standard is issued under the fixed designation A799/A799M; the number immediately following the designation indicates the year
of original adoption or, in the case of revision, the year of last revision. A number in parentheses indicates the year of last reapproval.
A superscript epsilon (´) indicates an editorial change since the last revision or reapproval.
1. Scope*
1.1 This practice covers the procedure for calibration of instruments to be used for estimating the ferrite content of the
microstructure of cast stainless steels by magnetic response or measurement of permeability. This procedure covers both primary
and secondary instruments.
1.1.1 A primary instrument is one that has been calibrated using National Institute of Standards and Technology-Standard
Reference Material (NIST-SRM) thickness coating standards. It is a laboratory tool to be used with test specimens. Some primary
instruments may be used to directly measure the ferrite content of castings.
1.1.2 A secondary instrument is one that has been calibrated by the use of secondary standards that have been measured by a
calibrated primary instrument. Secondary instruments are to be used to directly measure the ferrite content of castings.
1.2 The values stated in either SI units or inch-pound units are to be regarded separately as standard. The values stated in each
system may not be exact equivalents; therefore, each system shall be used independently of the other. Combining values from the
two systems may result in non-conformance with the standard.
1.2.1 Within the text, the SI units are shown in brackets.
1.3 This standard does not purport to address all of the safety concerns, if any, associated with its use. It is the responsibility
of the user of this standard to establish appropriate safety and health practices and determine the applicability of regulatory
limitations prior to use.
2. Referenced Documents
2.1 ASTM Standards:
A941 Terminology Relating to Steel, Stainless Steel, Related Alloys, and Ferroalloys
B499 Test Method for Measurement of Coating Thicknesses by the Magnetic Method: Nonmagnetic Coatings on Magnetic Basis
Metals
E562 Test Method for Determining Volume Fraction by Systematic Manual Point Count
2.2 NIST Standard:
NIST-SRM Coating Thickness Standards
NOTE 1—The specific coating thickness standards previously referenced in this practice are no longer available. Similar ones are now available from
NIST.
3. Terminology
3.1 Definitions—The definitions in Terminology A941 are applicable to this standard.
3.2 Definitions of Terms Specific to This Standard:
3.2.1 ferrite, n—the body-centered cubic microconstituent in stainless steel.
3.2.2 ferrite percentage, n—a value designating the ferrite content of stainless steels.
This practice is under the jurisdiction of ASTM Committee A01 on Steel, Stainless Steel and Related Alloys and is the direct responsibility of Subcommittee A01.18
on Castings.
Current edition approved April 1, 2010Nov. 1, 2015. Published April 2010November 2015. Originally approved in 1982. Last previous edition approved in 2009 as 2010as
A799/A799M – 04A799/A799M – 10. (2009). DOI: 10.1520/A0799_A0799M-10R15
For referenced ASTM standards, visit the ASTM website, www.astm.org, or contact ASTM Customer Service at service@astm.org. For Annual Book of ASTM Standards
volume information, refer to the standard’s Document Summary page on the ASTM website. DOI: 10.1520/A0799_A0799M-04R09.
3.2.2.1 Discussion—
*A Summary of Changes section appears at the end of this standard
Copyright © ASTM International, 100 Barr Harbor Drive, PO Box C700, West Conshohocken, PA 19428-2959. United States
A799/A799M − 10 (2015)
The Steel Founders’ Society of America (SFSA) has assigned ferrite percentages to the series of NIST coating thickness standards .
This assignment was based on the magnetic attraction for a standard magnet by the coating standards when compared with the
magnetic attraction of the same magnet by a series of cast stainless steels whose ferrite content had been determined by an accurate
metallographic point count. A similar assignment based on magnetic permeability was also established. Algebraic equations have
now been derived from a plot of the thickness of these standards and the assigned ferrite percentages. By the use of these equations,
any primary instrument will have its calibration traceable to the SFSA’s instruments or any other calibrated instrument and thus
afford comparable reproducible ferrite percentages. It also allows traceability to NIST.
3.2.3 secondary standards, n—a piece of cast stainless steel whose ferrite percentage has been determined by a calibrated
primary instrument.
Aubrey, L.S., Weiser, P.F., Pollard, W.J., and Schoefer, E.A., “ Ferrite Measurement and Control in Cast Duplex Stainless Steels,” Stainless Steel Castings, ASTM STP
756, ASTM, 1982, p 126.
3.2.3.1 Discussion—
Secondary statements are used to calibrate secondary instruments (see Calibration of Secondary Instruments).
4. Significance and Use
4.1 The amount of ferrite present in an austenitic stainless steel has been shown to influence the strength, toughness and
corrosion resistance of this type of cast alloy. The amount of ferrite present tends to correlate well with the magnetic permeability
of the steel. The methods described in this standard cover calibration practice for estimating ferrite by the magnetic permeability
of the steel. The practice is inexpensive to use over large areas of the cast part and is non-destructive.
4.2 This practice has been used for research, alloy development, quality control, and manufacturing control.
4.2.1 Many instruments are available having different designs, and different principles of operation. When the probe is placed
on the material being investigated, a closed magnetic circuit is formed allowing measurement of the magnetic permeability. When
calibrated with standards having known ferrite content, this permeability indicates the ferrite content of the material being
analyzed. The estimated ferrite content is read from a calibrated dial or from a digital-readout dial. Follow the manufacturer’s
instructions for proper calibration of the instrument.
4.3 Since this practice measures magnetic attraction and not ferrite directly, it is subject to all of the variables that affect
magnetic permeability, such as the shape, size, orientation, and composition of the ferrite phase. These in turn are affected by
thermal history. Ferrite measurements by magnetic methods have also been found to be affected by the surface finish of the material
being analyzed.
4.4 Magnetic methods should not be used for arbitration of conflicts on ferrite content except when agreed upon between
manufacturer and purchaser.
5. Apparatus
5.1 One primary instrument that uses magnetic attraction consists of a spring-loaded balance arm from which a rod-shaped
magnet is suspended. The opposite end of the balance arm from the magnet has counterweights that balance most but not all of
the weight of the magnet.
5.1.1 When this instrument is used, the spring load is relaxed sufficiently to allow the magnet to make contact with the material
being tested.
5.1.2 The spring is then wound until the force of the coiled spring overcomes the magnetic attraction of the magnet for the
material being tested, causing the magnet to break contact and the lever arm to rise.
5.1.3 The amount of force that the coiled spring has developed is determined from a marked dial securely attached to the shaft
that is used to coil or uncoil the spring.
5.1.3.1 A weighted number 2 magnet (catalog number J5-0664W) is used with this instrument.
5.2 When using a Feritscope, follow the manufacturer’s instructions for calibration. When traceability is required, confirm the
calibration using the appropriate NIST standards.
5.2.1 Newer versions of this instrument have a single-point probe while older versions have a two-point probe as the sensing
device. When this probe is placed on the material being investigated, a closed magnetic circuit is formed and energized by a
low-frequency magnetic field. The voltage induced in the probe coil by this field is a measure of the permeability. When calibrated
with standards having known ferrite content, this permeability indicates the ferrite content of the material being analyzed. The
estimated ferrite content is read from a calibrated dial or from a digital-readout dial.
Magne Gage, produced by Magne Gage Sales and Service Co., Inc., 629 Packer Street, Avoca, PA 18641; http://www.magne-gage.com.
Feritscope, produced by Fischer Technology, Inc., 750 Marshall Phelps Road, Windsor, CT 06095; http://www.fischer-technology.com.
A799/A799M − 10 (2015)
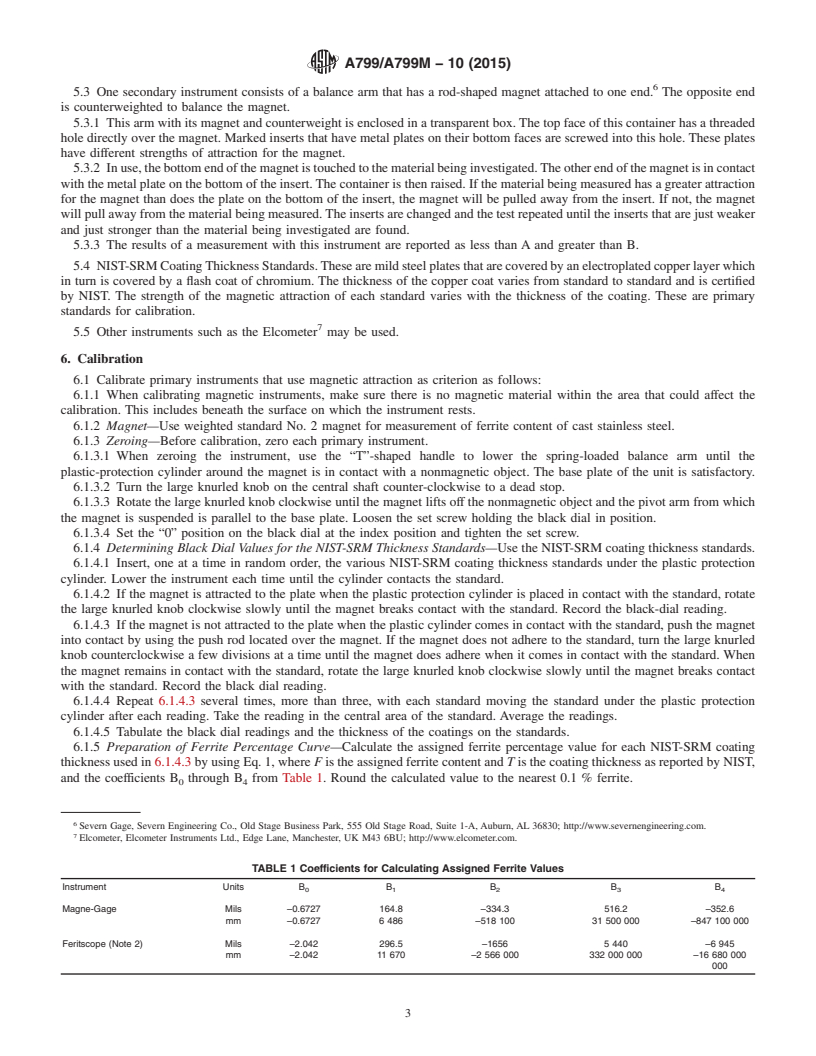
5.3 One secondary instrument consists of a balance arm that has a rod-shaped magnet attached to one end. The opposite end
is counterweighted to balance the magnet.
5.3.1 This arm with its magnet and counterweight is enclosed in a transparent box. The top face of this container has a threaded
hole directly over the magnet. Marked inserts that have metal plates on their bottom faces are screwed into this hole. These plates
have different strengths of attraction for the magnet.
5.3.2 In use, the bottom end of the magnet is touched to the material being investigated. The other end of the magnet is in contact
with the metal plate on the bottom of the insert. The container is then raised. If the material being measured has a greater attraction
for the magnet than does the plate on the bottom of the insert, the magnet will be pulled away from the insert. If not, the magnet
will pull away from the material being measured. The inserts are changed and the test repeated until the inserts that are just weaker
and just stronger than the material being investigated are found.
5.3.3 The results of a measurement with this instrument are reported as less than A and greater than B.
5.4 NIST-SRM Coating Thickness Standards. These are mild steel plates that are covered by an electroplated copper layer which
in turn is covered by a flash coat of chromium. The thickness of the copper coat varies from standard to standard and is certified
by NIST. The strength of the magnetic attraction of each standard varies with the thickness of the coating. These are primary
standards for calibration.
5.5 Other instruments such as the Elcometer may be u
...


Questions, Comments and Discussion
Ask us and Technical Secretary will try to provide an answer. You can facilitate discussion about the standard in here.