ASTM F1165-20
(Test Method)Standard Test Method for Measuring Angular Displacement of Multiple Images in Transparent Parts
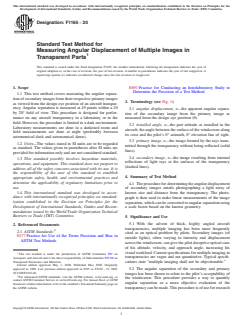
Standard Test Method for Measuring Angular Displacement of Multiple Images in Transparent Parts
SIGNIFICANCE AND USE
5.1 With the advent of thick, highly angled aircraft transparencies, multiple imaging has been more frequently cited as an optical problem by pilots. Secondary images (of outside lights), often varying in intensity and displacement across the windscreen, can give the pilot deceptive optical cues of his altitude, velocity, and approach angle, increasing his visual workload. Current specifications for multiple imaging in transparencies are vague and not quantitative. Typical specifications state “multiple imaging shall not be objectionable.”
5.2 The angular separation of the secondary and primary images has been shown to relate to the pilot's acceptability of the windscreen. This procedure provides a way to quantify angular separation so a more objective evaluation of the transparency can be made. This procedure is of use for research of multiple imaging, quantifying aircrew complaints, or as the basis for windscreen specifications.
5.3 It is of note that the basic multiple imaging characteristics of a windscreen are determined early in the design phase and are virtually impossible to change after the windscreen has been manufactured. In fact, a perfectly manufactured windscreen has some multiple imaging. For a particular windscreen, caution is advised in the selection of specification criteria for multiple imaging, as inherent multiple imaging characteristics have the potential to vary significantly depending upon windscreen thickness, material, or installation angle. Any tolerances that might be established are advised to allow for inherent multiple imaging characteristics.
SCOPE
1.1 This test method covers measuring the angular separation of secondary images from their respective primary images as viewed from the design eye position of an aircraft transparency. Angular separation is measured at 49 points within a 20 by 20° field of view. This procedure is designed for performance on any aircraft transparency in a laboratory or in the field. However, the procedure is limited to a dark environment. Laboratory measurements are done in a darkened room and field measurements are done at night (preferably between astronomical dusk and astronomical dawn).
1.2 Units—The values stated in SI units are to be regarded as standard. The values given in parentheses after SI units are provided for information only and are not considered standard.
1.3 This standard possibly involves hazardous materials, operations, and equipment. This standard does not purport to address all of the safety concerns associated with its use. It is the responsibility of the user of this standard to establish appropriate safety, health, and environmental practices and determine the applicability of regulatory limitations prior to use.
1.4 This international standard was developed in accordance with internationally recognized principles on standardization established in the Decision on Principles for the Development of International Standards, Guides and Recommendations issued by the World Trade Organization Technical Barriers to Trade (TBT) Committee.
General Information
- Status
- Published
- Publication Date
- 30-Apr-2020
- Technical Committee
- F07 - Aerospace and Aircraft
- Drafting Committee
- F07.08 - Transparent Enclosures and Materials
Relations
- Effective Date
- 01-May-2020
- Effective Date
- 01-May-2014
- Effective Date
- 01-May-2013
- Effective Date
- 01-May-2013
- Effective Date
- 01-Nov-2011
- Effective Date
- 01-Oct-2010
- Effective Date
- 01-Oct-2008
- Effective Date
- 01-Oct-2008
- Refers
ASTM E177-06b - Standard Practice for Use of the Terms Precision and Bias in ASTM Test Methods - Effective Date
- 15-Nov-2006
- Refers
ASTM E177-06a - Standard Practice for Use of the Terms Precision and Bias in ASTM Test Methods - Effective Date
- 01-Nov-2006
- Effective Date
- 01-Nov-2005
- Refers
ASTM E177-04e1 - Standard Practice for Use of the Terms Precision and Bias in ASTM Test Methods - Effective Date
- 01-Nov-2004
- Effective Date
- 01-Nov-2004
- Effective Date
- 01-Nov-2004
- Refers
ASTM E177-90a(2002) - Standard Practice for Use of the Terms Precision and Bias in ASTM Test Methods - Effective Date
- 10-Jan-2002
Overview
ASTM F1165-20 is the internationally recognized standard test method for measuring the angular displacement of multiple images in transparent parts, particularly aircraft transparencies such as windscreens and canopies. Developed by ASTM International, this standard provides a quantitative procedure for evaluating the angular separation between secondary and primary images as viewed from a designated eye position. With modern aircraft utilizing thick, highly angled transparent parts, multiple imaging is a growing concern because it can interfere with a pilot's perception, creating deceptive optical cues regarding altitude, speed, and approach angle.
Key Topics
Multiple Imaging in Aircraft Transparencies
- Occurs when light reflects within thick or angled transparent materials, creating secondary images alongside the primary view.
- Can adversely impact pilot workload and flight safety due to misleading visual information.
Quantitative Assessment of Angular Displacement
- This test method quantifies the angular separation between primary and secondary images at 49 points within a 20° by 20° field of view.
- Measurements are made from the pilot’s design eye position, providing objective, repeatable data.
Test Method Highlights
- Utilizes a 7x7 matrix of small lights as a reference array, positioned at a fixed distance from the transparent part.
- Both laboratory (in darkened rooms) and field (at night) environments are suitable for testing.
- A digital or film camera is placed at the design eye position to capture the light array as seen through the transparency.
- Linear image separations on photographs are converted to angular separations using a calculated scale factor.
Precision and Bias
- Includes guidelines for the repeatability and reproducibility of measurements, ensuring consistency across different users and laboratories.
- The method is designed to eliminate bias, as angular separation is strictly defined by the procedure.
Applications
Aircraft Transparency Evaluation
- Used during the design and specification phase of aircraft windscreens and canopies to ensure optical clarity and minimize unwanted multiple imaging effects.
- Provides essential feedback for aircraft manufacturers and regulatory agencies specifying transparency quality and safety standards.
Quality Control and Compliance
- Enables objective measurement for surveillance and acceptance testing of manufactured transparent parts.
- Aids in addressing aircrew or pilot complaints by providing quantifiable evidence of multiple imaging issues.
Research and Development
- Supports studies on the optical characteristics of different transparency materials, thicknesses, and installation angles.
- Facilitates iterative improvement of transparent components before finalizing design or entering mass production.
Field and Laboratory Testing
- The method’s portability allows effective use both in controlled laboratory environments and on installed aircraft in operational settings.
Related Standards
- ASTM E177 - Practice for Use of the Terms Precision and Bias in ASTM Test Methods
- ASTM E691 - Practice for Conducting an Interlaboratory Study to Determine the Precision of a Test Method
- Other Transparency Standards - Standards related to materials, manufacturing, and performance requirements for aircraft and vehicle transparent enclosures
Keywords: ASTM F1165-20, measuring angular displacement, multiple imaging, aircraft transparency, transparent parts, windscreen, canopy, secondary image, optical clarity, laboratory testing, field evaluation, precision and bias, compliance testing
By enabling precise, objective measurement of multiple images in transparent aircraft components, ASTM F1165-20 contributes to safer and more reliable aircrew visibility, supporting the aviation industry's ongoing commitment to quality and safety.
Buy Documents
ASTM F1165-20 - Standard Test Method for Measuring Angular Displacement of Multiple Images in Transparent Parts
REDLINE ASTM F1165-20 - Standard Test Method for Measuring Angular Displacement of Multiple Images in Transparent Parts
Get Certified
Connect with accredited certification bodies for this standard

BSMI (Bureau of Standards, Metrology and Inspection)
Taiwan's standards and inspection authority.
Sponsored listings
Frequently Asked Questions
ASTM F1165-20 is a standard published by ASTM International. Its full title is "Standard Test Method for Measuring Angular Displacement of Multiple Images in Transparent Parts". This standard covers: SIGNIFICANCE AND USE 5.1 With the advent of thick, highly angled aircraft transparencies, multiple imaging has been more frequently cited as an optical problem by pilots. Secondary images (of outside lights), often varying in intensity and displacement across the windscreen, can give the pilot deceptive optical cues of his altitude, velocity, and approach angle, increasing his visual workload. Current specifications for multiple imaging in transparencies are vague and not quantitative. Typical specifications state “multiple imaging shall not be objectionable.” 5.2 The angular separation of the secondary and primary images has been shown to relate to the pilot's acceptability of the windscreen. This procedure provides a way to quantify angular separation so a more objective evaluation of the transparency can be made. This procedure is of use for research of multiple imaging, quantifying aircrew complaints, or as the basis for windscreen specifications. 5.3 It is of note that the basic multiple imaging characteristics of a windscreen are determined early in the design phase and are virtually impossible to change after the windscreen has been manufactured. In fact, a perfectly manufactured windscreen has some multiple imaging. For a particular windscreen, caution is advised in the selection of specification criteria for multiple imaging, as inherent multiple imaging characteristics have the potential to vary significantly depending upon windscreen thickness, material, or installation angle. Any tolerances that might be established are advised to allow for inherent multiple imaging characteristics. SCOPE 1.1 This test method covers measuring the angular separation of secondary images from their respective primary images as viewed from the design eye position of an aircraft transparency. Angular separation is measured at 49 points within a 20 by 20° field of view. This procedure is designed for performance on any aircraft transparency in a laboratory or in the field. However, the procedure is limited to a dark environment. Laboratory measurements are done in a darkened room and field measurements are done at night (preferably between astronomical dusk and astronomical dawn). 1.2 Units—The values stated in SI units are to be regarded as standard. The values given in parentheses after SI units are provided for information only and are not considered standard. 1.3 This standard possibly involves hazardous materials, operations, and equipment. This standard does not purport to address all of the safety concerns associated with its use. It is the responsibility of the user of this standard to establish appropriate safety, health, and environmental practices and determine the applicability of regulatory limitations prior to use. 1.4 This international standard was developed in accordance with internationally recognized principles on standardization established in the Decision on Principles for the Development of International Standards, Guides and Recommendations issued by the World Trade Organization Technical Barriers to Trade (TBT) Committee.
SIGNIFICANCE AND USE 5.1 With the advent of thick, highly angled aircraft transparencies, multiple imaging has been more frequently cited as an optical problem by pilots. Secondary images (of outside lights), often varying in intensity and displacement across the windscreen, can give the pilot deceptive optical cues of his altitude, velocity, and approach angle, increasing his visual workload. Current specifications for multiple imaging in transparencies are vague and not quantitative. Typical specifications state “multiple imaging shall not be objectionable.” 5.2 The angular separation of the secondary and primary images has been shown to relate to the pilot's acceptability of the windscreen. This procedure provides a way to quantify angular separation so a more objective evaluation of the transparency can be made. This procedure is of use for research of multiple imaging, quantifying aircrew complaints, or as the basis for windscreen specifications. 5.3 It is of note that the basic multiple imaging characteristics of a windscreen are determined early in the design phase and are virtually impossible to change after the windscreen has been manufactured. In fact, a perfectly manufactured windscreen has some multiple imaging. For a particular windscreen, caution is advised in the selection of specification criteria for multiple imaging, as inherent multiple imaging characteristics have the potential to vary significantly depending upon windscreen thickness, material, or installation angle. Any tolerances that might be established are advised to allow for inherent multiple imaging characteristics. SCOPE 1.1 This test method covers measuring the angular separation of secondary images from their respective primary images as viewed from the design eye position of an aircraft transparency. Angular separation is measured at 49 points within a 20 by 20° field of view. This procedure is designed for performance on any aircraft transparency in a laboratory or in the field. However, the procedure is limited to a dark environment. Laboratory measurements are done in a darkened room and field measurements are done at night (preferably between astronomical dusk and astronomical dawn). 1.2 Units—The values stated in SI units are to be regarded as standard. The values given in parentheses after SI units are provided for information only and are not considered standard. 1.3 This standard possibly involves hazardous materials, operations, and equipment. This standard does not purport to address all of the safety concerns associated with its use. It is the responsibility of the user of this standard to establish appropriate safety, health, and environmental practices and determine the applicability of regulatory limitations prior to use. 1.4 This international standard was developed in accordance with internationally recognized principles on standardization established in the Decision on Principles for the Development of International Standards, Guides and Recommendations issued by the World Trade Organization Technical Barriers to Trade (TBT) Committee.
ASTM F1165-20 is classified under the following ICS (International Classification for Standards) categories: 17.180.01 - Optics and optical measurements in general. The ICS classification helps identify the subject area and facilitates finding related standards.
ASTM F1165-20 has the following relationships with other standards: It is inter standard links to ASTM F1165-15, ASTM E177-14, ASTM E177-13, ASTM E691-13, ASTM E691-11, ASTM E177-10, ASTM E691-08, ASTM E177-08, ASTM E177-06b, ASTM E177-06a, ASTM E691-05, ASTM E177-04e1, ASTM E177-04, ASTM E177-06, ASTM E177-90a(2002). Understanding these relationships helps ensure you are using the most current and applicable version of the standard.
ASTM F1165-20 is available in PDF format for immediate download after purchase. The document can be added to your cart and obtained through the secure checkout process. Digital delivery ensures instant access to the complete standard document.
Standards Content (Sample)
This international standard was developed in accordance with internationally recognized principles on standardization established in the Decision on Principles for the
Development of International Standards, Guides and Recommendations issued by the World Trade Organization Technical Barriers to Trade (TBT) Committee.
Designation: F1165 − 20
Standard Test Method for
Measuring Angular Displacement of Multiple Images in
Transparent Parts
This standard is issued under the fixed designation F1165; the number immediately following the designation indicates the year of
original adoption or, in the case of revision, the year of last revision. A number in parentheses indicates the year of last reapproval. A
superscript epsilon (´) indicates an editorial change since the last revision or reapproval.
1. Scope E691 Practice for Conducting an Interlaboratory Study to
Determine the Precision of a Test Method
1.1 This test method covers measuring the angular separa-
tion of secondary images from their respective primary images
3. Terminology (see Fig. 1)
as viewed from the design eye position of an aircraft transpar-
ency. Angular separation is measured at 49 points within a 20
3.1 angular displacement, n—the apparent angular separa-
by 20° field of view. This procedure is designed for perfor-
tion of the secondary image from the primary image as
mance on any aircraft transparency in a laboratory or in the
measured from the design eye position (θ).
field. However, the procedure is limited to a dark environment.
3.2 installed angle, n—the part attitude as installed in the
Laboratory measurements are done in a darkened room and
aircraft; the angle between the surface of the windscreen along
field measurements are done at night (preferably between
its crest and the pilot’s 0° azimuth, 0° elevation line of sight.
astronomical dusk and astronomical dawn).
3.3 primary image, n—the image formed by the rays trans-
1.2 Units—The values stated in SI units are to be regarded
mitted through the transparency without being reflected (solid
as standard. The values given in parentheses after SI units are
lines).
provided for information only and are not considered standard.
3.4 secondary image, n—the image resulting from internal
1.3 This standard possibly involves hazardous materials,
reflections of light rays at the surfaces of the transparency
operations, and equipment. This standard does not purport to
(dashed lines).
address all of the safety concerns associated with its use. It is
the responsibility of the user of this standard to establish
4. Summary of Test Method
appropriate safety, health, and environmental practices and
determine the applicability of regulatory limitations prior to
4.1 The procedure for determining the angular displacement
use.
of secondary images entails photographing a light array of
1.4 This international standard was developed in accor-
known size and distance from the transparency. The photo-
dance with internationally recognized principles on standard-
graph is then used to make linear measurements of the image
ization established in the Decision on Principles for the
separation, which can be converted to angular separation using
Development of International Standards, Guides and Recom-
a scale factor based on the known geometry.
mendations issued by the World Trade Organization Technical
Barriers to Trade (TBT) Committee.
5. Significance and Use
5.1 With the advent of thick, highly angled aircraft
2. Referenced Documents
transparencies, multiple imaging has been more frequently
2.1 ASTM Standards:
cited as an optical problem by pilots. Secondary images (of
E177 Practice for Use of the Terms Precision and Bias in
outside lights), often varying in intensity and displacement
ASTM Test Methods
across the windscreen, can give the pilot deceptive optical cues
of his altitude, velocity, and approach angle, increasing his
visual workload. Current specifications for multiple imaging in
This test method is under the jurisdiction of ASTM Committee F07 on
transparencies are vague and not quantitative. Typical specifi-
Aerospace and Aircraft and is the direct responsibility of Subcommittee F07.08 on
Transparent Enclosures and Materials.
cations state “multiple imaging shall not be objectionable.”
Current edition approved May 1, 2020. Published May 2020. Originally
5.2 The angular separation of the secondary and primary
approved in 1988. Last previous edition approved in 2015 as F1165 – 15. DOI:
10.1520/F1165-20.
images has been shown to relate to the pilot’s acceptability of
For referenced ASTM standards, visit the ASTM website, www.astm.org, or
the windscreen. This procedure provides a way to quantify
contact ASTM Customer Service at service@astm.org. For Annual Book of ASTM
angular separation so a more objective evaluation of the
Standards volume information, refer to the standard’s Document Summary page on
the ASTM website. transparencycanbemade.Thisprocedureisofuseforresearch
Copyright © ASTM International, 100 Barr Harbor Drive, PO Box C700, West Conshohocken, PA 19428-2959. United States
F1165 − 20
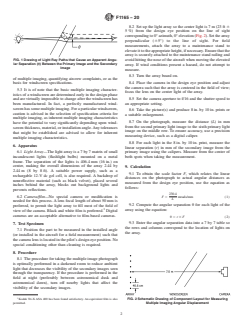
8.2 Set up the light array so the center light is 7 m (23 ft 6
5 %) from the design eye position on the line of sight
correspondingto0°azimuth,0°elevation(Fig.2).Setthearray
perpendicular (65°) to the line of sight. For field
measurements, attach the array to a maintenance stand to
elevateittotheappropriateheight,ifnecessary.Ensurethatthe
array is securely attached to the maintenance stand railing and
FIG. 1 Drawing of Light Ray Paths that Cause an Apparent Angu- avoid hitting the nose of the aircraft when moving the elevated
lar Separation (θ) Between the Primary Image and the Secondary
array. If wind conditions present a hazard, do not attempt to
Image
measure.
8.3 Turn the array board on.
of multiple imaging, quantifying aircrew complaints, or as the
8.4 Place the camera in the design eye position and adjust
basis for windscreen specifications.
the camera such that the array is centered in the field of view;
5.3 It is of note that the basic multiple imaging character-
focus the lens on the center light of the array.
istics of a windscreen are determined early in the design phase
8.5 Set the camera aperture to f/16 and the shutter speed to
and are virtually impossible to change after the windscreen has
been manufactured. In fact, a perfectly manufactured wind- an appropriate setting.
screenhassomemultipleimaging.Foraparticularwindscreen,
8.6 Take the picture(s) and produce 8 in. by 10 in. prints or
caution is advised in the selection of specification criteria for
a suitable enlargement.
multiple imaging, as inherent multiple imaging characteristics
8.7 On the photograph, measure the distance (L)inmm
have the potential to vary significantly depending upon wind-
from the second primary light image to the sixth primary light
screen thickness, material, or installation angle.Any tolerances
image on the middle row. To ensure accuracy, use a precision
that might be established are advised to allow for inherent
measuring device, such as a digital caliper.
multiple imaging characteristics.
8.8 For each light in the 8 in. by 10 in. print, measure the
6. Apparatus
linear separation (r) in mm of the secondary image from the
6.1 Light Array—The light array isa7by7 matrix of small primary image using the calipers. Measure from the center of
incandescent lights (flashlight bulbs) mounted on a metal
both spots when taking the measurement.
frame. The separation of the lights is 406.4 mm (16 in.) on
center, making the overall dimensions of the array 2.44 by
9. Calculation
2.44 m (8 by 8 ft). A suitable power supply, such as a
9.1 To obtain the scale factor F, which relates the linear
rechargable 12-V dc gel cell, is also required. A backdrop of
distances on the photograph to actual angular distances as
nonreflective material (such as black velvet), placed several
measured from the design eye position, use the equation as
inches behind the array, blocks out background lights and
follows:
prevents reflections.
230.4
6.2 Camera/film—No special camera or modification is
F 5 mrads/mm (1)
L
needed for this process. A lens focal length of about 50 mm is
9.2 Compute the angular separation θ for each light of the
preferred, to permit the light array to fill most of the field of
array using the equation:
view of the camer
...
This document is not an ASTM standard and is intended only to provide the user of an ASTM standard an indication of what changes have been made to the previous version. Because
it may not be technically possible to adequately depict all changes accurately, ASTM recommends that users consult prior editions as appropriate. In all cases only the current version
of the standard as published by ASTM is to be considered the official document.
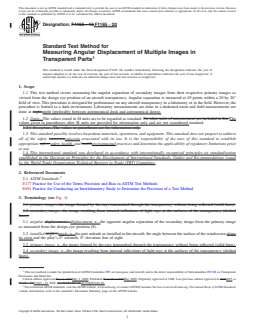
Designation: F1165 − 15 F1165 − 20
Standard Test Method for
Measuring Angular Displacement of Multiple Images in
Transparent Parts
This standard is issued under the fixed designation F1165; the number immediately following the designation indicates the year of
original adoption or, in the case of revision, the year of last revision. A number in parentheses indicates the year of last reapproval. A
superscript epsilon (´) indicates an editorial change since the last revision or reapproval.
1. Scope
1.1 This test method covers measuring the angular separation of secondary images from their respective primary images as
viewed from the design eye position of an aircraft transparency. Angular separation is measured at 49 points within a 20 by 20°
field of view. This procedure is designed for performance on any aircraft transparency in a laboratory or in the field. However, the
procedure is limited to a dark environment. Laboratory measurements are done in a darkened room and field measurements are
done at night.night (preferably between astronomical dusk and astronomical dawn).
1.2 Units—The values stated in SI units are to be regarded as standard. No other units of measurement are included in this The
values given in parentheses after SI units are provided for information only and are not considered standard.
1.2.1 Exception—The values in parentheses are for information only.
1.3 This standard possibly involves hazardous materials, operations, and equipment. This standard does not purport to address
all of the safety concerns,concerns associated with its use. It is the responsibility of the user of this standard to establish
appropriate safety safety, health, and healthenvironmental practices and determine the applicability of regulatory limitations prior
to use.
1.4 This international standard was developed in accordance with internationally recognized principles on standardization
established in the Decision on Principles for the Development of International Standards, Guides and Recommendations issued
by the World Trade Organization Technical Barriers to Trade (TBT) Committee.
2. Referenced Documents
2.1 ASTM Standards:
E177 Practice for Use of the Terms Precision and Bias in ASTM Test Methods
E691 Practice for Conducting an Interlaboratory Study to Determine the Precision of a Test Method
3. Terminology (see Fig. 1)
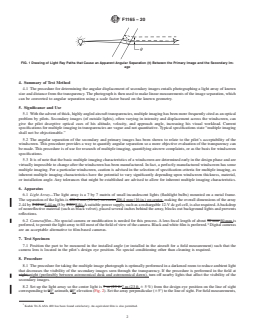
3.1 primary image—the image formed by the rays transmitted through the transparency without being reflected (solid lines).
3.2 secondary image—the image resulting from internal reflections of light rays at the surfaces of the transparency (dashed
lines).
3.1 angular displacement—displacement, n—the apparent angular separation of the secondary image from the primary image
as measured from the design eye position (θ).
3.2 installed angle—angle, n—the part attitude as installed in the aircraft; the angle between the surface of the windscreen along
its crest and the pilot’s 0° azimuth, 0° elevation line of sight.
3.3 primary image, n—the image formed by the rays transmitted through the transparency without being reflected (solid lines).
3.4 secondary image, n—the image resulting from internal reflections of light rays at the surfaces of the transparency (dashed
lines).
This test method is under the jurisdiction of ASTM Committee F07 on Aerospace and Aircraft and is the direct responsibility of Subcommittee F07.08 on Transparent
Enclosures and Materials.
Current edition approved Nov. 1, 2015May 1, 2020. Published November 2015May 2020. Originally approved in 1988. Last previous edition approved in 20102015 as
F1165 – 10.F1165 – 15. DOI: 10.1520/F1165-15.10.1520/F1165-20.
For referenced ASTM standards, visit the ASTM website, www.astm.org, or contact ASTM Customer Service at service@astm.org. For Annual Book of ASTM Standards
volume information, refer to the standard’s Document Summary page on the ASTM website.
Copyright © ASTM International, 100 Barr Harbor Drive, PO Box C700, West Conshohocken, PA 19428-2959. United States
F1165 − 20
FIG. 1 Drawing of Light Ray Paths that Cause an Apparent Angular Separation (θ) Between the Primary Image and the Secondary Im-
age
4. Summary of Test Method
4.1 The procedure for determining the angular displacement of secondary images entails photographing a light array of known
size and distance from the transparency. The photograph is then used to make linear measurements of the image separation, which
can be converted to angular separation using a scale factor based on the known geometry.
5. Significance and Use
5.1 With the advent of thick, highly angled aircraft transparencies, multiple imaging has been more frequently cited as an optical
problem by pilots. Secondary images (of outside lights), often varying in intensity and displacement across the windscreen, can
give the pilot deceptive optical cues of his altitude, velocity, and approach angle, increasing his visual workload. Current
specifications for multiple imaging in transparencies are vague and not quantitative. Typical specifications state “multiple imaging
shall not be objectionable.”
5.2 The angular separation of the secondary and primary images has been shown to relate to the pilot’s acceptability of the
windscreen. This procedure provides a way to quantify angular separation so a more objective evaluation of the transparency can
be made. This procedure is of use for research of multiple imaging, quantifying aircrew complaints, or as the basis for windscreen
specifications.
5.3 It is of note that the basic multiple imaging characteristics of a windscreen are determined early in the design phase and are
virtually impossible to change after the windscreen has been manufactured. In fact, a perfectly manufactured windscreen has some
multiple imaging. For a particular windscreen, caution is advised in the selection of specification criteria for multiple imaging, as
inherent multiple imaging characteristics have the potential to vary significantly depending upon windscreen thickness, material,
or installation angle. Any tolerances that might be established are advised to allow for inherent multiple imaging characteristics.
6. Apparatus
6.1 Light Array—The light array is a 7 by 7 matrix of small incandescent lights (flashlight bulbs) mounted on a metal frame.
The separation of the lights is 406.4 mm (16 in.) on center406.4 mm (16 in.) on center, making the overall dimensions of the array
2.44 by 2.44 m 2.44 m (8 by 8 ft). 8 ft). A suitable power supply, such as a rechargable 12-V dc gel cell, is also required. A backdrop
of nonreflective material (such as black velvet), placed several inches behind the array, blocks out background lights and prevents
reflections.
6.2 Camera/film—No special camera or modification is needed for this process. A lens focal length of about 50 mm 50 mm is
preferred, to permit the light array to fill most of the field of view of the camera. Black and white film is preferred. Digital cameras
are an acceptable alternative to film-based cameras.
7. Test Specimen
7.1 Position the part to be measured in the installed angle (or installed in the aircraft for a field measurement) such that the
camera lens is located in the pilot’s design eye position. No special conditioning other than cleaning is required.
8. Procedure
8.1 The procedure for taking the multiple image photograph is optimally performed in a darkened room to reduce ambient light
that decreases the visibility of the secondary images seen through the transparency. If the procedure is performed in the field at
night, night (preferably between astronomical dusk and astronomical dawn), turn off nearby lights that affect the visibility of the
secondary images.
8.2 Set up the light array so the center light is 7 m (23 ft 7 m (23 ft 6 5 %) from the design eye position on the line of sight
corresponding to 00° azimuth, 00° elevation (Fig. 2). Set the array perpendicular (65°) to the line of sight. For field measurements,
Kodak Tri-X ASA 400 has been found satisfactory. An equivalent film is also permitted.
F1165 − 20
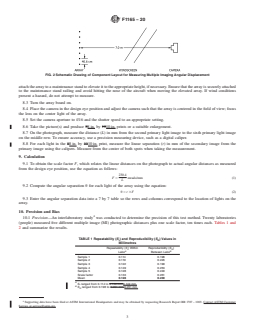
FIG. 2 Schematic Drawing of Component Layout for Measuring Multiple Imaging Angular Displacement
attach the array to a maintenance stand to elevate it to the appropriate height, if necessary. Ensure that the array is securely attached
to the maintenance stand railing and avoid hitting the n
...

Questions, Comments and Discussion
Ask us and Technical Secretary will try to provide an answer. You can facilitate discussion about the standard in here.
Loading comments...