ASTM D1875-03(2008)e1
(Test Method)Standard Test Method for Density of Adhesives in Fluid Form
Standard Test Method for Density of Adhesives in Fluid Form
SIGNIFICANCE AND USE
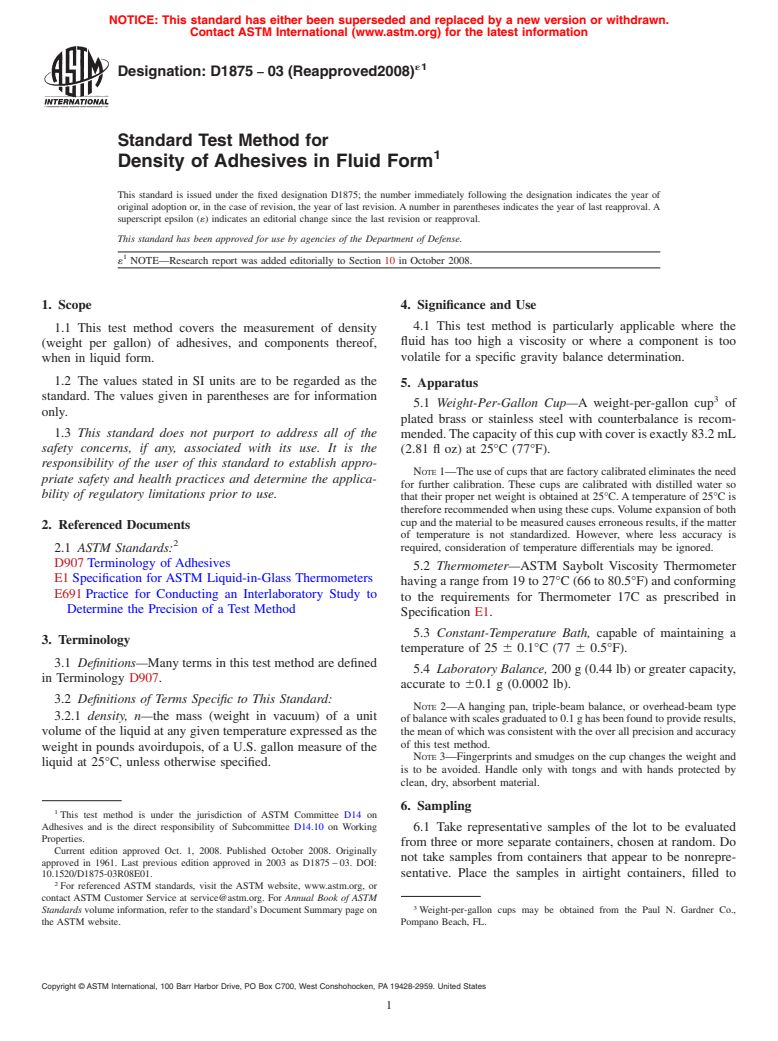
This test method is particularly applicable where the fluid has too high a viscosity or where a component is too volatile for a specific gravity balance determination.
SCOPE
1.1 This test method covers the measurement of density (weight per gallon) of adhesives, and components thereof, when in liquid form.
1.2 The values stated in SI units are to be regarded as the standard. The values given in parentheses are for information only.
1.3 This standard does not purport to address all of the safety concerns, if any, associated with its use. It is the responsibility of the user of this standard to establish appropriate safety and health practices and determine the applicability of regulatory limitations prior to use.
General Information
Relations
Buy Standard
Standards Content (Sample)
NOTICE: This standard has either been superseded and replaced by a new version or withdrawn.
Contact ASTM International (www.astm.org) for the latest information
´1
Designation: D1875 − 03 (Reapproved2008)
Standard Test Method for
Density of Adhesives in Fluid Form
This standard is issued under the fixed designation D1875; the number immediately following the designation indicates the year of
original adoption or, in the case of revision, the year of last revision. A number in parentheses indicates the year of last reapproval. A
superscript epsilon (´) indicates an editorial change since the last revision or reapproval.
This standard has been approved for use by agencies of the Department of Defense.
´ NOTE—Research report was added editorially to Section 10 in October 2008.
1. Scope 4. Significance and Use
4.1 This test method is particularly applicable where the
1.1 This test method covers the measurement of density
fluid has too high a viscosity or where a component is too
(weight per gallon) of adhesives, and components thereof,
volatile for a specific gravity balance determination.
when in liquid form.
1.2 The values stated in SI units are to be regarded as the
5. Apparatus
standard. The values given in parentheses are for information
5.1 Weight-Per-Gallon Cup—A weight-per-gallon cup of
only.
plated brass or stainless steel with counterbalance is recom-
1.3 This standard does not purport to address all of the mended.Thecapacityofthiscupwithcoverisexactly83.2mL
safety concerns, if any, associated with its use. It is the
(2.81 fl oz) at 25°C (77°F).
responsibility of the user of this standard to establish appro-
NOTE 1—The use of cups that are factory calibrated eliminates the need
priate safety and health practices and determine the applica-
for further calibration. These cups are calibrated with distilled water so
bility of regulatory limitations prior to use.
that their proper net weight is obtained at 25°C.Atemperature of 25°C is
therefore recommended when using these cups.Volume expansion of both
cup and the material to be measured causes erroneous results, if the matter
2. Referenced Documents
of temperature is not standardized. However, where less accuracy is
required, consideration of temperature differentials may be ignored.
2.1 ASTM Standards:
D907 Terminology of Adhesives
5.2 Thermometer—ASTM Saybolt Viscosity Thermometer
E1 Specification for ASTM Liquid-in-Glass Thermometers
having a range from 19 to 27°C (66 to 80.5°F) and conforming
E691 Practice for Conducting an Interlaboratory Study to
to the requirements for Thermometer 17C as prescribed in
Determine the Precision of a Test Method
Specification E1.
5.3 Constant-Temperature Bath, capable of maintaining a
3. Terminology
temperature of 25 6 0.1°C (77 6 0.5°F).
3.1 Definitions—Many terms in this test method are defined
5.4 Laboratory Balance, 200 g (0.44 lb) or greater capacity,
in Terminology D907.
accurate to 60.1 g (0.0002 lb).
3.2 Definitions of Terms Specific to This Standard:
NOTE 2—A hanging pan, triple-beam balance, or overhead-beam type
3.2.1 density, n—the mass (weight in vacuum) of a unit
ofbalancewithscalesgraduatedto0.1ghasbeenfoundtoprovideresults,
the mean of which was consistent with the over all precision and accuracy
volume of the liquid at any given temperature expressed as the
of this test method.
weight in pounds avoirdupois, of a U.S. gallon measure of the
NOTE 3—Fingerprints and smudges on the cup changes the weight and
liquid at 25°C, unless otherwise specified.
is to be avoided. Handle only with tongs and with hands protected by
clean, dry, absorbent material.
6. Sampling
This test method is under the jurisdiction of ASTM Committee D14 on
Adhesives and is the direct responsibility of Subcommittee D14.10 on Working
6.1 Take representative samples of the lot to be evaluated
Properties.
from three or more separate containers, chosen at random. Do
Current edition approved Oct. 1, 2008. Published October 2008. Originally
not take samples from containers that appear to be nonrepre-
approved in 1961. Last previous edition approved in 2003 as D1875 – 03. DOI:
10.1520/D1875-03R08E01. sentative. Place the samples in airtight containers, filled to
For referenced ASTM standards, visit the ASTM website, www.astm.org, or
contact ASTM Customer Service at service@astm.org. For Annual Book of ASTM
Standards volume information, refer to the standard’s Document Summary page on Weight-per-gallon cups may be obtained from the Paul N. Gardner Co.,
the ASTM website. Pompano Beach, FL.
Copyright © ASTM International, 100 Barr Harbor Drive, PO Box C700, West Conshohocken, PA 19428-2959. United States
´1
D1875 − 03 (2008)
NOTE 4—The numerator of K, 8.3455, is calculated from the volume-
prevent excessive air space above the
...
This document is not an ASTM standard and is intended only to provide the user of an ASTM standard an indication of what changes have been made to the previous version. Because
it may not be technically possible to adequately depict all changes accurately, ASTM recommends that users consult prior editions as appropriate. In all cases only the current version
of the standard as published by ASTM is to be considered the official document.
´1
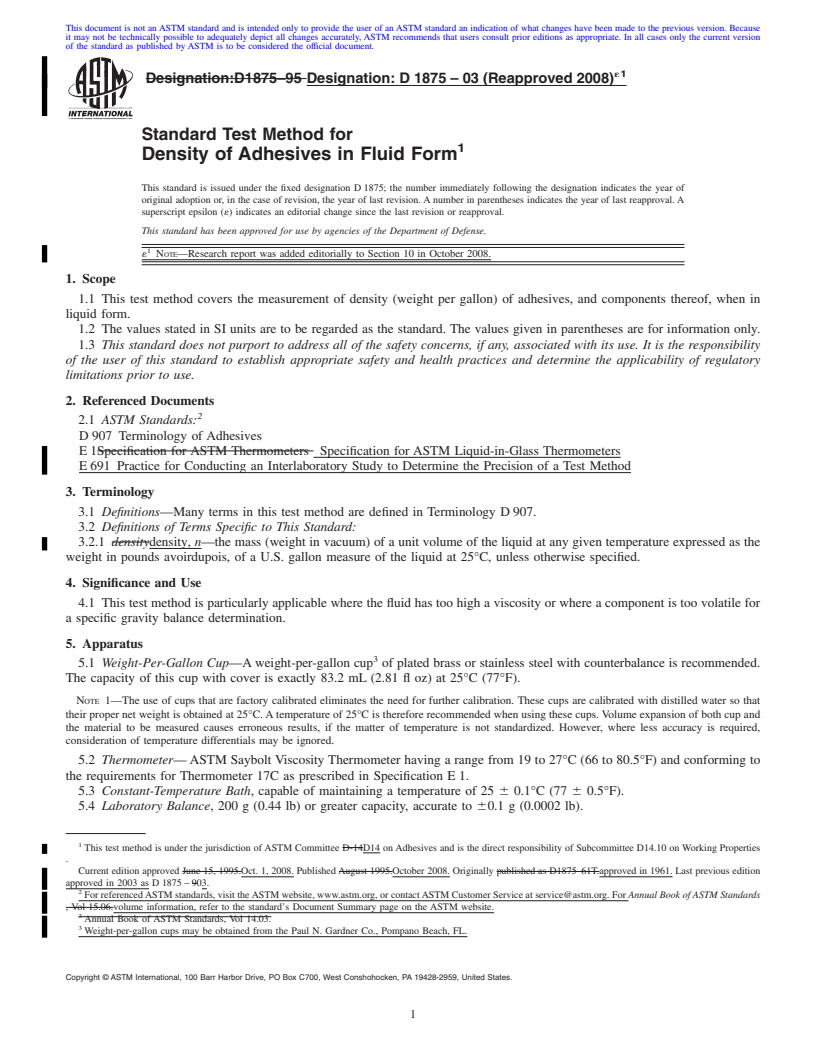
Designation:D1875–95 Designation: D 1875 – 03 (Reapproved 2008)
Standard Test Method for
Density of Adhesives in Fluid Form
This standard is issued under the fixed designation D 1875; the number immediately following the designation indicates the year of
original adoption or, in the case of revision, the year of last revision. A number in parentheses indicates the year of last reapproval. A
superscript epsilon (´) indicates an editorial change since the last revision or reapproval.
This standard has been approved for use by agencies of the Department of Defense.
´ NOTE—Research report was added editorially to Section 10 in October 2008.
1. Scope
1.1 This test method covers the measurement of density (weight per gallon) of adhesives, and components thereof, when in
liquid form.
1.2 The values stated in SI units are to be regarded as the standard. The values given in parentheses are for information only.
1.3 This standard does not purport to address all of the safety concerns, if any, associated with its use. It is the responsibility
of the user of this standard to establish appropriate safety and health practices and determine the applicability of regulatory
limitations prior to use.
2. Referenced Documents
2.1 ASTM Standards:
D 907 Terminology of Adhesives
E 1Specification for ASTM Thermometers Specification for ASTM Liquid-in-Glass Thermometers
E 691 Practice for Conducting an Interlaboratory Study to Determine the Precision of a Test Method
3. Terminology
3.1 Definitions—Many terms in this test method are defined in Terminology D 907.
3.2 Definitions of Terms Specific to This Standard:
3.2.1 densitydensity, n—the mass (weight in vacuum) of a unit volume of the liquid at any given temperature expressed as the
weight in pounds avoirdupois, of a U.S. gallon measure of the liquid at 25°C, unless otherwise specified.
4. Significance and Use
4.1 This test method is particularly applicable where the fluid has too high a viscosity or where a component is too volatile for
a specific gravity balance determination.
5. Apparatus
5.1 Weight-Per-Gallon Cup—A weight-per-gallon cup of plated brass or stainless steel with counterbalance is recommended.
The capacity of this cup with cover is exactly 83.2 mL (2.81 fl oz) at 25°C (77°F).
NOTE 1—The use of cups that are factory calibrated eliminates the need for further calibration. These cups are calibrated with distilled water so that
their proper net weight is obtained at 25°C.Atemperature of 25°C is therefore recommended when using these cups. Volume expansion of both cup and
the material to be measured causes erroneous results, if the matter of temperature is not standardized. However, where less accuracy is required,
consideration of temperature differentials may be ignored.
5.2 Thermometer— ASTM Saybolt Viscosity Thermometer having a range from 19 to 27°C (66 to 80.5°F) and conforming to
the requirements for Thermometer 17C as prescribed in Specification E 1.
5.3 Constant-Temperature Bath, capable of maintaining a temperature of 25 6 0.1°C (77 6 0.5°F).
5.4 Laboratory Balance, 200 g (0.44 lb) or greater capacity, accurate to 60.1 g (0.0002 lb).
This test method is under the jurisdiction of ASTM Committee D-14D14 on Adhesives and is the direct responsibility of Subcommittee D14.10 on Working Properties
.
Current edition approved June 15, 1995.Oct. 1, 2008. PublishedAugust 1995.October 2008. Originally published as D1875–61T.approved in 1961. Last previous edition
approved in 2003 as D 1875 – 903.
For referencedASTM standards, visit theASTM website, www.astm.org, or contactASTM Customer Service at service@astm.org. For Annual Book of ASTM Standards
, Vol 15.06.volume information, refer to the standard’s Document Summary page on the ASTM website.
Annual Book of ASTM Standards, Vol 14.03.
Weight-per-gallon cups may be obtained from the Paul N. Gardner Co., Pompano Beach, FL.
Copyright © ASTM International, 100 Barr Harbor Drive, PO Box C700, West Conshohocken, PA 19428-2959, United States.
´1
D 1875 – 03 (2008)
NOTE 2—Ahanging pan, triple-beam balance, or overhead-beam type of balance with scales graduated to 0.1 g has been found to provide results, the
mean of which was consistent with the over all precision and accuracy of this test method.
NOTE 3—Fingerprints and smudges on the cup changes the weight and is to be avoided. Handle only with tongs and with hands protected by clean,
dry, absorbent material.
6. Sampling
6.1 Take representative samples of the lot to be evaluated from three or more separate containers, chosen at random. Do not
take samples from containers that appear to be nonrepresentative. Place the samples
...


Questions, Comments and Discussion
Ask us and Technical Secretary will try to provide an answer. You can facilitate discussion about the standard in here.