ASTM G14-04(2018)
(Test Method)Standard Test Method for Impact Resistance of Pipeline Coatings (Falling Weight Test)
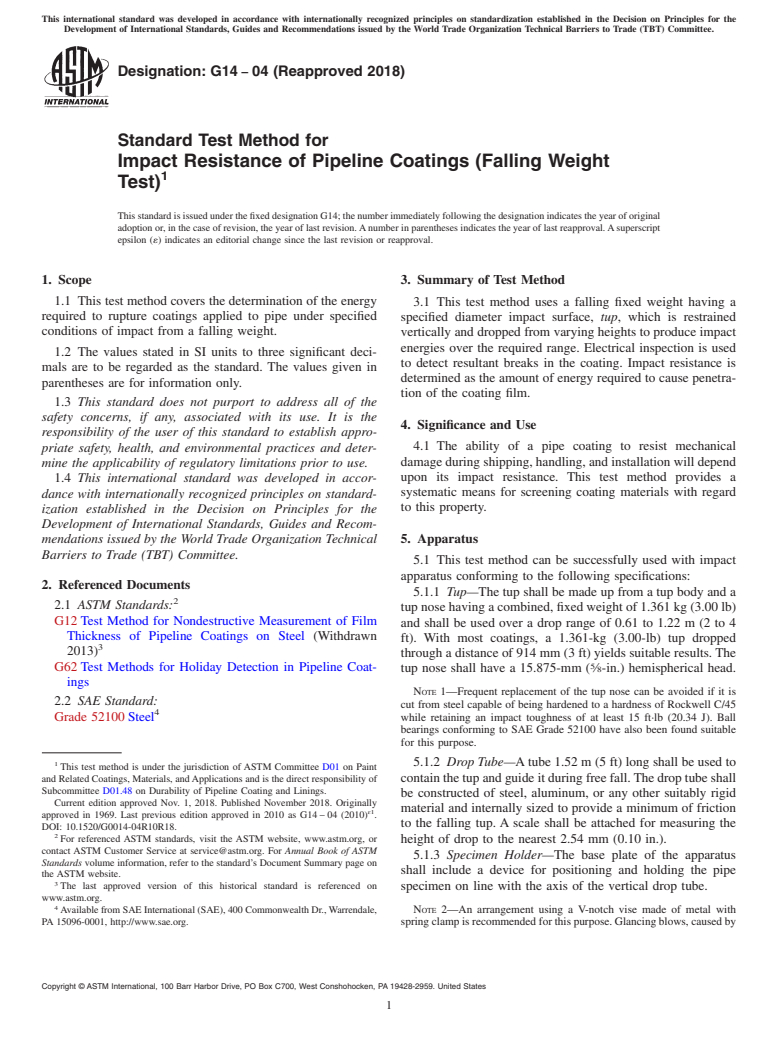
Standard Test Method for Impact Resistance of Pipeline Coatings (Falling Weight Test)
SIGNIFICANCE AND USE
4.1 The ability of a pipe coating to resist mechanical damage during shipping, handling, and installation will depend upon its impact resistance. This test method provides a systematic means for screening coating materials with regard to this property.
SCOPE
1.1 This test method covers the determination of the energy required to rupture coatings applied to pipe under specified conditions of impact from a falling weight.
1.2 The values stated in SI units to three significant decimals are to be regarded as the standard. The values given in parentheses are for information only.
1.3 This standard does not purport to address all of the safety concerns, if any, associated with its use. It is the responsibility of the user of this standard to establish appropriate safety, health, and environmental practices and determine the applicability of regulatory limitations prior to use.
1.4 This international standard was developed in accordance with internationally recognized principles on standardization established in the Decision on Principles for the Development of International Standards, Guides and Recommendations issued by the World Trade Organization Technical Barriers to Trade (TBT) Committee.
General Information
Relations
Standards Content (Sample)
This international standard was developed in accordance with internationally recognized principles on standardization established in the Decision on Principles for the
Development of International Standards, Guides and Recommendations issued by the World Trade Organization Technical Barriers to Trade (TBT) Committee.
Designation: G14 − 04 (Reapproved 2018)
Standard Test Method for
Impact Resistance of Pipeline Coatings (Falling Weight
Test)
This standard is issued under the fixed designation G14; the number immediately following the designation indicates the year of original
adoption or, in the case of revision, the year of last revision.Anumber in parentheses indicates the year of last reapproval.Asuperscript
epsilon (´) indicates an editorial change since the last revision or reapproval.
1. Scope 3. Summary of Test Method
1.1 This test method covers the determination of the energy
3.1 This test method uses a falling fixed weight having a
required to rupture coatings applied to pipe under specified
specified diameter impact surface, tup, which is restrained
conditions of impact from a falling weight.
vertically and dropped from varying heights to produce impact
energies over the required range. Electrical inspection is used
1.2 The values stated in SI units to three significant deci-
to detect resultant breaks in the coating. Impact resistance is
mals are to be regarded as the standard. The values given in
determined as the amount of energy required to cause penetra-
parentheses are for information only.
tion of the coating film.
1.3 This standard does not purport to address all of the
safety concerns, if any, associated with its use. It is the
4. Significance and Use
responsibility of the user of this standard to establish appro-
4.1 The ability of a pipe coating to resist mechanical
priate safety, health, and environmental practices and deter-
damage during shipping, handling, and installation will depend
mine the applicability of regulatory limitations prior to use.
upon its impact resistance. This test method provides a
1.4 This international standard was developed in accor-
systematic means for screening coating materials with regard
dance with internationally recognized principles on standard-
to this property.
ization established in the Decision on Principles for the
Development of International Standards, Guides and Recom-
5. Apparatus
mendations issued by the World Trade Organization Technical
Barriers to Trade (TBT) Committee.
5.1 This test method can be successfully used with impact
apparatus conforming to the following specifications:
2. Referenced Documents
5.1.1 Tup—The tup shall be made up from a tup body and a
2.1 ASTM Standards:
tup nose having a combined, fixed weight of 1.361 kg (3.00 lb)
G12 Test Method for Nondestructive Measurement of Film
and shall be used over a drop range of 0.61 to 1.22 m (2 to 4
Thickness of Pipeline Coatings on Steel (Withdrawn
ft). With most coatings, a 1.361-kg (3.00-lb) tup dropped
2013)
through a distance of 914 mm (3 ft) yields suitable results. The
G62 Test Methods for Holiday Detection in Pipeline Coat-
tup nose shall have a 15.875-mm ( ⁄8-in.) hemispherical head.
ings
NOTE 1—Frequent replacement of the tup nose can be avoided if it is
2.2 SAE Standard:
cut from steel capable of being hardened to a hardness of Rockwell C/45
Grade 52100 Steel while retaining an impact toughness of at least 15 ft·lb (20.34 J). Ball
bearings conforming to SAE Grade 52100 have also been found suitable
for this purpose.
1 5.1.2 Drop Tube—Atube 1.52 m (5 ft) long shall be used to
This test method is under the jurisdiction of ASTM Committee D01 on Paint
and Related Coatings, Materials, andApplications and is the direct responsibility of containthetupandguideitduringfreefall.Thedroptubeshall
Subcommittee D01.48 on Durability of Pipeline Coating and Linings.
be constructed of steel, aluminum, or any other suitably rigid
Current edition approved Nov. 1, 2018. Published November 2018. Originally
material and internally sized to provide a minimum of friction
ɛ1
approved in 1969. Last previous edition approved in 2010 as G14 – 04 (2010) .
to the falling tup. A scale shall be attached for measuring the
DOI: 10.1520/G0014-04R10R18.
For referenced ASTM standards, visit the ASTM website, www.astm.org, or
height of drop to the nearest 2.54 mm (0.10 in.).
contact ASTM Customer Service at service@astm.org. For Annual Book of ASTM
5.1.3 Specimen Holder—The base plate of the apparatus
Standards volume information, refer to the standard’s Document Summary page on
shall include a device for positioning and holding the pipe
the ASTM website.
The last approved version of this historical standard is referenced on specimen on line with the axis of the vertical drop tube.
www.astm.org.
Available from SAE International (SAE), 400 Commonwealth Dr.,Warrendale, NOTE 2—An arrangement using a V-notch vise made of metal with
PA 15096-0001, http://www.sae.org. springclampisrecommendedforthispurpose.Glancingblows,causedby
Copyright © ASTM International, 100 Barr Harbor Drive, PO Box C700, West Conshohocken, PA 19428-2959. United States
G14 − 04 (2018)
an out-of-plumb condition between drop tube and pipe sample, will cause
9. Procedure
erratic test results.
9.1 Performthetestataroomtemperatureof21to25°C(70
5.1.4 Apparatus Support—Both the apparatus and sample
to 77°F).
shall be firmly supported and secured to a rigid base to
9.2 Begin testing from the approximate height determined
optimize energy transfer from the tup to the specimen.
in 8.2 and corresponding to the point at which the first
5.2 A design for the test apparatus appears in Figs. X1.1-
nonfailure was registered. Maintain a fixed increment between
X1.3 of Appendix X1.
adjacent testing heights.
5.3 Thickness Gage—Measurements of coating thickness 9.3 Useasuitabledetector,asspecifiedinTestMethodG62,
will be required for this test, and shall be done in accordance to determine penetration or lack thereof of the coating after
with Test Method G12. each individual impact.
9.4 If the coating film is penetrated on the initial drop, make
5.4 Holiday Detector—A suitable detector as specified in
the next test at the next lower height increment. If the first
Test Methods G62 shall be used to locate breaks in the coating
specimen does not fail, make the second test at the next higher
film.
increment.
6. Test Specimen
9.5 In a similar manner, determine the height of fall by the
performance of the coating on each preceding drop. Maintain a
6.1 The test specimen shall be a 406.4 mm (16 in.) long
constant height increment between readings. Continue to apply
piece of Schedule 40, 60.325 mm (2.375 in.) outside diameter
this “up-and-down” method until 20 successive impact read-
coated pipe prepared with its surface preparation and coating
ings have been made.
procedures equivalent to that of production coated pipe.
6.2 Seven specimens shall be required for the test. 10. Calculation
10.1 Calculate the mean value of impact strength, m,in
7. Conditioning
g/cm (or in./lb) as follows:
7.1 The specimen shall be exposed to a room temperature of
A 1
m 5 h 1d 6 3W (1)
F S DG
21 to 25°C (70 to 77°F) for a period of 24 h before beginning
N 2
the test.
where:
h = minimum height at which the le
...


Questions, Comments and Discussion
Ask us and Technical Secretary will try to provide an answer. You can facilitate discussion about the standard in here.