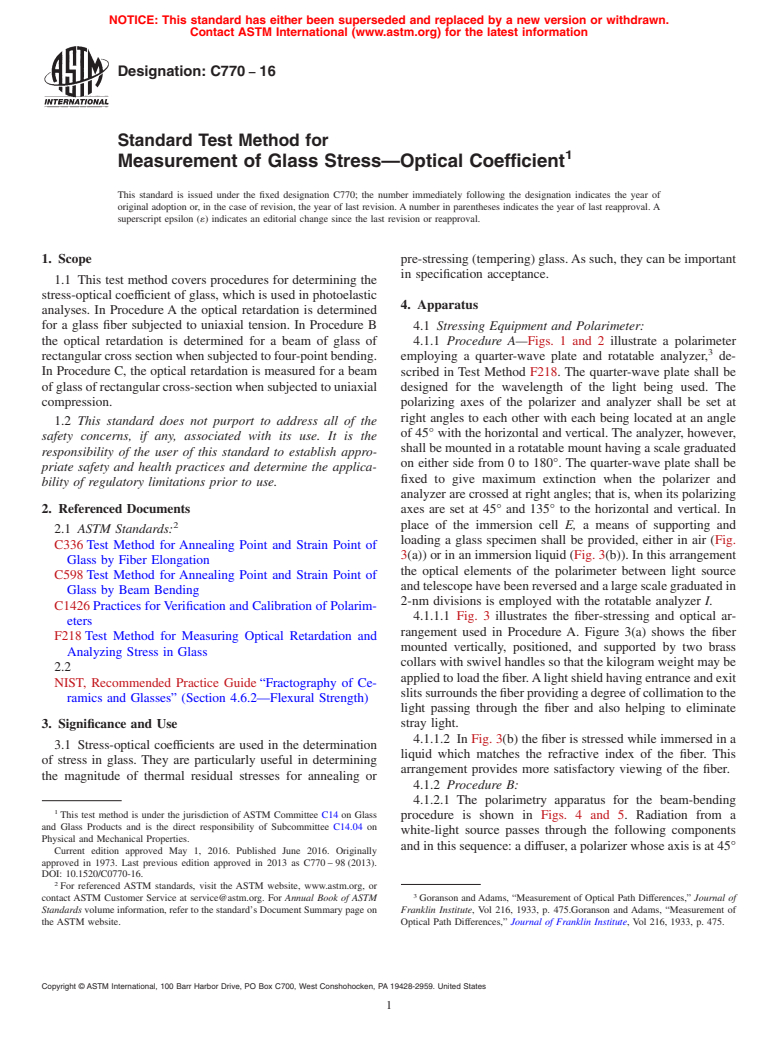
ASTM C770-16
(Test Method)Standard Test Method for Measurement of Glass Stress—Optical Coefficient
Standard Test Method for Measurement of Glass Stress—Optical Coefficient
SIGNIFICANCE AND USE
3.1 Stress-optical coefficients are used in the determination of stress in glass. They are particularly useful in determining the magnitude of thermal residual stresses for annealing or pre-stressing (tempering) glass. As such, they can be important in specification acceptance.
SCOPE
1.1 This test method covers procedures for determining the stress-optical coefficient of glass, which is used in photoelastic analyses. In Procedure A the optical retardation is determined for a glass fiber subjected to uniaxial tension. In Procedure B the optical retardation is determined for a beam of glass of rectangular cross section when subjected to four-point bending. In Procedure C, the optical retardation is measured for a beam of glass of rectangular cross-section when subjected to uniaxial compression.
1.2 This standard does not purport to address all of the safety concerns, if any, associated with its use. It is the responsibility of the user of this standard to establish appropriate safety and health practices and determine the applicability of regulatory limitations prior to use.
General Information
Relations
Buy Standard
Standards Content (Sample)
NOTICE: This standard has either been superseded and replaced by a new version or withdrawn.
Contact ASTM International (www.astm.org) for the latest information
Designation: C770 − 16
Standard Test Method for
1
Measurement of Glass Stress—Optical Coefficient
This standard is issued under the fixed designation C770; the number immediately following the designation indicates the year of
original adoption or, in the case of revision, the year of last revision.Anumber in parentheses indicates the year of last reapproval.A
superscript epsilon (´) indicates an editorial change since the last revision or reapproval.
1. Scope pre-stressing(tempering)glass.Assuch,theycanbeimportant
in specification acceptance.
1.1 This test method covers procedures for determining the
stress-optical coefficient of glass, which is used in photoelastic
4. Apparatus
analyses. In Procedure A the optical retardation is determined
for a glass fiber subjected to uniaxial tension. In Procedure B 4.1 Stressing Equipment and Polarimeter:
the optical retardation is determined for a beam of glass of
4.1.1 Procedure A—Figs. 1 and 2 illustrate a polarimeter
3
rectangularcrosssectionwhensubjectedtofour-pointbending. employing a quarter-wave plate and rotatable analyzer, de-
In Procedure C, the optical retardation is measured for a beam
scribed in Test Method F218. The quarter-wave plate shall be
ofglassofrectangularcross-sectionwhensubjectedtouniaxial designed for the wavelength of the light being used. The
compression.
polarizing axes of the polarizer and analyzer shall be set at
right angles to each other with each being located at an angle
1.2 This standard does not purport to address all of the
of 45° with the horizontal and vertical.The analyzer, however,
safety concerns, if any, associated with its use. It is the
shallbemountedinarotatablemounthavingascalegraduated
responsibility of the user of this standard to establish appro-
on either side from 0 to 180°. The quarter-wave plate shall be
priate safety and health practices and determine the applica-
fixed to give maximum extinction when the polarizer and
bility of regulatory limitations prior to use.
analyzer are crossed at right angles; that is, when its polarizing
2. Referenced Documents axes are set at 45° and 135° to the horizontal and vertical. In
2 place of the immersion cell E, a means of supporting and
2.1 ASTM Standards:
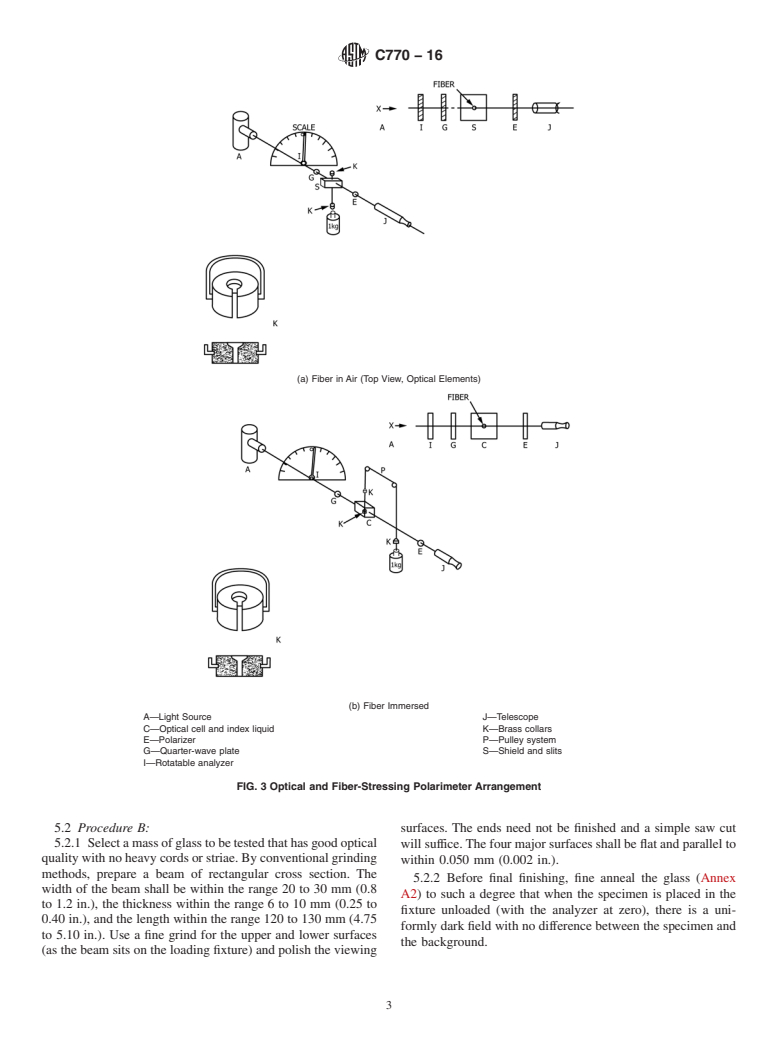
loading a glass specimen shall be provided, either in air (Fig.
C336Test Method for Annealing Point and Strain Point of
3(a)) or in an immersion liquid (Fig. 3(b)). In this arrangement
Glass by Fiber Elongation
the optical elements of the polarimeter between light source
C598Test Method for Annealing Point and Strain Point of
andtelescopehavebeenreversedandalargescalegraduatedin
Glass by Beam Bending
2-nm divisions is employed with the rotatable analyzer I.
C1426Practices forVerification and Calibration of Polarim-
4.1.1.1 Fig. 3 illustrates the fiber-stressing and optical ar-
eters
rangement used in Procedure A. Figure 3(a) shows the fiber
F218Test Method for Measuring Optical Retardation and
mounted vertically, positioned, and supported by two brass
Analyzing Stress in Glass
collarswithswivelhandlessothatthekilogramweightmaybe
2.2
appliedtoloadthefiber.Alightshieldhavingentranceandexit
NIST, Recommended Practice Guide“Fractography of Ce-
slitssurroundsthefiberprovidingadegreeofcollimationtothe
ramics and Glasses” (Section 4.6.2—Flexural Strength)
light passing through the fiber and also helping to eliminate
3. Significance and Use stray light.
4.1.1.2 In Fig. 3(b) the fiber is stressed while immersed in a
3.1 Stress-optical coefficients are used in the determination
liquid which matches the refractive index of the fiber. This
of stress in glass. They are particularly useful in determining
arrangement provides more satisfactory viewing of the fiber.
the magnitude of thermal residual stresses for annealing or
4.1.2 Procedure B:
4.1.2.1 The polarimetry apparatus for the beam-bending
1
This test method is under the jurisdiction of ASTM Committee C14 on Glass
procedure is shown in Figs. 4 and 5. Radiation from a
and Glass Products and is the direct responsibility of Subcommittee C14.04 on
white-light source passes through the following components
Physical and Mechanical Properties.
andinthissequence:adiffuser,apolarizerwhoseaxisisat45°
Current edition approved May 1, 2016. Published June 2016. Originally
approved in 1973. Last previous edition approved in 2013 as C770–98(2013).
DOI: 10.1520/C0770-16.
2
For referenced ASTM standards, visit the ASTM website, www.astm.org, or
3
contact ASTM Customer Service at service@astm.org. For Annual Book of ASTM Goranson andAdams, “Measurement of Optical Path Differences,” Journal of
Standards volume information, refer to the standard’s Document Summary page on Franklin Institute, Vol 216, 1933, p. 475.Goranson and Adams, “Measurement of
the ASTM website. Optical Path Differences,” Journal of Franklin Institute, Vol 216, 1933, p. 475.
Copyrigh
...
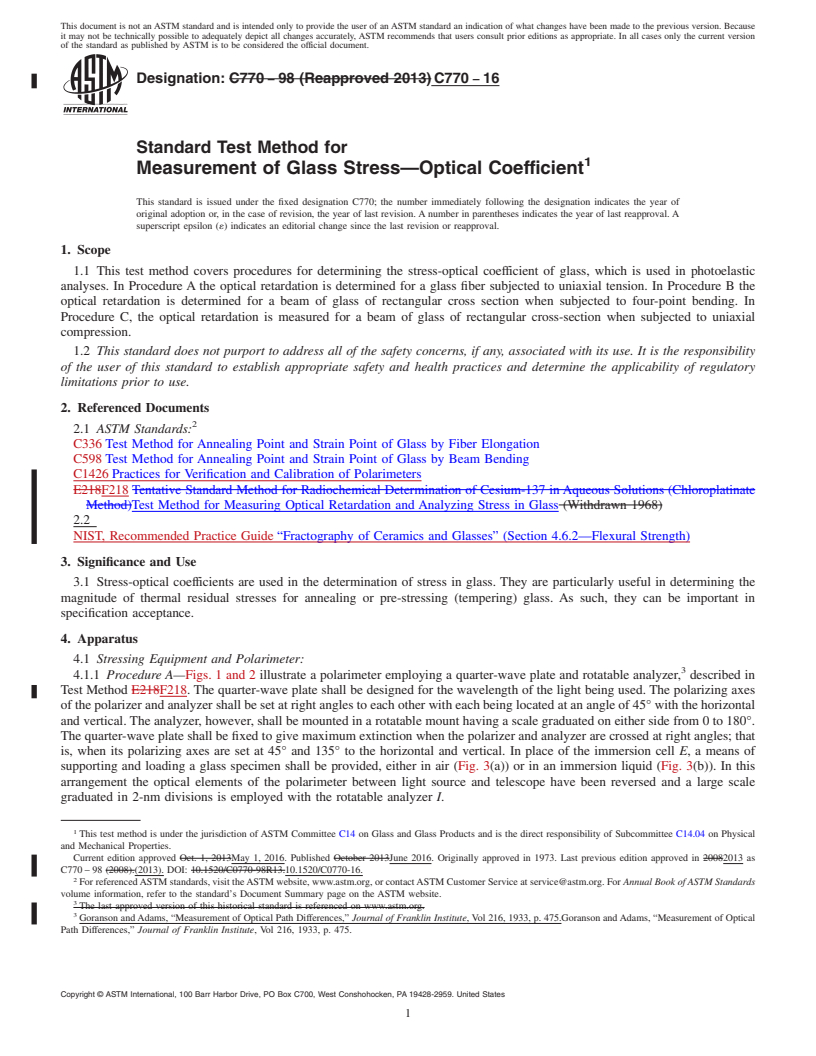
This document is not an ASTM standard and is intended only to provide the user of an ASTM standard an indication of what changes have been made to the previous version. Because
it may not be technically possible to adequately depict all changes accurately, ASTM recommends that users consult prior editions as appropriate. In all cases only the current version
of the standard as published by ASTM is to be considered the official document.
Designation: C770 − 98 (Reapproved 2013) C770 − 16
Standard Test Method for
1
Measurement of Glass Stress—Optical Coefficient
This standard is issued under the fixed designation C770; the number immediately following the designation indicates the year of
original adoption or, in the case of revision, the year of last revision. A number in parentheses indicates the year of last reapproval. A
superscript epsilon (´) indicates an editorial change since the last revision or reapproval.
1. Scope
1.1 This test method covers procedures for determining the stress-optical coefficient of glass, which is used in photoelastic
analyses. In Procedure A the optical retardation is determined for a glass fiber subjected to uniaxial tension. In Procedure B the
optical retardation is determined for a beam of glass of rectangular cross section when subjected to four-point bending. In
Procedure C, the optical retardation is measured for a beam of glass of rectangular cross-section when subjected to uniaxial
compression.
1.2 This standard does not purport to address all of the safety concerns, if any, associated with its use. It is the responsibility
of the user of this standard to establish appropriate safety and health practices and determine the applicability of regulatory
limitations prior to use.
2. Referenced Documents
2
2.1 ASTM Standards:
C336 Test Method for Annealing Point and Strain Point of Glass by Fiber Elongation
C598 Test Method for Annealing Point and Strain Point of Glass by Beam Bending
C1426 Practices for Verification and Calibration of Polarimeters
E218F218 Tentative Standard Method for Radiochemical Determination of Cesium-137 in Aqueous Solutions (Chloroplatinate
Method)Test Method for Measuring Optical Retardation and Analyzing Stress in Glass (Withdrawn 1968)
2.2
NIST, Recommended Practice Guide “Fractography of Ceramics and Glasses” (Section 4.6.2—Flexural Strength)
3. Significance and Use
3.1 Stress-optical coefficients are used in the determination of stress in glass. They are particularly useful in determining the
magnitude of thermal residual stresses for annealing or pre-stressing (tempering) glass. As such, they can be important in
specification acceptance.
4. Apparatus
4.1 Stressing Equipment and Polarimeter:
3
Figs. 1 and 2 illustrate a polarimeter employing a quarter-wave plate and rotatable analyzer, described in
4.1.1 Procedure A—
Test Method E218F218. The quarter-wave plate shall be designed for the wavelength of the light being used. The polarizing axes
of the polarizer and analyzer shall be set at right angles to each other with each being located at an angle of 45° with the horizontal
and vertical. The analyzer, however, shall be mounted in a rotatable mount having a scale graduated on either side from 0 to 180°.
The quarter-wave plate shall be fixed to give maximum extinction when the polarizer and analyzer are crossed at right angles; that
is, when its polarizing axes are set at 45° and 135° to the horizontal and vertical. In place of the immersion cell E, a means of
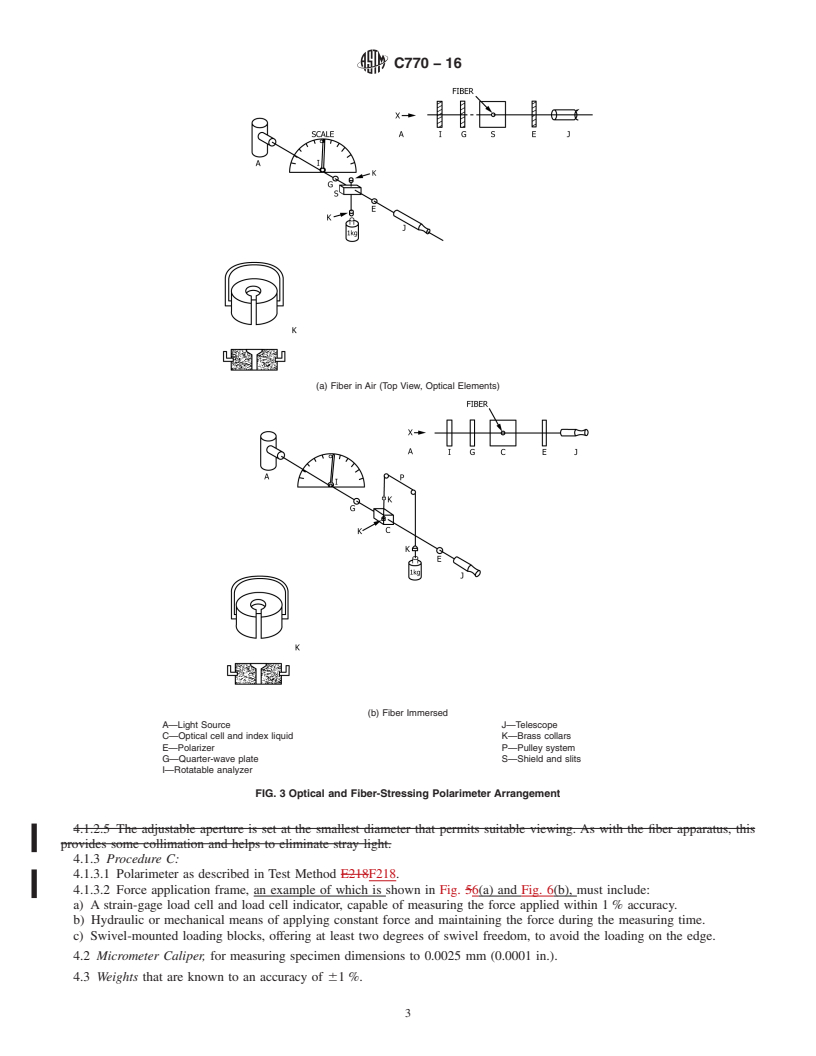
supporting and loading a glass specimen shall be provided, either in air (Fig. 3(a)) or in an immersion liquid (Fig. 3(b)). In this
arrangement the optical elements of the polarimeter between light source and telescope have been reversed and a large scale
graduated in 2-nm divisions is employed with the rotatable analyzer I.
1
This test method is under the jurisdiction of ASTM Committee C14 on Glass and Glass Products and is the direct responsibility of Subcommittee C14.04 on Physical
and Mechanical Properties.
Current edition approved Oct. 1, 2013May 1, 2016. Published October 2013June 2016. Originally approved in 1973. Last previous edition approved in 20082013 as
C770 – 98 (2008).(2013). DOI: 10.1520/C0770-98R13.10.1520/C0770-16.
2
For referenced ASTM standards, visit the ASTM website, www.astm.org, or contact ASTM Customer Service at service@astm.org. For Annual Book of ASTM Standards
volume information, refer to the standard’s Document Summary page on the ASTM website.
3
The last approved version of this historical standard is referenced on www.astm.org.
3
Goranson and Adams, “Measurement of Optical Path Differences,” Journal of Franklin Institute, Vol 216, 1933, p. 475.Goranson and Adams, “Measurement of Optical
Path Differences,” Journal of Franklin Institute, Vol 216, 1933, p. 475.
Copyright © ASTM International, 100 Barr Harbor Drive, PO Box C700, West Conshohocken, PA 19428-2959. United States
1
---------------------- Page: 1 ----------------------
C770 − 16
FIG. 1 Polarimeter
FIG.
...


Questions, Comments and Discussion
Ask us and Technical Secretary will try to provide an answer. You can facilitate discussion about the standard in here.