ASTM E210-63(1999)e1
(Specification)Standard Specification for Microscope Objective Thread
Standard Specification for Microscope Objective Thread
SCOPE
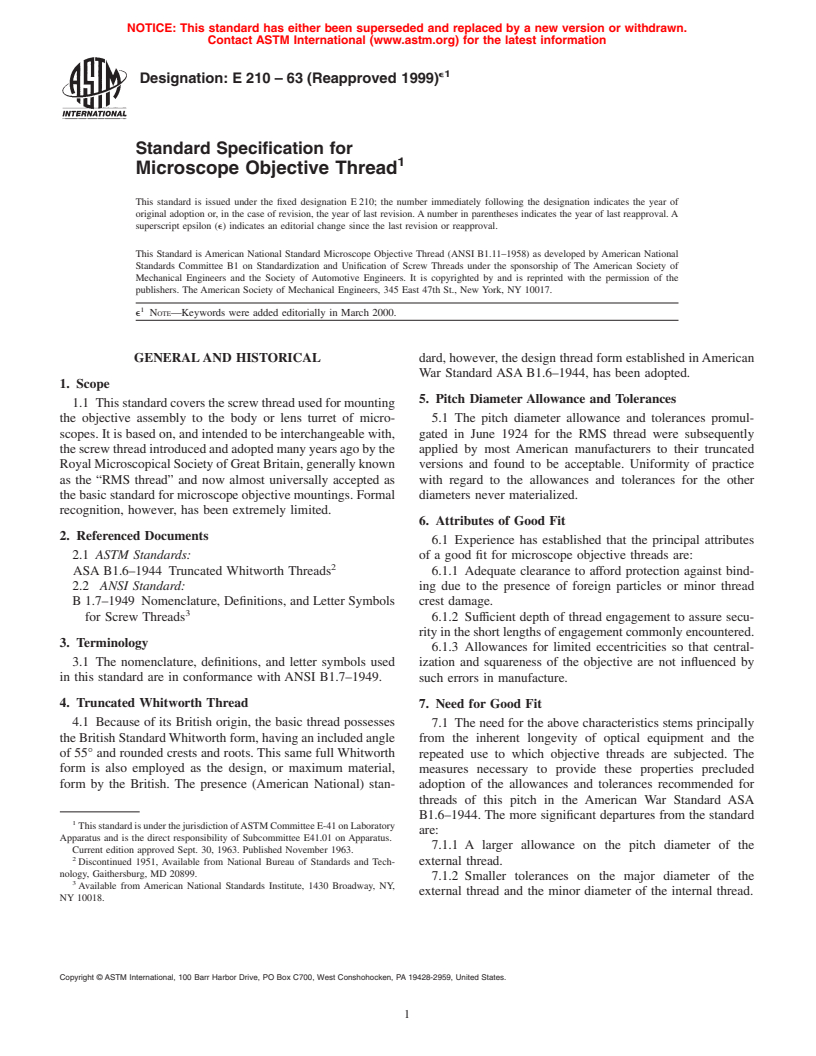
1.1 This standard covers the screw thread used for mounting the objective assembly to the body or lens turret of microscopes. It is based on, and intended to be interchangeable with, the screw thread introduced and adopted many years ago by the Royal Microscopical Society of Great Britain, generally known as the "RMS thread" and now almost universally accepted as the basic standard for microscope objective mountings. Formal recognition, however, has been extremely limited.
General Information
Relations
Standards Content (Sample)
NOTICE: This standard has either been superseded and replaced by a new version or withdrawn.
Contact ASTM International (www.astm.org) for the latest information
e1
Designation: E 210 – 63 (Reapproved 1999)
Standard Specification for
Microscope Objective Thread
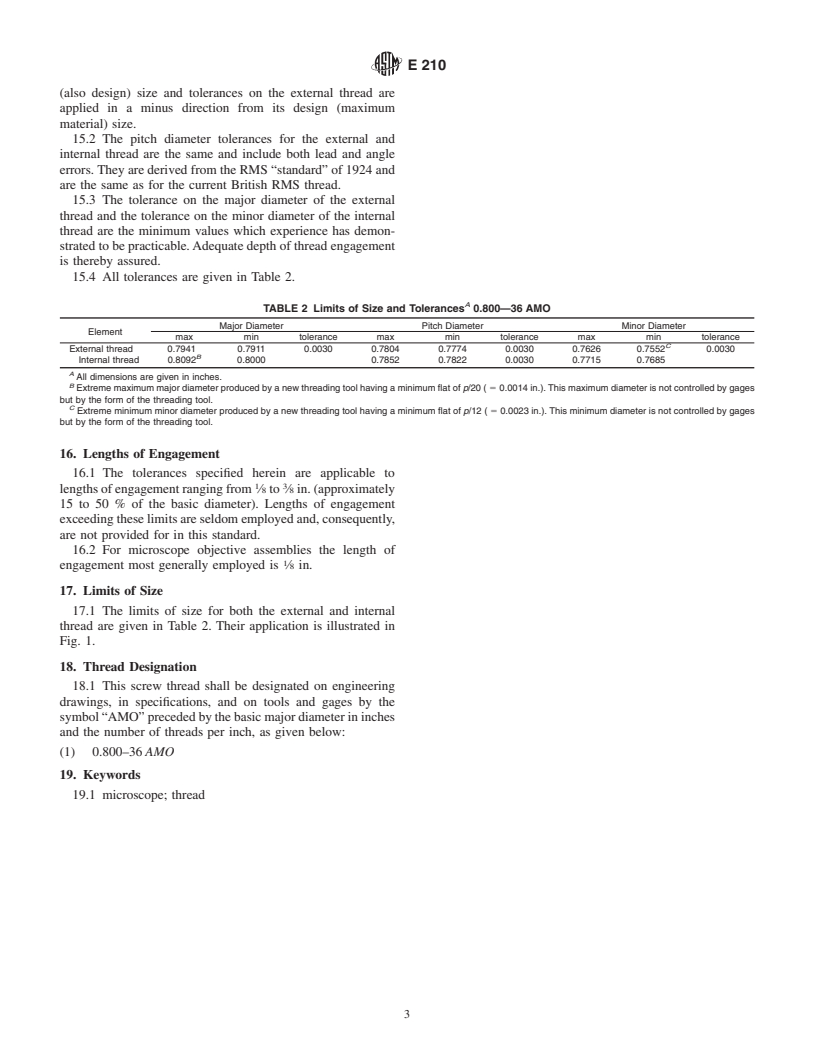
This standard is issued under the fixed designation E 210; the number immediately following the designation indicates the year of
original adoption or, in the case of revision, the year of last revision. A number in parentheses indicates the year of last reapproval. A
superscript epsilon (e) indicates an editorial change since the last revision or reapproval.
This Standard is American National Standard Microscope Objective Thread (ANSI B1.11–1958) as developed by American National
Standards Committee B1 on Standardization and Unification of Screw Threads under the sponsorship of The American Society of
Mechanical Engineers and the Society of Automotive Engineers. It is copyrighted by and is reprinted with the permission of the
publishers. The American Society of Mechanical Engineers, 345 East 47th St., New York, NY 10017.
e NOTE—Keywords were added editorially in March 2000.
GENERALAND HISTORICAL dard, however, the design thread form established inAmerican
War Standard ASA B1.6–1944, has been adopted.
1. Scope
5. Pitch Diameter Allowance and Tolerances
1.1 Thisstandardcoversthescrewthreadusedformounting
the objective assembly to the body or lens turret of micro- 5.1 The pitch diameter allowance and tolerances promul-
scopes. It is based on, and intended to be interchangeable with, gated in June 1924 for the RMS thread were subsequently
thescrewthreadintroducedandadoptedmanyyearsagobythe applied by most American manufacturers to their truncated
RoyalMicroscopicalSocietyofGreatBritain,generallyknown versions and found to be acceptable. Uniformity of practice
as the “RMS thread” and now almost universally accepted as with regard to the allowances and tolerances for the other
the basic standard for microscope objective mountings. Formal diameters never materialized.
recognition, however, has been extremely limited.
6. Attributes of Good Fit
2. Referenced Documents
6.1 Experience has established that the principal attributes
2.1 ASTM Standards: of a good fit for microscope objective threads are:
ASA B1.6–1944 Truncated Whitworth Threads 6.1.1 Adequate clearance to afford protection against bind-
2.2 ANSI Standard: ing due to the presence of foreign particles or minor thread
B 1.7–1949 Nomenclature, Definitions, and Letter Symbols crest damage.
for Screw Threads 6.1.2 Sufficient depth of thread engagement to assure secu-
rityintheshortlengthsofengagementcommonlyencountered.
3. Terminology
6.1.3 Allowances for limited eccentricities so that central-
3.1 The nomenclature, definitions, and letter symbols used ization and squareness of the objective are not influenced by
in this standard are in conformance with ANSI B1.7–1949.
such errors in manufacture.
4. Truncated Whitworth Thread 7. Need for Good Fit
4.1 Because of its British origin, the basic thread possesses
7.1 The need for the above characteristics stems principally
the British StandardWhitworth form, having an included angle from the inherent longevity of optical equipment and the
of 55° and rounded crests and roots. This same full Whitworth
repeated use to which objective threads are subjected. The
form is also employed as the design, or maximum material, measures necessary to provide these properties precluded
form by the British. The presence (American National) stan-
adoption of the allowances and tolerances recommended for
threads of this pitch in the American War Standard ASA
B1.6–1944. The more significant departures from the standard
ThisstandardisunderthejurisdictionofASTMCommitteeE-41onLaboratory
are:
Apparatus and is the direct responsibility of Subcommittee E41.01 on Apparatus.
7.1.1 A larger allowance on the pitch diameter of the
Current edition approved Sept. 30, 1963. Published November 1963.
Discontinued 1951, Available from National Bureau of Standards and Tech- external thread.
nology, Gaithersburg, MD 20899.
7.1.2 Smaller tolerances on the major diameter of the
Available from American National Standards Institute, 1430 Broadway, NY,
external thread and the minor diameter of the internal thread.
NY 10018.
Copyright © ASTM International, 100 Barr Harbor Drive, PO Box C700, West Conshohocken, PA 19428-2959, United States.
E 210
7.1.3 The provision of allowances on the major and minor 13. Nominal Sizes
diameters of the external thread.
13.1 There is only one nominal size having a basic major
7.2 The values established and further details regarding
diameter of 0.800 in. and a pitch of 0.027778 in. (36 threads
them are given under Specifications.
per in.).
14. Allowances
8. Other Applications
14.1 Positive allowances (minimum clearances) are pro-
8.1 Though utilized principally for microscope objective
vided on the pitch, major, and minor diameters of the external
mountings, this screw thread is recommended also for other
thread. The allowance on the pitch diameter is 0.0018 in., the
optical assemblies of microscopes and associated apparatus,
valueestablishedbytheBritishRoyalMicroscopicalSocietyin
such as photomicrographic equipment.
1924 and now widely regarded as a basic requirement. The
same allowance is also applied on both the major and minor
SPECIFICATIONS
diameters.
9. Basic Form of Thread 14.2 Where interchangeability with product having full-
form Whitworth threads is not required, the allowances on the
9.1 The basic form of the thread for this standard is the
major and minor diameters of the external thread are not
British Standard Whitworth form. Basic dimensions are given
necessary, since the forms at the root and crest of the truncated
in Table 1.
internal thread provide the desired clearances. In such cases,
either both limits or only the maximum limit of the major and
10. Design Form of Thread
minor diameters may be increased by the amount of the
Thedesign,ormaximummaterial,formsofboththeexternal
allowance. Benefits are derived principally from changes in the
and internal threads conform to the ASA B1.6–1944. The
major diameter where increasing both limits improves the
design dimensions are given in Table 1.
depth of thread engagement, and increasing only the maximum
limit grants a larger manufacturing tolerance. However, unless
11. Lead of Thread
such deviations are specifically covered in purchase negotia-
The thread is of the single (single-start) type.
tions, it is to be assumed that the threads will be supplied in
accordance with the tables in this standard.
12. Classification
15. Tolerances
12.1 There is established herein only one class of thread
which experience has proved to be adequate to meet the 15.1 In accordance with standard practice, tolerances on the
demands of the applications.
internal thread are applied in a plus direction from the basic
TABLE 1 Definitions, Formulas, Basic and Design Dimensions
Property Symbol Formula Dimension
Basic Thread Form
A
Half angle of thread a . 27° 30 min
A
Included angle of thread 2a . 55° 00 min
A
Number of threads per inch n . 36°
Pitch p 1/n 0.027778
Height of fundamental triangle H 0.960491p 0.026680
Height of basic thread h 0.640327p 0.0178
b
Radius at crest and root of
...


Questions, Comments and Discussion
Ask us and Technical Secretary will try to provide an answer. You can facilitate discussion about the standard in here.