ASTM B917/B917M-11
(Practice)Standard Practice for Heat Treatment of Aluminum-Alloy Castings from All Processes
Standard Practice for Heat Treatment of Aluminum-Alloy Castings from All Processes
ABSTRACT
This practice covers the requirements for the heat treatment of aluminum alloy castings from any casting process such as investment casting, permanent mould casting, sand casting, and others. It excludes castings that are used in specific aerospace applications or those made from wrought aluminum alloys. The aluminum alloys should be subjected to controlled heat treatment using the usual air chamber furnace or other heating media like lead baths, oil baths, fluidized beds, or even superheated steam. Air chambers may be oil or gas fired or may also be electrically heated but the atmosphere inside each should be controlled to prevent porosity. Quenching is normally performed by immersing castings in a hot-water bath. It is important that the furnace be calibrated before it is used initially and after any change in the furnace. Likewise, temperature-measurement systems should be regularly checked for accuracy.
SCOPE
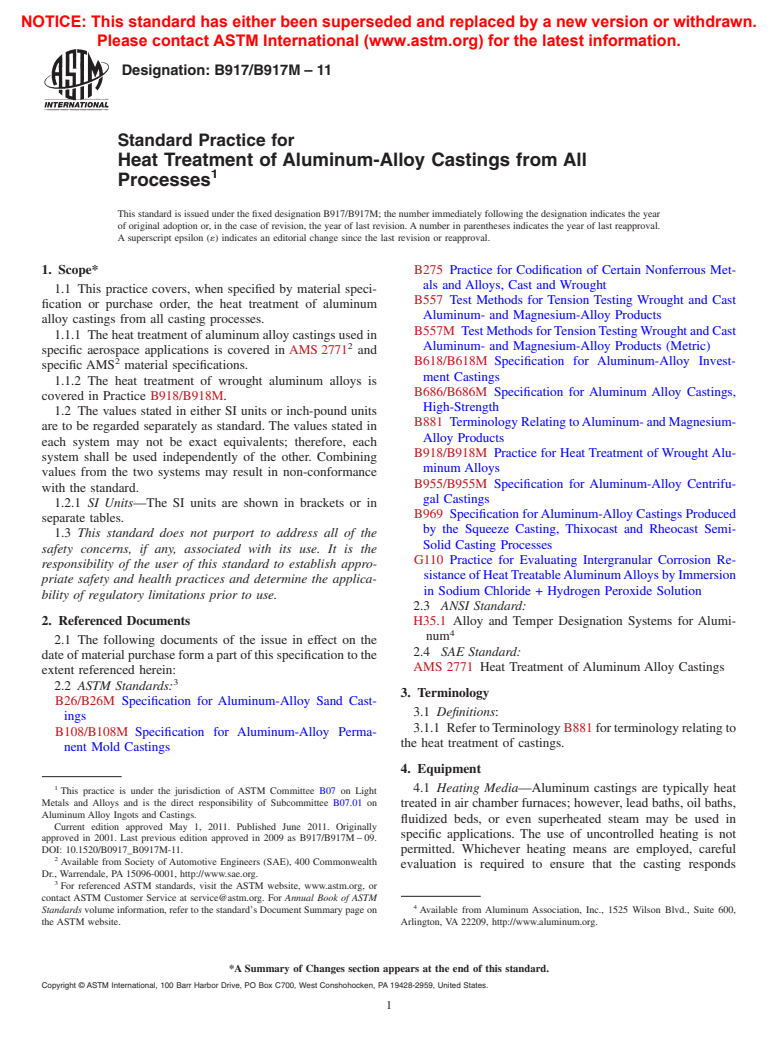
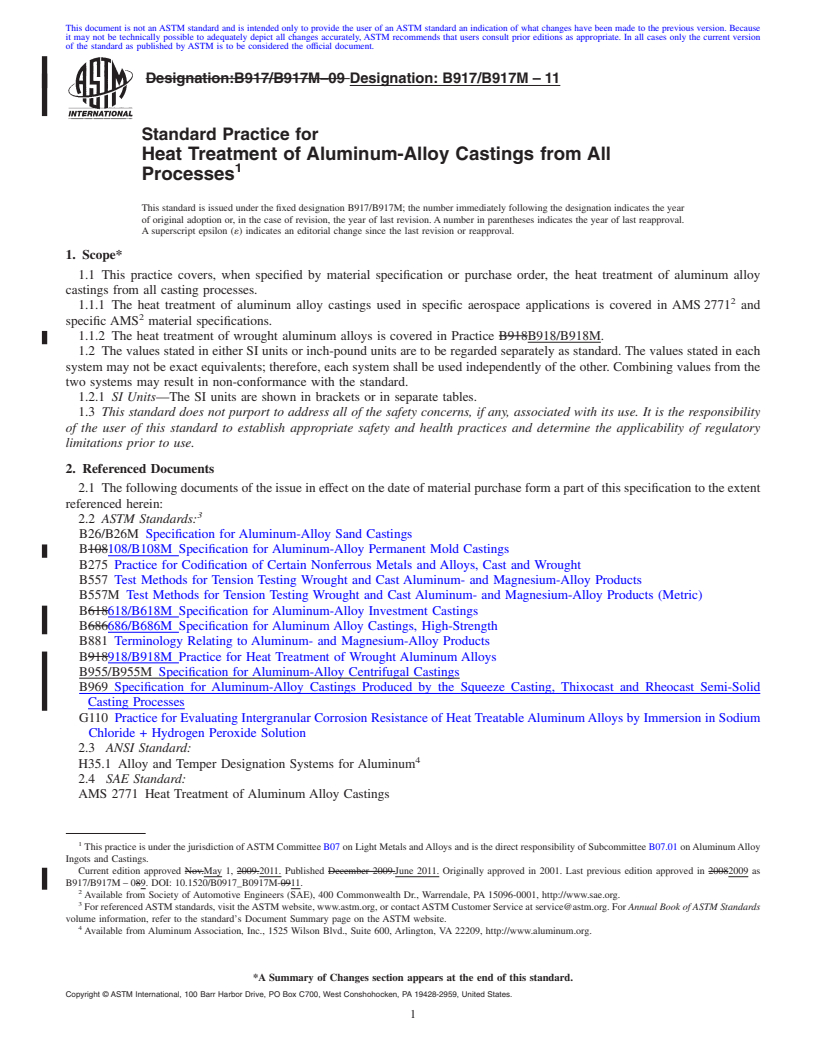
1.1 This practice covers, when specified by material specification or purchase order, the heat treatment of aluminum alloy castings from all casting processes.
1.1.1 The heat treatment of aluminum alloy castings used in specific aerospace applications is covered in AMS 2771 and specific AMS material specifications.
1.1.2 The heat treatment of wrought aluminum alloys is covered in Practice B918/B918M.
1.2 The values stated in either SI units or inch-pound units are to be regarded separately as standard. The values stated in each system may not be exact equivalents; therefore, each system shall be used independently of the other. Combining values from the two systems may result in non-conformance with the standard.
1.2.1 SI Units—The SI units are shown in brackets or in separate tables.
1.3 This standard does not purport to address all of the safety concerns, if any, associated with its use. It is the responsibility of the user of this standard to establish appropriate safety and health practices and determine the applicability of regulatory limitations prior to use.
General Information
Relations
Buy Standard
Standards Content (Sample)
NOTICE: This standard has either been superseded and replaced by a new version or withdrawn.
Please contact ASTM International (www.astm.org) for the latest information.
Designation: B917/B917M – 11
Standard Practice for
Heat Treatment of Aluminum-Alloy Castings from All
1
Processes
This standard is issued under the fixed designation B917/B917M; the number immediately following the designation indicates the year
of original adoption or, in the case of revision, the year of last revision. A number in parentheses indicates the year of last reapproval.
A superscript epsilon (´) indicates an editorial change since the last revision or reapproval.
1. Scope* B275 Practice for Codification of Certain Nonferrous Met-
als and Alloys, Cast and Wrought
1.1 This practice covers, when specified by material speci-
B557 Test Methods for Tension Testing Wrought and Cast
fication or purchase order, the heat treatment of aluminum
Aluminum- and Magnesium-Alloy Products
alloy castings from all casting processes.
B557M TestMethodsforTensionTestingWroughtandCast
1.1.1 The heat treatment of aluminum alloy castings used in
2 Aluminum- and Magnesium-Alloy Products (Metric)
specific aerospace applications is covered in AMS 2771 and
2
B618/B618M Specification for Aluminum-Alloy Invest-
specific AMS material specifications.
ment Castings
1.1.2 The heat treatment of wrought aluminum alloys is
B686/B686M Specification for Aluminum Alloy Castings,
covered in Practice B918/B918M.
High-Strength
1.2 The values stated in either SI units or inch-pound units
B881 TerminologyRelatingtoAluminum-andMagnesium-
are to be regarded separately as standard. The values stated in
Alloy Products
each system may not be exact equivalents; therefore, each
B918/B918M Practice for Heat Treatment of Wrought Alu-
system shall be used independently of the other. Combining
minum Alloys
values from the two systems may result in non-conformance
B955/B955M Specification for Aluminum-Alloy Centrifu-
with the standard.
gal Castings
1.2.1 SI Units—The SI units are shown in brackets or in
B969 Specification forAluminum-Alloy Castings Produced
separate tables.
by the Squeeze Casting, Thixocast and Rheocast Semi-
1.3 This standard does not purport to address all of the
Solid Casting Processes
safety concerns, if any, associated with its use. It is the
G110 Practice for Evaluating Intergranular Corrosion Re-
responsibility of the user of this standard to establish appro-
sistanceofHeatTreatableAluminumAlloysbyImmersion
priate safety and health practices and determine the applica-
in Sodium Chloride + Hydrogen Peroxide Solution
bility of regulatory limitations prior to use.
2.3 ANSI Standard:
2. Referenced Documents
H35.1 Alloy and Temper Designation Systems for Alumi-
4
num
2.1 The following documents of the issue in effect on the
2.4 SAE Standard:
dateofmaterialpurchaseformapartofthisspecificationtothe
AMS 2771 Heat Treatment of Aluminum Alloy Castings
extent referenced herein:
3
2.2 ASTM Standards:
3. Terminology
B26/B26M Specification for Aluminum-Alloy Sand Cast-
3.1 Definitions:
ings
3.1.1 RefertoTerminologyB881forterminologyrelatingto
B108/B108M Specification for Aluminum-Alloy Perma-
the heat treatment of castings.
nent Mold Castings
4. Equipment
1
4.1 Heating Media—Aluminum castings are typically heat
This practice is under the jurisdiction of ASTM Committee B07 on Light
Metals and Alloys and is the direct responsibility of Subcommittee B07.01 on
treated in air chamber furnaces; however, lead baths, oil baths,
Aluminum Alloy Ingots and Castings.
fluidized beds, or even superheated steam may be used in
Current edition approved May 1, 2011. Published June 2011. Originally
specific applications. The use of uncontrolled heating is not
approved in 2001. Last previous edition approved in 2009 as B917/B917M – 09.
DOI: 10.1520/B0917_B0917M-11. permitted. Whichever heating means are employed, careful
2
Available from Society of Automotive Engineers (SAE), 400 Commonwealth
evaluation is required to ensure that the casting responds
Dr., Warrendale, PA 15096-0001, http://www.sae.org.
3
For referenced ASTM standards, visit the ASTM website, www.astm.org, or
contact ASTM Customer Service at service@astm.org. For Annual Book of ASTM
4
Standards volume information, refer to the standard’s Document Summary page on Available from Aluminum Association, Inc., 1525 Wilson Blvd., Suite 600,
the ASTM website. Arlington, VA 22209, http://www.aluminum.org.
*ASummary of Changes section appears at the end of this standard.
Copyright © ASTM International, 100 Barr Harbor Drive, PO Box C700, West Conshohocken, PA 19428-2959, United States.
1
---------------------- Page: 1 ----------------------
NOTICE: This standard has either been superseded and replaced by a new version or withdrawn.
Please contact ASTM International (www.astm.org) for the latest information.
B917/B917M – 11
properly to heat treatment and is not overheated or damaged by 5.1.2 Working instruments shall be calibrated at least once
the heat
...
This document is not anASTM standard and is intended only to provide the user of anASTM standard an indication of what changes have been made to the previous version. Because
it may not be technically possible to adequately depict all changes accurately, ASTM recommends that users consult prior editions as appropriate. In all cases only the current version
of the standard as published by ASTM is to be considered the official document.
Designation:B917/B917M–09 Designation: B917/B917M – 11
Standard Practice for
Heat Treatment of Aluminum-Alloy Castings from All
1
Processes
This standard is issued under the fixed designation B917/B917M; the number immediately following the designation indicates the year
of original adoption or, in the case of revision, the year of last revision. A number in parentheses indicates the year of last reapproval.
A superscript epsilon (´) indicates an editorial change since the last revision or reapproval.
1. Scope*
1.1 This practice covers, when specified by material specification or purchase order, the heat treatment of aluminum alloy
castings from all casting processes.
2
1.1.1 The heat treatment of aluminum alloy castings used in specific aerospace applications is covered in AMS 2771 and
2
specific AMS material specifications.
1.1.2 The heat treatment of wrought aluminum alloys is covered in Practice B918B918/B918M.
1.2 The values stated in either SI units or inch-pound units are to be regarded separately as standard. The values stated in each
system may not be exact equivalents; therefore, each system shall be used independently of the other. Combining values from the
two systems may result in non-conformance with the standard.
1.2.1 SI Units—The SI units are shown in brackets or in separate tables.
1.3 This standard does not purport to address all of the safety concerns, if any, associated with its use. It is the responsibility
of the user of this standard to establish appropriate safety and health practices and determine the applicability of regulatory
limitations prior to use.
2. Referenced Documents
2.1 The following documents of the issue in effect on the date of material purchase form a part of this specification to the extent
referenced herein:
3
2.2 ASTM Standards:
B26/B26M Specification for Aluminum-Alloy Sand Castings
B108108/B108M Specification for Aluminum-Alloy Permanent Mold Castings
B275 Practice for Codification of Certain Nonferrous Metals and Alloys, Cast and Wrought
B557 Test Methods for Tension Testing Wrought and Cast Aluminum- and Magnesium-Alloy Products
B557M Test Methods for Tension Testing Wrought and Cast Aluminum- and Magnesium-Alloy Products (Metric)
B618618/B618M Specification for Aluminum-Alloy Investment Castings
B686686/B686M Specification for Aluminum Alloy Castings, High-Strength
B881 Terminology Relating to Aluminum- and Magnesium-Alloy Products
B918918/B918M Practice for Heat Treatment of Wrought Aluminum Alloys
B955/B955M Specification for Aluminum-Alloy Centrifugal Castings
B969 Specification for Aluminum-Alloy Castings Produced by the Squeeze Casting, Thixocast and Rheocast Semi-Solid
Casting Processes
G110 Practice for Evaluating Intergranular Corrosion Resistance of Heat TreatableAluminumAlloys by Immersion in Sodium
Chloride + Hydrogen Peroxide Solution
2.3 ANSI Standard:
4
H35.1 Alloy and Temper Designation Systems for Aluminum
2.4 SAE Standard:
AMS 2771 Heat Treatment of Aluminum Alloy Castings
1
This practice is under the jurisdiction ofASTM Committee B07 on Light Metals andAlloys and is the direct responsibility of Subcommittee B07.01 onAluminumAlloy
Ingots and Castings.
Current edition approved Nov.May 1, 2009.2011. Published December 2009.June 2011. Originally approved in 2001. Last previous edition approved in 20082009 as
B917/B917M – 089. DOI: 10.1520/B0917_B0917M-0911.
2
Available from Society of Automotive Engineers (SAE), 400 Commonwealth Dr., Warrendale, PA 15096-0001, http://www.sae.org.
3
For referencedASTM standards, visit theASTM website, www.astm.org, or contactASTM Customer Service at service@astm.org. For Annual Book of ASTM Standards
volume information, refer to the standard’s Document Summary page on the ASTM website.
4
Available from Aluminum Association, Inc., 1525 Wilson Blvd., Suite 600, Arlington, VA 22209, http://www.aluminum.org.
*ASummary of Changes section appears at the end of this standard.
Copyright © ASTM International, 100 Barr Harbor Drive, PO Box C700, West Conshohocken, PA 19428-2959, United States.
1
---------------------- Page: 1 ----------------------
B917/B917M – 11
3. Terminology
3.1 Definitions:
3.1.1 Refer to Terminology B881 for terminology relating to the heat treatment of castings.
4. Equipment
4.1 Heating Media—Aluminum castings are typically heat treated in air chamber furnaces; however, lead baths, oil baths,
fluidized beds, or even superheated steam may be used in specific applications. The use of uncontrolled heating is not permitted.
Whichever heating means are employed, careful evaluation is
...


Questions, Comments and Discussion
Ask us and Technical Secretary will try to provide an answer. You can facilitate discussion about the standard in here.