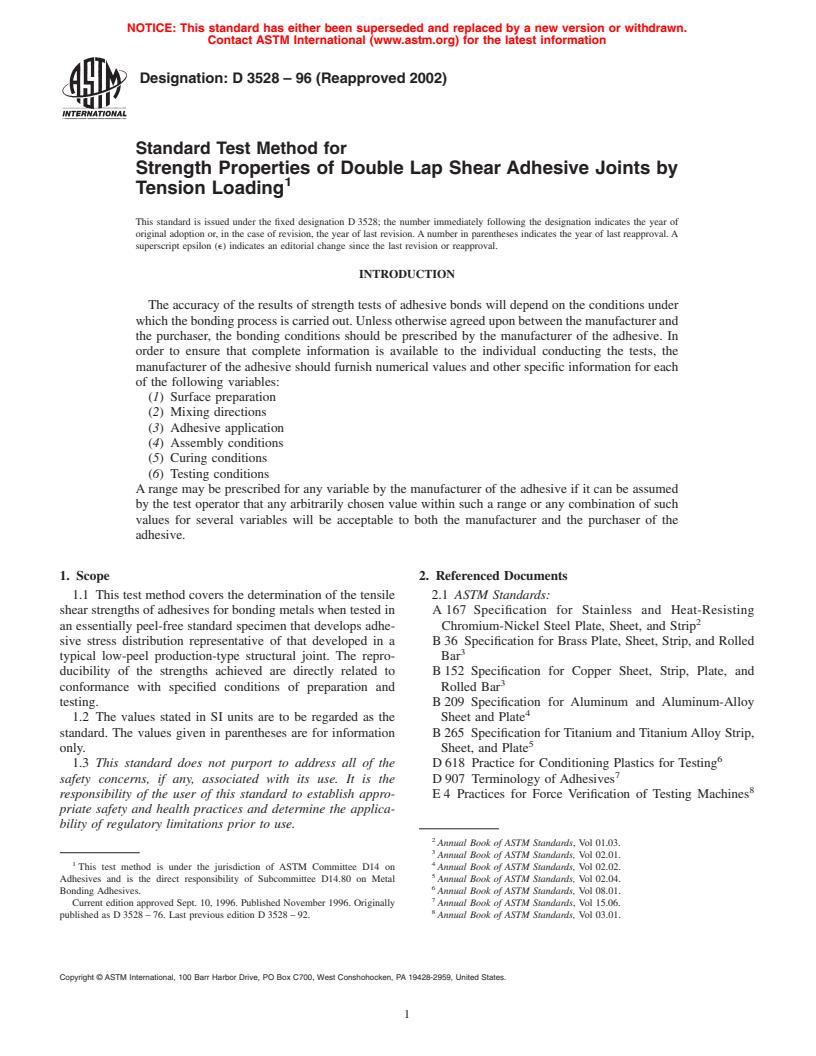
ASTM D3528-96(2002)
(Test Method)Standard Test Method for Strength Properties of Double Lap Shear Adhesive Joints by Tension Loading
Standard Test Method for Strength Properties of Double Lap Shear Adhesive Joints by Tension Loading
SIGNIFICANCE AND USE
This test method is designed to produce shear property data for the process control and specification of adhesives. This test method may also be useful for research and development of adhesives.
Lap shear properties vary with specimen configuration preparation, speed, and environment of testing. Consequently, where precise comparative results are desired, these factors must be carefully controlled and reported.
SCOPE
1.1 This test method covers the determination of the tensile shear strengths of adhesives for bonding metals when tested in an essentially peel-free standard specimen that develops adhesive stress distribution representative of that developed in a typical low-peel production-type structural joint. The reproducibility of the strengths achieved are directly related to conformance with specified conditions of preparation and testing.
1.2 The values stated in SI units are to be regarded as the standard. The values given in parentheses are for information only.
1.3 This standard does not purport to address all of the safety concerns, if any, associated with its use. It is the responsibility of the user of this standard to establish appropriate safety and health practices and determine the applicability of regulatory limitations prior to use.
General Information
Relations
Standards Content (Sample)
NOTICE: This standard has either been superseded and replaced by a new version or withdrawn.
Contact ASTM International (www.astm.org) for the latest information
Designation:D3528–96(Reapproved2002)
Standard Test Method for
Strength Properties of Double Lap Shear Adhesive Joints by
Tension Loading
This standard is issued under the fixed designation D 3528; the number immediately following the designation indicates the year of
original adoption or, in the case of revision, the year of last revision. A number in parentheses indicates the year of last reapproval. A
superscript epsilon (e) indicates an editorial change since the last revision or reapproval.
INTRODUCTION
The accuracy of the results of strength tests of adhesive bonds will depend on the conditions under
which the bonding process is carried out. Unless otherwise agreed upon between the manufacturer and
the purchaser, the bonding conditions should be prescribed by the manufacturer of the adhesive. In
order to ensure that complete information is available to the individual conducting the tests, the
manufacturer of the adhesive should furnish numerical values and other specific information for each
of the following variables:
(1) Surface preparation
(2) Mixing directions
(3) Adhesive application
(4) Assembly conditions
(5) Curing conditions
(6) Testing conditions
A range may be prescribed for any variable by the manufacturer of the adhesive if it can be assumed
by the test operator that any arbitrarily chosen value within such a range or any combination of such
values for several variables will be acceptable to both the manufacturer and the purchaser of the
adhesive.
1. Scope 2. Referenced Documents
1.1 This test method covers the determination of the tensile 2.1 ASTM Standards:
shear strengths of adhesives for bonding metals when tested in A 167 Specification for Stainless and Heat-Resisting
an essentially peel-free standard specimen that develops adhe- Chromium-Nickel Steel Plate, Sheet, and Strip
sive stress distribution representative of that developed in a B 36 Specification for Brass Plate, Sheet, Strip, and Rolled
typical low-peel production-type structural joint. The repro- Bar
ducibility of the strengths achieved are directly related to B 152 Specification for Copper Sheet, Strip, Plate, and
conformance with specified conditions of preparation and Rolled Bar
testing. B 209 Specification for Aluminum and Aluminum-Alloy
1.2 The values stated in SI units are to be regarded as the Sheet and Plate
standard. The values given in parentheses are for information B 265 Specification for Titanium and Titanium Alloy Strip,
only. Sheet, and Plate
1.3 This standard does not purport to address all of the D 618 Practice for Conditioning Plastics for Testing
safety concerns, if any, associated with its use. It is the D 907 Terminology of Adhesives
responsibility of the user of this standard to establish appro- E 4 Practices for Force Verification of Testing Machines
priate safety and health practices and determine the applica-
bility of regulatory limitations prior to use.
Annual Book of ASTM Standards, Vol 01.03.
Annual Book of ASTM Standards, Vol 02.01.
1 4
This test method is under the jurisdiction of ASTM Committee D14 on Annual Book of ASTM Standards, Vol 02.02.
Adhesives and is the direct responsibility of Subcommittee D14.80 on Metal Annual Book of ASTM Standards, Vol 02.04.
Bonding Adhesives. Annual Book of ASTM Standards, Vol 08.01.
Current edition approved Sept. 10, 1996. Published November 1996. Originally Annual Book of ASTM Standards, Vol 15.06.
published as D 3528 – 76. Last previous edition D 3528 – 92. Annual Book of ASTM Standards, Vol 03.01.
Copyright © ASTM International, 100 Barr Harbor Drive, PO Box C700, West Conshohocken, PA 19428-2959, United States.
D3528–96 (2002)
E 122 Practice for Calculating Sample Size, With a Speci-
fied Tolerable Error, the Average for a Characteristic of a
Lot or Process
E 171 Specification for Standard Atmospheres for Condi-
tioning and Testing Flexible Barrier Materials
3. Terminology
3.1 Definitions—Many terms in this test method are defined
in Terminology D 907.
4. Significance and Use
4.1 This test method is designed to produce shear property
datafortheprocesscontrolandspecificationofadhesives.This
test method may also be useful for research and development
T =1.6mm
T =3.2mm
of adhesives.
A = Test Gluelines
4.2 Lap shear properties vary with specimen configuration
B = Spacer = T
preparation, speed, and environment of testing. Consequently, C = Area in Test Grips
D Shear Area
where precise comparative results are desired, these factors
FIG. 1 Form and Dimensions of Type A Specimens
must be carefully controlled and reported.
5. Apparatus
5.1 Testing Machine, conforming to the requirements of
Practices E 4. The testing machine should be so selected that
the breaking load of the specimens falls between 15 and 85 %
of the full-scale capacity. The machine should be capable of
maintaining a rate of loading of 8.27 to 9.65 MPa (1200 to
1400 psi)/min, or if the rate is dependent on crosshead motion,
the machine should be set to approach the rate of loading. It
should be provided with a suitable pair of self-aligning grips to
hold the specimen. The grips and attachments should be so
constructed that they will move into alignment with the test
specimen as soon as the load is applied, so that the long axis of
thetestspecimenwillcoincidewiththedirectionoftheapplied
pull through the center line of the grip assembly.
T =1.6mm
T =3.2mm
6. Test Specimen 2
A = Test Gluelines
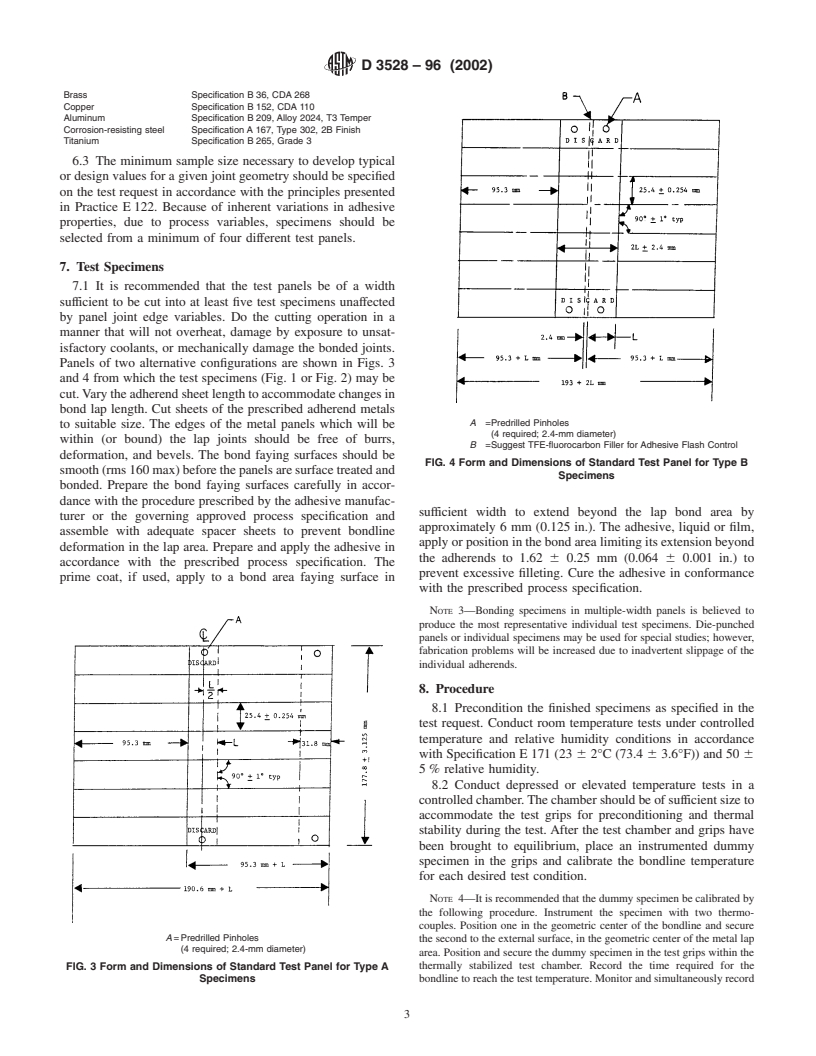
6.1 The test specimens should conform to one of the
B = Area in Test Grips
C = Shear areas
alternative types as dimensioned and shown in Fig. 1 or Fig. 2.
Cut the specimens from the appropriate test panels that have FIG. 2 Form and Dimensions of Type B Specimen
been prepared as prescribed in Section 7. For aluminum-alloy
where:
specimens the recommended thickness of the sheet is 3.24 6
L = length of overlap, in., (Figs. 1 and 2),
0.125 mm (0.125 6 0.005 in.). The recommended test overlap
t = thickness of doubler, in., (Figs. 1 and 2),
length (L) for most metals, with adherends of the prescribed
t = thickness of adherend in., (Figs. 1 and 2),
metal thickness and arranged as shown in Figs. 1 and 2, is 12.7
Fty = yield point of adherend (or stress at proportional limit), psi,
6 0.25 mm (0.5 6 0.01 in.).
and
t = 150 % of the estimated average shear strength of the adhesive
NOTE 1—Since it is undesirable to exceed the yield point of the metal
bond, psi.
in tension during test, the permissible length of overlap in the specimen
NOTE 2—Variations in adherend thickness, and of the length of the
will vary with the thickness and type of metal and on the general level of
overlap, normally influence the test values and make direct comparison of
strength of the adhesive being investigated. The maximum permissible
test data questionable. Therefore, it is preferable for the comparative or
length may be computed from the following relationship:
specification tests, to standardize on the typical specimen configuration
Fty t Fty t
shown with appropriate adherend gages as computed in accordance with
1 2
L 5 and L 5
t 2
Note 1. When specimens incorporating special lap lengths are developed
for specific studies, the adherend gage and geometry, once established,
should not be altered.
9 6.2 The following grades of metals are recommended for
Annual Book of ASTM Standards, Vol 14.02.
Annual Book of ASTM Standards, Vol 15.09. the test specimens:
D3528–96 (2002)
Brass Specification B 36, CDA 268
Copper Specification B 152, CDA 110
Aluminum Specification B 209, Alloy 2024, T3 Temper
Corrosion-resisting steel Specification A 167, Type 302, 2B Finish
Titanium Specification B 265, Grade 3
6.3 The minimum sample size necessary to deve
...


Questions, Comments and Discussion
Ask us and Technical Secretary will try to provide an answer. You can facilitate discussion about the standard in here.