ASTM D6132-13
(Test Method)Standard Test Method for Nondestructive Measurement of Dry Film Thickness of Applied Organic Coatings Using an Ultrasonic Coating Thickness Gage
Standard Test Method for Nondestructive Measurement of Dry Film Thickness of Applied Organic Coatings Using an Ultrasonic Coating Thickness Gage
SIGNIFICANCE AND USE
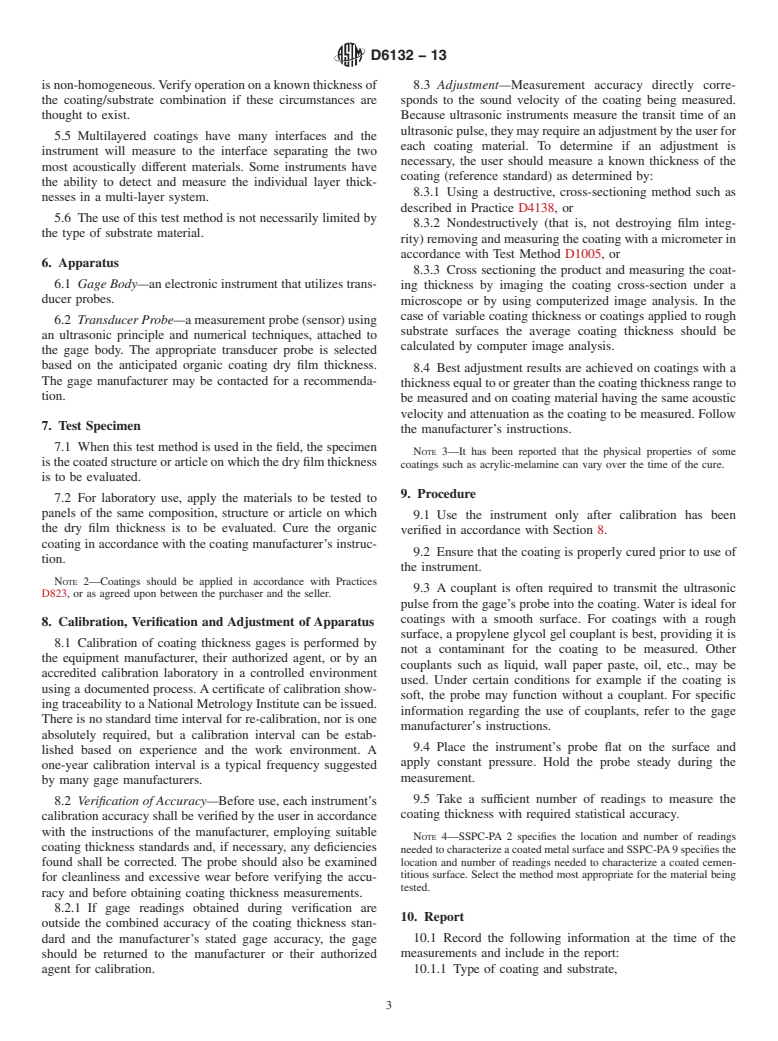
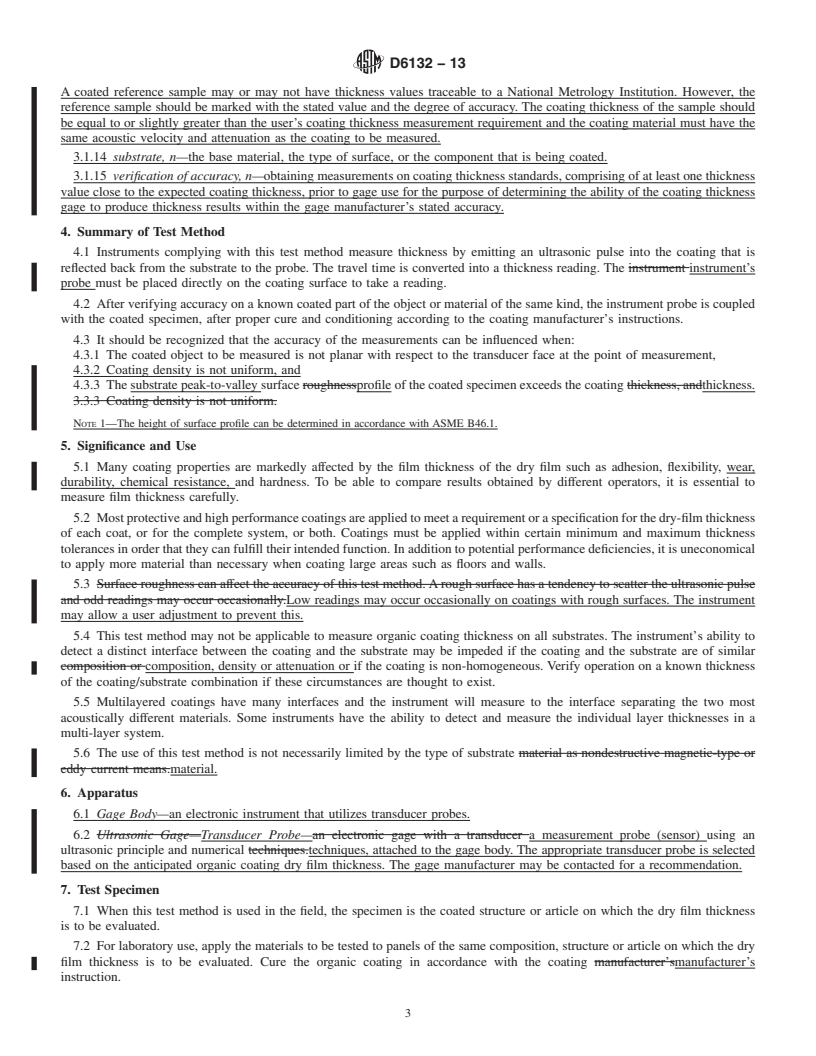
5.1 Many coating properties are markedly affected by the film thickness of the dry film such as adhesion, flexibility, wear, durability, chemical resistance, and hardness. To be able to compare results obtained by different operators, it is essential to measure film thickness carefully.
5.2 Most protective and high performance coatings are applied to meet a requirement or a specification for the dry-film thickness of each coat, or for the complete system, or both. Coatings must be applied within certain minimum and maximum thickness tolerances in order that they can fulfill their intended function. In addition to potential performance deficiencies, it is uneconomical to apply more material than necessary when coating large areas such as floors and walls.
5.3 Low readings may occur occasionally on coatings with rough surfaces. The instrument may allow a user adjustment to prevent this.
5.4 This test method may not be applicable to measure organic coating thickness on all substrates. The instrument's ability to detect a distinct interface between the coating and the substrate may be impeded if the coating and the substrate are of similar composition, density or attenuation or if the coating is non-homogeneous. Verify operation on a known thickness of the coating/substrate combination if these circumstances are thought to exist.
5.5 Multilayered coatings have many interfaces and the instrument will measure to the interface separating the two most acoustically different materials. Some instruments have the ability to detect and measure the individual layer thicknesses in a multi-layer system.
5.6 The use of this test method is not necessarily limited by the type of substrate material.
SCOPE
1.1 This test method describes the use of ultrasonic film thickness gages to measure accurately and nondestructively the dry film thickness of organic coatings applied over a substrate of dissimilar material. Measurements may be made on field structures, on commercially manufactured products, or on laboratory test specimens. These types of gages can accurately measure the dry film thickness of organic coatings on a variety of substrates such as concrete, wood, wallboard, plastic, fiber composites and metal.
1.2 This test method is not applicable to coatings that will be readily deformable under load of the measuring instrument as the instrument probe is placed directly on the coating surface to take a reading.
1.3 The effective range of instruments using the principle of ultrasonics is limited by gage design. A thickness range of 8 μm to 7.60 mm (0.3 to 300 mils) has been demonstrated.
1.4 The values stated in SI units are to be regarded as standard. No other units of measurement are included in this standard.
1.5 This standard does not purport to address the safety concerns, if any, associated with its use. It is the responsibility of the user of this standard to establish appropriate safety and health practices and determine the applicability of regulatory limitations prior to use.
General Information
Relations
Buy Standard
Standards Content (Sample)
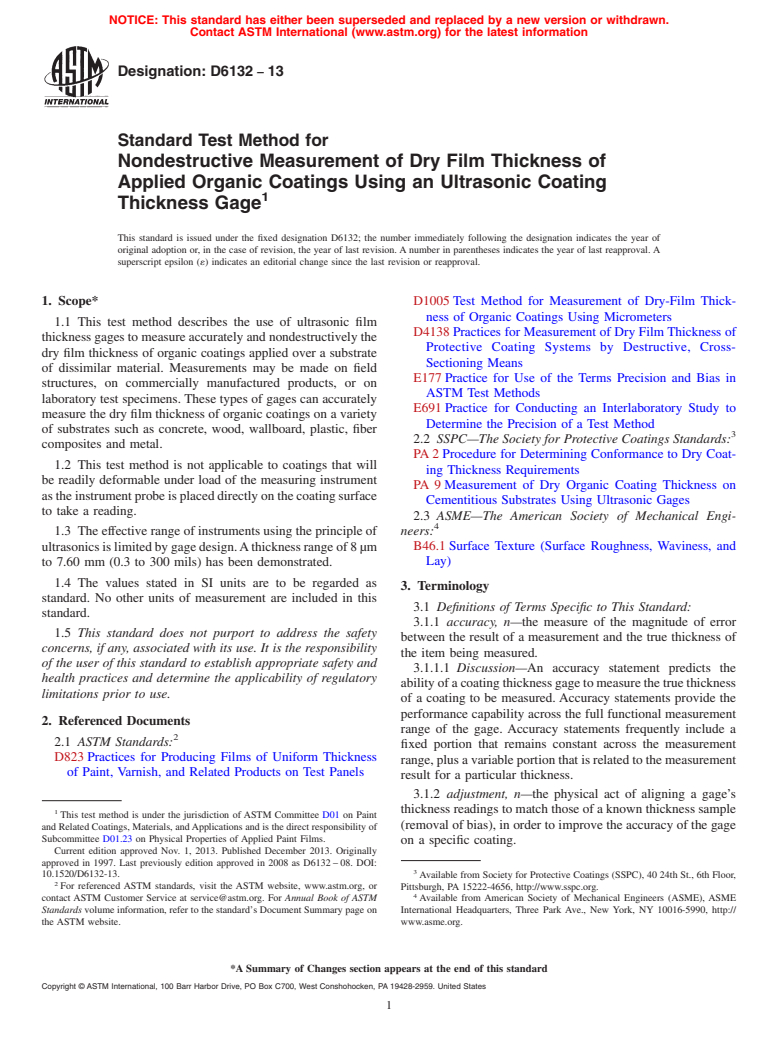
NOTICE: This standard has either been superseded and replaced by a new version or withdrawn.
Contact ASTM International (www.astm.org) for the latest information
Designation: D6132 − 13
Standard Test Method for
Nondestructive Measurement of Dry Film Thickness of
Applied Organic Coatings Using an Ultrasonic Coating
1
Thickness Gage
This standard is issued under the fixed designation D6132; the number immediately following the designation indicates the year of
original adoption or, in the case of revision, the year of last revision. A number in parentheses indicates the year of last reapproval. A
superscript epsilon (´) indicates an editorial change since the last revision or reapproval.
1. Scope* D1005 Test Method for Measurement of Dry-Film Thick-
ness of Organic Coatings Using Micrometers
1.1 This test method describes the use of ultrasonic film
D4138 Practices for Measurement of Dry Film Thickness of
thicknessgagestomeasureaccuratelyandnondestructivelythe
Protective Coating Systems by Destructive, Cross-
dry film thickness of organic coatings applied over a substrate
Sectioning Means
of dissimilar material. Measurements may be made on field
E177 Practice for Use of the Terms Precision and Bias in
structures, on commercially manufactured products, or on
ASTM Test Methods
laboratory test specimens. These types of gages can accurately
E691 Practice for Conducting an Interlaboratory Study to
measure the dry film thickness of organic coatings on a variety
Determine the Precision of a Test Method
of substrates such as concrete, wood, wallboard, plastic, fiber
3
2.2 SSPC—The Society for Protective Coatings Standards:
composites and metal.
PA 2 Procedure for Determining Conformance to Dry Coat-
1.2 This test method is not applicable to coatings that will
ing Thickness Requirements
be readily deformable under load of the measuring instrument
PA 9 Measurement of Dry Organic Coating Thickness on
astheinstrumentprobeisplaceddirectlyonthecoatingsurface
Cementitious Substrates Using Ultrasonic Gages
to take a reading.
2.3 ASME—The American Society of Mechanical Engi-
4
neers:
1.3 The effective range of instruments using the principle of
ultrasonicsislimitedbygagedesign.Athicknessrangeof8µm B46.1 Surface Texture (Surface Roughness, Waviness, and
Lay)
to 7.60 mm (0.3 to 300 mils) has been demonstrated.
1.4 The values stated in SI units are to be regarded as
3. Terminology
standard. No other units of measurement are included in this
3.1 Definitions of Terms Specific to This Standard:
standard.
3.1.1 accuracy, n—the measure of the magnitude of error
1.5 This standard does not purport to address the safety
between the result of a measurement and the true thickness of
concerns, if any, associated with its use. It is the responsibility
the item being measured.
of the user of this standard to establish appropriate safety and
3.1.1.1 Discussion—An accuracy statement predicts the
health practices and determine the applicability of regulatory
abilityofacoatingthicknessgagetomeasurethetruethickness
limitations prior to use.
of a coating to be measured. Accuracy statements provide the
performance capability across the full functional measurement
2. Referenced Documents
range of the gage. Accuracy statements frequently include a
2
2.1 ASTM Standards:
fixed portion that remains constant across the measurement
D823 Practices for Producing Films of Uniform Thickness
range,plusavariableportionthatisrelatedtothemeasurement
of Paint, Varnish, and Related Products on Test Panels
result for a particular thickness.
3.1.2 adjustment, n—the physical act of aligning a gage’s
thickness readings to match those of a known thickness sample
1
This test method is under the jurisdiction of ASTM Committee D01 on Paint
and Related Coatings, Materials, andApplications and is the direct responsibility of (removal of bias), in order to improve the accuracy of the gage
Subcommittee D01.23 on Physical Properties of Applied Paint Films.
on a specific coating.
Current edition approved Nov. 1, 2013. Published December 2013. Originally
approved in 1997. Last previously edition approved in 2008 as D6132 – 08. DOI:
3
10.1520/D6132-13. Available from Society for Protective Coatings (SSPC), 40 24th St., 6th Floor,
2
For referenced ASTM standards, visit the ASTM website, www.astm.org, or Pittsburgh, PA 15222-4656, http://www.sspc.org.
4
contact ASTM Customer Service at service@astm.org. For Annual Book of ASTM Available from American Society of Mechanical Engineers (ASME), ASME
Standards volume information, refer to the standard’s Document Summary page on International Headquarters, Three Park Ave., New York, NY 10016-5990, http://
the ASTM website. www.asme.org.
*A Summary of Changes section appears at the end of this standard
Copyright © ASTM International, 100 Barr Harbor Drive, PO Box C700, West Conshohocken, PA 19428-2959. United States
1
---------------------- Page: 1 ----------------------
D6132 − 13
3.1.2.1 Discussion—An adjustment will affect the outcome greater
...
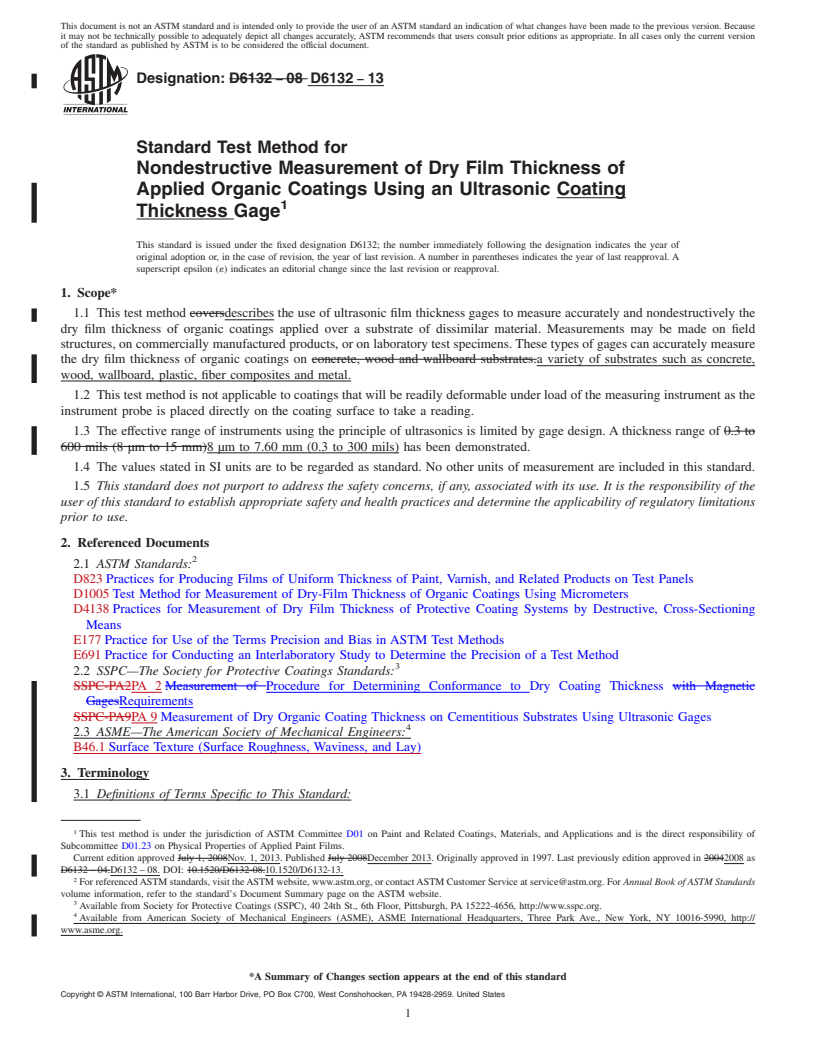
This document is not an ASTM standard and is intended only to provide the user of an ASTM standard an indication of what changes have been made to the previous version. Because
it may not be technically possible to adequately depict all changes accurately, ASTM recommends that users consult prior editions as appropriate. In all cases only the current version
of the standard as published by ASTM is to be considered the official document.
Designation: D6132 − 08 D6132 − 13
Standard Test Method for
Nondestructive Measurement of Dry Film Thickness of
Applied Organic Coatings Using an Ultrasonic Coating
1
Thickness Gage
This standard is issued under the fixed designation D6132; the number immediately following the designation indicates the year of
original adoption or, in the case of revision, the year of last revision. A number in parentheses indicates the year of last reapproval. A
superscript epsilon (´) indicates an editorial change since the last revision or reapproval.
1. Scope*
1.1 This test method coversdescribes the use of ultrasonic film thickness gages to measure accurately and nondestructively the
dry film thickness of organic coatings applied over a substrate of dissimilar material. Measurements may be made on field
structures, on commercially manufactured products, or on laboratory test specimens. These types of gages can accurately measure
the dry film thickness of organic coatings on concrete, wood and wallboard substrates.a variety of substrates such as concrete,
wood, wallboard, plastic, fiber composites and metal.
1.2 This test method is not applicable to coatings that will be readily deformable under load of the measuring instrument as the
instrument probe is placed directly on the coating surface to take a reading.
1.3 The effective range of instruments using the principle of ultrasonics is limited by gage design. A thickness range of 0.3 to
600 mils (8 μm to 15 mm)8 μm to 7.60 mm (0.3 to 300 mils) has been demonstrated.
1.4 The values stated in SI units are to be regarded as standard. No other units of measurement are included in this standard.
1.5 This standard does not purport to address the safety concerns, if any, associated with its use. It is the responsibility of the
user of this standard to establish appropriate safety and health practices and determine the applicability of regulatory limitations
prior to use.
2. Referenced Documents
2
2.1 ASTM Standards:
D823 Practices for Producing Films of Uniform Thickness of Paint, Varnish, and Related Products on Test Panels
D1005 Test Method for Measurement of Dry-Film Thickness of Organic Coatings Using Micrometers
D4138 Practices for Measurement of Dry Film Thickness of Protective Coating Systems by Destructive, Cross-Sectioning
Means
E177 Practice for Use of the Terms Precision and Bias in ASTM Test Methods
E691 Practice for Conducting an Interlaboratory Study to Determine the Precision of a Test Method
3
2.2 SSPC—The Society for Protective Coatings Standards:
SSPC-PA2PA 2 Measurement of Procedure for Determining Conformance to Dry Coating Thickness with Magnetic
GagesRequirements
SSPC-PA9PA 9 Measurement of Dry Organic Coating Thickness on Cementitious Substrates Using Ultrasonic Gages
4
2.3 ASME—The American Society of Mechanical Engineers:
B46.1 Surface Texture (Surface Roughness, Waviness, and Lay)
3. Terminology
3.1 Definitions of Terms Specific to This Standard:
1
This test method is under the jurisdiction of ASTM Committee D01 on Paint and Related Coatings, Materials, and Applications and is the direct responsibility of
Subcommittee D01.23 on Physical Properties of Applied Paint Films.
Current edition approved July 1, 2008Nov. 1, 2013. Published July 2008December 2013. Originally approved in 1997. Last previously edition approved in 20042008 as
D6132 – 04.D6132 – 08. DOI: 10.1520/D6132-08.10.1520/D6132-13.
2
For referenced ASTM standards, visit the ASTM website, www.astm.org, or contact ASTM Customer Service at service@astm.org. For Annual Book of ASTM Standards
volume information, refer to the standard’s Document Summary page on the ASTM website.
3
Available from Society for Protective Coatings (SSPC), 40 24th St., 6th Floor, Pittsburgh, PA 15222-4656, http://www.sspc.org.
4
Available from American Society of Mechanical Engineers (ASME), ASME International Headquarters, Three Park Ave., New York, NY 10016-5990, http://
www.asme.org.
*A Summary of Changes section appears at the end of this standard
Copyright © ASTM International, 100 Barr Harbor Drive, PO Box C700, West Conshohocken, PA 19428-2959. United States
1
---------------------- Page: 1 ----------------------
D6132 − 13
3.1.1 accuracy, n—the measure of the magnitude of error between the result of a measurement and the true thickness of the item
being measured.
3.1.1.1 Discussion—
An accuracy statement predicts the ability of a coating thickness gage to measure the true thickness of a coating to be measured.
Accuracy statements provide the performance capability across the full
...


Questions, Comments and Discussion
Ask us and Technical Secretary will try to provide an answer. You can facilitate discussion about the standard in here.