ASTM E1770-19
(Practice)Standard Practice for Optimization of Instrumentation for Graphite Furnace Atomic Absorption Spectrometry
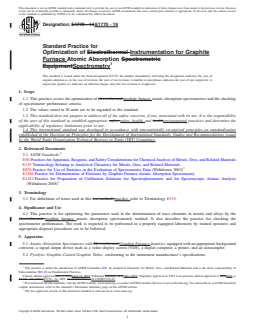
Standard Practice for Optimization of Instrumentation for Graphite Furnace Atomic Absorption Spectrometry
SIGNIFICANCE AND USE
4.1 This practice is for optimizing the parameters used in the determination of trace elements in metals and alloys by the graphite furnace atomic absorption spectrometric method. It also describes the practice for checking the spectrometer performance. The work is expected to be performed in a properly equipped laboratory by trained operators and appropriate disposal procedures are to be followed.
SCOPE
1.1 This practice covers the optimization of graphite furnace atomic absorption spectrometers and the checking of spectrometer performance criteria.
1.2 The values stated in SI units are to be regarded as the standard.
1.3 This standard does not purport to address all of the safety concerns, if any, associated with its use. It is the responsibility of the user of this standard to establish appropriate safety, health, and environmental practices and determine the applicability of regulatory limitations prior to use.
1.4 This international standard was developed in accordance with internationally recognized principles on standardization established in the Decision on Principles for the Development of International Standards, Guides and Recommendations issued by the World Trade Organization Technical Barriers to Trade (TBT) Committee.
General Information
- Status
- Published
- Publication Date
- 14-Apr-2019
- Technical Committee
- E01 - Analytical Chemistry for Metals, Ores, and Related Materials
- Drafting Committee
- E01.20 - Fundamental Practices
Relations
- Effective Date
- 15-Apr-2019
- Effective Date
- 01-Jan-2020
- Effective Date
- 15-May-2019
- Effective Date
- 01-Sep-2017
- Effective Date
- 01-Aug-2016
- Effective Date
- 15-May-2016
- Effective Date
- 01-Jul-2015
- Effective Date
- 15-May-2015
- Effective Date
- 15-Aug-2014
- Effective Date
- 01-Apr-2014
- Effective Date
- 15-Feb-2014
- Effective Date
- 01-Dec-2013
- Effective Date
- 15-Oct-2011
- Effective Date
- 15-Sep-2011
- Effective Date
- 15-Jun-2011
Overview
ASTM E1770-19: Standard Practice for Optimization of Instrumentation for Graphite Furnace Atomic Absorption Spectrometry provides essential guidelines for the effective and safe use of graphite furnace atomic absorption spectrometers (GFAAS) within analytical laboratories. Developed by ASTM International, this standard outlines methods for the optimization of instrumentation and the verification of spectrometer performance when analyzing trace elements in metals and alloys. Its adoption facilitates greater reliability, sensitivity, and accuracy in trace metal analysis.
Key Topics
- Optimization Procedures: The standard describes systematic approaches for setting and refining critical parameters such as drying, pyrolysis, atomization, and clean-out steps in the graphite furnace heating program.
- Instrument Checks: It details performance verification procedures, including background correction, autosampler operation, and the use of calibration solutions to ensure precise measurement.
- Spectrometer Performance Criteria: Guidance is provided on evaluating instrument sensitivity (characteristic mass), measurement variability (standard deviation, RSD), detection limits, and linearity of calibration graphs.
- Operational Safety: ASTM E1770-19 emphasizes the responsibility of users to follow laboratory safety, health, and environmental practices, noting that the standard itself does not address all potential hazards.
- Terminology and Referenced Methods: The document references related ASTM practices and terminology relevant to analytical chemistry of metals and alloys, such as calibration and reagent purity.
Applications
The standard is widely used in analytical chemistry, particularly for:
- Trace Elements Analysis: Optimizing GFAAS systems ensures accurate detection and quantification of trace metals in materials such as steel, nickel alloys, and various metal matrices.
- Quality Control: Laboratories engaged in metal production, environmental monitoring, and material certification use ASTM E1770-19 to comply with rigorous quality and performance standards.
- Laboratory Best Practices: Following these procedures helps laboratories maintain globally recognized best practices for GFAAS, enhancing reproducibility and credibility in test results.
- Research and Development: Academic and industrial research involving advanced metallurgical studies often relies on the standard’s optimization methodologies for reliable data.
Related Standards
ASTM E1770-19 references and aligns with several other ASTM standards to support comprehensive analytical protocols, including:
- ASTM E50: Practices for Apparatus, Reagents, and Safety Considerations for Chemical Analysis of Metals, Ores, and Related Materials
- ASTM E135: Terminology Relating to Analytical Chemistry for Metals, Ores, and Related Materials
- ASTM E1184: Practice for Determination of Elements by Graphite Furnace Atomic Absorption Spectrometry
- ASTM E1452: Practice for Preparation of Calibration Solutions for Spectrophotometric and Spectroscopic Atomic Analysis
These referenced standards cover apparatus specifications, reagent requirements, terminology, calibration procedures, and statistical analysis, forming an integrated framework for trace element determination in various matrices.
Summary
ASTM E1770-19 is a foundational standard for professionals utilizing graphite furnace atomic absorption spectrometry. By following its comprehensive procedures for instrument optimization and performance validation, laboratories can achieve high-precision trace metal analysis in compliance with international best practices. This standard is essential for maintaining accuracy, reproducibility, and safety in modern analytical chemistry laboratories focused on metals and alloys.
Buy Documents
ASTM E1770-19 - Standard Practice for Optimization of Instrumentation for Graphite Furnace Atomic Absorption Spectrometry
REDLINE ASTM E1770-19 - Standard Practice for Optimization of Instrumentation for Graphite Furnace Atomic Absorption Spectrometry
Get Certified
Connect with accredited certification bodies for this standard

ECOCERT
Organic and sustainability certification.

Eurofins Food Testing Global
Global leader in food, environment, and pharmaceutical product testing.

Intertek Bangladesh
Intertek certification and testing services in Bangladesh.
Sponsored listings
Frequently Asked Questions
ASTM E1770-19 is a standard published by ASTM International. Its full title is "Standard Practice for Optimization of Instrumentation for Graphite Furnace Atomic Absorption Spectrometry". This standard covers: SIGNIFICANCE AND USE 4.1 This practice is for optimizing the parameters used in the determination of trace elements in metals and alloys by the graphite furnace atomic absorption spectrometric method. It also describes the practice for checking the spectrometer performance. The work is expected to be performed in a properly equipped laboratory by trained operators and appropriate disposal procedures are to be followed. SCOPE 1.1 This practice covers the optimization of graphite furnace atomic absorption spectrometers and the checking of spectrometer performance criteria. 1.2 The values stated in SI units are to be regarded as the standard. 1.3 This standard does not purport to address all of the safety concerns, if any, associated with its use. It is the responsibility of the user of this standard to establish appropriate safety, health, and environmental practices and determine the applicability of regulatory limitations prior to use. 1.4 This international standard was developed in accordance with internationally recognized principles on standardization established in the Decision on Principles for the Development of International Standards, Guides and Recommendations issued by the World Trade Organization Technical Barriers to Trade (TBT) Committee.
SIGNIFICANCE AND USE 4.1 This practice is for optimizing the parameters used in the determination of trace elements in metals and alloys by the graphite furnace atomic absorption spectrometric method. It also describes the practice for checking the spectrometer performance. The work is expected to be performed in a properly equipped laboratory by trained operators and appropriate disposal procedures are to be followed. SCOPE 1.1 This practice covers the optimization of graphite furnace atomic absorption spectrometers and the checking of spectrometer performance criteria. 1.2 The values stated in SI units are to be regarded as the standard. 1.3 This standard does not purport to address all of the safety concerns, if any, associated with its use. It is the responsibility of the user of this standard to establish appropriate safety, health, and environmental practices and determine the applicability of regulatory limitations prior to use. 1.4 This international standard was developed in accordance with internationally recognized principles on standardization established in the Decision on Principles for the Development of International Standards, Guides and Recommendations issued by the World Trade Organization Technical Barriers to Trade (TBT) Committee.
ASTM E1770-19 is classified under the following ICS (International Classification for Standards) categories: 71.040.50 - Physicochemical methods of analysis. The ICS classification helps identify the subject area and facilitates finding related standards.
ASTM E1770-19 has the following relationships with other standards: It is inter standard links to ASTM E1770-14, ASTM E135-20, ASTM E135-19, ASTM E50-17, ASTM E50-11(2016), ASTM E135-16, ASTM E135-15a, ASTM E135-15, ASTM E135-14b, ASTM E135-14a, ASTM E135-14, ASTM E135-13a, ASTM E50-11, ASTM E135-11b, ASTM E135-11a. Understanding these relationships helps ensure you are using the most current and applicable version of the standard.
ASTM E1770-19 is available in PDF format for immediate download after purchase. The document can be added to your cart and obtained through the secure checkout process. Digital delivery ensures instant access to the complete standard document.
Standards Content (Sample)
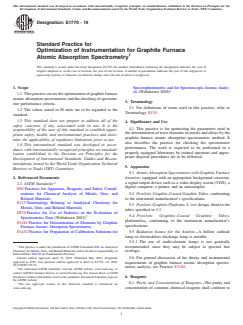
This international standard was developed in accordance with internationally recognized principles on standardization established in the Decision on Principles for the
Development of International Standards, Guides and Recommendations issued by the World Trade Organization Technical Barriers to Trade (TBT) Committee.
Designation: E1770 − 19
Standard Practice for
Optimization of Instrumentation for Graphite Furnace
Atomic Absorption Spectrometry
This standard is issued under the fixed designation E1770; the number immediately following the designation indicates the year of
original adoption or, in the case of revision, the year of last revision. A number in parentheses indicates the year of last reapproval. A
superscript epsilon (´) indicates an editorial change since the last revision or reapproval.
1. Scope Spectrophotometric and for Spectroscopic Atomic Analy-
sis (Withdrawn 2005)
1.1 Thispracticecoverstheoptimizationofgraphitefurnace
atomicabsorptionspectrometersandthecheckingofspectrom-
3. Terminology
eter performance criteria.
3.1 For definitions of terms used in this practice, refer to
1.2 The values stated in SI units are to be regarded as the
Terminology E135.
standard.
1.3 This standard does not purport to address all of the
4. Significance and Use
safety concerns, if any, associated with its use. It is the
4.1 This practice is for optimizing the parameters used in
responsibility of the user of this standard to establish appro-
the determination of trace elements in metals and alloys by the
priate safety, health, and environmental practices and deter-
graphite furnace atomic absorption spectrometric method. It
mine the applicability of regulatory limitations prior to use.
also describes the practice for checking the spectrometer
1.4 This international standard was developed in accor-
performance. The work is expected to be performed in a
dance with internationally recognized principles on standard-
properly equipped laboratory by trained operators and appro-
ization established in the Decision on Principles for the
priate disposal procedures are to be followed.
Development of International Standards, Guides and Recom-
mendations issued by the World Trade Organization Technical
5. Apparatus
Barriers to Trade (TBT) Committee.
5.1 Atomic Absorption Spectrometer with Graphite Furnace
2. Referenced Documents Atomizer, equipped with an appropriate background corrector,
2 a signal output device such as a video display screen (VDS), a
2.1 ASTM Standards:
digital computer, a printer, and an autosampler.
E50 Practices for Apparatus, Reagents, and Safety Consid-
erations for Chemical Analysis of Metals, Ores, and 5.2 Pyrolytic Graphite-Coated Graphite Tubes, conforming
Related Materials to the instrument manufacturer’s specifications.
E135 Terminology Relating to Analytical Chemistry for
5.3 Pyrolytic Graphite Platforms, L’vov design, fitted to the
Metals, Ores, and Related Materials
tubes specified in 5.2.
E876 Practice for Use of Statistics in the Evaluation of
5.4 Pyrolytic Graphite-Coated Graphite Tubes,
Spectrometric Data (Withdrawn 2003)
platformless, conforming to the instrument manufacturer’s
E1184 Practice for Determination of Elements by Graphite
specifications.
Furnace Atomic Absorption Spectrometry
E1452 Practice for Preparation of Calibration Solutions for 5.5 Radiation Source for the Analyte—A hollow cathode
lamp or electrodeless discharge lamp is suitable.
5.5.1 The use of multi-element lamps is not generally
This practice is under the jurisdiction of ASTM Committee E01 on Analytical recommended, since they may be subject to spectral line
Chemistry for Metals, Ores, and Related Materials and is the direct responsibility of
overlaps.
Subcommittee E01.20 on Fundamental Practices.
Current edition approved April 15, 2019. Published May 2019. Originally 5.6 For general discussion of the theory and instrumental
approved in 1995. Last previous edition approved in 2014 as E1770 – 14. DOI:
requirements of graphite furnace atomic absorption spectro-
10.1520/E1770-19.
metric analysis, see Practice E1184.
For referenced ASTM standards, visit the ASTM website, www.astm.org, or
contact ASTM Customer Service at service@astm.org. For Annual Book of ASTM
Standards volume information, refer to the standard’s Document Summary page on 6. Reagents
the ASTM website.
6.1 Purity and Concentration of Reagents—The purity and
The last approved version of this historical standard is referenced on
www.astm.org. concentration of common chemical reagents shall conform to
Copyright © ASTM International, 100 Barr Harbor Drive, PO Box C700, West Conshohocken, PA 19428-2959. United States
E1770 − 19
Practices E50. The reagents should be free of or contain 9.2 Slit Width, as recommended by the manufacturer.Where
minimal amounts (<0.01 µg/g) of the analyte of interest. two slit width settings are available, select the shorter width.
6.2 Magnesium Nitrate Solution(2g/L)—Dissolve0.36g 6 9.3 Background Correction:
0.01 g high-purity Mg(NO ) •6H O in about 50 mL of water, 9.3.1 Zeeman Background Correction System:
3 2 2
in a 100-mL beaker, and transfer the solution into a 100-mL 9.3.1.1 Ensure that the poles of the magnet are clean and
volumetric flask. Dilute to mark with water and mix. Store in securely tightened.
polypropylene or high-density polyethylene bottle. 9.3.1.2 If necessary, set the optical temperature sensor as
Alternatively, this solution may be purchased from a commer- directed in the instrument manufacturer’s instructions.
cial supplier. 9.3.2 Continuum Background System:
9.3.2.1 Select the background correction option and allow
6.3 Calibration Solutions—Refer to the preparation of cali-
lamps to stabilize for 30 min. Verify that the energies of the
bration solutions in the relevant analytical method for the
analyte lamp and the deuterium lamp are balanced within
determination of trace elements in the specific matrix. Calibra-
tolerances recommended by the manufacturer.
tion solution S represents the calibration solution containing
9.3.2.2 If necessary, set the optical temperature sensor as
no analyte; S the least concentrated calibration solution; S
1 2
directed in the instrument manufacturer’s recommendation.
-the calibration solution with the next highest concentration;
9.3.3 To check the performance of the background correc-
through S , the most concentrated calibration solution. Also
k
tion system, measure the atomic background absorbance of 20
refer to Practice E1452.
µL of 2 g/L magnesium nitrate solution at a wavelength in the
6.4 Matrix Modifiers—Refer to the relevant analytical
200 nm to 250 nm region (for example, Bi 223.1 nm) using a
method for the determination of trace elements in the specific
dry temperature of 120 °C, a pyrolysis temperature of 950 °C,
matrix.
and an atomization temperature of 1800 °C. A large back-
ground signal should be observed with no over-or under-
7. Initial Checks and Adjustments
correction of the atomic signal.
7.1 Turn on power, cooling water, gas supplies, and fume
NOTE 1—In general, Zeeman systems should compensate for back-
exhaust system as required for the instrument being used.
ground levels as high as 1.0 absorbance unit to 1.5 absorbance units. A
7.2 Open the furnace to inspect the tube and contacts. continuum correction system should be able to correct for the broad-band
background absorbance up to 0.5 absorbance unit to 0.6 absorbance unit.
Replace graphite components, if wear or contamination is
evident. Inspect windows and clean or replace as required.
9.4 Autosampler—Check operation of the autosampler. Pay
7.2.1 New graphite contacts or new tubes should be condi-
particular attention to the condition of the pipette tip and
tioned prior to use, as directed in the heating program recom-
position of the tip during sample deposition. Clean the pipette
mended by the manufacturer.
tip with methanol. Adjust as directed in the manufacturer’s
7.2.1.1 In the absence of manufacturer’s recommendations,
instructions.
a conditioning program for a graphite furnace is shown in
NOTE 2—Use of an appropriate surfactant in the rinse water may
Table 1.
enhance operation. If a surfactant is used, it should be checked for the
presence of all the analytes to be determined.
8. Radiation Source
8.1 Install and operate hollow cathode lamps or electrode- 10. Optimization of the Furnace Heating Program
less discharge lamps as directed in the manufacturer’s instruc-
10.1 Optimization of the furnace heating program is essen-
tions.
tial. Furnace programs recommended by the manufacturers are
often designed for samples of a completely unrelated matrix.
8.2 After the manufacturer’s prescribed warm-up time, the
signal from the radiation source should not deviate by more The analyst shall optimize the furnace program for a particular
sample matrix (for example, steel, nickel alloys, etc.) and
than 0.5 % from the maximum value (that is, by not more than
0.002 absorbance units) over a period of 15 min. Significantly modifier system as follows:
greater fluctuations are usually indicative of a faulty lamp or
Furnace Step Section
power supply.
Drying 10.2
Pyrolysis 10.3
9. Spectrometer Parameters
Atomization 10.4
Clean-out 10.5
9.1 Wavelength, as specified by the appropriate procedure.
10.2 Drying Step:
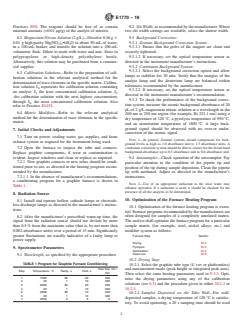
TABLE 1 Program for Graphite Furnace Conditioning
10.2.1 Select the graphite tube type (L’vov or platformless)
Gas flow, mL/ and measurement mode (peak height or integrated peak area).
Step Temperature, °C Ramp, s Hold, s
min
Then select the same heating parameters used in 9.3.3. Opti-
1 1500 60 20 300
mize the drying parameters using any of the calibration
2 20 1 10 300
solutions (see 6.3) and the procedure given in either 10.2.2 or
3 2000 60 20 300
4 20 1 10 300 10.2.3.
5 2600 60 10 300
10.2.2 Samples Deposited on the Tube Wall—For wall-
6 20 1 10 300
deposited samples, a drying temperature of 120 °C is satisfac-
7 2650 2 5 0
tory. To avoid spattering, a 20 s ramping time should be used
E1770 − 19
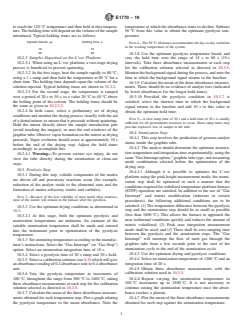
to reach the 120 °C temperature and then held at that tempera- temperature at which the absorbance starts to decline. Subtract
ture.Theholdingtimewilldependonthevolumeofthesample 50 °C from this value to obtain the optimum pyrolysis tem-
introduced. Typical holding times are as follows: perature.
Injected Volume, µL Holding Time, s
NOTE4—The50 °Callowanceaccommodatestheday-to-dayvariations
in the working temperature of the system.
10 15
40 30
10.3.8 Use the optimum pyrolysis temperature found, and
10.2.3 Samples Deposited on the L’vov Platform:
vary the hold time over the range of 15 s to 60 s (15-s
10.2.3.1 When using an L’vov platform, a two-stage drying intervals). Take three absorbance measurements at each step
process is beneficial to prevent spattering. for the calibration solution selected as directed in 10.3.5.
10.2.3.2 In the first stage, heat the sample rapidly to 80 °C, Monitorthebackgroundsignalduringtheprocess,andnotethe
usinga1s ramp and then hold the temperature at 80 °C for a time at which the background signal returns to the baseline.
short time. The holding time depends upon the volume of the
10.3.9 Calculate the mean of the three absorbance measure-
solution injected. Typical holding times are shown in 10.2.2. ments. There should be no evidence of analyte loss (indicated
10.2.3.3 For the second stage, the temperature is ramped
by lower absorbances for the longer hold times).
over a period of 20 s to 30 s, to a value 20 °C to 40 °C above
10.3.10 Provided the pyrolysis condition in 10.3
...
This document is not an ASTM standard and is intended only to provide the user of an ASTM standard an indication of what changes have been made to the previous version. Because
it may not be technically possible to adequately depict all changes accurately, ASTM recommends that users consult prior editions as appropriate. In all cases only the current version
of the standard as published by ASTM is to be considered the official document.
Designation: E1770 − 14 E1770 − 19
Standard Practice for
Optimization of Electrothermal Instrumentation for Graphite
Furnace Atomic Absorption Spectrometric
EquipmentSpectrometry
This standard is issued under the fixed designation E1770; the number immediately following the designation indicates the year of
original adoption or, in the case of revision, the year of last revision. A number in parentheses indicates the year of last reapproval. A
superscript epsilon (´) indicates an editorial change since the last revision or reapproval.
1. Scope
1.1 This practice covers the optimization of electrothermal graphite furnace atomic absorption spectrometers and the checking
of spectrometer performance criteria.
1.2 The values stated in SI units are to be regarded as the standard.
1.3 This standard does not purport to address all of the safety concerns, if any, associated with its use. It is the responsibility
of the user of this standard to establish appropriate safety safety, health, and healthenvironmental practices and determine the
applicability of regulatory limitations prior to use.
1.4 This international standard was developed in accordance with internationally recognized principles on standardization
established in the Decision on Principles for the Development of International Standards, Guides and Recommendations issued
by the World Trade Organization Technical Barriers to Trade (TBT) Committee.
2. Referenced Documents
2.1 ASTM Standards:
E50 Practices for Apparatus, Reagents, and Safety Considerations for Chemical Analysis of Metals, Ores, and Related Materials
E135 Terminology Relating to Analytical Chemistry for Metals, Ores, and Related Materials
E876 Practice for Use of Statistics in the Evaluation of Spectrometric Data (Withdrawn 2003)
E1184 Practice for Determination of Elements by Graphite Furnace Atomic Absorption Spectrometry
E1452 Practice for Preparation of Calibration Solutions for Spectrophotometric and for Spectroscopic Atomic Analysis
(Withdrawn 2005)
3. Terminology
3.1 For definitions of terms used in this test method, practice, refer to Terminology E135.
4. Significance and Use
4.1 This practice is for optimizing the parameters used in the determination of trace elements in metals and alloys by the
electrothermal graphite furnace atomic absorption spectrometric method. It also describes the practice for checking the
spectrometer performance. The work is expected to be performed in a properly equipped laboratory by trained operators and
appropriate disposal procedures are to be followed.
5. Apparatus
5.1 Atomic Absorption Spectrometer with Electrothermal Graphite Furnace Atomizer, equipped with an appropriate background
corrector, a signal output device such as a video display screen (VDS), a digital computer, a printer, and an autosampler.
5.2 Pyrolytic Graphite-Coated Graphite Tubes, conforming to the instrument manufacturer’s specifications.
This practice is under the jurisdiction of ASTM Committee E01 on Analytical Chemistry for Metals, Ores, and Related Materials and is the direct responsibility of
Subcommittee E01.20 on Fundamental Practices.
Current edition approved Dec. 1, 2014April 15, 2019. Published February 2015 May 2019. Originally approved in 1995. Last previous edition approved in 20062014 as
E1770 – 95 (2006).E1770 – 14. DOI: 10.1520/E1770-14.10.1520/E1770-19.
For referenced ASTM standards, visit the ASTM website, www.astm.org, or contact ASTM Customer Service at service@astm.org. For Annual Book of ASTM Standards
volume information, refer to the standard’s Document Summary page on the ASTM website.
The last approved version of this historical standard is referenced on www.astm.org.
Copyright © ASTM International, 100 Barr Harbor Drive, PO Box C700, West Conshohocken, PA 19428-2959. United States
E1770 − 19
5.3 Pyrolytic Graphite Platforms, L’vov design, fitted to the tubes specified in 5.2.
5.4 Pyrolytic Graphite-Coated Graphite Tubes, platformless, conforming to the instrument manufacturer’s specifications.
5.5 Radiation Source for the Analyte—A hollow cathode lamp or electrodeless discharge lamp is suitable.
NOTE 1—The use of multi-element lamps is not generally recommended, since they may be subject to spectral line overlaps.
5.5.1 The use of multi-element lamps is not generally recommended, since they may be subject to spectral line overlaps.
5.6 For general discussion of the theory and instrumental requirements of electrothermal graphite furnace atomic absorption
spectrometric analysis, see Practice E1184.
6. Reagents
6.1 Purity and Concentration of Reagents—The purity and concentration of common chemical reagents shall conform to
Practices E50. The reagents should be free of or contain minimal amounts (<0.01 μg/g) of the analyte of interest.
6.2 Magnesium Nitrate Solution [2 g/L Mg(NO(2 g/L) ) ]—Dissolve 0.36 g 6 0.01 g high-purity Mg(NO ) ·6H•6H O in about
3 2 3 2 2
50 mL of water, in a 100-mL beaker, and transfer the solution into a 100-mL volumetric flask. Dilute to mark with water and mix.
Store in polypropylene or high-density polyethylene bottle. Alternatively, this solution may be purchased from a commercial
supplier.
6.3 Calibration Solutions—Refer to the preparation of calibration solutions in the relevant analytical method for the
determination of trace elements in the specific matrix. Calibration solution S represents the calibration solution containing no
analyte; S the least concentrated calibration solution; S the -the calibration solution with the next highest concentration; through
1 2
S , the most concentrated calibration solution. Also refer to Practice E1452.
k
6.4 Matrix Modifiers—Refer to the relevant analytical method for the determination of trace elements in the specific matrix.
7. Initial Checks and Adjustments
7.1 Turn on power, cooling water, gas supplies, and fume exhaust system as required for the instrument being used.
7.2 Open the furnace to inspect the tube and contacts. Replace graphite components, if wear or contamination is evident. Inspect
windows and clean or replace as required.
7.2.1 New graphite contacts or new tubes should be conditioned prior to use, in accordance withas directed in the heating
program recommended by the manufacturer.
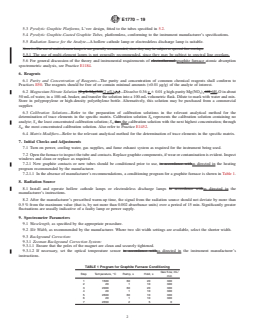
7.2.1.1 In the absence of manufacturer’s recommendations, a conditioning program for a graphite furnace is shown in Table 1.
8. Radiation Source
8.1 Install and operate hollow cathode lamps or electrodeless discharge lamps in accordance withas directed in the
manufacturer’s instructions.
8.2 After the manufacturer’s prescribed warm-up time, the signal from the radiation source should not deviate by more than
0.5 % from the maximum value (that is, by not more than 0.002 absorbance units) over a period of 15 min. Significantly greater
fluctuations are usually indicative of a faulty lamp or power supply.
9. Spectrometer Parameters
9.1 Wavelength, as specified by the appropriate procedure.
9.2 Slit Width, as recommended by the manufacturer. Where two slit width settings are available, select the shorter width.
9.3 Background Correction:
9.3.1 Zeeman Background Correction System:
9.3.1.1 Ensure that the poles of the magnet are clean and securely tightened.
9.3.1.2 If necessary, set the optical temperature sensor in accordance withas directed in the instrument manufacturer’s
instructions.
TABLE 1 Program for Graphite Furnace Conditioning
Gas flow, mL/
Step Temperature, °C Ramp, s Hold, s
min
1 1500 60 20 300
2 20 1 10 300
3 2000 60 20 300
4 20 1 10 300
5 2600 60 10 300
6 20 1 10 300
7 2650 2 5 0
E1770 − 19
9.3.2 Continuum Background System:
9.3.2.1 Select the background correction option and allow lamps to stabilize for 30 min. Verify that the energies of the analyte
lamp and the deuterium lamp are balanced within tolerances recommended by the manufacturer.
9.3.2.2 If necessary, set the optical temperature sensor in accordance withas directed in the instrument manufacturer’s
recommendation.
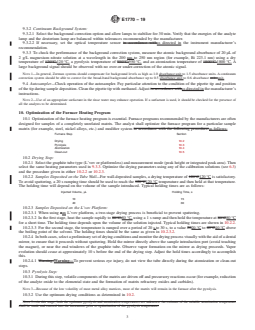
9.3.3 To check the performance of the background correction system, measure the atomic background absorbance of 20 μL of
2 g/L magnesium nitrate solution at a wavelength in the 200 nm to 250 nm region (for example, Bi 223.1 nm) using a dry
temperature of 120°C,120 °C, a pyrolysis temperature of 950°C,950 °C, and an atomization temperature of 1800°C.1800 °C. A
large background signal should be observed with no over-or under-correction of the atomic signal.
NOTE 1—In general, Zeeman systems should compensate for background levels as high as 1.0 absorbance unit to 1.5 absorbance units. A continuum
correction system should be able to correct for the broad-band background absorbance up to 0.5 absorbance unit to 0.6 absorbance units.unit.
9.4 Autosampler—Check operation of the autosampler. Pay particular attention to the condition of the pipette tip and position
of the tip during sample deposition. Clean the pipette tip with methanol. Adjust in accordance withas directed in the manufacturer’s
instructions.
NOTE 2—Use of an appropriate surfactant in the rinse water may enhance operation. If a surfactant is used, it should be checked for the presence of
all the analytes to be determined.
10. Optimization of the Furnace Heating Program
10.1 Optimization of the furnace heating program is essential. Furnace programs recommended by the manufacturers are often
designed for samples of a completely unrelated matrix. The analyst shall optimize the furnace program for a particular sample
matrix (for example, steel, nickel alloys, etc.) and modifier system in accordance with the following procedure:as follows:
Furnace Step Section
Drying 10.2
Pyrolysis 10.3
Atomization 10.4
Clean-out 10.5
10.2 Drying Step:
10.2.1 Select the graphite tube type (L’vov or platformless) and measurement mode (peak height or integrated peak area). Then
select the same heating parameters used in 9.3.3. Optimize the drying parameters using any of the calibration solutions (see 6.3)
and the procedure given in either 10.2.2 or 10.2.3.
10.2.2 Samples Deposited on the Tube Wall—For wall-deposited samples, a drying temperature of 120°C120 °C is satisfactory.
To avoid spattering, a 20 s ramping time should be used to reach the 120°C120 °C temperature and then held at that temperature.
The holding time will depend on the volume of the sample introduced. Typical holding times are as follows:
Injected Volume, μL Holding Time, s
10 15
40 30
10.2.3 Samples Deposited on the L’vov Platform:
10.2.3.1 When using aan L’vov platform, a two-stage drying process is beneficial to prevent spattering.
10.2.3.2 In the first stage, heat the sample rapidly to 80°C,80 °C, using a 1 s ramp and then hold the temperature at 80°C80 °C
for a short time. The holding time depends upon the volume of the solution injected. Typical holding times are shown in 10.2.2.
10.2.3.3 For the second stage, the temperature is ramped over a period of 20 s to 30 s, to a value 2020 °C to 40°C40 °C above
the boiling point of the solvent. The holding times should be the same as given in 10.2.3.2.
10.2.4 In both cases, select a preliminary set of drying conditions and monitor the drying process visually with the aid of a dental
mirror, to ensure that it proceeds without spattering. Hold the mirror directly above the sample introduction port (avoid touching
the magnet), or near the end windows of the graphite tube. Observe vapor formation on the mirror as drying proceeds. Vapor
evolution should cease at approximately 10 s before the end of the drying step. Adjust the hold times accordingly to accomplish
this.
10.2.4.1 Warning:Warning—To prevent serious eye injury, do not view the tube directly during the atomization or clean-out
steps.
10.3 Pyrolysis Step:
10.3.1 During this step, volatile components of the matrix are driven off and precursory reactions occur (for example, reduction
of the analyte oxide to the elemental state and the formation of matrix refractory oxides and carbides).
NOTE 3—Because of the low volatility of most metal alloy matrices, most of the matrix will remain in the furnace after the pyrolysis.
10.3.2 Use the optimum drying conditions as determined in 10.2.
NOTE 5—At this stage, both the optimum pyrolysis and atomization temperatures are unknown. An estimate of the suitable atomization temperature
shall be made and entered into the instrument prior to optimization of the pyrolysis temperature.
E1770 − 19
10.3.2.1 At this st
...
Questions, Comments and Discussion
Ask us and Technical Secretary will try to provide an answer. You can facilitate discussion about the standard in here.
Loading comments...