ASTM F256-05
(Specification)Standard Specification for Chromium-Iron Sealing Alloys with 18 or 28 Percent Chromium
Standard Specification for Chromium-Iron Sealing Alloys with 18 or 28 Percent Chromium
SCOPE
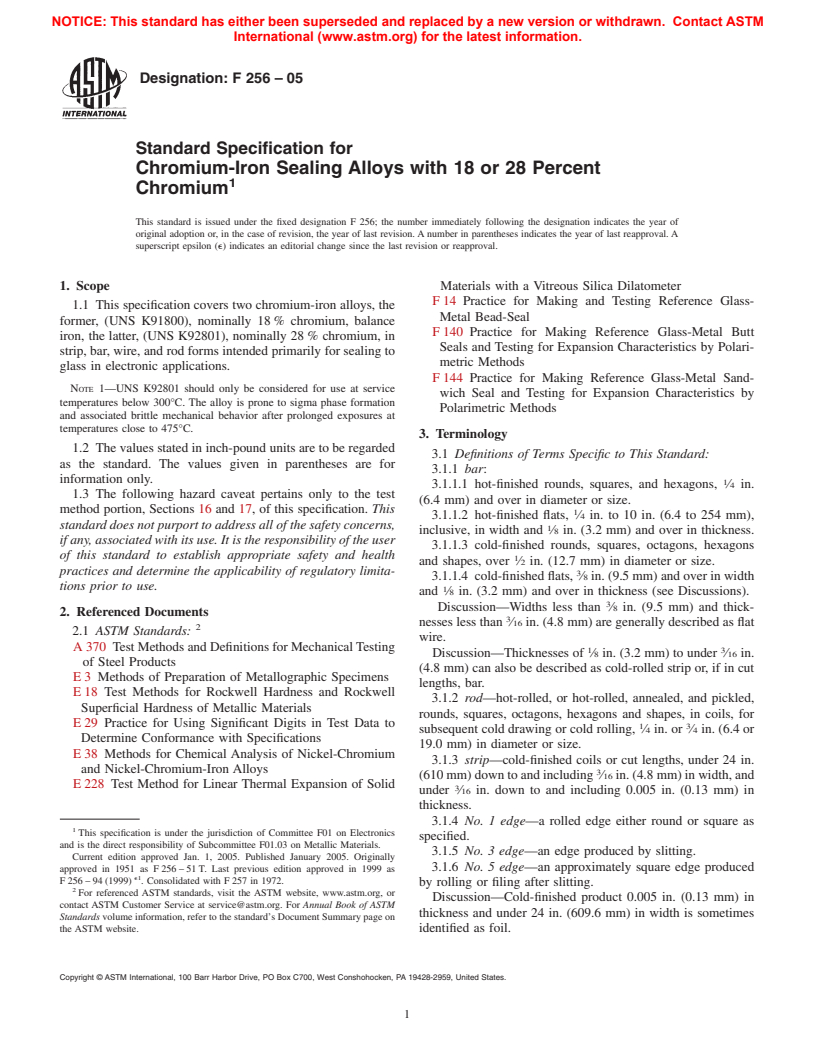
1.1 This specification covers two chromium-iron alloys, the former, (UNS K91800), nominally 18 % chromium, balance iron, the latter, (UNS K92801), nominally 28 % chromium, in strip, bar, wire, and rod forms intended primarily for sealing to glass in electronic applications.Note 1
UNS K92801 should only be considered for use at service temperatures below 300C. The alloy is prone to sigma phase formation and associated brittle mechanical behavior after prolonged exposures at temperatures close to 475C.
1.2 The values stated in inch-pound units are to be regarded as the standard. The values given in parentheses are for information only.
The following hazard caveat pertains only to the test method portion, Sections and , of this specification. This standard does not purport to address all of the safety concerns, if any, associated with its use. It is the responsibility of the user of this standard to establish appropriate safety and health practices and determine the applicability of regulatory limitations prior to use.
General Information
Relations
Standards Content (Sample)
NOTICE: This standard has either been superseded and replaced by a new version or withdrawn. Contact ASTM
International (www.astm.org) for the latest information.
Designation: F 256 – 05
Standard Specification for
Chromium-Iron Sealing Alloys with 18 or 28 Percent
1
Chromium
This standard is issued under the fixed designation F 256; the number immediately following the designation indicates the year of
original adoption or, in the case of revision, the year of last revision. A number in parentheses indicates the year of last reapproval. A
superscript epsilon (e) indicates an editorial change since the last revision or reapproval.
1. Scope Materials with a Vitreous Silica Dilatometer
F14 Practice for Making and Testing Reference Glass-
1.1 This specification covers two chromium-iron alloys, the
Metal Bead-Seal
former, (UNS K91800), nominally 18 % chromium, balance
F 140 Practice for Making Reference Glass-Metal Butt
iron, the latter, (UNS K92801), nominally 28 % chromium, in
Seals and Testing for Expansion Characteristics by Polari-
strip, bar, wire, and rod forms intended primarily for sealing to
metric Methods
glass in electronic applications.
F 144 Practice for Making Reference Glass-Metal Sand-
NOTE 1—UNS K92801 should only be considered for use at service
wich Seal and Testing for Expansion Characteristics by
temperatures below 300°C. The alloy is prone to sigma phase formation
Polarimetric Methods
and associated brittle mechanical behavior after prolonged exposures at
temperatures close to 475°C.
3. Terminology
1.2 The values stated in inch-pound units are to be regarded
3.1 Definitions of Terms Specific to This Standard:
as the standard. The values given in parentheses are for
3.1.1 bar:
information only.
1
3.1.1.1 hot-finished rounds, squares, and hexagons, ⁄4 in.
1.3 The following hazard caveat pertains only to the test
(6.4 mm) and over in diameter or size.
method portion, Sections 16 and 17, of this specification. This
1
3.1.1.2 hot-finished flats, ⁄4 in. to 10 in. (6.4 to 254 mm),
standard does not purport to address all of the safety concerns,
1
inclusive, in width and ⁄8 in. (3.2 mm) and over in thickness.
if any, associated with its use. It is the responsibility of the user
3.1.1.3 cold-finished rounds, squares, octagons, hexagons
of this standard to establish appropriate safety and health
1
and shapes, over ⁄2 in. (12.7 mm) in diameter or size.
practices and determine the applicability of regulatory limita-
3
3.1.1.4 cold-finished flats, ⁄8 in. (9.5 mm) and over in width
tions prior to use.
1
and ⁄8 in. (3.2 mm) and over in thickness (see Discussions).
3
Discussion—Widths less than ⁄8 in. (9.5 mm) and thick-
2. Referenced Documents
3
nesses less than ⁄16 in. (4.8 mm) are generally described as flat
2
2.1 ASTM Standards:
wire.
A 370 Test Methods and Definitions for MechanicalTesting
1 3
Discussion—Thicknesses of ⁄8 in. (3.2 mm) to under ⁄16 in.
of Steel Products
(4.8 mm) can also be described as cold-rolled strip or, if in cut
E3 Methods of Preparation of Metallographic Specimens
lengths, bar.
E18 Test Methods for Rockwell Hardness and Rockwell
3.1.2 rod—hot-rolled, or hot-rolled, annealed, and pickled,
Superficial Hardness of Metallic Materials
rounds, squares, octagons, hexagons and shapes, in coils, for
E29 Practice for Using Significant Digits in Test Data to
1 3
subsequent cold drawing or cold rolling, ⁄4 in. or ⁄4 in. (6.4 or
Determine Conformance with Specifications
19.0 mm) in diameter or size.
E38 Methods for Chemical Analysis of Nickel-Chromium
3.1.3 strip—cold-finished coils or cut lengths, under 24 in.
and Nickel-Chromium-Iron Alloys
3
(610mm)downtoandincluding ⁄16in.(4.8mm)inwidth,and
E 228 Test Method for Linear Thermal Expansion of Solid
3
under ⁄16 in. down to and including 0.005 in. (0.13 mm) in
thickness.
3.1.4 No. 1 edge—a rolled edge either round or square as
1
This specification is under the jurisdiction of Committee F01 on Electronics
specified.
and is the direct responsibility of Subcommittee F01.03 on Metallic Materials.
3.1.5 No. 3 edge—an edge produced by slitting.
Current edition approved Jan. 1, 2005. Published January 2005. Originally
3.1.6 No. 5 edge—an approximately square edge produced
approved in 1951 as F 256 – 51 T. Last previous edition approved in 1999 as
e1
F 256 – 94 (1999) . Consolidated with F 257 in 1972.
by rolling or filing after slitting.
2
For referenced ASTM standards, visit the ASTM website, www.astm.org, or
Discussion—Cold-finished product 0.005 in. (0.13 mm) in
contact ASTM Customer Service at service@astm.org. For Annual Book of ASTM
thickness and under 24 in. (609.6 mm) in width is sometimes
Standards volume information, refer to the standard’s Document Summary page on
the ASTM website. identified as foil.
Copyright © ASTM International, 100 Barr Harbor Drive, PO Box C700, West Conshohocken, PA 19428-2959, United States.
1
---------------------- Page: 1 ----------------------
NOTICE: This standard has either been superseded and replaced by a new version or wi
...


Questions, Comments and Discussion
Ask us and Technical Secretary will try to provide an answer. You can facilitate discussion about the standard in here.