ASTM E408-13(2019)
(Test Method)Standard Test Methods for Total Normal Emittance of Surfaces Using Inspection-Meter Techniques
Standard Test Methods for Total Normal Emittance of Surfaces Using Inspection-Meter Techniques
ABSTRACT
These test methods cover determination of the total normal emittance of surfaces by means of portable, inspection-meter instruments. At least two different types of instruments are commercially available for performing this measurement. Test Method A uses an instrument which measures radiant energy reflected from the specimen and Test Method B utilizes an instrument which measures radiant energy emitted from the specimen. Both test methods are limited in accuracy by the degree to which the emittance properties of calibrating standards are known and by the angular emittance characteristics of the surfaces being measure. Test Method A is normally subject to a small error caused by the difference in wavelength distributions between the radiant energy emitted by the two cavities at different temperatures, and that emitted by a blackbody at the specimen temperature. Test Method B also has nongray errors since the detector is not at absolute zero temperature. Test Method A is subject to small errors that may be introduced if the orientation of the sensing component is changed between calibration and specimen measurements. This type of error results from minor changes in alignment of the optical system. Test Method A is subject to error when curved specular surfaces of less than about a certain radius are measured. These errors can be minimized by using calibrating standards that have the same radius of curvature as the test surface. Test Method A can measure reflectance on specimens that are either opaque or semi-transparent in the wavelength region of interest. However, if emittance is to be derived from the reflectance data on a semi-transparent specimen, a correction must be made for transmittance losses. Test Method B is subject to several possible significant errors. These may be due to variation of the test surface temperature during measurements, differences in temperature between the calibrating standards and the test surfaces, changes in orientation of the sensing component between calibration and measurement, errors due to irradiation of the specimen with thermal radiation by the sensing component, and errors due to specimen curvature. Test Method B is limited to emittance measurements on specimens that are opaque to infrared radiation in the wavelength region of interest.
SCOPE
1.1 These test methods cover determination of the total normal emittance (Note 1) of surfaces by means of portable, as well as desktop, inspection-meter instruments.
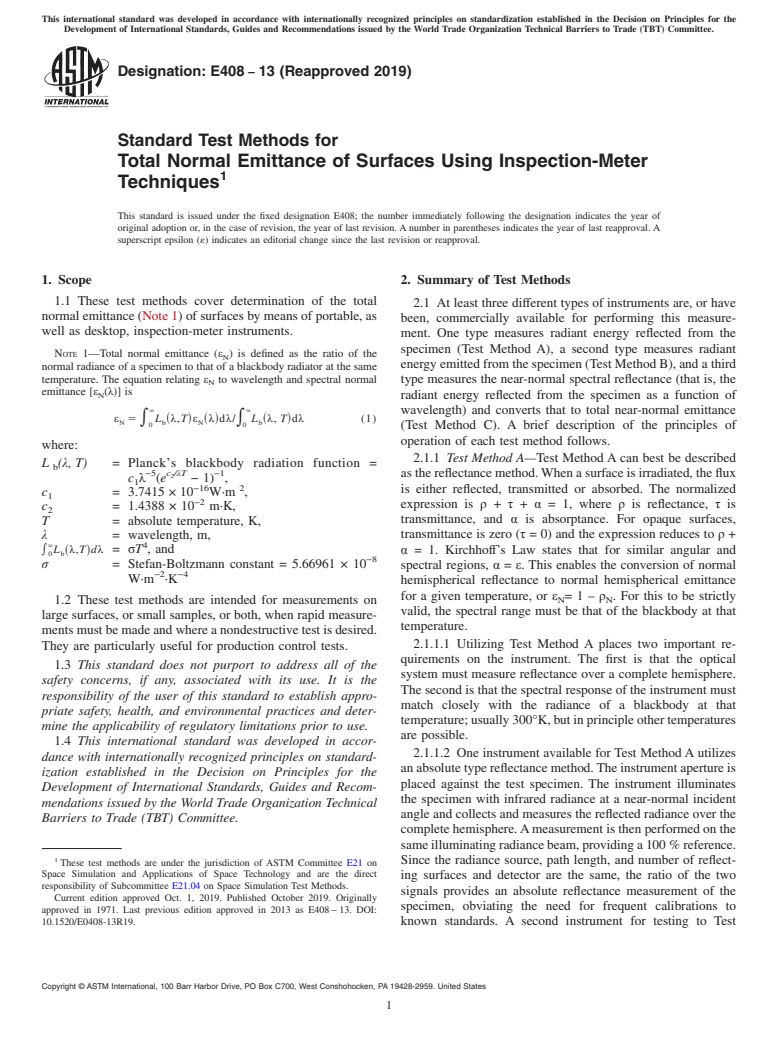
Note 1: Total normal emittance (εN) is defined as the ratio of the normal radiance of a specimen to that of a blackbody radiator at the same temperature. The equation relating εN to wavelength and spectral normal emittance [εN(λ)] is
where:
L b(λ, T) = Planck's blackbody radiation function = c1λ−5(ec2/λT − 1)−1, c1 = 3.7415 × 10⁻¹⁶W·m 2, c2 = 1.4388 × 10⁻² m·K, T = absolute temperature, K, λ = wavelength, m, = σT4, and σ = Stefan-Boltzmann constant = 5.66961 × 10 −8 W·m−2·K−4
1.2 These test methods are intended for measurements on large surfaces, or small samples, or both, when rapid measurements must be made and where a nondestructive test is desired. They are particularly useful for production control tests.
1.3 This standard does not purport to address all of the safety concerns, if any, associated with its use. It is the responsibility of the user of this standard to establish appropriate safety, health, and environmental practices and determine the applicability of regulatory limitations prior to use.
1.4 This international standard was developed in accordance with internationally recognized principles on standardization established in the Decision on Principles for the Development of International Standards, Guides and Recommendations issued by the World Trade Organization Technical Barriers to Trade (TBT) Committee.
General Information
Relations
Standards Content (Sample)
This international standard was developed in accordance with internationally recognized principles on standardization established in the Decision on Principles for the
Development of International Standards, Guides and Recommendations issued by the World Trade Organization Technical Barriers to Trade (TBT) Committee.
Designation: E408 − 13 (Reapproved 2019)
Standard Test Methods for
Total Normal Emittance of Surfaces Using Inspection-Meter
1
Techniques
This standard is issued under the fixed designation E408; the number immediately following the designation indicates the year of
original adoption or, in the case of revision, the year of last revision.Anumber in parentheses indicates the year of last reapproval.A
superscript epsilon (´) indicates an editorial change since the last revision or reapproval.
1. Scope 2. Summary of Test Methods
1.1 These test methods cover determination of the total
2.1 At least three different types of instruments are, or have
normalemittance(Note1)ofsurfacesbymeansofportable,as
been, commercially available for performing this measure-
well as desktop, inspection-meter instruments.
ment. One type measures radiant energy reflected from the
specimen (Test Method A), a second type measures radiant
NOTE 1—Total normal emittance (ε ) is defined as the ratio of the
N
energyemittedfromthespecimen(TestMethodB),andathird
normal radiance of a specimen to that of a blackbody radiator at the same
temperature. The equation relating ε to wavelength and spectral normal type measures the near-normal spectral reflectance (that is, the
N
emittance [ε (λ)] is
N
radiant energy reflected from the specimen as a function of
` `
wavelength) and converts that to total near-normal emittance
ε 5 L λ,T ε λ dλ/ L λ, T dλ (1)
* ~ ! ~ ! * ~ !
N b N b
0 0
(Test Method C). A brief description of the principles of
operation of each test method follows.
where:
2.1.1 Test Method A—Test Method A can best be described
L (λ,T) = Planck’s blackbody radiation function =
b
−5 c /λT −1
2 asthereflectancemethod.Whenasurfaceisirradiated,theflux
c λ (e −1) ,
1
−16 2
is either reflected, transmitted or absorbed. The normalized
c = 3.7415 × 10 W·m ,
1
−2
expression is ρ + τ + α = 1, where ρ is reflectance, τ is
c = 1.4388 × 10 m·K,
2
transmittance, and α is absorptance. For opaque surfaces,
T = absolute temperature, K,
λ = wavelength, m, transmittance is zero (τ = 0) and the expression reduces to ρ +
` 4
* L λ,T dλ = σT , and α = 1. Kirchhoff’s Law states that for similar angular and
~ !
0 b
−8
σ = Stefan-Boltzmann constant = 5.66961 × 10
spectral regions, α = ε. This enables the conversion of normal
−2 −4
W·m ·K
hemispherical reflectance to normal hemispherical emittance
for a given temperature, or ε =1– ρ . For this to be strictly
N N
1.2 These test methods are intended for measurements on
valid, the spectral range must be that of the blackbody at that
large surfaces, or small samples, or both, when rapid measure-
temperature.
mentsmustbemadeandwhereanondestructivetestisdesired.
2.1.1.1 Utilizing Test Method A places two important re-
They are particularly useful for production control tests.
quirements on the instrument. The first is that the optical
1.3 This standard does not purport to address all of the
system must measure reflectance over a complete hemisphere.
safety concerns, if any, associated with its use. It is the
The second is that the spectral response of the instrument must
responsibility of the user of this standard to establish appro-
match closely with the radiance of a blackbody at that
priate safety, health, and environmental practices and deter-
temperature;usually300°K,butinprincipleothertemperatures
mine the applicability of regulatory limitations prior to use.
are possible.
1.4 This international standard was developed in accor-
2.1.1.2 One instrument available for Test MethodAutilizes
dance with internationally recognized principles on standard-
anabsolutetypereflectancemethod.Theinstrumentapertureis
ization established in the Decision on Principles for the
placed against the test specimen. The instrument illuminates
Development of International Standards, Guides and Recom-
the specimen with infrared radiance at a near-normal incident
mendations issued by the World Trade Organization Technical
angle and collects and measures the reflected radiance over the
Barriers to Trade (TBT) Committee.
completehemisphere.Ameasurementisthenperformedonthe
sameilluminatingradiancebeam,providinga100%reference.
1
Since the radiance source, path length, and number of reflect-
These test methods are under the jurisdiction of ASTM Committee E21 on
Space Simulation and Applications of Space Technology and are the direct
ing surfaces and detector are the same, the ratio of the two
responsibility of Subcommittee E21.04 on Space Simulation Test Methods.
signals provides an absolute reflectance measurement of the
Current edition approved Oct. 1, 2019. Published October 2019. Originally
specimen, obviating the need for frequent calibrations
...


Questions, Comments and Discussion
Ask us and Technical Secretary will try to provide an answer. You can facilitate discussion about the standard in here.