SIST ISO 3547-5:2021
(Main)Plain bearings - Wrapped bushes - Part 5: Checking the outside diameter
Plain bearings - Wrapped bushes - Part 5: Checking the outside diameter
This document specifies, following ISO 12301, the checking of the outside diameter of wrapped bushes (ISO 3547‑2:2017, methods A, B and D) and describes the necessary checking methods and measuring equipment.
NOTE The dimensions and tolerances of wrapped bushes are given in ISO 3547‑1. Checking the wall thickness is the subject of ISO 3547‑7.
Paliers lisses - Bagues roulées - Partie 5: Contrôle du diamètre extérieur
Drsni ležaji - Zvite puše - 5. del: Merjenje zunanjega premera
General Information
- Status
- Published
- Publication Date
- 07-Sep-2021
- Technical Committee
- ISEL - Mechanical elements
- Current Stage
- 6060 - National Implementation/Publication (Adopted Project)
- Start Date
- 02-Sep-2021
- Due Date
- 07-Nov-2021
- Completion Date
- 08-Sep-2021
Relations
- Replaces
SIST ISO 3547-5:2008 - Plain bearings - Wrapped bushes - Part 5: Checking the outside diameter - Effective Date
- 01-Oct-2021
Overview
ISO 3547-5:2020 - Plain bearings - Wrapped bushes - Part 5: Checking the outside diameter - specifies how to check the outside diameter of wrapped bushes (following ISO 12301 and ISO 3547-2:2017). The standard describes the required checking methods, measuring equipment and conditions needed to ensure the correct outside diameter so that the intended mounting compression (interference fit) in the housing bore is achieved. Note: dimensions/tolerances are in ISO 3547‑1 and wall‑thickness checking is covered by ISO 3547‑7.
Key topics and technical requirements
- Purpose: Verify outside diameter under a constraining/checking load so the flexible wrapped bush is measured in a state representative of assembled condition.
- Methods of checking:
- Method A (measurement) - Indirect measurement using a split checking block, setting plugs, measuring pin and indicating instrument; outside diameter inferred from change in gap (Δz). Preferred for bushes >10 mm; complex tooling.
- Method B (gauging) - Attributive "GO / NO GO" ring gauges for quick pass/fail gauging; simpler tooling.
- Method D (tape) - Use of a precision measuring tape for outside diameters >120 mm.
- Measuring equipment components: base plate fixture, load-generation system (hydraulic/pneumatic/mechanical), calibration means, upper plate, split checking block and setting plug, measuring pin with indicator.
- Checking load (Fch): Specified load ranges with permissible deviations and speed of approach (see Table 2). Test temperature typically 20–25 °C; temperature difference between block and bush must not exceed 1 °C.
- Metrology considerations: Correction factor C, calibration/setting plug requirements, measurement procedure, and error classes (equipment, bush, human factors) are addressed to ensure repeatable results.
- Selection guidance: Method choice depends on diameter and precision needs - Method A for precision (except very small bushes), Method B for production gauging, Method D for large diameters.
Applications and users
ISO 3547-5:2020 is intended for:
- Plain bearing manufacturers (quality control and production inspection)
- Metrology and inspection laboratories performing dimensional tests on wrapped bushes
- Mechanical engineers, design and procurement teams specifying bearing fit and interference
- Assembly and maintenance operations verifying components before installation
Practical uses include incoming inspection, process control, final inspection and conformity assessment for wrapped bushings used in automotive, industrial machinery and rotating equipment.
Related standards
- ISO 3547-1 (dimensions and tolerances for wrapped bushes)
- ISO 3547-2:2017 (test data for outside/inside diameters)
- ISO 3547-6 and ISO 3547-7 (inside diameter and wall thickness checks)
- ISO 12301, ISO 1938-1, ISO 286-2 (referenced normative documents)
Keywords: ISO 3547-5:2020, wrapped bushes, plain bearings, checking outside diameter, checking load, measuring equipment, Method A, Method B, Method D, ring gauge.
Frequently Asked Questions
SIST ISO 3547-5:2021 is a standard published by the Slovenian Institute for Standardization (SIST). Its full title is "Plain bearings - Wrapped bushes - Part 5: Checking the outside diameter". This standard covers: This document specifies, following ISO 12301, the checking of the outside diameter of wrapped bushes (ISO 3547‑2:2017, methods A, B and D) and describes the necessary checking methods and measuring equipment. NOTE The dimensions and tolerances of wrapped bushes are given in ISO 3547‑1. Checking the wall thickness is the subject of ISO 3547‑7.
This document specifies, following ISO 12301, the checking of the outside diameter of wrapped bushes (ISO 3547‑2:2017, methods A, B and D) and describes the necessary checking methods and measuring equipment. NOTE The dimensions and tolerances of wrapped bushes are given in ISO 3547‑1. Checking the wall thickness is the subject of ISO 3547‑7.
SIST ISO 3547-5:2021 is classified under the following ICS (International Classification for Standards) categories: 21.100.10 - Plain bearings. The ICS classification helps identify the subject area and facilitates finding related standards.
SIST ISO 3547-5:2021 has the following relationships with other standards: It is inter standard links to SIST ISO 3547-5:2008. Understanding these relationships helps ensure you are using the most current and applicable version of the standard.
SIST ISO 3547-5:2021 is available in PDF format for immediate download after purchase. The document can be added to your cart and obtained through the secure checkout process. Digital delivery ensures instant access to the complete standard document.
Standards Content (Sample)
SLOVENSKI STANDARD
01-oktober-2021
Nadomešča:
SIST ISO 3547-5:2008
Drsni ležaji - Zvite puše - 5. del: Merjenje zunanjega premera
Plain bearings - Wrapped bushes - Part 5: Checking the outside diameter
Paliers lisses - Bagues roulées - Partie 5: Contrôle du diamètre extérieur
Ta slovenski standard je istoveten z: ISO 3547-5:2020
ICS:
21.100.10 Drsni ležaji Plain bearings
2003-01.Slovenski inštitut za standardizacijo. Razmnoževanje celote ali delov tega standarda ni dovoljeno.
INTERNATIONAL ISO
STANDARD 3547-5
Second edition
2020-05
Plain bearings — Wrapped bushes —
Part 5:
Checking the outside diameter
Reference number
©
ISO 2020
© ISO 2020
All rights reserved. Unless otherwise specified, or required in the context of its implementation, no part of this publication may
be reproduced or utilized otherwise in any form or by any means, electronic or mechanical, including photocopying, or posting
on the internet or an intranet, without prior written permission. Permission can be requested from either ISO at the address
below or ISO’s member body in the country of the requester.
ISO copyright office
CP 401 • Ch. de Blandonnet 8
CH-1214 Vernier, Geneva
Phone: +41 22 749 01 11
Fax: +41 22 749 09 47
Email: copyright@iso.org
Website: www.iso.org
Published in Switzerland
ii © ISO 2020 – All rights reserved
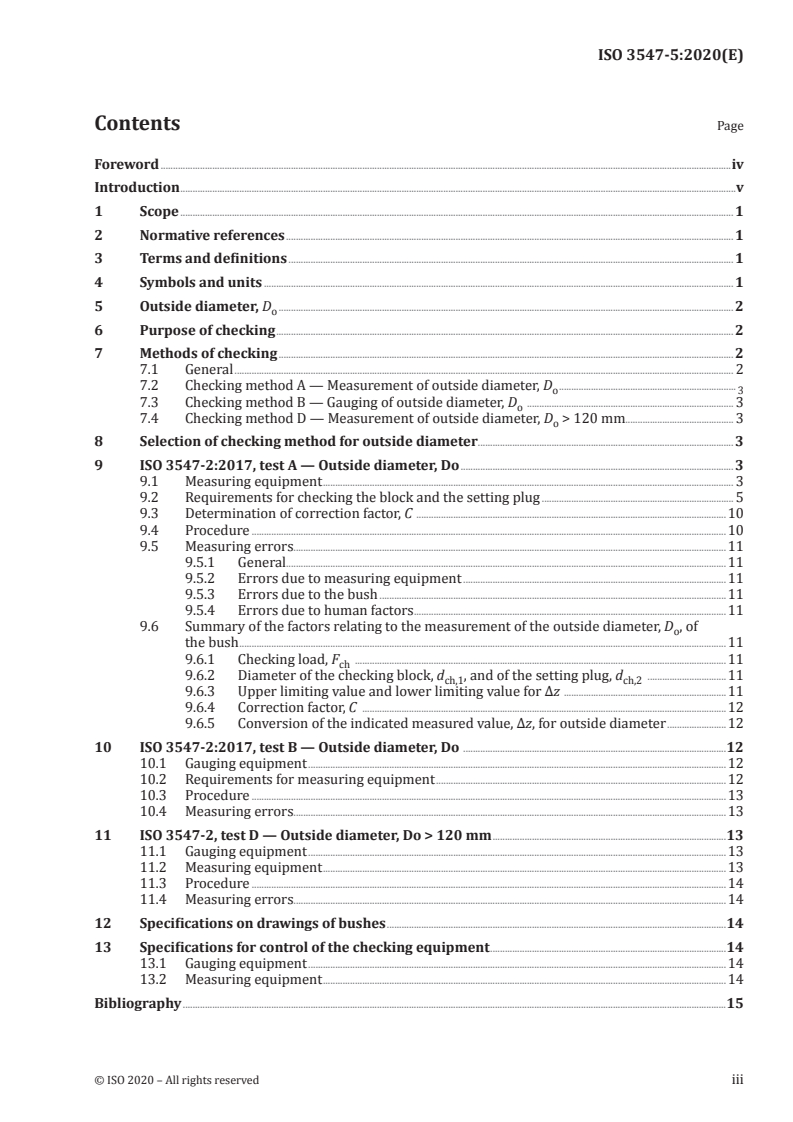
Contents Page
Foreword .iv
Introduction .v
1 Scope . 1
2 Normative references . 1
3 Terms and definitions . 1
4 Symbols and units . 1
5 Outside diameter, D . 2
o
6 Purpose of checking . 2
7 Methods of checking . 2
7.1 General . 2
7.2 Checking method A — Measurement of outside diameter, D .
o 3
7.3 Checking method B — Gauging of outside diameter, D . 3
o
7.4 Checking method D — Measurement of outside diameter, D > 120 mm. 3
o
8 Selection of checking method for outside diameter . 3
9 ISO 3547-2:2017, test A — Outside diameter, Do . 3
9.1 Measuring equipment . 3
9.2 Requirements for checking the block and the setting plug . 5
9.3 Determination of correction factor, C .10
9.4 Procedure .10
9.5 Measuring errors.11
9.5.1 General.11
9.5.2 Errors due to measuring equipment .11
9.5.3 Errors due to the bush .11
9.5.4 Errors due to human factors .11
9.6 Summary of the factors relating to the measurement of the outside diameter, D , of
o
the bush .11
9.6.1 Checking load, F .11
ch
9.6.2 Diameter of the checking block, d , and of the setting plug, d .11
ch,1 ch,2
9.6.3 Upper limiting value and lower limiting value for ∆z .11
9.6.4 Correction factor, C .12
9.6.5 Conversion of the indicated measured value, ∆z, for outside diameter .12
10 ISO 3547-2:2017, test B — Outside diameter, Do .12
10.1 Gauging equipment .12
10.2 Requirements for measuring equipment .12
10.3 Procedure .13
10.4 Measuring errors.13
11 ISO 3547-2, test D — Outside diameter, Do > 120 mm .13
11.1 Gauging equipment .13
11.2 Measuring equipment .13
11.3 Procedure .14
11.4 Measuring errors.14
12 Specifications on drawings of bushes .14
13 Specifications for control of the checking equipment .14
13.1 Gauging equipment .14
13.2 Measuring equipment .14
Bibliography .15
Foreword
ISO (the International Organization for Standardization) is a worldwide federation of national standards
bodies (ISO member bodies). The work of preparing International Standards is normally carried out
through ISO technical committees. Each member body interested in a subject for which a technical
committee has been established has the right to be represented on that committee. International
organizations, governmental and non-governmental, in liaison with ISO, also take part in the work.
ISO collaborates closely with the International Electrotechnical Commission (IEC) on all matters of
electrotechnical standardization.
The procedures used to develop this document and those intended for its further maintenance are
described in the ISO/IEC Directives, Part 1. In particular, the different approval criteria needed for the
different types of ISO documents should be noted. This document was drafted in accordance with the
editorial rules of the ISO/IEC Directives, Part 2 (see www .iso .org/ directives).
Attention is drawn to the possibility that some of the elements of this document may be the subject of
patent rights. ISO shall not be held responsible for identifying any or all such patent rights. Details of
any patent rights identified during the development of the document will be in the Introduction and/or
on the ISO list of patent declarations received (see www .iso .org/ patents).
Any trade name used in this document is information given for the convenience of users and does not
constitute an endorsement.
For an explanation of the voluntary nature of standards, the meaning of ISO specific terms and
expressions related to conformity assessment, as well as information about ISO's adherence to
the World Trade Organization (WTO) principles in the Technical Barriers to Trade (TBT) see
www .iso .org/ iso/ foreword .html.
This document was prepared by Technical Committee ISO/TC 123, Plain bearings, Subcommittee SC 5,
Quality analysis and assurance.
This second edition cancels and replaces the first edition (ISO 3547-5:2007), which has been technically
revised.
The main changes compared to the previous edition are as follows:
— Clause 2 has been updated;
— Clause 9 has been updated;
— Figure 8 has been updated.
A list of all parts in the ISO 3547 series can be found on the ISO website.
Any feedback or questions on this document should be directed to the user’s national standards body. A
complete listing of these bodies can be found at www .iso .org/ members .html.
iv © ISO 2020 – All rights reserved
Introduction
Wrapped bushes in the free condition are flexible, but after insertion they adapt largely to the shape of
the housing bore due to the oversize between the outside diameter of the bush and the housing bore.
For this reason, checking of the outside diameter of wrapped bushes can only be carried out under a
constraining load by use of specialized measuring equipment.
INTERNATIONAL STANDARD ISO 3547-5:2020(E)
Plain bearings — Wrapped bushes —
Part 5:
Checking the outside diameter
1 Scope
This document specifies, following ISO 12301, the checking of the outside diameter of wrapped bushes
(ISO 3547-2:2017, methods A, B and D) and describes the necessary checking methods and measuring
equipment.
NOTE The dimensions and tolerances of wrapped bushes are given in ISO 3547-1. Checking the wall thickness
is the subject of ISO 3547-7.
2 Normative references
The following documents are referred to in the text in such a way that some or all of their content
constitutes requirements of this document. For dated references, only the edition cited applies. For
undated references, the latest edition of the referenced document (including any amendments) applies.
ISO 286-2:2010, Geometrical product specifications (GPS) — ISO code system for tolerances on linear
sizes — Part 2: Tables of standard tolerance classes and limit deviations for holes and shafts
ISO 1938-1, Geometrical product specifications (GPS) — Dimensional measuring equipment — Part 1: Plain
limit gauges of linear size
ISO 3547-2:2017, Plain bearings — Wrapped bushes — Part 2: Test data for outside and inside diameters
3 Terms and definitions
No terms and definitions are listed in this document.
ISO and IEC maintain terminological databases for use in standardization at the following addresses:
— ISO Online browsing platform: available at https:// www .iso .org/ obp
— IEC Electropedia: available at http:// www .electropedia .org/
4 Symbols and units
For the purposes of this document, the symbols and units given in Table 1 apply.
Table 1 — Symbols and units
Symbol Parameter SI unit
B Width of the bush millimetres
b Width of the checking block millimetres
ch,1
b Width of the setting plug millimetres
ch,2
d Outside diameter of the ring gauge millimetres
o
D Outside diameter of the bush millimetres
o
d Diameter of the checking block bore (see ISO 3547-2) millimetres
ch,1
Table 1 (continued)
Symbol Parameter SI unit
d Diameter of the setting plug (see ISO 3547-2) millimetres
ch,2
d Actual diameter of the checking block millimetres
ch,a ,1
d Actual diameter of the setting plug millimetres
ch,a ,2
F Checking load newtons
ch
C Correction factor millimetres
Ra Surface roughness micrometres
t . t Tolerances of form and position millimetres
1 6
x Length of checking block m
...
INTERNATIONAL ISO
STANDARD 3547-5
Second edition
2020-05
Plain bearings — Wrapped bushes —
Part 5:
Checking the outside diameter
Reference number
©
ISO 2020
© ISO 2020
All rights reserved. Unless otherwise specified, or required in the context of its implementation, no part of this publication may
be reproduced or utilized otherwise in any form or by any means, electronic or mechanical, including photocopying, or posting
on the internet or an intranet, without prior written permission. Permission can be requested from either ISO at the address
below or ISO’s member body in the country of the requester.
ISO copyright office
CP 401 • Ch. de Blandonnet 8
CH-1214 Vernier, Geneva
Phone: +41 22 749 01 11
Fax: +41 22 749 09 47
Email: copyright@iso.org
Website: www.iso.org
Published in Switzerland
ii © ISO 2020 – All rights reserved
Contents Page
Foreword .iv
Introduction .v
1 Scope . 1
2 Normative references . 1
3 Terms and definitions . 1
4 Symbols and units . 1
5 Outside diameter, D . 2
o
6 Purpose of checking . 2
7 Methods of checking . 2
7.1 General . 2
7.2 Checking method A — Measurement of outside diameter, D .
o 3
7.3 Checking method B — Gauging of outside diameter, D . 3
o
7.4 Checking method D — Measurement of outside diameter, D > 120 mm. 3
o
8 Selection of checking method for outside diameter . 3
9 ISO 3547-2:2017, test A — Outside diameter, Do . 3
9.1 Measuring equipment . 3
9.2 Requirements for checking the block and the setting plug . 5
9.3 Determination of correction factor, C .10
9.4 Procedure .10
9.5 Measuring errors.11
9.5.1 General.11
9.5.2 Errors due to measuring equipment .11
9.5.3 Errors due to the bush .11
9.5.4 Errors due to human factors .11
9.6 Summary of the factors relating to the measurement of the outside diameter, D , of
o
the bush .11
9.6.1 Checking load, F .11
ch
9.6.2 Diameter of the checking block, d , and of the setting plug, d .11
ch,1 ch,2
9.6.3 Upper limiting value and lower limiting value for ∆z .11
9.6.4 Correction factor, C .12
9.6.5 Conversion of the indicated measured value, ∆z, for outside diameter .12
10 ISO 3547-2:2017, test B — Outside diameter, Do .12
10.1 Gauging equipment .12
10.2 Requirements for measuring equipment .12
10.3 Procedure .13
10.4 Measuring errors.13
11 ISO 3547-2, test D — Outside diameter, Do > 120 mm .13
11.1 Gauging equipment .13
11.2 Measuring equipment .13
11.3 Procedure .14
11.4 Measuring errors.14
12 Specifications on drawings of bushes .14
13 Specifications for control of the checking equipment .14
13.1 Gauging equipment .14
13.2 Measuring equipment .14
Bibliography .15
Foreword
ISO (the International Organization for Standardization) is a worldwide federation of national standards
bodies (ISO member bodies). The work of preparing International Standards is normally carried out
through ISO technical committees. Each member body interested in a subject for which a technical
committee has been established has the right to be represented on that committee. International
organizations, governmental and non-governmental, in liaison with ISO, also take part in the work.
ISO collaborates closely with the International Electrotechnical Commission (IEC) on all matters of
electrotechnical standardization.
The procedures used to develop this document and those intended for its further maintenance are
described in the ISO/IEC Directives, Part 1. In particular, the different approval criteria needed for the
different types of ISO documents should be noted. This document was drafted in accordance with the
editorial rules of the ISO/IEC Directives, Part 2 (see www .iso .org/ directives).
Attention is drawn to the possibility that some of the elements of this document may be the subject of
patent rights. ISO shall not be held responsible for identifying any or all such patent rights. Details of
any patent rights identified during the development of the document will be in the Introduction and/or
on the ISO list of patent declarations received (see www .iso .org/ patents).
Any trade name used in this document is information given for the convenience of users and does not
constitute an endorsement.
For an explanation of the voluntary nature of standards, the meaning of ISO specific terms and
expressions related to conformity assessment, as well as information about ISO's adherence to
the World Trade Organization (WTO) principles in the Technical Barriers to Trade (TBT) see
www .iso .org/ iso/ foreword .html.
This document was prepared by Technical Committee ISO/TC 123, Plain bearings, Subcommittee SC 5,
Quality analysis and assurance.
This second edition cancels and replaces the first edition (ISO 3547-5:2007), which has been technically
revised.
The main changes compared to the previous edition are as follows:
— Clause 2 has been updated;
— Clause 9 has been updated;
— Figure 8 has been updated.
A list of all parts in the ISO 3547 series can be found on the ISO website.
Any feedback or questions on this document should be directed to the user’s national standards body. A
complete listing of these bodies can be found at www .iso .org/ members .html.
iv © ISO 2020 – All rights reserved
Introduction
Wrapped bushes in the free condition are flexible, but after insertion they adapt largely to the shape of
the housing bore due to the oversize between the outside diameter of the bush and the housing bore.
For this reason, checking of the outside diameter of wrapped bushes can only be carried out under a
constraining load by use of specialized measuring equipment.
INTERNATIONAL STANDARD ISO 3547-5:2020(E)
Plain bearings — Wrapped bushes —
Part 5:
Checking the outside diameter
1 Scope
This document specifies, following ISO 12301, the checking of the outside diameter of wrapped bushes
(ISO 3547-2:2017, methods A, B and D) and describes the necessary checking methods and measuring
equipment.
NOTE The dimensions and tolerances of wrapped bushes are given in ISO 3547-1. Checking the wall thickness
is the subject of ISO 3547-7.
2 Normative references
The following documents are referred to in the text in such a way that some or all of their content
constitutes requirements of this document. For dated references, only the edition cited applies. For
undated references, the latest edition of the referenced document (including any amendments) applies.
ISO 286-2:2010, Geometrical product specifications (GPS) — ISO code system for tolerances on linear
sizes — Part 2: Tables of standard tolerance classes and limit deviations for holes and shafts
ISO 1938-1, Geometrical product specifications (GPS) — Dimensional measuring equipment — Part 1: Plain
limit gauges of linear size
ISO 3547-2:2017, Plain bearings — Wrapped bushes — Part 2: Test data for outside and inside diameters
3 Terms and definitions
No terms and definitions are listed in this document.
ISO and IEC maintain terminological databases for use in standardization at the following addresses:
— ISO Online browsing platform: available at https:// www .iso .org/ obp
— IEC Electropedia: available at http:// www .electropedia .org/
4 Symbols and units
For the purposes of this document, the symbols and units given in Table 1 apply.
Table 1 — Symbols and units
Symbol Parameter SI unit
B Width of the bush millimetres
b Width of the checking block millimetres
ch,1
b Width of the setting plug millimetres
ch,2
d Outside diameter of the ring gauge millimetres
o
D Outside diameter of the bush millimetres
o
d Diameter of the checking block bore (see ISO 3547-2) millimetres
ch,1
Table 1 (continued)
Symbol Parameter SI unit
d Diameter of the setting plug (see ISO 3547-2) millimetres
ch,2
d Actual diameter of the checking block millimetres
ch,a ,1
d Actual diameter of the setting plug millimetres
ch,a ,2
F Checking load newtons
ch
C Correction factor millimetres
Ra Surface roughness micrometres
t . t Tolerances of form and position millimetres
1 6
x Length of checking block millimetres
y Width of checking block millimetres
z Distance between checking block halves millimetres
∆D Tolerance of D millimetres
o o
∆z Indicator reading millimetres
∆z Circumference indicator reading millimetres
D
5 Outside diameter, D
o
For the outside diameter of a wrapped bush, see Figure 1.
a
Split line.
NOTE The free diameter of a wrapped bush is not measured directly bec
...



Questions, Comments and Discussion
Ask us and Technical Secretary will try to provide an answer. You can facilitate discussion about the standard in here.
Loading comments...