ASTM D1506-99
(Test Method)Standard Test Methods for Carbon Black-Ash Content
Standard Test Methods for Carbon Black-Ash Content
SCOPE
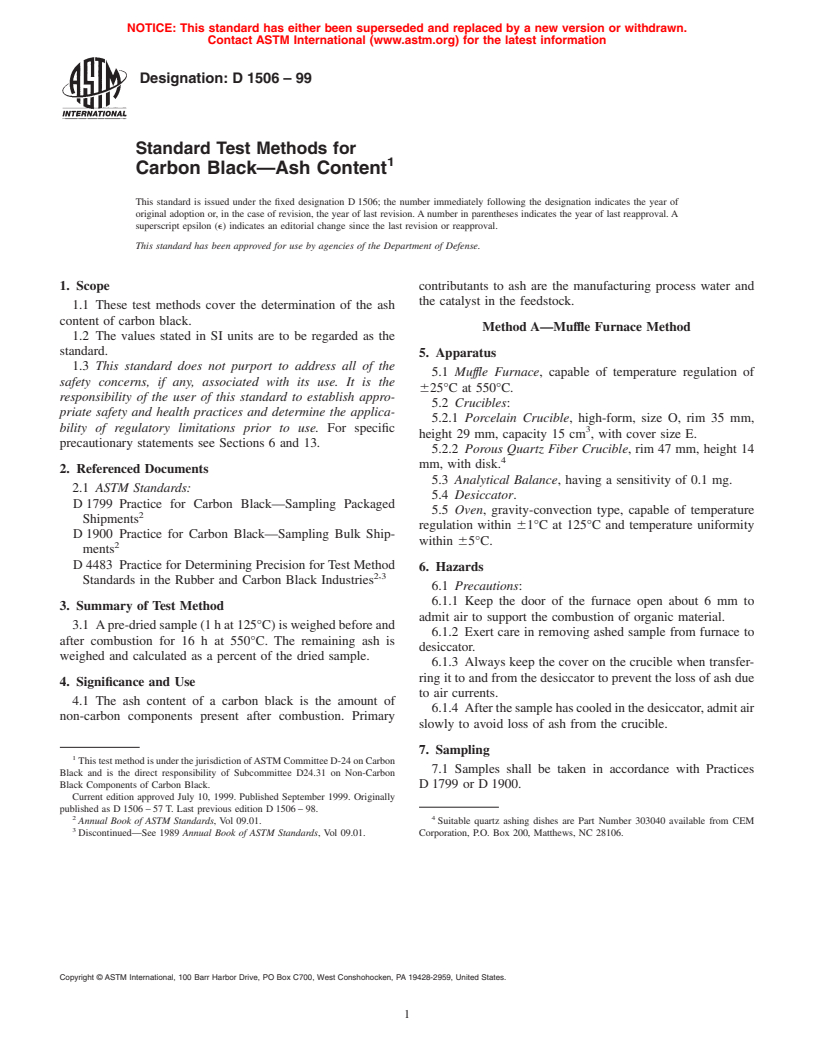
1.1 These test methods cover the determination of the ash content of carbon black.
1.2 The values stated in SI units are to be regarded as the standard.
1.3 This standard does not purport to address all of the safety concerns, if any, associated with its use. It is the responsibility of the user of this standard to establish appropriate safety and health practices and determine the applicability of regulatory limitations prior to use. For specific precautionary statements see Sections 6 and 13.
General Information
Relations
Standards Content (Sample)
NOTICE: This standard has either been superseded and replaced by a new version or withdrawn.
Contact ASTM International (www.astm.org) for the latest information
Designation:D1506–99
Standard Test Methods for
Carbon Black—Ash Content
This standard is issued under the fixed designation D 1506; the number immediately following the designation indicates the year of
original adoption or, in the case of revision, the year of last revision. A number in parentheses indicates the year of last reapproval. A
superscript epsilon (e) indicates an editorial change since the last revision or reapproval.
This standard has been approved for use by agencies of the Department of Defense.
1. Scope contributants to ash are the manufacturing process water and
the catalyst in the feedstock.
1.1 These test methods cover the determination of the ash
content of carbon black.
Method A—Muffle Furnace Method
1.2 The values stated in SI units are to be regarded as the
standard.
5. Apparatus
1.3 This standard does not purport to address all of the
5.1 Muffle Furnace, capable of temperature regulation of
safety concerns, if any, associated with its use. It is the
625°C at 550°C.
responsibility of the user of this standard to establish appro-
5.2 Crucibles:
priate safety and health practices and determine the applica-
5.2.1 Porcelain Crucible, high-form, size O, rim 35 mm,
bility of regulatory limitations prior to use. For specific 3
height 29 mm, capacity 15 cm , with cover size E.
precautionary statements see Sections 6 and 13.
5.2.2 Porous Quartz Fiber Crucible, rim 47 mm, height 14
mm, with disk.
2. Referenced Documents
5.3 Analytical Balance, having a sensitivity of 0.1 mg.
2.1 ASTM Standards:
5.4 Desiccator.
D 1799 Practice for Carbon Black—Sampling Packaged
5.5 Oven, gravity-convection type, capable of temperature
Shipments
regulation within 61°C at 125°C and temperature uniformity
D 1900 Practice for Carbon Black—Sampling Bulk Ship-
within 65°C.
ments
D 4483 Practice for Determining Precision for Test Method
6. Hazards
,
2 3
Standards in the Rubber and Carbon Black Industries
6.1 Precautions:
6.1.1 Keep the door of the furnace open about 6 mm to
3. Summary of Test Method
admit air to support the combustion of organic material.
3.1 Apre-dried sample (1 h at 125°C) is weighed before and
6.1.2 Exert care in removing ashed sample from furnace to
after combustion for 16 h at 550°C. The remaining ash is
desiccator.
weighed and calculated as a percent of the dried sample.
6.1.3 Always keep the cover on the crucible when transfer-
ring it to and from the desiccator to prevent the loss of ash due
4. Significance and Use
to air currents.
4.1 The ash content of a carbon black is the amount of
6.1.4 Afterthesamplehascooledinthedesiccator,admitair
non-carbon components present after combustion. Primary
slowly to avoid loss of ash from the crucible.
7. Sampling
This test method is under the jurisdiction ofASTM Committee D-24 on Carbon
7.1 Samples shall be taken in accordance with Practices
Black and is the direct responsibility of Subcommittee D24.31 on Non-Carbon
Black Components of Carbon Black. D 1799 or D 1900.
Current edition approved July 10, 1999. Published September 1999. Originally
published as D 1506 – 57 T. Last previous edition D 1506 – 98.
2 4
Annual Book of ASTM Standards, Vol 09.01. Suitable quartz ashing dishes are Part Number 303040 available from CEM
Discontinued—See 1989 Annual Book of ASTM Standards, Vol 09.01. Corporation, P.O. Box 200, Matthews, NC 28106.
Copyright © ASTM International, 100 Barr Harbor Drive, PO Box C700, West Conshohocken, PA 19428-2959, United States.
D1506
TABLE 1 Precision Parameters for D1506 Ash Content, (Type 1
8. Procedure
Precision)
8.1 Ignite the crucible with cover in the muffle furnace at
Units Percent Ash
550 6 25°C for 1 h. Place the crucible and cover in the
Material Mean Level Sr (r) SR (R)
desiccator. Cool to room temperature and weigh to nearest 0.1
IRB#6 (N330) 0.233 0.018 21.4 0.027 32.4
mg.
SRB D5 (N762) 0.258 0.015 16.0 0.030 32.6
8.2 Dry an adequate sample of carbon black for1hinthe
N650 0.289 0.019 18.7 0.031 30.4
gravity-convection oven set at 125°C in an open container of
N550 0.436 0.025 16.1 0.037 23.7
SRB A5 (N135) 0.565 0.023 11.5 0.056 27.9
suitable dimensions, so that the depth of the black is no more
Average 0.356
than 10 mm. Cool and store the sample in a desiccator.
Pooled Values 0.020 16.0 0.037 29.7
8.3 Weigh 2 60.1 g of the dried carbon black into the
ignited crucible and weigh to the nearest 0.1 mg. Place the
uncovered crucible and its cover into the furnace (Note 1) at
TABLE 2 Interlaboratory Precision Program
550°C for 16 h (porcelain crucible) or 1.5 h (porous quartz
Nominal Test Period Material Number of Laboratories
fiber crucible–see 6.1.1). Cover the crucible containing the ash,
March 1996 N650 45
remove from the furnace to the desiccator, and allow to cool to
October 1996 IRB#6 (N330) 37
March 1997 SRB N762 48
room temperature. Weigh the covered crucible to the nearest
September 1997 SRB A5 (N135) 43
0.1 mg. Put the covered crucible back into the desiccator for
March 1998 N550 46
additional 0.5 h. Reweigh to the nearest 0.1 mg. Repeat this
weighing process until constant mass is obtained.
NOTE 1—For carbon blacks with very low ash content (such as high
purity blacks) larger sample mass and longer ashing time may be required. determination. Acceptable difference values were not mea-
NOTE 2—If control testing is done at temperatures exceeding 550°C,
sured. The between operator component of variation is in-
some volatile salts may be lost from inorganic ash.
cluded in the calculated values for r and R.
11.4 The results of the precision calculations for this test are
9. Calculation
given in Table 1. The materials are arranged in ascending
9.1 Calculate the percent ash to the nearest 0.01 % as
“mean level” order.
follows:
11.5 Repeatability—The pooled relative repeatability, (r), of
A 5 @~D 2 B!/~C 2 B!# 3 100 (1)
this test has been established as 16.0 %. Any other value in
Table 1 may be used as an estimate of repeatability, as
where:
appropriate. The difference between two single test results (or
A 5 ash, %,
determinations) found on identical test material under the
B 5 mass of crucible, g,
C 5 mass of crucible plus the sample, g, and repeatability conditions prescribed for this test will exceed the
D 5 mass of crucible plus the ash, g.
repeatability on an average of not more than once in 20 cases
in the normal and correct operation of the method. Two single
10. Report
test results that differ by more than the appropriate value from
10.1 Report the following information:
Table 1 must be suspected of being from different populations
10.1.1 Proper identification of the sample, and
and some appropriate action taken.
10.1.2 A result obtained from an individual determination
NOTE 3—Appropriate action may be an investigation of the test method
reported to the nearest 0.01 %.
procedure or apparatus for faulty operation or the declaration of a
significant difference in the two materials, samples, etc., which generated
11. Precision and Bias
the two test results.
11.1 These precision statements have been prepared in
11.6 Reproducibility—The pooled relative reproducibility,
accordance with Practice D 4483. Refer to this practice for
(R),ofthistesthasbeenestablishedas29.7 %.Anyothervalue
terminology and other statistical details.
in Table 1 may be used as an estimate of reproducibility, as
11.2 The precision results in this precision and bias section
appropriate. The difference between two single and indepen-
give an estimate of the precision of this test method with the
dent test results found by two operators working under the
materials used in the particular interlaboratory program de-
prescribed reproducibility conditions in different laboratories
scribed below.The precision parameters should not be used for
on identical test material will exceed the reproducibility on an
acceptance or rejection testing of any group of materials
average of not more than once in 20 cases in the normal and
without documentation that they are applicable to those par-
correct operation of the method. Two single test results
ticular materials and the specific testing protocols of the test
produced in different laboratories that differ by more than the
method.
...


Questions, Comments and Discussion
Ask us and Technical Secretary will try to provide an answer. You can facilitate discussion about the standard in here.