ASTM E1086-94(2000)
(Test Method)Standard Test Method for Optical Emission Vacuum Spectrometric Analysis of Stainless Steel by the Point-to-Plane Excitation Technique
Standard Test Method for Optical Emission Vacuum Spectrometric Analysis of Stainless Steel by the Point-to-Plane Excitation Technique
SCOPE
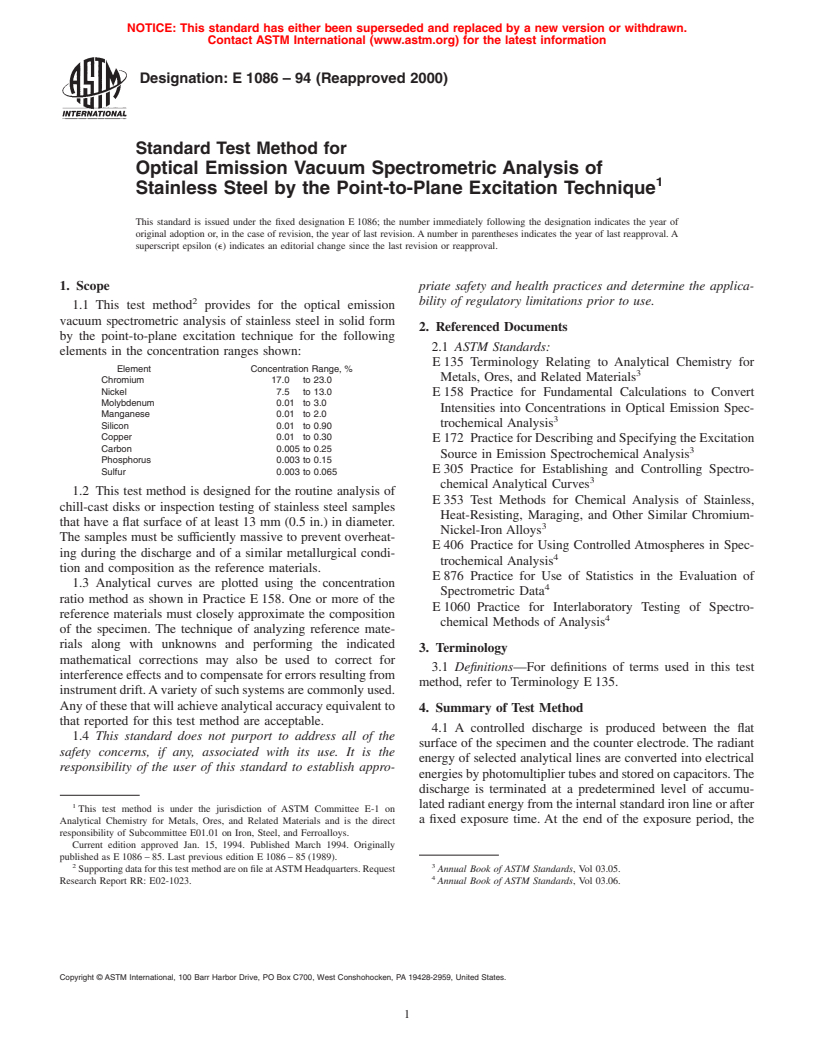
1.1 This test method provides for the optical emission vacuum spectrometric analysis of stainless steel in solid form by the point-to-plane excitation technique for the following elements in the concentration ranges shown:ElementConcentration Range, %Chromium17.0 to 23.0Nickel 7.5 to 13.0Molybdenum0.01 to 3.0 Manganese0.01 to 2.0 Silicon 0.01 to 0.90Copper 0.01 to 0.30Carbon 0.005 to 0.25Phosphorus0.003 to 0.15Sulfur 0.003 to 0.065
1.2 This test method is designed for the routine analysis of chill-cast disks or inspection testing of stainless steel samples that have a flat surface of at least 13 mm (0.5 in.) in diameter. The samples must be sufficiently massive to prevent overheating during the discharge and of a similar metallurgical condition and composition as the reference materials.
1.3 Analytical curves are plotted using the concentration ratio method as shown in Practice E158. One or more of the reference materials must closely approximate the composition of the specimen. The technique of analyzing reference materials along with unknowns and performing the indicated mathematical corrections may also be used to correct for interference effects and to compensate for errors resulting from instrument drift. A variety of such systems are commonly used. Any of these that will achieve analytical accuracy equivalent to that reported for this test method are acceptable.
1.4 This standard does not purport to address all of the safety concerns, if any, associated with its use. It is the responsibility of the user of this standard to establish appropriate safety and health practices and determine the applicability of regulatory limitations prior to use.
General Information
Relations
Standards Content (Sample)
NOTICE: This standard has either been superseded and replaced by a new version or withdrawn.
Contact ASTM International (www.astm.org) for the latest information
Designation:E1086–94 (Reapproved 2000)
Standard Test Method for
Optical Emission Vacuum Spectrometric Analysis of
Stainless Steel by the Point-to-Plane Excitation Technique
This standard is issued under the fixed designation E 1086; the number immediately following the designation indicates the year of
original adoption or, in the case of revision, the year of last revision. A number in parentheses indicates the year of last reapproval. A
superscript epsilon (e) indicates an editorial change since the last revision or reapproval.
1. Scope priate safety and health practices and determine the applica-
2 bility of regulatory limitations prior to use.
1.1 This test method provides for the optical emission
vacuum spectrometric analysis of stainless steel in solid form
2. Referenced Documents
by the point-to-plane excitation technique for the following
2.1 ASTM Standards:
elements in the concentration ranges shown:
E 135 Terminology Relating to Analytical Chemistry for
Element Concentration Range, %
Metals, Ores, and Related Materials
Chromium 17.0 to 23.0
Nickel 7.5 to 13.0
E 158 Practice for Fundamental Calculations to Convert
Molybdenum 0.01 to 3.0
Intensities into Concentrations in Optical Emission Spec-
Manganese 0.01 to 2.0
trochemical Analysis
Silicon 0.01 to 0.90
Copper 0.01 to 0.30
E 172 Practice for Describing and Specifying the Excitation
Carbon 0.005 to 0.25
Source in Emission Spectrochemical Analysis
Phosphorus 0.003 to 0.15
E 305 Practice for Establishing and Controlling Spectro-
Sulfur 0.003 to 0.065
chemical Analytical Curves
1.2 This test method is designed for the routine analysis of
E 353 Test Methods for Chemical Analysis of Stainless,
chill-cast disks or inspection testing of stainless steel samples
Heat-Resisting, Maraging, and Other Similar Chromium-
that have a flat surface of at least 13 mm (0.5 in.) in diameter.
Nickel-Iron Alloys
The samples must be sufficiently massive to prevent overheat-
E 406 Practice for Using Controlled Atmospheres in Spec-
ing during the discharge and of a similar metallurgical condi-
trochemical Analysis
tion and composition as the reference materials.
E 876 Practice for Use of Statistics in the Evaluation of
1.3 Analytical curves are plotted using the concentration
Spectrometric Data
ratio method as shown in Practice E 158. One or more of the
E 1060 Practice for Interlaboratory Testing of Spectro-
reference materials must closely approximate the composition
chemical Methods of Analysis
of the specimen. The technique of analyzing reference mate-
rials along with unknowns and performing the indicated
3. Terminology
mathematical corrections may also be used to correct for
3.1 Definitions—For definitions of terms used in this test
interference effects and to compensate for errors resulting from
method, refer to Terminology E 135.
instrument drift.Avariety of such systems are commonly used.
Any of these that will achieve analytical accuracy equivalent to
4. Summary of Test Method
that reported for this test method are acceptable.
4.1 A controlled discharge is produced between the flat
1.4 This standard does not purport to address all of the
surface of the specimen and the counter electrode. The radiant
safety concerns, if any, associated with its use. It is the
energy of selected analytical lines are converted into electrical
responsibility of the user of this standard to establish appro-
energiesbyphotomultipliertubesandstoredoncapacitors.The
discharge is terminated at a predetermined level of accumu-
1 lated radiant energy from the internal standard iron line or after
This test method is under the jurisdiction of ASTM Committee E-1 on
a fixed exposure time. At the end of the exposure period, the
Analytical Chemistry for Metals, Ores, and Related Materials and is the direct
responsibility of Subcommittee E01.01 on Iron, Steel, and Ferroalloys.
Current edition approved Jan. 15, 1994. Published March 1994. Originally
published as E 1086 – 85. Last previous edition E 1086 – 85 (1989).
2 3
Supporting data for this test method are on file atASTM Headquarters. Request Annual Book of ASTM Standards, Vol 03.05.
Research Report RR: E02-1023. Annual Book of ASTM Standards, Vol 03.06.
Copyright © ASTM International, 100 Barr Harbor Drive, PO Box C700, West Conshohocken, PA 19428-2959, United States.
E1086
TABLE 1 Analytical and Internal Standard Lines
charge on each capacitor is measured, and displayed or
recorded as a relative energy or concentration. Concentration Switch Over
Element Wavelength, nm
Points
Chromium 298.919
5. Significance and Use
Nickel 243.789
5.1 The chemical composition of stainless steels must be 227.021
218.549
determined accurately in order to ensure the desired metallur-
216.910
gical properties. This procedure is suitable for manufacturing
Molybdenum 202.030 <1 %
control and inspection testing.
281.615
308.561 >1 %
369.265
6. Apparatus
Manganese 293.306
A
Silicon 251.612
6.1 Sample Preparation Equipment:
288.158
6.1.1 Sample Mold, capable of producing castings that are
Copper 327.396 <0.10 %
224.699 >0.10 %
homogeneous and free of voids and porosity. The following
Carbon 193.092
mold types have been found to produce acceptable samples.
A
Phosphorus 178.287
6.1.1.1 Refractory Mold Ring, having a minimum inside
Sulfur 180.731
B
Iron 271.441
diameter of 32 mm (1.25 in.) and a minimum height of 25 mm
322.706
(1.0 in.). The ring is placed on a flat surface of a copper plate
A
Silicon 251.612 can have a small but significant interference from molybde-
approximately 50 mm (2.0 in.) thick.
num 251.611. Phosphorus 178.287 may show small but significant interferences
6.1.1.2 Book-Type Steel Mold, to produce a chill-cast disk
from unlisted lines or background due to molybdenum, chromium, and manga-
64mm(2.5in.)indiameterand13mm(0.5in.)thick.Thewall nese. Interference corrections will not be necessary if: separate silicon and
phosphoruscurvesareusedfor316and317alloys;themanganesecontentvaries
thickness of the mold should be 32 mm (1.25 in.) to aid chill
only between 0.7 and 1.5 %; and the chromium concentration is held between 17
casting.
and 20 %.
B
Either iron line 271.441 or 322.775 with narrow entrance and exit slits to avoid
6.1.2 Abrasive Grinder, a suitable belt grinder, horizontal
interference from manganese 322.809 can be used as internal standard with any
disk grinder, or similar grinding apparatus. The resulting
of the listed analytical lines. Iron 271.441 is not appropriate for tungsten tool steels
surface should be uniformly plane and free of defects. These
or super alloys with high cobalt because of interference from cobalt 271.442.
may be either wet or dry grinding devices. Grinding materials
with grit sizes ranging from 60 to 180 have been found
required flush period. The flushing system shall be in accor-
satisfactory.
dance with Practice E 406.
6.2 Excitation Source, with parameters capable of produc-
ing a usable spectrum as described in 10.2 and conforming to
NOTE 1—It is not within the scope of this test method to prescribe all
Practice E 172.
details of equipment to be used. Equipment varies among laboratories.
6.3 Excitation Stand, suitable for mounting in optical align-
7. Reagents and Materials
ment, a flat surface of the specimen in opposition to a counter
7.1 Argon, either gaseous or liquid, must be of sufficient
electrode. The stand shall provide an atmosphere of argon and
may be water cooled. Electrode and argon are described in 7.1 purity to permit proper excitation of the analytical lines of
and 7.2. interest.Argon of 99.998 % purity has been found satisfactory.
Refer to Practice E 406.
6.4 Spectrometer, having sufficient resolving power and
7.2 Electrodes, may be 3 to 6 mm (0.125 to 0.25 in.) in
linear dispersion to separate clearly the analytical lines from
diameter ground to a 90° tip or whatever the instrument
other lines in the spectrum of a specimen in the spectral region
manufacturer recommends for the particular source. Hard-
170.0 to 500.0 nm. Spectrometer characteristics for two of the
drawn, fine, silver rods, thoriated-tungsten rods, or other
instruments used in this test method are described as having
material may be used provided it can be shown experimentally
dispersion of 0.697 nm/mm (first order), the focal length of 1
that equivalent precision and accuracy are obtained.
m. Spectral lines are listed in Table 1.
6.5 Measuring System, consisting of photomultiplier tubes
8. Reference Materials
having individual voltage adjustment, capacitors on which the
output of each photomultiplier tube is stored and an electronic 8.1 Certified Reference Materials are available from the
system to measure voltages on the capacitors either directly or
National Institute of Standards and Technology and other
indirectly, and the necessary switching arrangements to pro- international certification agencies.
vide the desired sequence of operation.
8.2 Reference Materials with matrices similar to that of the
6.6 Readout Console, capable of indicating the ratio of the test specimen and containing varying amounts of the elements
analytical lines to the internal standard with sufficient precision
to be determined may be used provided they have been
to produce the accuracy of analysis desired. chemically analyzed in accordance with ASTM standard test
6.7 Vacuum Pump, capable of maintaining a vacuum of 25
methods.These reference materials shall be homogeneous, and
µm Hg. free of voids or porosity.
6.8 Flushing System, consisting of argon tanks, a pressure
regulator, and a gas flowmeter. Automatic sequencing shall be
provided to actuate the flow of argon at a given flow rate for a
National Institute of Standards and Technology, U.S. Department of Com-
given time interval and to start the excitation at the end of the merce, Gaithersburg, MD 20899.
E1086
8.3 The reference materials shall cover the concentration required concentration range. Repeat with different random
ranges of the elements being sought. A minimum of three sequences at least four times. Follow the procedure for the
reference materials shall be used for each element. concentration-ratio method as described in Practice E 158.
Using the averages of the data for each point, determine
9. Preparation of Samples
...


Questions, Comments and Discussion
Ask us and Technical Secretary will try to provide an answer. You can facilitate discussion about the standard in here.