ASTM B331-10
(Test Method)Standard Test Method for Compressibility of Metal Powders in Uniaxial Compaction
Standard Test Method for Compressibility of Metal Powders in Uniaxial Compaction
SIGNIFICANCE AND USE
The compressibility value obtained by this test is a measure of a material characteristic of the powder.
The test method is useful in research and development projects, as a quality control test in the evaluation and manufacturing control of metal powder production, and as an acceptance test for shipment of metal powder lots.
In PM production operations, the test is helpful in determining pressing and tooling requirements for high density parts.
Results may be affected by test conditions such as the type amount, and method of lubrication, dwell time during compaction, and die material. The compressibility values may not necessarily agree with results obtained under production conditions.
SCOPE
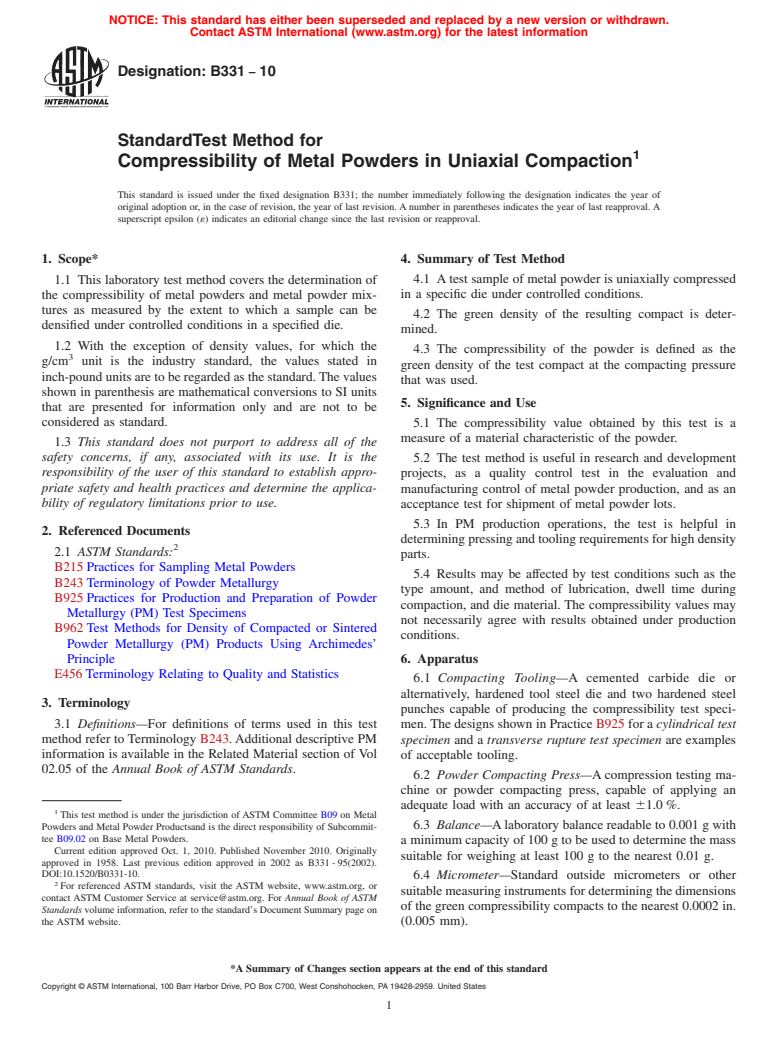
1.1 This laboratory test method covers the determination of the compressibility of metal powders and metal powder mixtures as measured by the extent to which a sample can be densified under controlled conditions in a specified die.
1.2 With the exception of density values, for which the g/cm3 unit is the industry standard, the values stated in inch-pound units are to be regarded as the standard. The values shown in parenthesis are mathematical conversions to SI units that are presented for information only and are not to be considered as standard.
1.3 This standard does not purport to address all of the safety concerns, if any, associated with its use. It is the responsibility of the user of this standard to establish appropriate safety and health practices and determine the applicability of regulatory limitations prior to use.
General Information
Relations
Buy Standard
Standards Content (Sample)
NOTICE: This standard has either been superseded and replaced by a new version or withdrawn.
Contact ASTM International (www.astm.org) for the latest information
Designation: B331 − 10
StandardTest Method for
1
Compressibility of Metal Powders in Uniaxial Compaction
This standard is issued under the fixed designation B331; the number immediately following the designation indicates the year of
original adoption or, in the case of revision, the year of last revision. A number in parentheses indicates the year of last reapproval. A
superscript epsilon (´) indicates an editorial change since the last revision or reapproval.
1. Scope* 4. Summary of Test Method
4.1 Atest sample of metal powder is uniaxially compressed
1.1 This laboratory test method covers the determination of
in a specific die under controlled conditions.
the compressibility of metal powders and metal powder mix-
tures as measured by the extent to which a sample can be
4.2 The green density of the resulting compact is deter-
densified under controlled conditions in a specified die.
mined.
1.2 With the exception of density values, for which the
4.3 The compressibility of the powder is defined as the
3
g/cm unit is the industry standard, the values stated in
green density of the test compact at the compacting pressure
inch-pound units are to be regarded as the standard.The values
that was used.
shown in parenthesis are mathematical conversions to SI units
5. Significance and Use
that are presented for information only and are not to be
considered as standard. 5.1 The compressibility value obtained by this test is a
measure of a material characteristic of the powder.
1.3 This standard does not purport to address all of the
safety concerns, if any, associated with its use. It is the
5.2 The test method is useful in research and development
responsibility of the user of this standard to establish appro-
projects, as a quality control test in the evaluation and
priate safety and health practices and determine the applica- manufacturing control of metal powder production, and as an
bility of regulatory limitations prior to use.
acceptance test for shipment of metal powder lots.
5.3 In PM production operations, the test is helpful in
2. Referenced Documents
determining pressing and tooling requirements for high density
2
2.1 ASTM Standards:
parts.
B215 Practices for Sampling Metal Powders
5.4 Results may be affected by test conditions such as the
B243 Terminology of Powder Metallurgy
type amount, and method of lubrication, dwell time during
B925 Practices for Production and Preparation of Powder
compaction, and die material. The compressibility values may
Metallurgy (PM) Test Specimens
not necessarily agree with results obtained under production
B962 Test Methods for Density of Compacted or Sintered
conditions.
Powder Metallurgy (PM) Products Using Archimedes’
Principle 6. Apparatus
E456 Terminology Relating to Quality and Statistics
6.1 Compacting Tooling—A cemented carbide die or
alternatively, hardened tool steel die and two hardened steel
3. Terminology
punches capable of producing the compressibility test speci-
3.1 Definitions—For definitions of terms used in this test men. The designs shown in Practice B925 for a cylindrical test
method refer to Terminology B243.Additional descriptive PM
specimen and a transverse rupture test specimen are examples
information is available in the Related Material section of Vol of acceptable tooling.
02.05 of the Annual Book of ASTM Standards.
6.2 Powder Compacting Press—A compression testing ma-
chine or powder compacting press, capable of applying an
adequate load with an accuracy of at least 61.0 %.
1
This test method is under the jurisdiction of ASTM Committee B09 on Metal
Powders and Metal Powder Productsand is the direct responsibility of Subcommit- 6.3 Balance—Alaboratory balance readable to 0.001 g with
tee B09.02 on Base Metal Powders.
a minimum capacity of 100 g to be used to determine the mass
Current edition approved Oct. 1, 2010. Published November 2010. Originally
suitable for weighing at least 100 g to the nearest 0.01 g.
approved in 1958. Last previous edition approved in 2002 as B331 - 95(2002).
DOI:10.1520/B0331-10.
6.4 Micrometer—Standard outside micrometers or other
2
For referenced ASTM standards, visit the ASTM website, www.astm.org, or
suitable measuring instruments for determining the dimensions
contact ASTM Customer Service at service@astm.org. For Annual Book of ASTM
of the green compressibility compacts to the nearest 0.0002 in.
Standards volume information, refer to the standard’s Document Summary page on
the ASTM website. (0.005 mm).
*A Summary of Changes section appears at the end of this standard
Copyright © ASTM International, 100 Barr Harbor Drive, PO Box C700, West Conshohocken, PA 19428-2959. United States
1
---------------------- Page: 1 ----------------------
B331 − 10
7. Gross Metal Powder Sample 0.250 6 0.010 in. thick. (31.8 by 12.7 by 6.35 6 0.25 mm),
similar to that which is
...
This document is not anASTM standard and is intended only to provide the user of anASTM standard an indication of what changes have been made to the previous version. Because
it may not be technically possible to adequately depict all changes accurately, ASTM recommends that users consult prior editions as appropriate. In all cases only the current version
of the standard as published by ASTM is to be considered the official document.
Designation:B331–95 (Reapproved 2002) Designation:B331–10
Standard Test Method for
1
Compressibility of Metal Powders in Uniaxial Compaction
This standard is issued under the fixed designation B331; the number immediately following the designation indicates the year of
original adoption or, in the case of revision, the year of last revision. A number in parentheses indicates the year of last reapproval. A
superscript epsilon (´) indicates an editorial change since the last revision or reapproval.
1. Scope
1.1This test method covers determination of compressibility of metal powders as measured by the extent to which they can be
densified in a specified die under controlled conditions.
1.2The values stated in inch-pound units are to be regarded as the standard. The SI equivalents are in parentheses and may be
approximate. *
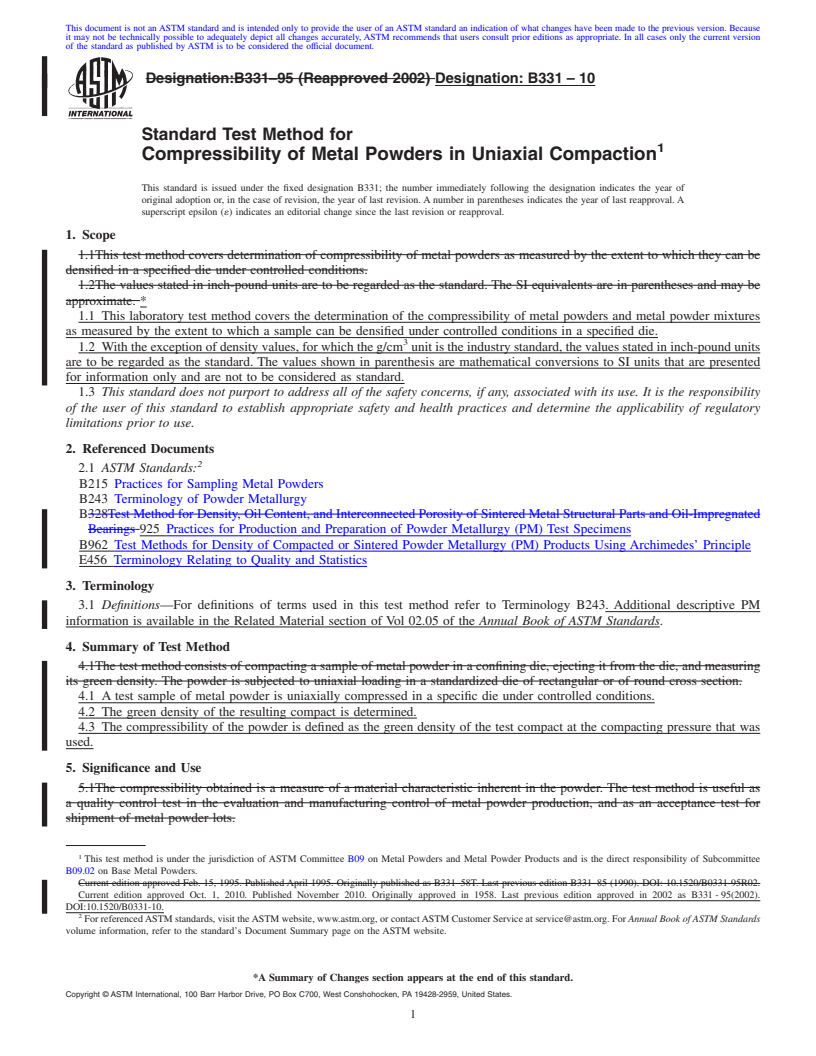
1.1 This laboratory test method covers the determination of the compressibility of metal powders and metal powder mixtures
as measured by the extent to which a sample can be densified under controlled conditions in a specified die.
3
1.2 With the exception of density values, for which the g/cm unit is the industry standard, the values stated in inch-pound units
are to be regarded as the standard. The values shown in parenthesis are mathematical conversions to SI units that are presented
for information only and are not to be considered as standard.
1.3 This standard does not purport to address all of the safety concerns, if any, associated with its use. It is the responsibility
of the user of this standard to establish appropriate safety and health practices and determine the applicability of regulatory
limitations prior to use.
2. Referenced Documents
2
2.1 ASTM Standards:
B215 Practices for Sampling Metal Powders
B243 Terminology of Powder Metallurgy
B328Test Method for Density, Oil Content, and Interconnected Porosity of Sintered Metal Structural Parts and Oil-Impregnated
Bearings 925 Practices for Production and Preparation of Powder Metallurgy (PM) Test Specimens
B962 Test Methods for Density of Compacted or Sintered Powder Metallurgy (PM) Products Using Archimedes’ Principle
E456 Terminology Relating to Quality and Statistics
3. Terminology
3.1 Definitions—For definitions of terms used in this test method refer to Terminology B243. Additional descriptive PM
information is available in the Related Material section of Vol 02.05 of the Annual Book of ASTM Standards.
4. Summary of Test Method
4.1The test method consists of compacting a sample of metal powder in a confining die, ejecting it from the die, and measuring
its green density. The powder is subjected to uniaxial loading in a standardized die of rectangular or of round cross section.
4.1 A test sample of metal powder is uniaxially compressed in a specific die under controlled conditions.
4.2 The green density of the resulting compact is determined.
4.3 The compressibility of the powder is defined as the green density of the test compact at the compacting pressure that was
used.
5. Significance and Use
5.1The compressibility obtained is a measure of a material characteristic inherent in the powder. The test method is useful as
a quality control test in the evaluation and manufacturing control of metal powder production, and as an acceptance test for
shipment of metal powder lots.
1
This test method is under the jurisdiction of ASTM Committee B09 on Metal Powders and Metal Powder Products and is the direct responsibility of Subcommittee
B09.02 on Base Metal Powders.
Current edition approved Feb. 15, 1995. Published April 1995. Originally published as B331–58T. Last previous edition B331–85 (1990). DOI: 10.1520/B0331-95R02.
Current edition approved Oct. 1, 2010. Published November 2010. Originally approved in 1958. Last previous edition approved in 2002 as B331 - 95(2002).
DOI:10.1520/B0331-10.
2
For referencedASTM standards, visit theASTM website, www.astm.org, or contactASTM Customer Service at service@astm.org. For Annual Book of ASTM Standards
volume information, refer to the standard’s Document Summary page on the ASTM website.
*A Summary of Changes section appears at the end of this standard.
Copyright © ASTM International, 100 Barr Harbor Drive, PO Box C700, West Conshohocken, PA 19428-2959, United States.
1
---------------------- Page: 1 ----------------------
B331–10
5.2Results may be affected by test conditions such as the type amount, and method of lubrication, dwell time, and die material.
They may not necessarily agree with results obtained under production conditions.
5.1 The compressibility va
...


Questions, Comments and Discussion
Ask us and Technical Secretary will try to provide an answer. You can facilitate discussion about the standard in here.