ASTM A327/A327M-11
(Test Method)Standard Test Methods for Impact Testing of Cast Irons
Standard Test Methods for Impact Testing of Cast Irons
ABSTRACT
This test method for impact testing covers the details of apparatus, test specimens and procedures for cast iron, including gray iron, white iron, malleable iron, ductile iron, and austempered ductile iron, but not including chilled rolls or rolls with white iron skins. The gray and white irons shall be subjected to round bar, single-blow Charpy impact test using a pendulum-type impact machine. Characterization of the fracture toughness of any cast iron should be based upon testing at least three specimens. Either the standard notched or unnotched Charpy impact test shall be employed in testing of malleable or ductile irons. Both types of charpy bars have been designated to characterize the fracture toughness of irons.
SCOPE
1.1 These test methods for impact testing cover the details of apparatus, test specimens and procedures for cast iron, including gray iron, white iron, malleable iron, ductile iron, and austempered ductile iron, but not including chilled rolls or rolls with white iron skins.
1.2 Units—The values stated in either SI units or inch-pound units are to be regarded separately as standard. The values stated in each system may not be exact equivalents; therefore, each system shall be used independently of the other. Combining values from the two systems may result in non-conformance with the standard.
1.3 This standard does not purport to address all of the safety concerns, if any, associated with its use. It is the responsibility of the user of this standard to establish appropriate safety and health practices and determine the applicability of regulatory limitations prior to use.
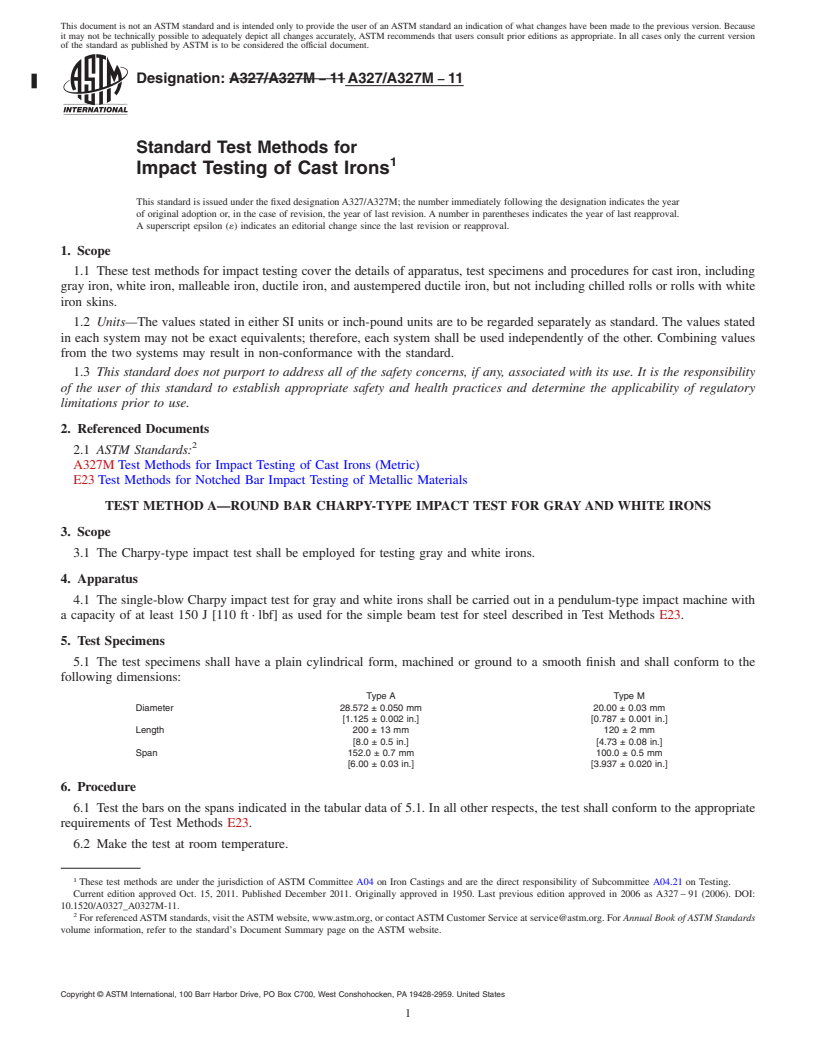
3.1 The Charpy-type impact test shall be employed for testing gray and white irons.
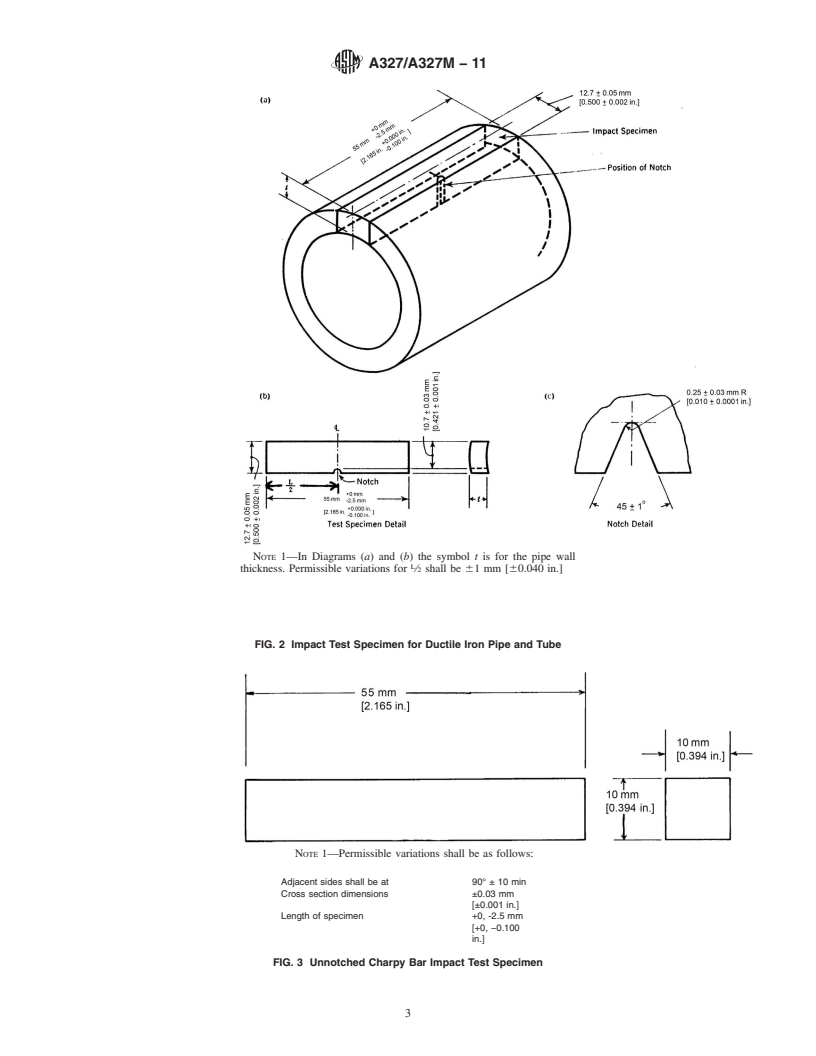
8.1 Either the standard notched or unnotched Charpy impact test shall be employed in testing of malleable or ductile irons. Selection of the type bar is dependent upon the specific material to be evaluated as defined in Section 9.
8.2 Both types of charpy bars have been designated to characterize the fracture toughness of irons. The unnotched Charpy bar, when tested, will produce substantially higher energy values than the notch bar type. The unnotched bar is therefore specified for testing irons that have low fracture toughness characteristics.
General Information
Relations
Buy Standard
Standards Content (Sample)
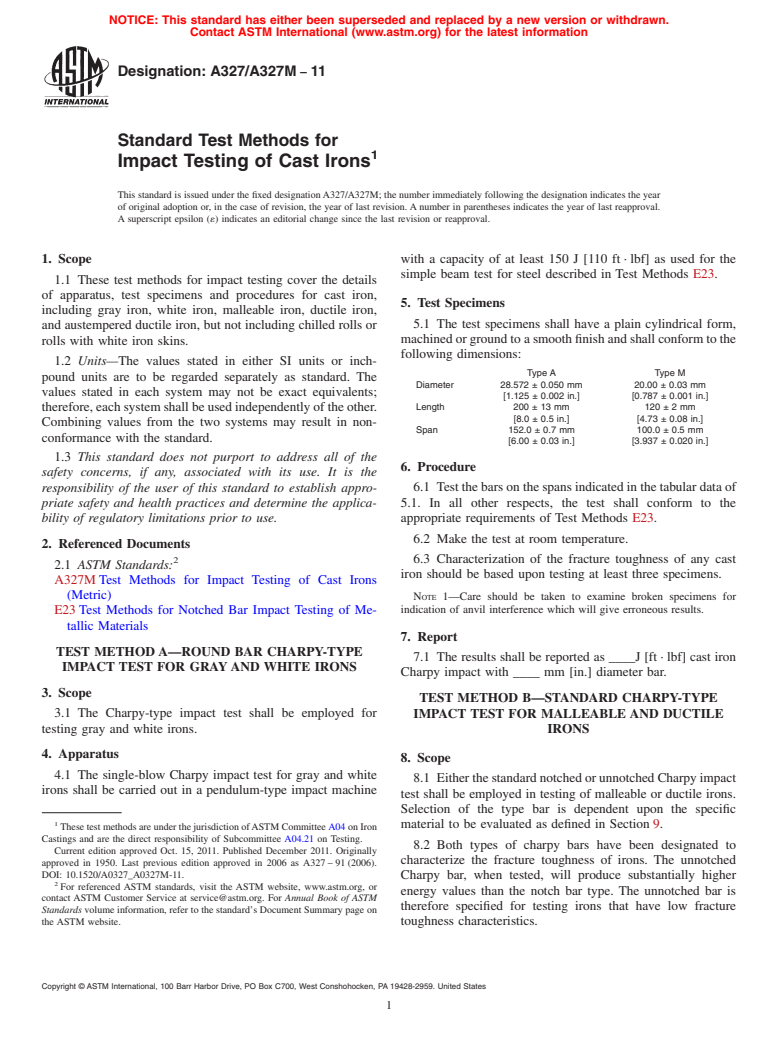
NOTICE: This standard has either been superseded and replaced by a new version or withdrawn.
Contact ASTM International (www.astm.org) for the latest information
Designation: A327/A327M − 11
Standard Test Methods for
1
Impact Testing of Cast Irons
This standard is issued under the fixed designationA327/A327M; the number immediately following the designation indicates the year
of original adoption or, in the case of revision, the year of last revision.Anumber in parentheses indicates the year of last reapproval.
A superscript epsilon (´) indicates an editorial change since the last revision or reapproval.
1. Scope with a capacity of at least 150 J [110 ft · lbf] as used for the
simple beam test for steel described in Test Methods E23.
1.1 These test methods for impact testing cover the details
of apparatus, test specimens and procedures for cast iron,
5. Test Specimens
including gray iron, white iron, malleable iron, ductile iron,
5.1 The test specimens shall have a plain cylindrical form,
and austempered ductile iron, but not including chilled rolls or
machinedorgroundtoasmoothfinishandshallconformtothe
rolls with white iron skins.
following dimensions:
1.2 Units—The values stated in either SI units or inch-
Type A Type M
pound units are to be regarded separately as standard. The
Diameter 28.572 ± 0.050 mm 20.00±0.03mm
values stated in each system may not be exact equivalents;
[1.125 ± 0.002 in.] [0.787 ± 0.001 in.]
therefore,eachsystemshallbeusedindependentlyoftheother. Length 200 ± 13 mm 120±2mm
[8.0 ± 0.5 in.] [4.73 ± 0.08 in.]
Combining values from the two systems may result in non-
Span 152.0 ± 0.7 mm 100.0 ± 0.5 mm
conformance with the standard.
[6.00 ± 0.03 in.] [3.937 ± 0.020 in.]
1.3 This standard does not purport to address all of the
6. Procedure
safety concerns, if any, associated with its use. It is the
responsibility of the user of this standard to establish appro- 6.1 Testthebarsonthespansindicatedinthetabulardataof
priate safety and health practices and determine the applica- 5.1. In all other respects, the test shall conform to the
appropriate requirements of Test Methods E23.
bility of regulatory limitations prior to use.
6.2 Make the test at room temperature.
2. Referenced Documents
2 6.3 Characterization of the fracture toughness of any cast
2.1 ASTM Standards:
iron should be based upon testing at least three specimens.
A327M Test Methods for Impact Testing of Cast Irons
(Metric)
NOTE 1—Care should be taken to examine broken specimens for
indication of anvil interference which will give erroneous results.
E23 Test Methods for Notched Bar Impact Testing of Me-
tallic Materials
7. Report
TEST METHOD A—ROUND BAR CHARPY-TYPE
7.1 The results shall be reported as ____J [ft · lbf] cast iron
IMPACT TEST FOR GRAY AND WHITE IRONS
Charpy impact with ____ mm [in.] diameter bar.
3. Scope
TEST METHOD B—STANDARD CHARPY-TYPE
3.1 The Charpy-type impact test shall be employed for IMPACT TEST FOR MALLEABLE AND DUCTILE
testing gray and white irons. IRONS
4. Apparatus
8. Scope
4.1 The single-blow Charpy impact test for gray and white
8.1 EitherthestandardnotchedorunnotchedCharpyimpact
irons shall be carried out in a pendulum-type impact machine
test shall be employed in testing of malleable or ductile irons.
Selection of the type bar is dependent upon the specific
1
material to be evaluated as defined in Section 9.
ThesetestmethodsareunderthejurisdictionofASTMCommitteeA04onIron
Castings and are the direct responsibility of Subcommittee A04.21 on Testing.
8.2 Both types of charpy bars have been designated to
Current edition approved Oct. 15, 2011. Published December 2011. Originally
characterize the fracture toughness of irons. The unnotched
approved in 1950. Last previous edition approved in 2006 as A327 – 91 (2006).
DOI: 10.1520/A0327_A0327M-11.
Charpy bar, when tested, will produce substantially higher
2
For referenced ASTM standards, visit the ASTM website, www.astm.org, or
energy values than the notch bar type. The unnotched bar is
contact ASTM Customer Service at service@astm.org. For Annual Book of ASTM
therefore specified for testing irons that have low fracture
Standards volume information, refer to the standard’s Document Summary page on
the ASTM website. toughness characteristics.
Copyright © ASTM International, 100 Barr Harbor Drive, PO Box C700, West Conshohocken, PA 19428-2959. United States
1
---------------------- Page: 1 ----------------------
A327/A327M − 11
9. Charpy Test Bar Type 11. Test Specimens
9.1 Unless specified otherwise, the notched bar type speci-
11.1 Except for pipe, the test specimen shall have the shape
mens in Fig. 1 or Fig. 2 (for pipe type products) shall be
and dimensions as shown in Fig. 1 for notch Charpy bars and
employed. Exceptions are defined in 9.2 and 9.3.
Fig. 3 for unnotched Charpy bars. Bars must have a smooth
9.2 The unnotched charpy type specimen in Fig. 3 shall be
machined or ground surface finish. The notched area of notch
employed for testing of all grades of
...
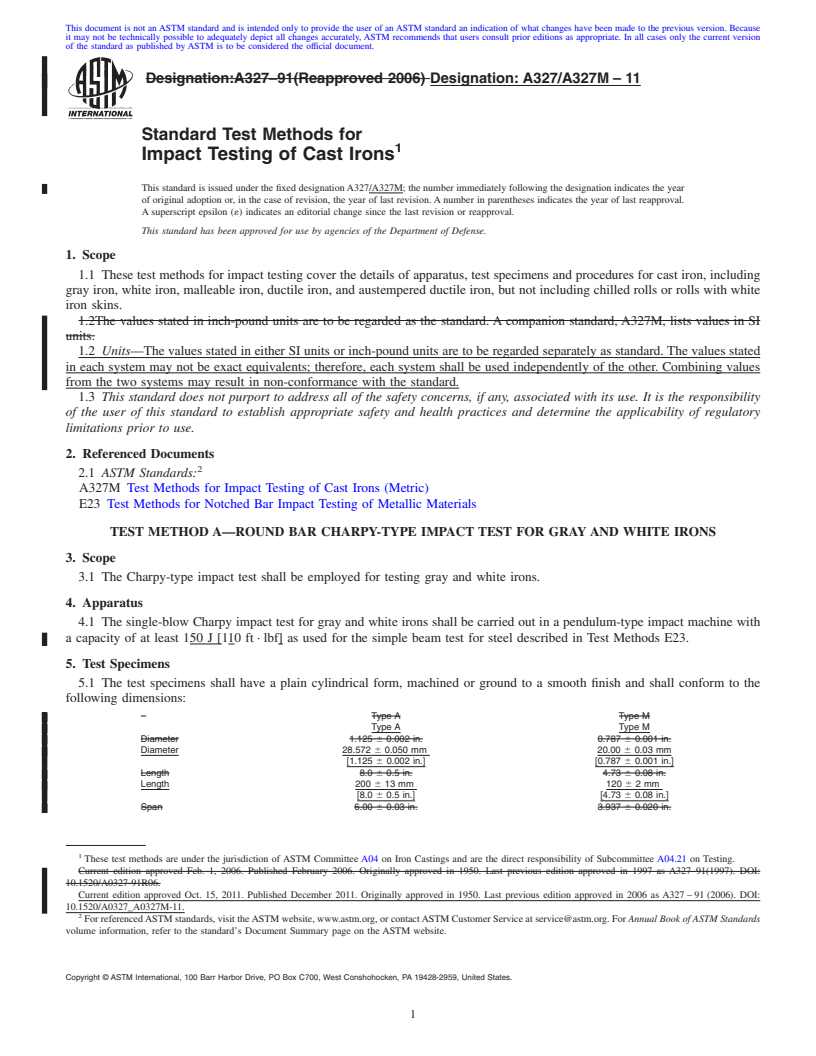
This document is not an ASTM standard and is intended only to provide the user of an ASTM standard an indication of what changes have been made to the previous version. Because
it may not be technically possible to adequately depict all changes accurately, ASTM recommends that users consult prior editions as appropriate. In all cases only the current version
of the standard as published by ASTM is to be considered the official document.
Designation:A327–91(Reapproved 2006) Designation:A327/A327M–11
Standard Test Methods for
1
Impact Testing of Cast Irons
This standard is issued under the fixed designationA327/A327M; the number immediately following the designation indicates the year
of original adoption or, in the case of revision, the year of last revision. A number in parentheses indicates the year of last reapproval.
A superscript epsilon (´) indicates an editorial change since the last revision or reapproval.
This standard has been approved for use by agencies of the Department of Defense.
1. Scope
1.1 These test methods for impact testing cover the details of apparatus, test specimens and procedures for cast iron, including
gray iron, white iron, malleable iron, ductile iron, and austempered ductile iron, but not including chilled rolls or rolls with white
iron skins.
1.2The values stated in inch-pound units are to be regarded as the standard. A companion standard, A327M, lists values in SI
units.
1.2 Units—The values stated in either SI units or inch-pound units are to be regarded separately as standard. The values stated
in each system may not be exact equivalents; therefore, each system shall be used independently of the other. Combining values
from the two systems may result in non-conformance with the standard.
1.3 This standard does not purport to address all of the safety concerns, if any, associated with its use. It is the responsibility
of the user of this standard to establish appropriate safety and health practices and determine the applicability of regulatory
limitations prior to use.
2. Referenced Documents
2
2.1 ASTM Standards:
A327M Test Methods for Impact Testing of Cast Irons (Metric)
E23 Test Methods for Notched Bar Impact Testing of Metallic Materials
TEST METHODA—ROUND BAR CHARPY-TYPE IMPACT TEST FOR GRAYAND WHITE IRONS
3. Scope
3.1 The Charpy-type impact test shall be employed for testing gray and white irons.
4. Apparatus
4.1 The single-blow Charpy impact test for gray and white irons shall be carried out in a pendulum-type impact machine with
a capacity of at least 150 J [110 ft · lbf] as used for the simple beam test for steel described in Test Methods E23.
5. Test Specimens
5.1 The test specimens shall have a plain cylindrical form, machined or ground to a smooth finish and shall conform to the
following dimensions:
Type A Type M
Type A Type M
Diameter 1.125 6 0.002 in. 0.787 6 0.001 in.
Diameter 28.572 6 0.050 mm 20.00 6 0.03 mm
[1.125 6 0.002 in.] [0.787 6 0.001 in.]
Length 8.0 6 0.5 in. 4.73 6 0.08 in.
Length 200 6 13 mm 120 6 2mm
[8.0 6 0.5 in.] [4.73 6 0.08 in.]
Span 6.00 6 0.03 in. 3.937 6 0.020 in.
1
These test methods are under the jurisdiction of ASTM Committee A04 on Iron Castings and are the direct responsibility of Subcommittee A04.21 on Testing.
Current edition approved Feb. 1, 2006. Published February 2006. Originally approved in 1950. Last previous edition approved in 1997 as A327–91(1997). DOI:
10.1520/A0327-91R06.
Current edition approved Oct. 15, 2011. Published December 2011. Originally approved in 1950. Last previous edition approved in 2006 as A327 – 91 (2006). DOI:
10.1520/A0327_A0327M-11.
2
For referencedASTM standards, visit theASTM website, www.astm.org, or contactASTM Customer Service at service@astm.org. For Annual Book ofASTM Standards
volume information, refer to the standard’s Document Summary page on the ASTM website.
Copyright © ASTM International, 100 Barr Harbor Drive, PO Box C700, West Conshohocken, PA 19428-2959, United States.
1
---------------------- Page: 1 ----------------------
A327/A327M–11
Span 152.0 6 0.7 mm 100.0 6 0.5 mm
[6.00 6 0.03 in.] [3.937 6 0.020 in.]
6. Procedure
6.1 Test the bars on the spans indicated in the tabular data of 5.1. In all other respects, the test shall conform to the appropriate
requirements of Test Methods E23.
6.2 Make the test at room temperature.
6.3 Characterization of the fracture toughness of any cast iron should be based upon testing at least three specimens.
NOTE 1—Care should be taken to examine broken specimens for indication of anvil interference which will give erroneous results.
7. Report
7.1 The results shall be reported as ____J [ft · lbf] cast iron Charpy impact with ____ mm [in.] diameter bar.
TEST METHOD B—STANDARD CHARPY-TYPE IMPACT TEST FOR MALLEABLEAND DUCTILE IRONS
8. Scope
8.1 Either the standard notched or unnotched Charpy impact test shall be employed in testing of malleable or ductile irons.
Selection of the type bar is dependent upon the specific material to be evaluated as define
...
This document is not an ASTM standard and is intended only to provide the user of an ASTM standard an indication of what changes have been made to the previous version. Because
it may not be technically possible to adequately depict all changes accurately, ASTM recommends that users consult prior editions as appropriate. In all cases only the current version
of the standard as published by ASTM is to be considered the official document.
Designation: A327/A327M − 11 A327/A327M − 11
Standard Test Methods for
1
Impact Testing of Cast Irons
This standard is issued under the fixed designation A327/A327M; the number immediately following the designation indicates the year
of original adoption or, in the case of revision, the year of last revision. A number in parentheses indicates the year of last reapproval.
A superscript epsilon (´) indicates an editorial change since the last revision or reapproval.
1. Scope
1.1 These test methods for impact testing cover the details of apparatus, test specimens and procedures for cast iron, including
gray iron, white iron, malleable iron, ductile iron, and austempered ductile iron, but not including chilled rolls or rolls with white
iron skins.
1.2 Units—The values stated in either SI units or inch-pound units are to be regarded separately as standard. The values stated
in each system may not be exact equivalents; therefore, each system shall be used independently of the other. Combining values
from the two systems may result in non-conformance with the standard.
1.3 This standard does not purport to address all of the safety concerns, if any, associated with its use. It is the responsibility
of the user of this standard to establish appropriate safety and health practices and determine the applicability of regulatory
limitations prior to use.
2. Referenced Documents
2
2.1 ASTM Standards:
A327M Test Methods for Impact Testing of Cast Irons (Metric)
E23 Test Methods for Notched Bar Impact Testing of Metallic Materials
TEST METHOD A—ROUND BAR CHARPY-TYPE IMPACT TEST FOR GRAY AND WHITE IRONS
3. Scope
3.1 The Charpy-type impact test shall be employed for testing gray and white irons.
4. Apparatus
4.1 The single-blow Charpy impact test for gray and white irons shall be carried out in a pendulum-type impact machine with
a capacity of at least 150 J [110 ft · lbf] as used for the simple beam test for steel described in Test Methods E23.
5. Test Specimens
5.1 The test specimens shall have a plain cylindrical form, machined or ground to a smooth finish and shall conform to the
following dimensions:
Type A Type M
Diameter 28.572 ± 0.050 mm 20.00 ± 0.03 mm
[1.125 ± 0.002 in.] [0.787 ± 0.001 in.]
Length 200 ± 13 mm 120 ± 2 mm
[8.0 ± 0.5 in.] [4.73 ± 0.08 in.]
Span 152.0 ± 0.7 mm 100.0 ± 0.5 mm
[6.00 ± 0.03 in.] [3.937 ± 0.020 in.]
6. Procedure
6.1 Test the bars on the spans indicated in the tabular data of 5.1. In all other respects, the test shall conform to the appropriate
requirements of Test Methods E23.
6.2 Make the test at room temperature.
1
These test methods are under the jurisdiction of ASTM Committee A04 on Iron Castings and are the direct responsibility of Subcommittee A04.21 on Testing.
Current edition approved Oct. 15, 2011. Published December 2011. Originally approved in 1950. Last previous edition approved in 2006 as A327 – 91 (2006). DOI:
10.1520/A0327_A0327M-11.
2
For referenced ASTM standards, visit the ASTM website, www.astm.org, or contact ASTM Customer Service at service@astm.org. For Annual Book of ASTM Standards
volume information, refer to the standard’s Document Summary page on the ASTM website.
Copyright © ASTM International, 100 Barr Harbor Drive, PO Box C700, West Conshohocken, PA 19428-2959. United States
1
---------------------- Page: 1 ----------------------
A327/A327M − 11
6.3 Characterization of the fracture toughness of any cast iron should be based upon testing at least three specimens.
NOTE 1—Care should be taken to examine broken specimens for indication of anvil interference which will give erroneous results.
7. Report
7.1 The results shall be reported as ____J [ft · lbf] cast iron Charpy impact with ____ mm [in.] diameter bar.
TEST METHOD B—STANDARD CHARPY-TYPE IMPACT TEST FOR MALLEABLE AND DUCTILE IRONS
8. Scope
8.1 Either the standard notched or unnotched Charpy impact test shall be employed in testing of malleable or ductile irons.
Selection of the type bar is dependent upon the specific material to be evaluated as defined in Section 9.
8.2 Both types of charpy bars have been designated to characterize the fracture toughness of irons. The unnotched Charpy bar,
when tested, will produce substantially higher energy values than the notch bar type. The unnotched bar is therefore specified for
testing irons that have low fracture toughness characteristics.
9. Charpy Test Bar Type
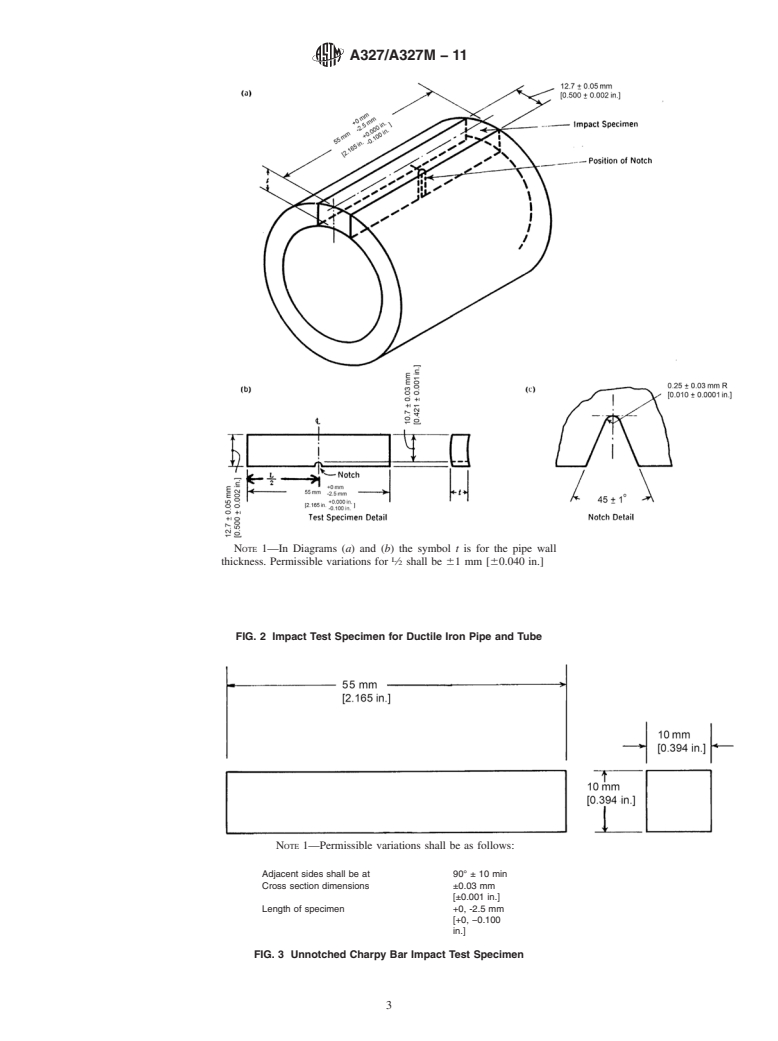
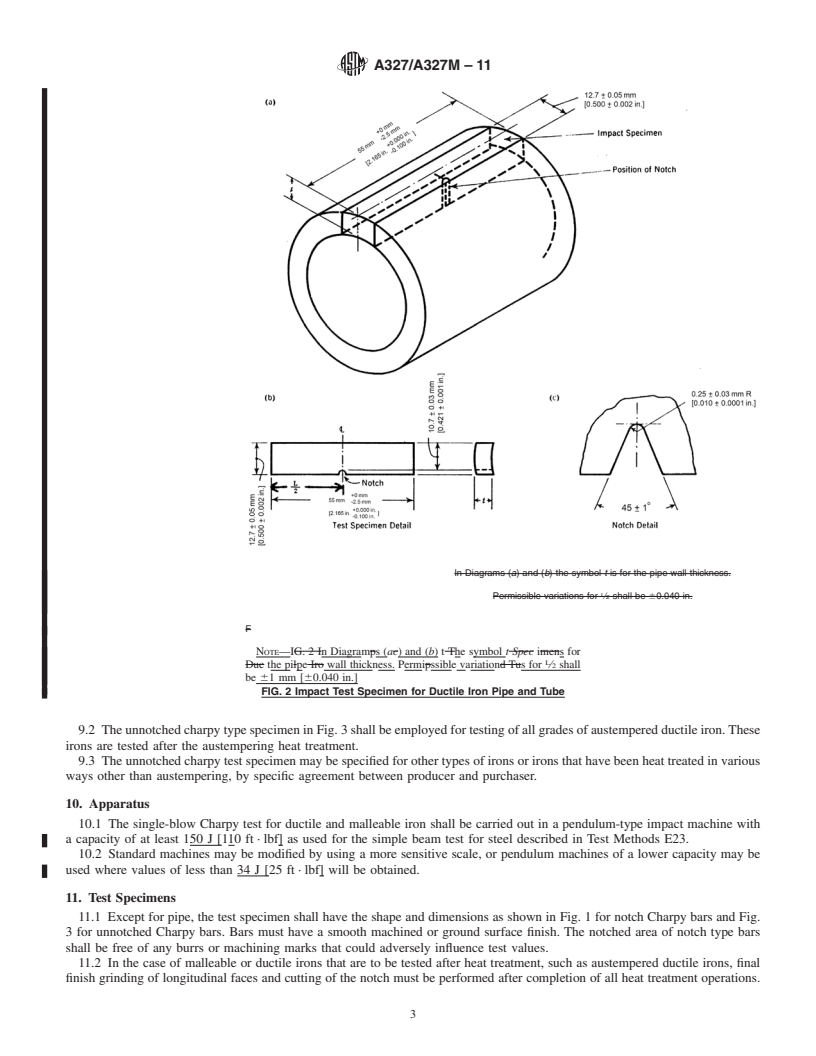
9.1 Unless specified otherwise, the notched bar type specimens in Fig. 1 or Fig. 2 (for pipe type products) shall be employed.
Exceptions are defined in 9.2 and 9.3.
9.2 The u
...


Questions, Comments and Discussion
Ask us and Technical Secretary will try to provide an answer. You can facilitate discussion about the standard in here.