ASTM B977-13
(Specification)Standard Specification for Titanium and Titanium Ingots
Standard Specification for Titanium and Titanium Ingots
ABSTRACT
This specification covers titanium and titanium alloy ingots. The chemical requirements and permissible variations in product analysis are specified. This standard does not claim to address all of the safety concerns, if any, associated with its use.
SCOPE
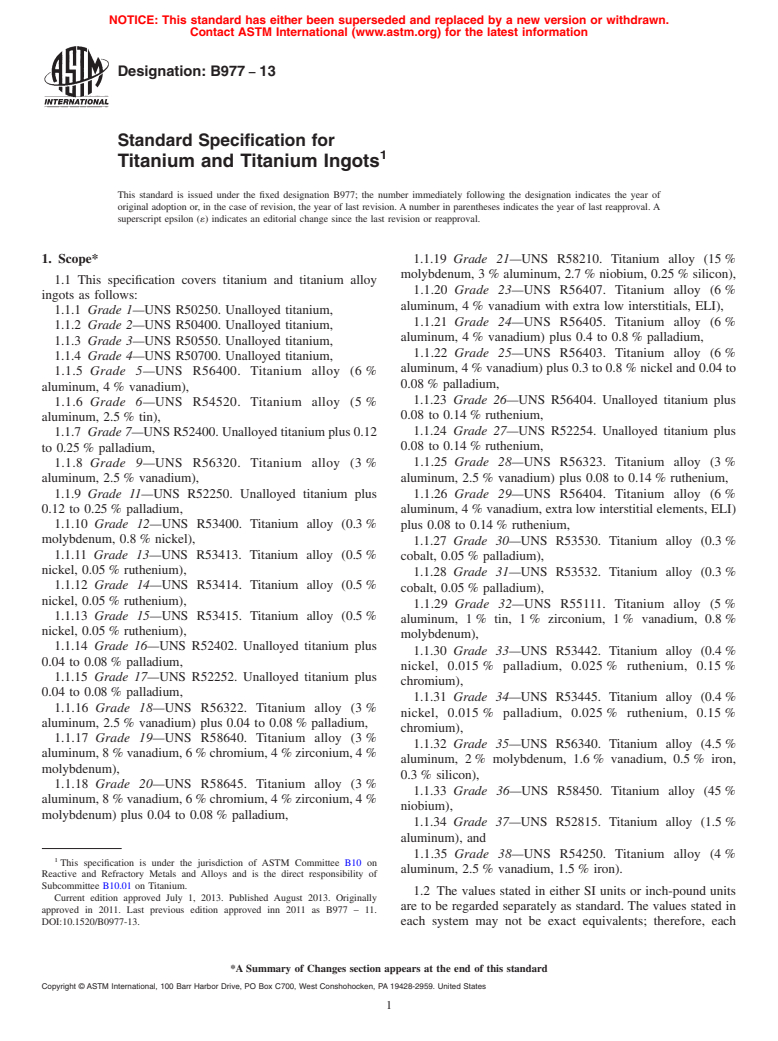
1.1 This specification covers titanium and titanium alloy ingots as follows:
1.1.1 Grade 1—UNS R50250. Unalloyed titanium,
1.1.2 Grade 2—UNS R50400. Unalloyed titanium,
1.1.3 Grade 3—UNS R50550. Unalloyed titanium,
1.1.4 Grade 4—UNS R50700. Unalloyed titanium,
1.1.5 Grade 5—UNS R56400. Titanium alloy (6 % aluminum, 4 % vanadium),
1.1.6 Grade 6—UNS R54520. Titanium alloy (5 % aluminum, 2.5 % tin),
1.1.7 Grade 7—UNS R52400. Unalloyed titanium plus 0.12 to 0.25 % palladium,
1.1.8 Grade 9—UNS R56320. Titanium alloy (3 % aluminum, 2.5 % vanadium),
1.1.9 Grade 11—UNS R52250. Unalloyed titanium plus 0.12 to 0.25 % palladium,
1.1.10 Grade 12—UNS R53400. Titanium alloy (0.3 % molybdenum, 0.8 % nickel),
1.1.11 Grade 13—UNS R53413. Titanium alloy (0.5 % nickel, 0.05 % ruthenium),
1.1.12 Grade 14—UNS R53414. Titanium alloy (0.5 % nickel, 0.05 % ruthenium),
1.1.13 Grade 15—UNS R53415. Titanium alloy (0.5 % nickel, 0.05 % ruthenium),
1.1.14 Grade 16—UNS R52402. Unalloyed titanium plus 0.04 to 0.08 % palladium,
1.1.15 Grade 17—UNS R52252. Unalloyed titanium plus 0.04 to 0.08 % palladium,
1.1.16 Grade 18—UNS R56322. Titanium alloy (3 % aluminum, 2.5 % vanadium) plus 0.04 to 0.08 % palladium,
1.1.17 Grade 19—UNS R58640. Titanium alloy (3 % aluminum, 8 % vanadium, 6 % chromium, 4 % zirconium, 4 % molybdenum),
1.1.18 Grade 20—UNS R58645. Titanium alloy (3 % aluminum, 8 % vanadium, 6 % chromium, 4 % zirconium, 4 % molybdenum) plus 0.04 to 0.08 % palladium,
1.1.19 Grade 21—UNS R58210. Titanium alloy (15 % molybdenum, 3 % aluminum, 2.7 % niobium, 0.25 % silicon),
1.1.20 Grade 23—UNS R56407. Titanium alloy (6 % aluminum, 4 % vanadium with extra low interstitials, ELI),
1.1.21 Grade 24—UNS R56405. Titanium alloy (6 % aluminum, 4 % vanadium) plus 0.4 to 0.8 % palladium,
1.1.22 Grade 25—UNS R56403. Titanium alloy (6 % aluminum, 4 % vanadium) plus 0.3 to 0.8 % nickel and 0.04 to 0.08 % palladium,
1.1.23 Grade 26—UNS R56404. Unalloyed titanium plus 0.08 to 0.14 % ruthenium,
1.1.24 Grade 27—UNS R52254. Unalloyed titanium plus 0.08 to 0.14 % ruthenium,
1.1.25 Grade 28—UNS R56323. Titanium alloy (3 % aluminum, 2.5 % vanadium) plus 0.08 to 0.14 % ruthenium,
1.1.26 Grade 29—UNS R56404. Titanium alloy (6 % aluminum, 4 % vanadium, extra low interstitial elements, ELI) plus 0.08 to 0.14 % ruthenium,
1.1.27 Grade 30—UNS R53530. Titanium alloy (0.3 % cobalt, 0.05 % palladium),
1.1.28 Grade 31—UNS R53532. Titanium alloy (0.3 % cobalt, 0.05 % palladium),
1.1.29 Grade 32—UNS R55111. Titanium alloy (5 % aluminum, 1 % tin, 1 % zirconium, 1 % vanadium, 0.8 % molybdenum),
1.1.30 Grade 33—UNS R53442. Titanium alloy (0.4 % nickel, 0.015 % palladium, 0.025 % ruthenium, 0.15 % chromium),
1.1.31 Grade 34—UNS R53445. Titanium alloy (0.4 % nickel, 0.015 % palladium, 0.025 % ruthenium, 0.15 % chromium),
1.1.32 Grade 35—UNS R56340. Titanium alloy (4.5 % aluminum, 2 % molybdenum, 1.6 % vanadium, 0.5 % iron, 0.3 % silicon),
1.1.33 Grade 36—UNS R58450. Titanium alloy (45 % niobium),
1.1.34 Grade 37—UNS R52815. Titanium alloy (1.5 % aluminum), and
1.1.35 Grade 38—UNS R54250. Titanium alloy (4 % aluminum, 2.5 % vanadium, 1.5 % iron).
1.2 The values stated in either SI units or inch-pound units are to be regarded separately as standard. The values stated in each system may not be exact equivalents; therefore, each system shall be used independently of the other. Combining values from the two systems may result in non-conformance with the standard.
1.3 The following caveat pertains only to the test method portions of this specification: This standard does not purport to address all of the safety conce...
General Information
Relations
Buy Standard
Standards Content (Sample)
NOTICE: This standard has either been superseded and replaced by a new version or withdrawn.
Contact ASTM International (www.astm.org) for the latest information
Designation:B977 −13
Standard Specification for
1
Titanium and Titanium Ingots
This standard is issued under the fixed designation B977; the number immediately following the designation indicates the year of
original adoption or, in the case of revision, the year of last revision. A number in parentheses indicates the year of last reapproval. A
superscript epsilon (´) indicates an editorial change since the last revision or reapproval.
1. Scope* 1.1.19 Grade 21—UNS R58210. Titanium alloy (15 %
molybdenum, 3 % aluminum, 2.7 % niobium, 0.25 % silicon),
1.1 This specification covers titanium and titanium alloy
1.1.20 Grade 23—UNS R56407. Titanium alloy (6 %
ingots as follows:
aluminum, 4 % vanadium with extra low interstitials, ELI),
1.1.1 Grade 1—UNS R50250. Unalloyed titanium,
1.1.21 Grade 24—UNS R56405. Titanium alloy (6 %
1.1.2 Grade 2—UNS R50400. Unalloyed titanium,
aluminum, 4 % vanadium) plus 0.4 to 0.8 % palladium,
1.1.3 Grade 3—UNS R50550. Unalloyed titanium,
1.1.22 Grade 25—UNS R56403. Titanium alloy (6 %
1.1.4 Grade 4—UNS R50700. Unalloyed titanium,
aluminum, 4 % vanadium) plus 0.3 to 0.8 % nickel and 0.04 to
1.1.5 Grade 5—UNS R56400. Titanium alloy (6 %
0.08 % palladium,
aluminum, 4 % vanadium),
1.1.23 Grade 26—UNS R56404. Unalloyed titanium plus
1.1.6 Grade 6—UNS R54520. Titanium alloy (5 %
0.08 to 0.14 % ruthenium,
aluminum, 2.5 % tin),
1.1.24 Grade 27—UNS R52254. Unalloyed titanium plus
1.1.7 Grade 7—UNS R52400. Unalloyed titanium plus 0.12
0.08 to 0.14 % ruthenium,
to 0.25 % palladium,
1.1.8 Grade 9—UNS R56320. Titanium alloy (3 % 1.1.25 Grade 28—UNS R56323. Titanium alloy (3 %
aluminum, 2.5 % vanadium) plus 0.08 to 0.14 % ruthenium,
aluminum, 2.5 % vanadium),
1.1.9 Grade 11—UNS R52250. Unalloyed titanium plus 1.1.26 Grade 29—UNS R56404. Titanium alloy (6 %
0.12 to 0.25 % palladium, aluminum, 4 % vanadium, extra low interstitial elements, ELI)
1.1.10 Grade 12—UNS R53400. Titanium alloy (0.3 % plus 0.08 to 0.14 % ruthenium,
molybdenum, 0.8 % nickel),
1.1.27 Grade 30—UNS R53530. Titanium alloy (0.3 %
1.1.11 Grade 13—UNS R53413. Titanium alloy (0.5 %
cobalt, 0.05 % palladium),
nickel, 0.05 % ruthenium),
1.1.28 Grade 31—UNS R53532. Titanium alloy (0.3 %
1.1.12 Grade 14—UNS R53414. Titanium alloy (0.5 %
cobalt, 0.05 % palladium),
nickel, 0.05 % ruthenium),
1.1.29 Grade 32—UNS R55111. Titanium alloy (5 %
1.1.13 Grade 15—UNS R53415. Titanium alloy (0.5 %
aluminum, 1 % tin, 1 % zirconium, 1 % vanadium, 0.8 %
nickel, 0.05 % ruthenium),
molybdenum),
1.1.14 Grade 16—UNS R52402. Unalloyed titanium plus
1.1.30 Grade 33—UNS R53442. Titanium alloy (0.4 %
0.04 to 0.08 % palladium,
nickel, 0.015 % palladium, 0.025 % ruthenium, 0.15 %
1.1.15 Grade 17—UNS R52252. Unalloyed titanium plus
chromium),
0.04 to 0.08 % palladium,
1.1.31 Grade 34—UNS R53445. Titanium alloy (0.4 %
1.1.16 Grade 18—UNS R56322. Titanium alloy (3 %
nickel, 0.015 % palladium, 0.025 % ruthenium, 0.15 %
aluminum, 2.5 % vanadium) plus 0.04 to 0.08 % palladium,
chromium),
1.1.17 Grade 19—UNS R58640. Titanium alloy (3 %
1.1.32 Grade 35—UNS R56340. Titanium alloy (4.5 %
aluminum, 8 % vanadium, 6 % chromium, 4 % zirconium, 4 %
aluminum, 2 % molybdenum, 1.6 % vanadium, 0.5 % iron,
molybdenum),
0.3 % silicon),
1.1.18 Grade 20—UNS R58645. Titanium alloy (3 %
1.1.33 Grade 36—UNS R58450. Titanium alloy (45 %
aluminum, 8 % vanadium, 6 % chromium, 4 % zirconium, 4 %
niobium),
molybdenum) plus 0.04 to 0.08 % palladium,
1.1.34 Grade 37—UNS R52815. Titanium alloy (1.5 %
aluminum), and
1.1.35 Grade 38—UNS R54250. Titanium alloy (4 %
1
This specification is under the jurisdiction of ASTM Committee B10 on
aluminum, 2.5 % vanadium, 1.5 % iron).
Reactive and Refractory Metals and Alloys and is the direct responsibility of
Subcommittee B10.01 on Titanium.
1.2 The values stated in either SI units or inch-pound units
Current edition approved July 1, 2013. Published August 2013. Originally
are to be regarded separately as standard. The values stated in
approved in 2011. Last previous edition approved inn 2011 as B977 – 11.
DOI:10.1520/B0977-13. each system may not be exact equivalents; therefore, each
*A Summary of Changes section appears at the end of this standard
Copyright © ASTM International, 100 Barr Harbor Drive, PO Box C700, West Conshohocken, PA 19428-2959. United States
1
---------------------- Page: 1 ----------------------
B977−13
system shall be used independently of the other. Combining 4.2.4 Additional chemical analysis (6.1.3),
values from the two systems may result in non-conformance 4.2.5 Requirements for purchaser inspection/witness (11.1),
with the standard. and
4.2.6 Packaging (Section 15).
1.3 The following caveat pertains only to the test method
portions of this specification: This standard does not purport to
5. Materials and Manufacture
address all of the safety concerns, if any, assoc
...
This document is not an ASTM standard and is intended only to provide the user of an ASTM standard an indication of what changes have been made to the previous version. Because
it may not be technically possible to adequately depict all changes accurately, ASTM recommends that users consult prior editions as appropriate. In all cases only the current version
of the standard as published by ASTM is to be considered the official document.
Designation: B977 − 11 B977 − 13
Standard Specification for
1
Titanium and Titanium Ingots
This standard is issued under the fixed designation B977; the number immediately following the designation indicates the year of
original adoption or, in the case of revision, the year of last revision. A number in parentheses indicates the year of last reapproval. A
superscript epsilon (´) indicates an editorial change since the last revision or reapproval.
1. Scope Scope*
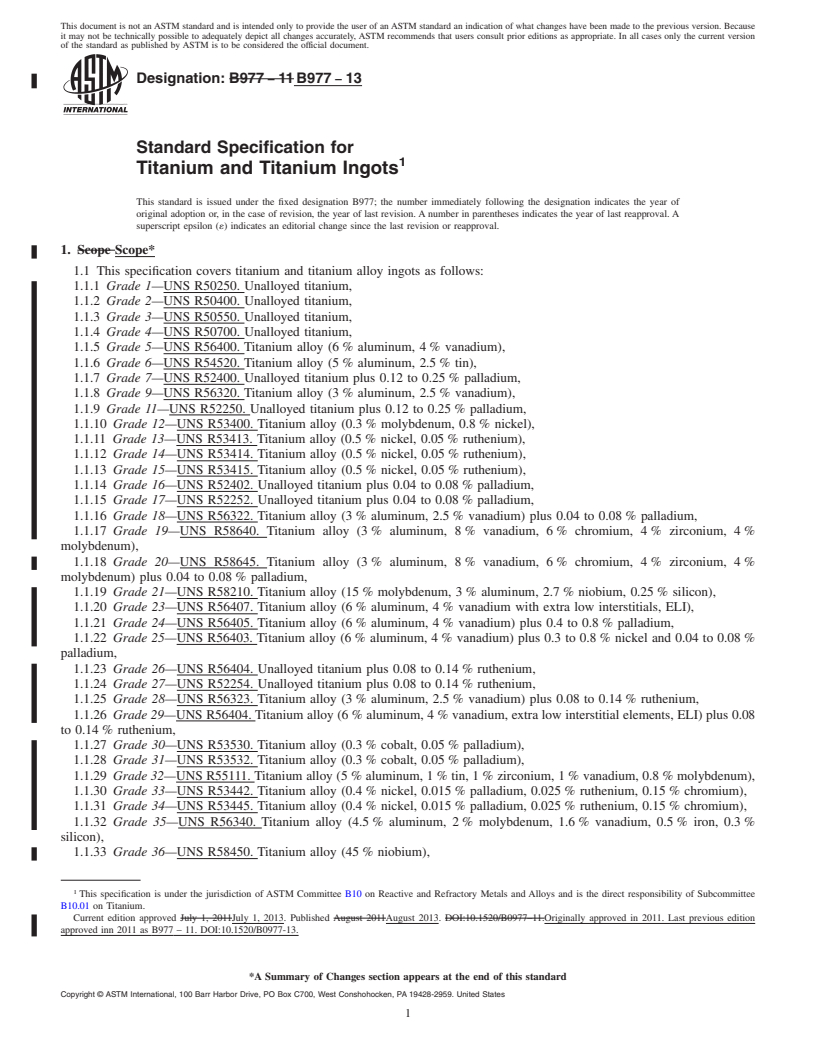
1.1 This specification covers titanium and titanium alloy ingots as follows:
1.1.1 Grade 1—UNS R50250. Unalloyed titanium,
1.1.2 Grade 2—UNS R50400. Unalloyed titanium,
1.1.3 Grade 3—UNS R50550. Unalloyed titanium,
1.1.4 Grade 4—UNS R50700. Unalloyed titanium,
1.1.5 Grade 5—UNS R56400. Titanium alloy (6 % aluminum, 4 % vanadium),
1.1.6 Grade 6—UNS R54520. Titanium alloy (5 % aluminum, 2.5 % tin),
1.1.7 Grade 7—UNS R52400. Unalloyed titanium plus 0.12 to 0.25 % palladium,
1.1.8 Grade 9—UNS R56320. Titanium alloy (3 % aluminum, 2.5 % vanadium),
1.1.9 Grade 11—UNS R52250. Unalloyed titanium plus 0.12 to 0.25 % palladium,
1.1.10 Grade 12—UNS R53400. Titanium alloy (0.3 % molybdenum, 0.8 % nickel),
1.1.11 Grade 13—UNS R53413. Titanium alloy (0.5 % nickel, 0.05 % ruthenium),
1.1.12 Grade 14—UNS R53414. Titanium alloy (0.5 % nickel, 0.05 % ruthenium),
1.1.13 Grade 15—UNS R53415. Titanium alloy (0.5 % nickel, 0.05 % ruthenium),
1.1.14 Grade 16—UNS R52402. Unalloyed titanium plus 0.04 to 0.08 % palladium,
1.1.15 Grade 17—UNS R52252. Unalloyed titanium plus 0.04 to 0.08 % palladium,
1.1.16 Grade 18—UNS R56322. Titanium alloy (3 % aluminum, 2.5 % vanadium) plus 0.04 to 0.08 % palladium,
1.1.17 Grade 19—UNS R58640. Titanium alloy (3 % aluminum, 8 % vanadium, 6 % chromium, 4 % zirconium, 4 %
molybdenum),
1.1.18 Grade 20—UNS R58645. Titanium alloy (3 % aluminum, 8 % vanadium, 6 % chromium, 4 % zirconium, 4 %
molybdenum) plus 0.04 to 0.08 % palladium,
1.1.19 Grade 21—UNS R58210. Titanium alloy (15 % molybdenum, 3 % aluminum, 2.7 % niobium, 0.25 % silicon),
1.1.20 Grade 23—UNS R56407. Titanium alloy (6 % aluminum, 4 % vanadium with extra low interstitials, ELI),
1.1.21 Grade 24—UNS R56405. Titanium alloy (6 % aluminum, 4 % vanadium) plus 0.4 to 0.8 % palladium,
1.1.22 Grade 25—UNS R56403. Titanium alloy (6 % aluminum, 4 % vanadium) plus 0.3 to 0.8 % nickel and 0.04 to 0.08 %
palladium,
1.1.23 Grade 26—UNS R56404. Unalloyed titanium plus 0.08 to 0.14 % ruthenium,
1.1.24 Grade 27—UNS R52254. Unalloyed titanium plus 0.08 to 0.14 % ruthenium,
1.1.25 Grade 28—UNS R56323. Titanium alloy (3 % aluminum, 2.5 % vanadium) plus 0.08 to 0.14 % ruthenium,
1.1.26 Grade 29—UNS R56404. Titanium alloy (6 % aluminum, 4 % vanadium, extra low interstitial elements, ELI) plus 0.08
to 0.14 % ruthenium,
1.1.27 Grade 30—UNS R53530. Titanium alloy (0.3 % cobalt, 0.05 % palladium),
1.1.28 Grade 31—UNS R53532. Titanium alloy (0.3 % cobalt, 0.05 % palladium),
1.1.29 Grade 32—UNS R55111. Titanium alloy (5 % aluminum, 1 % tin, 1 % zirconium, 1 % vanadium, 0.8 % molybdenum),
1.1.30 Grade 33—UNS R53442. Titanium alloy (0.4 % nickel, 0.015 % palladium, 0.025 % ruthenium, 0.15 % chromium),
1.1.31 Grade 34—UNS R53445. Titanium alloy (0.4 % nickel, 0.015 % palladium, 0.025 % ruthenium, 0.15 % chromium),
1.1.32 Grade 35—UNS R56340. Titanium alloy (4.5 % aluminum, 2 % molybdenum, 1.6 % vanadium, 0.5 % iron, 0.3 %
silicon),
1.1.33 Grade 36—UNS R58450. Titanium alloy (45 % niobium),
1
This specification is under the jurisdiction of ASTM Committee B10 on Reactive and Refractory Metals and Alloys and is the direct responsibility of Subcommittee
B10.01 on Titanium.
Current edition approved July 1, 2011July 1, 2013. Published August 2011August 2013. DOI:10.1520/B0977–11.Originally approved in 2011. Last previous edition
approved inn 2011 as B977 – 11. DOI:10.1520/B0977-13.
*A Summary of Changes section appears at the end of this standard
Copyright © ASTM International, 100 Barr Harbor Drive, PO Box C700, West Conshohocken, PA 19428-2959. United States
1
---------------------- Page: 1 ----------------------
B977 − 13
1.1.34 Grade 37—UNS R52815. Titanium alloy (1.5 % aluminum), and
1.1.35 Grade 38—UNS R54250. Titanium alloy (4 % aluminum, 2.5 % vanadium, 1.5 % iron).
1.2 The values stated in either SI units or inch-pound units are to be regarded separately as standard. The values stated in each
system may not be exact equivalents; therefore, each system shall be used independently of the other. Combining values from the
two systems may result in non-conformance with the standa
...


Questions, Comments and Discussion
Ask us and Technical Secretary will try to provide an answer. You can facilitate discussion about the standard in here.