ASTM E275-08
(Practice)Describing and Measuring Performance of Ultraviolet and Visible Spectrophotometers
Describing and Measuring Performance of Ultraviolet and Visible Spectrophotometers
SIGNIFICANCE AND USE
This practice permits an analyst to compare the general performance of an instrument, as it is being used in a specific spectrophotometric method, with the performance of instruments used in developing the method.
SCOPE
1.1 This practice covers the description of requirements of spectrophotometric performance, especially for test methods, and the testing of the adequacy of available equipment for a specific method (for example, qualification for a given application). The tests give a measurement of some of the important parameters controlling results obtained in spectrophotometric methods, but it is specifically not to be concluded that all the factors in instrument performance are measured, or in fact may be required for a given application.
1.1.1 This practice is primarily directed to dispersive spectrophotometers used for transmittance measurements rather than instruments designed for diffuse transmission and diffuse reflection.
1.2 The values stated in SI units are to be regarded as standard. No other units of measurement are included in this standard.
1.3 This standard does not purport to address all of the safety concerns, if any, associated with its use. It is the responsibility of the user of this standard to establish appropriate safety and health practices and determine the applicability of regulatory limitations prior to use.
General Information
Relations
Buy Standard
Standards Content (Sample)
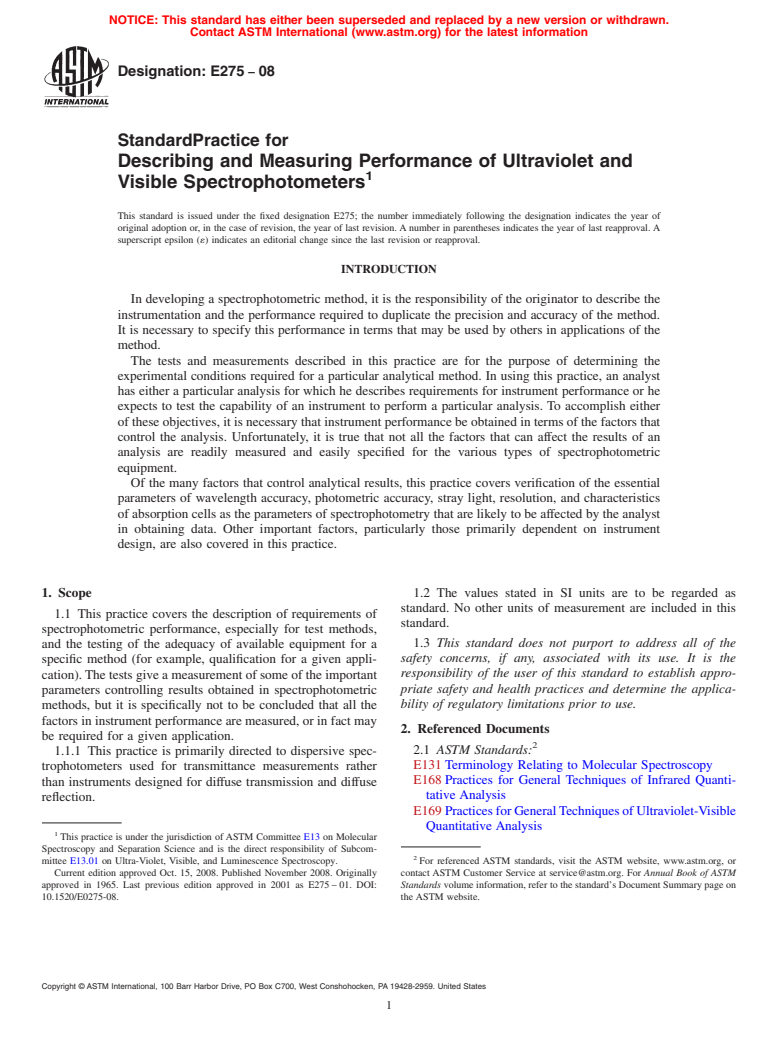
NOTICE: This standard has either been superseded and replaced by a new version or withdrawn.
Contact ASTM International (www.astm.org) for the latest information
Designation: E275 − 08
StandardPractice for
Describing and Measuring Performance of Ultraviolet and
1
Visible Spectrophotometers
This standard is issued under the fixed designation E275; the number immediately following the designation indicates the year of
original adoption or, in the case of revision, the year of last revision. A number in parentheses indicates the year of last reapproval. A
superscript epsilon (´) indicates an editorial change since the last revision or reapproval.
INTRODUCTION
In developing a spectrophotometric method, it is the responsibility of the originator to describe the
instrumentation and the performance required to duplicate the precision and accuracy of the method.
It is necessary to specify this performance in terms that may be used by others in applications of the
method.
The tests and measurements described in this practice are for the purpose of determining the
experimental conditions required for a particular analytical method. In using this practice, an analyst
has either a particular analysis for which he describes requirements for instrument performance or he
expects to test the capability of an instrument to perform a particular analysis. To accomplish either
of these objectives, it is necessary that instrument performance be obtained in terms of the factors that
control the analysis. Unfortunately, it is true that not all the factors that can affect the results of an
analysis are readily measured and easily specified for the various types of spectrophotometric
equipment.
Of the many factors that control analytical results, this practice covers verification of the essential
parameters of wavelength accuracy, photometric accuracy, stray light, resolution, and characteristics
of absorption cells as the parameters of spectrophotometry that are likely to be affected by the analyst
in obtaining data. Other important factors, particularly those primarily dependent on instrument
design, are also covered in this practice.
1. Scope 1.2 The values stated in SI units are to be regarded as
standard. No other units of measurement are included in this
1.1 This practice covers the description of requirements of
standard.
spectrophotometric performance, especially for test methods,
1.3 This standard does not purport to address all of the
and the testing of the adequacy of available equipment for a
safety concerns, if any, associated with its use. It is the
specific method (for example, qualification for a given appli-
responsibility of the user of this standard to establish appro-
cation).The tests give a measurement of some of the important
priate safety and health practices and determine the applica-
parameters controlling results obtained in spectrophotometric
bility of regulatory limitations prior to use.
methods, but it is specifically not to be concluded that all the
factors in instrument performance are measured, or in fact may
2. Referenced Documents
be required for a given application.
2
2.1 ASTM Standards:
1.1.1 This practice is primarily directed to dispersive spec-
E131 Terminology Relating to Molecular Spectroscopy
trophotometers used for transmittance measurements rather
E168 Practices for General Techniques of Infrared Quanti-
than instruments designed for diffuse transmission and diffuse
tative Analysis
reflection.
E169 PracticesforGeneralTechniquesofUltraviolet-Visible
Quantitative Analysis
1
This practice is under the jurisdiction of ASTM Committee E13 on Molecular
Spectroscopy and Separation Science and is the direct responsibility of Subcom-
2
mittee E13.01 on Ultra-Violet, Visible, and Luminescence Spectroscopy. For referenced ASTM standards, visit the ASTM website, www.astm.org, or
Current edition approved Oct. 15, 2008. Published November 2008. Originally contact ASTM Customer Service at service@astm.org. For Annual Book of ASTM
approved in 1965. Last previous edition approved in 2001 as E275 – 01. DOI: Standards volume information, refer to the standard’s Document Summary page on
10.1520/E0275-08. the ASTM website.
Copyright © ASTM International, 100 Barr Harbor Drive, PO Box C700, West Conshohocken, PA 19428-2959. United States
1
---------------------- Page: 1 ----------------------
E275 − 08
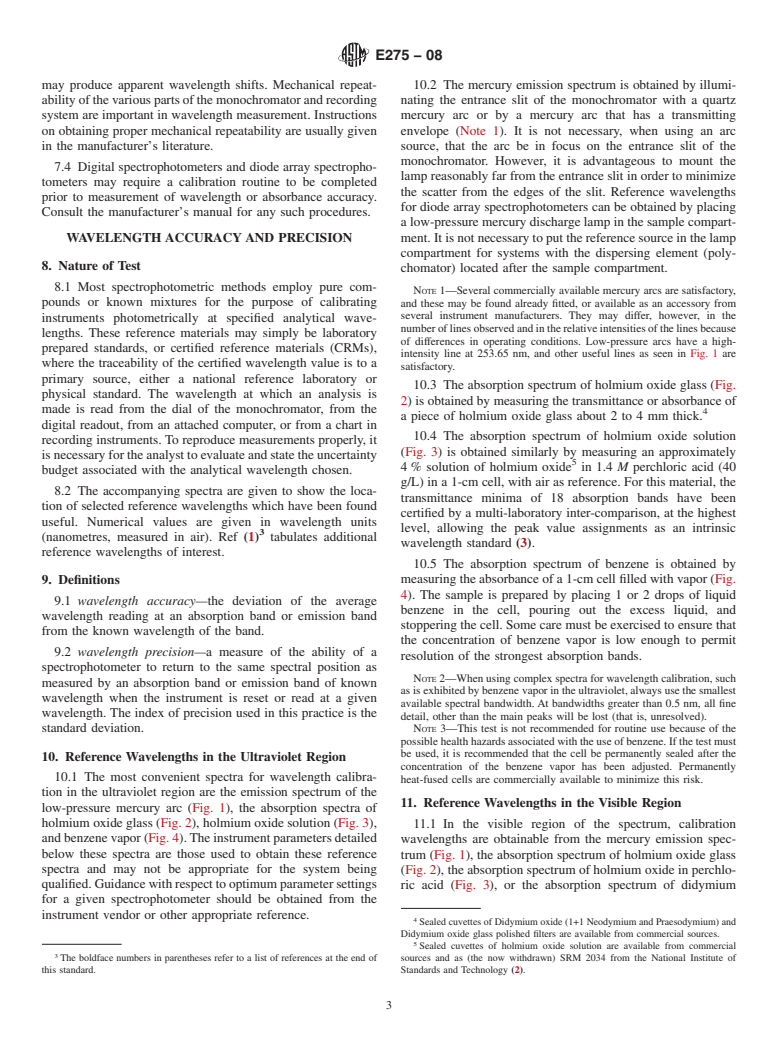
E387 TestMethodforEstimatingStrayRadiantPowerRatio scopeofthispractice.Themeasurementofstrayradiantenergy
of Dispersive Spectrophotometers by the Opaque Filter is described in Test Method E387 and resolution in Practice
Method E958.
E958 Practice for Measuring Practical Spectral Bandwidth
6.2 Modern spectrophotometers are capable of more accu-
of Ultraviolet-Visible Spectrophotometers
racy than most analysts obtain. The problem lies in the
selection and proper use of instrumentation. In order to ensure
3. Terminology
proper instrumentation and its use in a specific spectrophoto-
3.1 Definitions:
metric method, it is
...
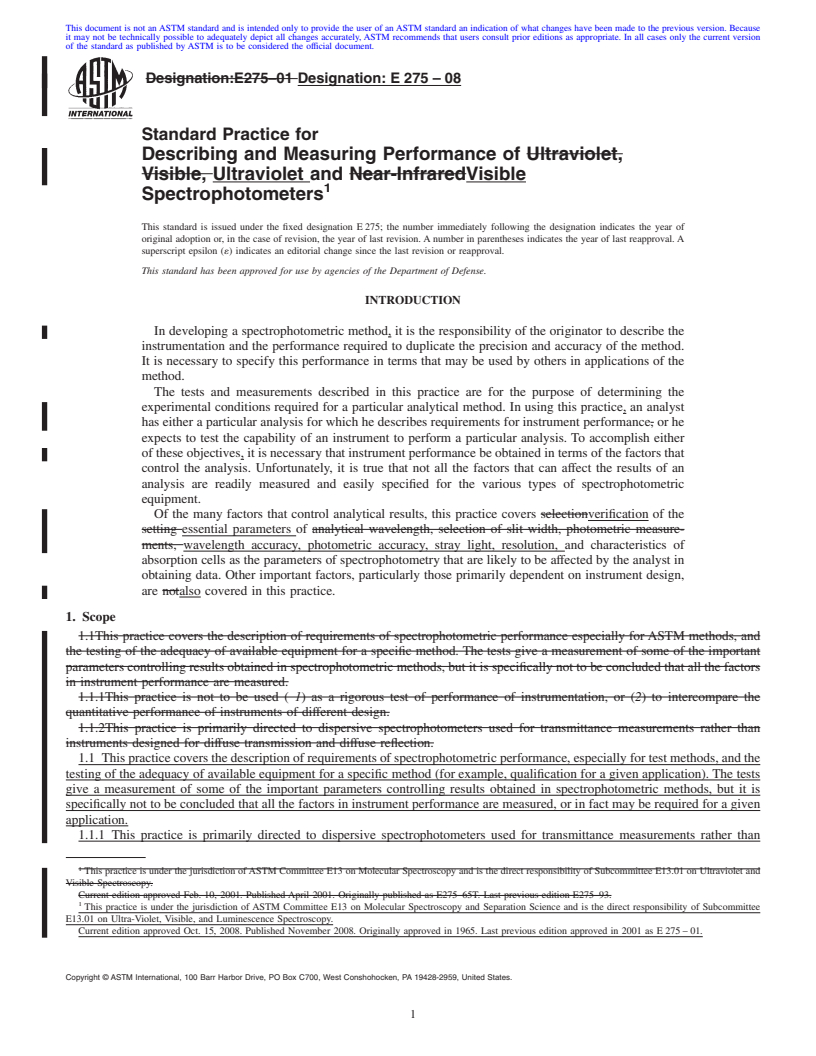
This document is not anASTM standard and is intended only to provide the user of anASTM standard an indication of what changes have been made to the previous version. Because
it may not be technically possible to adequately depict all changes accurately, ASTM recommends that users consult prior editions as appropriate. In all cases only the current version
of the standard as published by ASTM is to be considered the official document.
Designation:E275–01 Designation:E275–08
Standard Practice for
Describing and Measuring Performance of Ultraviolet,
Visible, Ultraviolet and Near-InfraredVisible
1
Spectrophotometers
This standard is issued under the fixed designation E 275; the number immediately following the designation indicates the year of
original adoption or, in the case of revision, the year of last revision. A number in parentheses indicates the year of last reapproval. A
superscript epsilon (´) indicates an editorial change since the last revision or reapproval.
This standard has been approved for use by agencies of the Department of Defense.
INTRODUCTION
In developing a spectrophotometric method, it is the responsibility of the originator to describe the
instrumentation and the performance required to duplicate the precision and accuracy of the method.
It is necessary to specify this performance in terms that may be used by others in applications of the
method.
The tests and measurements described in this practice are for the purpose of determining the
experimental conditions required for a particular analytical method. In using this practice, an analyst
has either a particular analysis for which he describes requirements for instrument performance, or he
expects to test the capability of an instrument to perform a particular analysis. To accomplish either
of these objectives, it is necessary that instrument performance be obtained in terms of the factors that
control the analysis. Unfortunately, it is true that not all the factors that can affect the results of an
analysis are readily measured and easily specified for the various types of spectrophotometric
equipment.
Of the many factors that control analytical results, this practice covers selectionverification of the
setting essential parameters of analytical wavelength, selection of slit width, photometric measure-
ments, wavelength accuracy, photometric accuracy, stray light, resolution, and characteristics of
absorption cells as the parameters of spectrophotometry that are likely to be affected by the analyst in
obtaining data. Other important factors, particularly those primarily dependent on instrument design,
are notalso covered in this practice.
1. Scope
1.1This practice covers the description of requirements of spectrophotometric performance especially forASTM methods, and
the testing of the adequacy of available equipment for a specific method. The tests give a measurement of some of the important
parameters controlling results obtained in spectrophotometric methods, but it is specifically not to be concluded that all the factors
in instrument performance are measured.
1.1.1This practice is not to be used ( 1) as a rigorous test of performance of instrumentation, or (2) to intercompare the
quantitative performance of instruments of different design.
1.1.2This practice is primarily directed to dispersive spectrophotometers used for transmittance measurements rather than
instruments designed for diffuse transmission and diffuse reflection.
1.1 Thispracticecoversthedescriptionofrequirementsofspectrophotometricperformance,especiallyfortestmethods,andthe
testing of the adequacy of available equipment for a specific method (for example, qualification for a given application). The tests
give a measurement of some of the important parameters controlling results obtained in spectrophotometric methods, but it is
specifically not to be concluded that all the factors in instrument performance are measured, or in fact may be required for a given
application.
1.1.1 This practice is primarily directed to dispersive spectrophotometers used for transmittance measurements rather than
1
This practice is under the jurisdiction ofASTM Committee E13 on Molecular Spectroscopy and is the direct responsibility of Subcommittee E13.01 on Ultraviolet and
Visible Spectroscopy.
Current edition approved Feb. 10, 2001. Published April 2001. Originally published as E275–65T. Last previous edition E275–93.
1
This practice is under the jurisdiction of ASTM Committee E13 on Molecular Spectroscopy and Separation Science and is the direct responsibility of Subcommittee
E13.01 on Ultra-Violet, Visible, and Luminescence Spectroscopy.
Current edition approved Oct. 15, 2008. Published November 2008. Originally approved in 1965. Last previous edition approved in 2001 as E 275 – 01.
Copyright © ASTM International, 100 Barr Harbor Drive, PO Box C700, West Conshohocken, PA 19428-2959, United States.
1
---------------------- Page: 1 ----------------------
E275–08
instruments designed for
...


Questions, Comments and Discussion
Ask us and Technical Secretary will try to provide an answer. You can facilitate discussion about the standard in here.