ASTM A504/A504M-14
(Specification)Standard Specification for Wrought Carbon Steel Wheels
Standard Specification for Wrought Carbon Steel Wheels
ABSTRACT
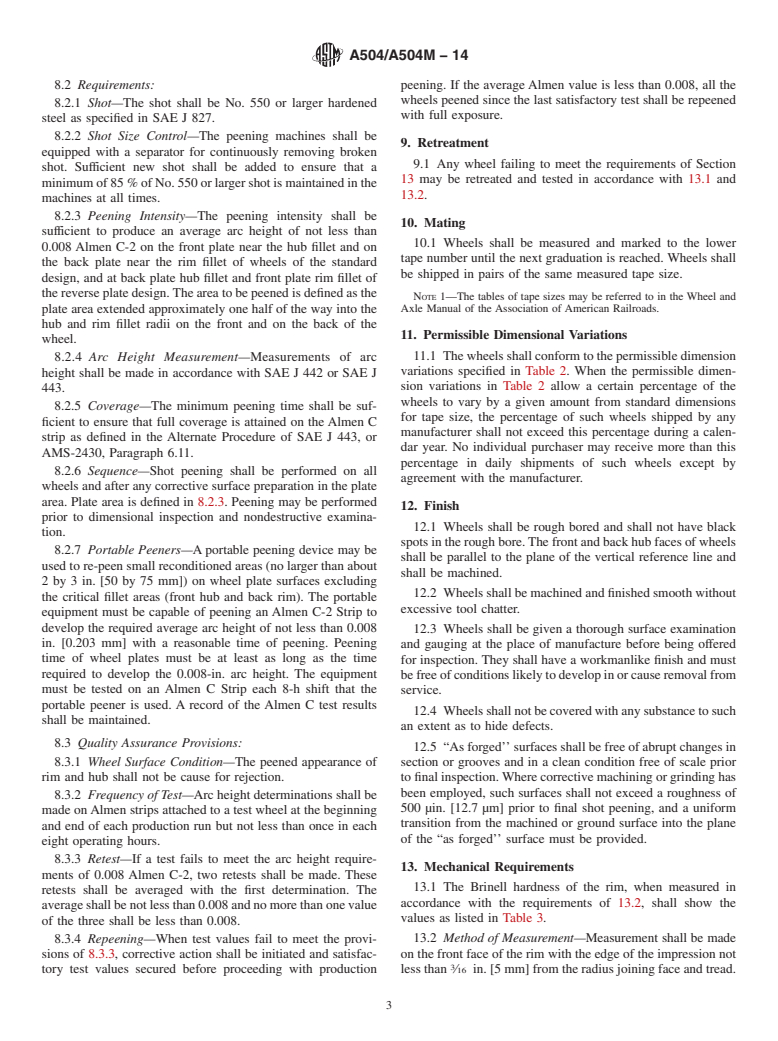
This specification deals with one-wear, two-wear, and multiple-wear wrought carbon steel wheels for locomotives and cars. The classes of steel wheels according to passenger car service covered here are: Class L, which are for high speed services with more severe braking conditions than other classes and light wheel loads; Class A, which are for high speed services with more severe braking conditions, but moderate wheel loads; Class B, which are for high speed services with severe braking conditions and heavier wheel loads; Class C (1), which are for services with light braking conditions and heavier wheel loads; and Class C (2), which are for services with heavier braking conditions where off-tread brakes are employed. Class B and C wheels shall be used for freight cars in interchange service, and are recommended for use on locomotives. Wheels shall be treated by rim-quenching and shot peening, and shall be finished by rough boring and machining. Heat analysis and rim hardness measurement procedures shall be performed to evaluate the conformance of wheel specimens with chemical composition and Brinell hardness requirements, respectively. Materials shall also go through nondestructive ultrasonic and magnetic particle examinations. Finally, customary product marking procedures shall be followed.
SCOPE
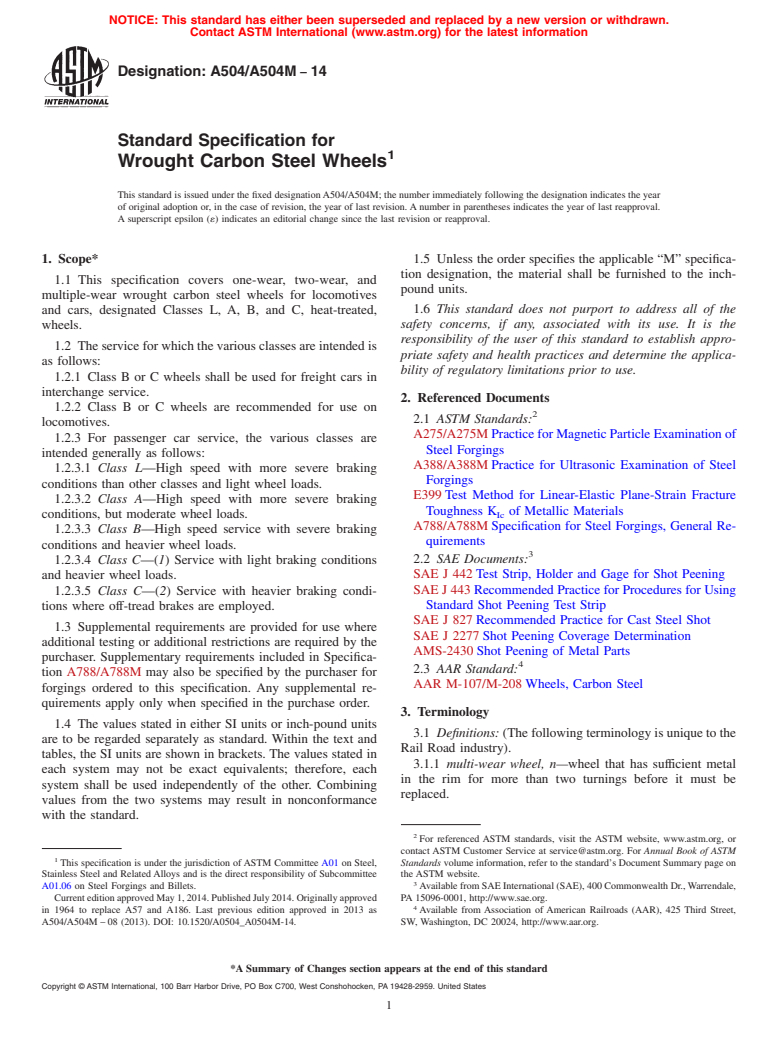
1.1 This specification covers one-wear, two-wear, and multiple-wear wrought carbon steel wheels for locomotives and cars, designated Classes L, A, B, and C, heat-treated, wheels.
1.2 The service for which the various classes are intended is as follows:
1.2.1 Class B or C wheels shall be used for freight cars in interchange service.
1.2.2 Class B or C wheels are recommended for use on locomotives.
1.2.3 For passenger car service, the various classes are intended generally as follows:
1.2.3.1 Class L—High speed with more severe braking conditions than other classes and light wheel loads.
1.2.3.2 Class A—High speed with more severe braking conditions, but moderate wheel loads.
1.2.3.3 Class B—High speed service with severe braking conditions and heavier wheel loads.
1.2.3.4 Class C—(1) Service with light braking conditions and heavier wheel loads.
1.2.3.5 Class C—(2) Service with heavier braking conditions where off-tread brakes are employed.
1.3 Supplemental requirements are provided for use where additional testing or additional restrictions are required by the purchaser. Supplementary requirements included in Specification A788/A788M may also be specified by the purchaser for forgings ordered to this specification. Any supplemental requirements apply only when specified in the purchase order.
1.4 The values stated in either SI units or inch-pound units are to be regarded separately as standard. Within the text and tables, the SI units are shown in brackets. The values stated in each system may not be exact equivalents; therefore, each system shall be used independently of the other. Combining values from the two systems may result in nonconformance with the standard.
1.5 Unless the order specifies the applicable “M” specification designation, the material shall be furnished to the inch-pound units.
1.6 This standard does not purport to address all of the safety concerns, if any, associated with its use. It is the responsibility of the user of this standard to establish appropriate safety and health practices and determine the applicability of regulatory limitations prior to use.
General Information
Relations
Buy Standard
Standards Content (Sample)
NOTICE: This standard has either been superseded and replaced by a new version or withdrawn.
Contact ASTM International (www.astm.org) for the latest information
Designation:A504/A504M −14
Standard Specification for
1
Wrought Carbon Steel Wheels
This standard is issued under the fixed designationA504/A504M; the number immediately following the designation indicates the year
of original adoption or, in the case of revision, the year of last revision. A number in parentheses indicates the year of last reapproval.
A superscript epsilon (´) indicates an editorial change since the last revision or reapproval.
1. Scope* 1.5 Unless the order specifies the applicable “M” specifica-
tion designation, the material shall be furnished to the inch-
1.1 This specification covers one-wear, two-wear, and
pound units.
multiple-wear wrought carbon steel wheels for locomotives
1.6 This standard does not purport to address all of the
and cars, designated Classes L, A, B, and C, heat-treated,
safety concerns, if any, associated with its use. It is the
wheels.
responsibility of the user of this standard to establish appro-
1.2 The service for which the various classes are intended is
priate safety and health practices and determine the applica-
as follows:
bility of regulatory limitations prior to use.
1.2.1 Class B or C wheels shall be used for freight cars in
interchange service.
2. Referenced Documents
1.2.2 Class B or C wheels are recommended for use on
2
2.1 ASTM Standards:
locomotives.
A275/A275M Practice for Magnetic Particle Examination of
1.2.3 For passenger car service, the various classes are
Steel Forgings
intended generally as follows:
A388/A388M Practice for Ultrasonic Examination of Steel
1.2.3.1 Class L—High speed with more severe braking
Forgings
conditions than other classes and light wheel loads.
E399 Test Method for Linear-Elastic Plane-Strain Fracture
1.2.3.2 Class A—High speed with more severe braking
Toughness K of Metallic Materials
Ic
conditions, but moderate wheel loads.
A788/A788M Specification for Steel Forgings, General Re-
1.2.3.3 Class B—High speed service with severe braking
quirements
conditions and heavier wheel loads.
3
2.2 SAE Documents:
1.2.3.4 Class C—(1) Service with light braking conditions
SAE J 442 Test Strip, Holder and Gage for Shot Peening
and heavier wheel loads.
SAE J 443 Recommended Practice for Procedures for Using
1.2.3.5 Class C—(2) Service with heavier braking condi-
tions where off-tread brakes are employed. Standard Shot Peening Test Strip
SAE J 827 Recommended Practice for Cast Steel Shot
1.3 Supplemental requirements are provided for use where
SAE J 2277 Shot Peening Coverage Determination
additional testing or additional restrictions are required by the
AMS-2430 Shot Peening of Metal Parts
purchaser. Supplementary requirements included in Specifica-
4
2.3 AAR Standard:
tion A788/A788M may also be specified by the purchaser for
AAR M-107/M-208 Wheels, Carbon Steel
forgings ordered to this specification. Any supplemental re-
quirements apply only when specified in the purchase order.
3. Terminology
1.4 The values stated in either SI units or inch-pound units
3.1 Definitions: (The following terminology is unique to the
are to be regarded separately as standard. Within the text and
Rail Road industry).
tables, the SI units are shown in brackets. The values stated in
3.1.1 multi-wear wheel, n—wheel that has sufficient metal
each system may not be exact equivalents; therefore, each
in the rim for more than two turnings before it must be
system shall be used independently of the other. Combining
replaced.
values from the two systems may result in nonconformance
with the standard.
2
For referenced ASTM standards, visit the ASTM website, www.astm.org, or
contact ASTM Customer Service at service@astm.org. For Annual Book of ASTM
1
This specification is under the jurisdiction of ASTM Committee A01 on Steel, Standards volume information, refer to the standard’s Document Summary page on
Stainless Steel and Related Alloys and is the direct responsibility of Subcommittee the ASTM website.
3
A01.06 on Steel Forgings and Billets. Available from SAE International (SAE), 400 Commonwealth Dr.,Warrendale,
CurrenteditionapprovedMay1,2014.PublishedJuly2014.Originallyapproved PA 15096-0001, http://www.sae.org.
4
in 1964 to replace A57 and A186. Last previous edition approved in 2013 as Available from Association of American Railroads (AAR), 425 Third Street,
A504/A504M – 08 (2013). DOI: 10.1520/A0504_A0504M-14. SW, Washington, DC 20024, http://www.aar.org.
*A Summary of Changes section appears at the end of this standard
Copyright © ASTM International, 100 Barr Harbor Drive, PO Box C700, West Conshohocken, PA 19428-2959. United States
1
---------------------- Page: 1 ----------------------
A504/A504M−14
3.1.2 one wear wheel, n—wheel that has only sufficient 4.2.3 Rough bore size,
metal for the tread to be worn once to condemnable worn 4.2.4 Wear category,
hollow condition. 4.2.5 Alternate magnetic parti
...
This document is not an ASTM standard and is intended only to provide the user of an ASTM standard an indication of what changes have been made to the previous version. Because
it may not be technically possible to adequately depict all changes accurately, ASTM recommends that users consult prior editions as appropriate. In all cases only the current version
of the standard as published by ASTM is to be considered the official document.
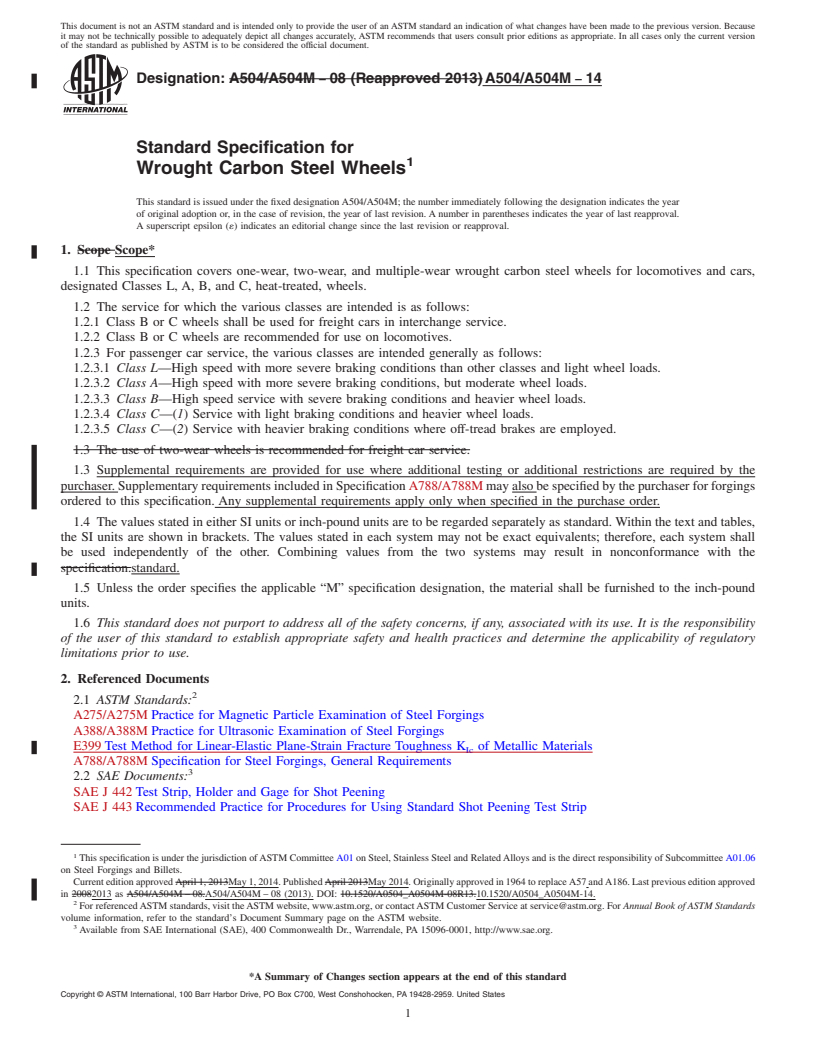
Designation: A504/A504M − 08 (Reapproved 2013) A504/A504M − 14
Standard Specification for
1
Wrought Carbon Steel Wheels
This standard is issued under the fixed designation A504/A504M; the number immediately following the designation indicates the year
of original adoption or, in the case of revision, the year of last revision. A number in parentheses indicates the year of last reapproval.
A superscript epsilon (´) indicates an editorial change since the last revision or reapproval.
1. Scope Scope*
1.1 This specification covers one-wear, two-wear, and multiple-wear wrought carbon steel wheels for locomotives and cars,
designated Classes L, A, B, and C, heat-treated, wheels.
1.2 The service for which the various classes are intended is as follows:
1.2.1 Class B or C wheels shall be used for freight cars in interchange service.
1.2.2 Class B or C wheels are recommended for use on locomotives.
1.2.3 For passenger car service, the various classes are intended generally as follows:
1.2.3.1 Class L—High speed with more severe braking conditions than other classes and light wheel loads.
1.2.3.2 Class A—High speed with more severe braking conditions, but moderate wheel loads.
1.2.3.3 Class B—High speed service with severe braking conditions and heavier wheel loads.
1.2.3.4 Class C—(1) Service with light braking conditions and heavier wheel loads.
1.2.3.5 Class C—(2) Service with heavier braking conditions where off-tread brakes are employed.
1.3 The use of two-wear wheels is recommended for freight car service.
1.3 Supplemental requirements are provided for use where additional testing or additional restrictions are required by the
purchaser. Supplementary requirements included in Specification A788/A788M may also be specified by the purchaser for forgings
ordered to this specification. Any supplemental requirements apply only when specified in the purchase order.
1.4 The values stated in either SI units or inch-pound units are to be regarded separately as standard. Within the text and tables,
the SI units are shown in brackets. The values stated in each system may not be exact equivalents; therefore, each system shall
be used independently of the other. Combining values from the two systems may result in nonconformance with the
specification.standard.
1.5 Unless the order specifies the applicable “M” specification designation, the material shall be furnished to the inch-pound
units.
1.6 This standard does not purport to address all of the safety concerns, if any, associated with its use. It is the responsibility
of the user of this standard to establish appropriate safety and health practices and determine the applicability of regulatory
limitations prior to use.
2. Referenced Documents
2
2.1 ASTM Standards:
A275/A275M Practice for Magnetic Particle Examination of Steel Forgings
A388/A388M Practice for Ultrasonic Examination of Steel Forgings
E399 Test Method for Linear-Elastic Plane-Strain Fracture Toughness K of Metallic Materials
Ic
A788/A788M Specification for Steel Forgings, General Requirements
3
2.2 SAE Documents:
SAE J 442 Test Strip, Holder and Gage for Shot Peening
SAE J 443 Recommended Practice for Procedures for Using Standard Shot Peening Test Strip
1
This specification is under the jurisdiction of ASTM Committee A01 on Steel, Stainless Steel and Related Alloys and is the direct responsibility of Subcommittee A01.06
on Steel Forgings and Billets.
Current edition approved April 1, 2013May 1, 2014. Published April 2013May 2014. Originally approved in 1964 to replace A57 and A186. Last previous edition approved
in 20082013 as A504/A504M – 08.A504/A504M – 08 (2013). DOI: 10.1520/A0504_A0504M-08R13.10.1520/A0504_A0504M-14.
2
For referenced ASTM standards, visit the ASTM website, www.astm.org, or contact ASTM Customer Service at service@astm.org. For Annual Book of ASTM Standards
volume information, refer to the standard’s Document Summary page on the ASTM website.
3
Available from SAE International (SAE), 400 Commonwealth Dr., Warrendale, PA 15096-0001, http://www.sae.org.
*A Summary of Changes section appears at the end of this standard
Copyright © ASTM International, 100 Barr Harbor Drive, PO Box C700, West Conshohocken, PA 19428-2959. United States
1
---------------------- Page: 1 ----------------------
A504/A504M − 14
SAE J 827 Recommended Practice for Cast Steel Shot
SAE J 2277 Shot Peening Coverage Determination
AMS-2430 Shot Peening of Metal Parts
2.3 Military Standard:
4
MIL-S-13165B Shot Peening of Metal Parts
4
2.3 AAR Standard:
AAR M-107/M-208 Wheels, Carbon Steel
3. Ter
...


Questions, Comments and Discussion
Ask us and Technical Secretary will try to provide an answer. You can facilitate discussion about the standard in here.