ASTM F109-12(2018)
(Terminology)Standard Terminology Relating to Surface Imperfections on Ceramics
Standard Terminology Relating to Surface Imperfections on Ceramics
SCOPE
1.1 This terminology describes and illustrates imperfections observed on whitewares and related products. For additional definitions of terms relating to whitewares and related products, refer to Terminology C242. To observe these defects, examination shall be performed visually, with or without the aid of a dye penetrant, as described in Test Method C949. Agreement by the manufacturer and the purchaser regarding specific techniques of observation is strongly recommended.
1.2 This international standard was developed in accordance with internationally recognized principles on standardization established in the Decision on Principles for the Development of International Standards, Guides and Recommendations issued by the World Trade Organization Technical Barriers to Trade (TBT) Committee.
General Information
Buy Standard
Standards Content (Sample)
NOTICE: This standard has either been superseded and replaced by a new version or withdrawn.
Contact ASTM International (www.astm.org) for the latest information
Designation: F109 − 12 (Reapproved 2018)
Standard Terminology Relating to
1
Surface Imperfections on Ceramics
ThisstandardisissuedunderthefixeddesignationF109;thenumberimmediatelyfollowingthedesignationindicatestheyearoforiginal
adoption or, in the case of revision, the year of last revision.Anumber in parentheses indicates the year of last reapproval.Asuperscript
epsilon (´) indicates an editorial change since the last revision or reapproval.
)
1. Scope
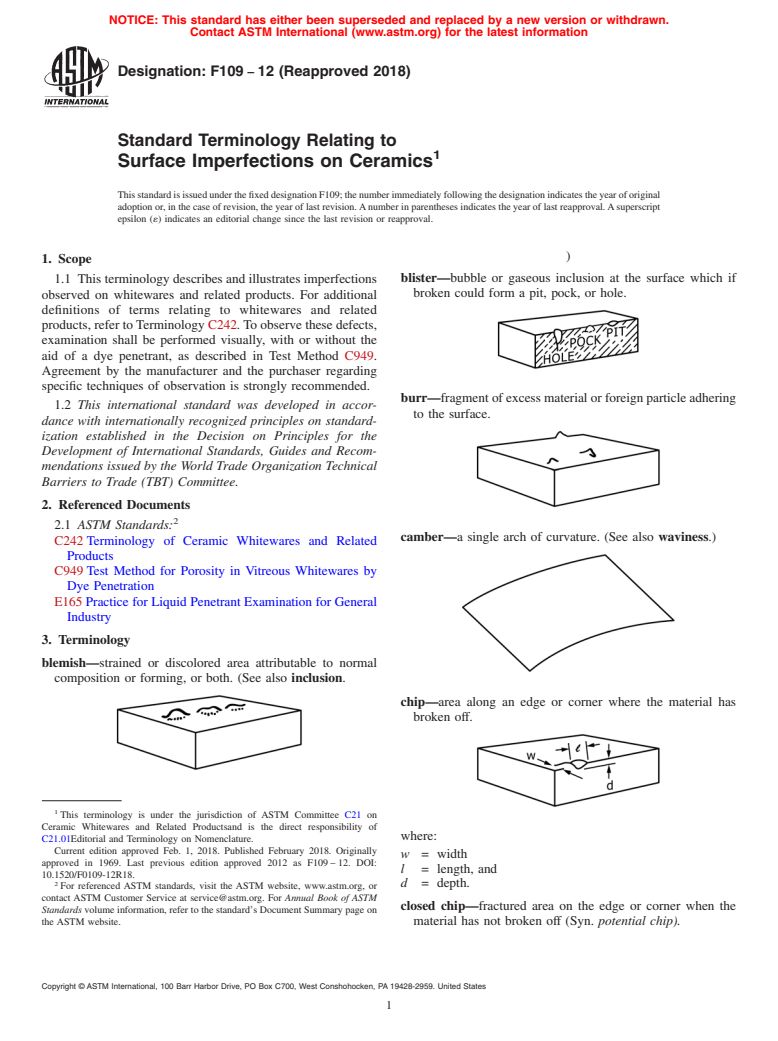
blister—bubble or gaseous inclusion at the surface which if
1.1 This terminology describes and illustrates imperfections
broken could form a pit, pock, or hole.
observed on whitewares and related products. For additional
definitions of terms relating to whitewares and related
products, refer to Terminology C242. To observe these defects,
examination shall be performed visually, with or without the
aid of a dye penetrant, as described in Test Method C949.
Agreement by the manufacturer and the purchaser regarding
specific techniques of observation is strongly recommended.
burr—fragment of excess material or foreign particle adhering
1.2 This international standard was developed in accor-
to the surface.
dance with internationally recognized principles on standard-
ization established in the Decision on Principles for the
Development of International Standards, Guides and Recom-
mendations issued by the World Trade Organization Technical
Barriers to Trade (TBT) Committee.
2. Referenced Documents
2
2.1 ASTM Standards:
camber—a single arch of curvature. (See also waviness.)
C242 Terminology of Ceramic Whitewares and Related
Products
C949 Test Method for Porosity in Vitreous Whitewares by
Dye Penetration
E165 Practice for Liquid Penetrant Examination for General
Industry
3. Terminology
blemish—strained or discolored area attributable to normal
composition or forming, or both. (See also inclusion.
chip—area along an edge or corner where the material has
broken off.
1
This terminology is under the jurisdiction of ASTM Committee C21 on
Ceramic Whitewares and Related Productsand is the direct responsibility of
C21.01Editorial and Terminology on Nomenclature. where:
Current edition approved Feb. 1, 2018. Published February 2018. Originally
w = width
approved in 1969. Last previous edition approved 2012 as F109 – 12. DOI:
l = length, and
10.1520/F0109-12R18.
2 d = depth.
For referenced ASTM standards, visit the ASTM website, www.astm.org, or
contact ASTM Customer Service at service@astm.org. For Annual Book of ASTM
closed chip—fractured area on the edge or corner when the
Standards volume information, refer to the standard’s Document Summary page on
the ASTM website. material has not broken off (Syn. potential chip).
Copyright © ASTM International, 100 Barr Harbor Drive, PO Box C700, West Conshohocken, PA 19428-2959. United States
1
---------------------- Page: 1 ----------------------
F109 − 12 (2018)
fin—fine feather-edge protrusion from the surface (Syn. flash).
where:
W = width
l = length, and
d = depth. flow line—one or more streaks distinguished by a difference in
light reflectance from the surrounding area, charateristic of
crack—line of fracture without complete separation.
injection-molded parts. (See also weld mark.)
crawling—apartingandcontractionoftheglazeonthesurface
grinding mark—a pattern of fine striations or scoring, usually
of ceramic ware during drying or firing, resulting in un-
directional, resulting from machining, as distinct from sur-
glazed areas bordered by coalesced glaze.
face marks
hole—a deep depression or void, the bottom of which is not
visible by normal (20/20) vision under 200 fc illumination.
crazing—the cracking that occurs in fired glazes or other
ceramic coatings as a result of tensile stresses, may also
inclusion—embedded foreign material or a stain other than
occur in the surface portion of uncoated (unglazed) white-
from normal composition or forming, or both (see blemish).
ware bodies.
kink—atypeofwavinessoccurringinteriortotheedges,notto
be confused with the more abrupt departures as ridges or
surface marks. (See also waviness.)
lump—a raised area on the surface having the appearance of
being solid.
2
---------------------- Page: 2 ----------------------
F109 − 12 (2018)
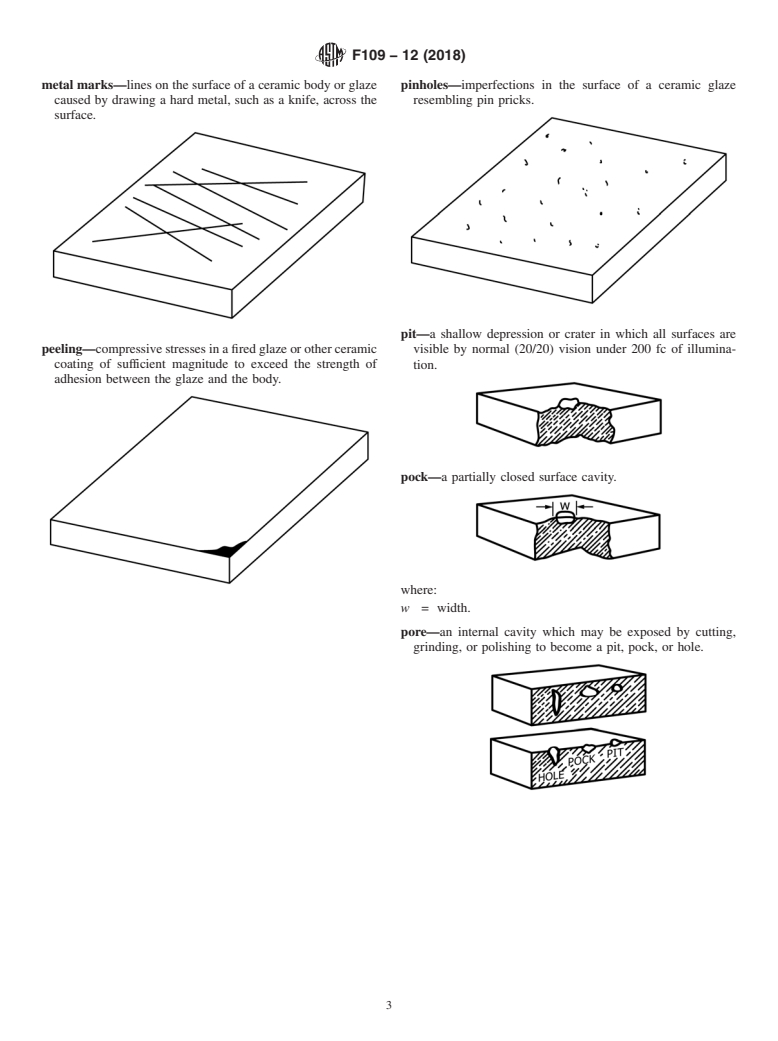
metal marks—lines on the surface of a ceramic body or glaze pinholes—imperfections in the surface of a ceramic glaze
caused by drawing a hard metal, such as a knife, across the resembling pin pricks.
surface.
pit—a shallow depression or crater in which all surfaces are
peeling—compressive stresses in a fired glaze or other ceramic
visible by normal (20/20) vision under 200 fc of illumina-
coating of sufficient magnitude to exceed the strength of tion.
adhesion between the glaze and the body.
pock—a partially closed surface cavity.
where:
w = width.
pore—an internal cavity which may be exposed by cutting,
...
This document is not an ASTM standard and is intended only to provide the user of an ASTM standard an indication of what changes have been made to the previous version. Because
it may not be technically possible to adequately depict all changes accurately, ASTM recommends that users consult prior editions as appropriate. In all cases only the current version
of the standard as published by ASTM is to be considered the official document.
Designation: F109 − 12 F109 − 12 (Reapproved 2018)
Standard Terminology Relating to
1
Surface Imperfections on Ceramics
This standard is issued under the fixed designation F109; the number immediately following the designation indicates the year of original
adoption or, in the case of revision, the year of last revision. A number in parentheses indicates the year of last reapproval. A superscript
epsilon (´) indicates an editorial change since the last revision or reapproval.
1. Scope
1.1 This terminology describes and illustrates imperfections observed on whitewares and related products. For additional
definitions of terms relating to whitewares and related products, refer to Terminology C242. To observe these defects, examination
shall be performed visually, with or without the aid of a dye penetrant, as described in Test Method C949. Agreement by the
manufacturer and the purchaser regarding specific techniques of observation is strongly recommended.
1.2 This international standard was developed in accordance with internationally recognized principles on standardization
established in the Decision on Principles for the Development of International Standards, Guides and Recommendations issued
by the World Trade Organization Technical Barriers to Trade (TBT) Committee.
2. Referenced Documents
2
2.1 ASTM Standards:
C242 Terminology of Ceramic Whitewares and Related Products
C949 Test Method for Porosity in Vitreous Whitewares by Dye Penetration
E165 Practice for Liquid Penetrant Examination for General Industry
3. Terminology
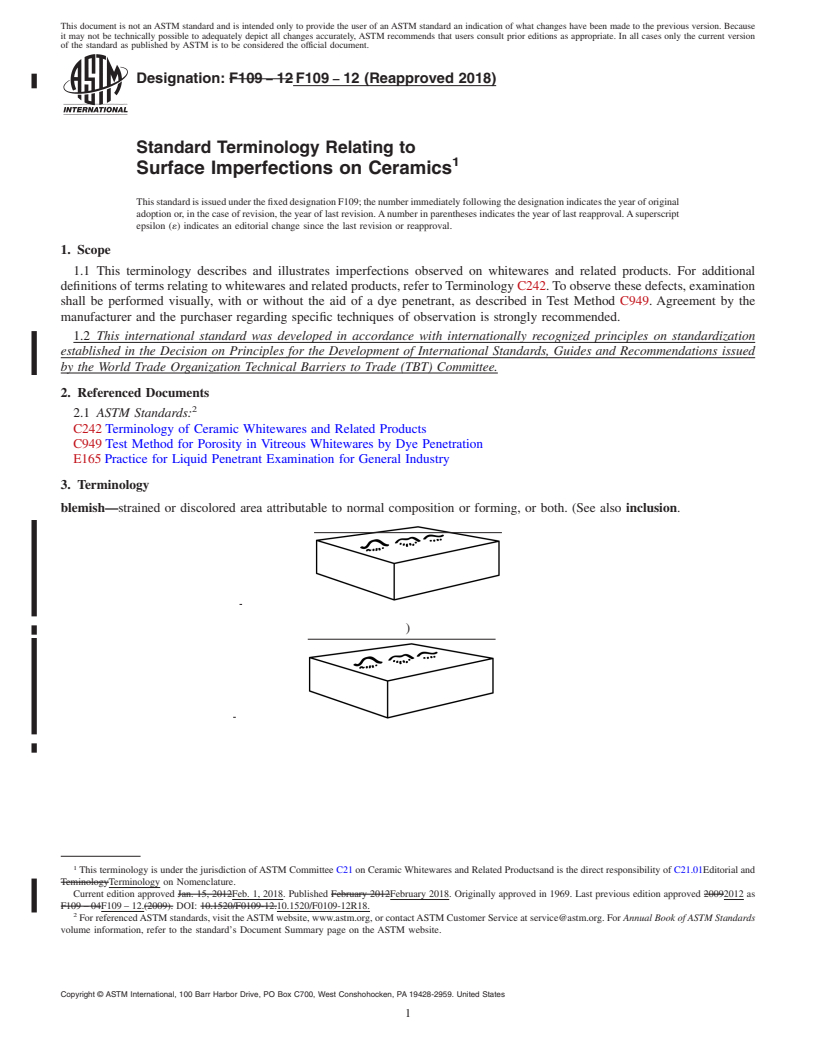
blemish—strained or discolored area attributable to normal composition or forming, or both. (See also inclusion.
)
1
This terminology is under the jurisdiction of ASTM Committee C21 on Ceramic Whitewares and Related Productsand is the direct responsibility of C21.01Editorial and
TeminologyTerminology on Nomenclature.
Current edition approved Jan. 15, 2012Feb. 1, 2018. Published February 2012February 2018. Originally approved in 1969. Last previous edition approved 20092012 as
F109 – 04F109 – 12.(2009). DOI: 10.1520/F0109-12.10.1520/F0109-12R18.
2
For referenced ASTM standards, visit the ASTM website, www.astm.org, or contact ASTM Customer Service at service@astm.org. For Annual Book of ASTM Standards
volume information, refer to the standard’s Document Summary page on the ASTM website.
Copyright © ASTM International, 100 Barr Harbor Drive, PO Box C700, West Conshohocken, PA 19428-2959. United States
1
---------------------- Page: 1 ----------------------
F109 − 12 (2018)
blister—bubble or gaseous inclusion at the surface which if broken could form a pit, pock, or hole.
burr—fragment of excess material or foreign particle adhering to the surface.
camber—a single arch of curvature. (See also waviness.)
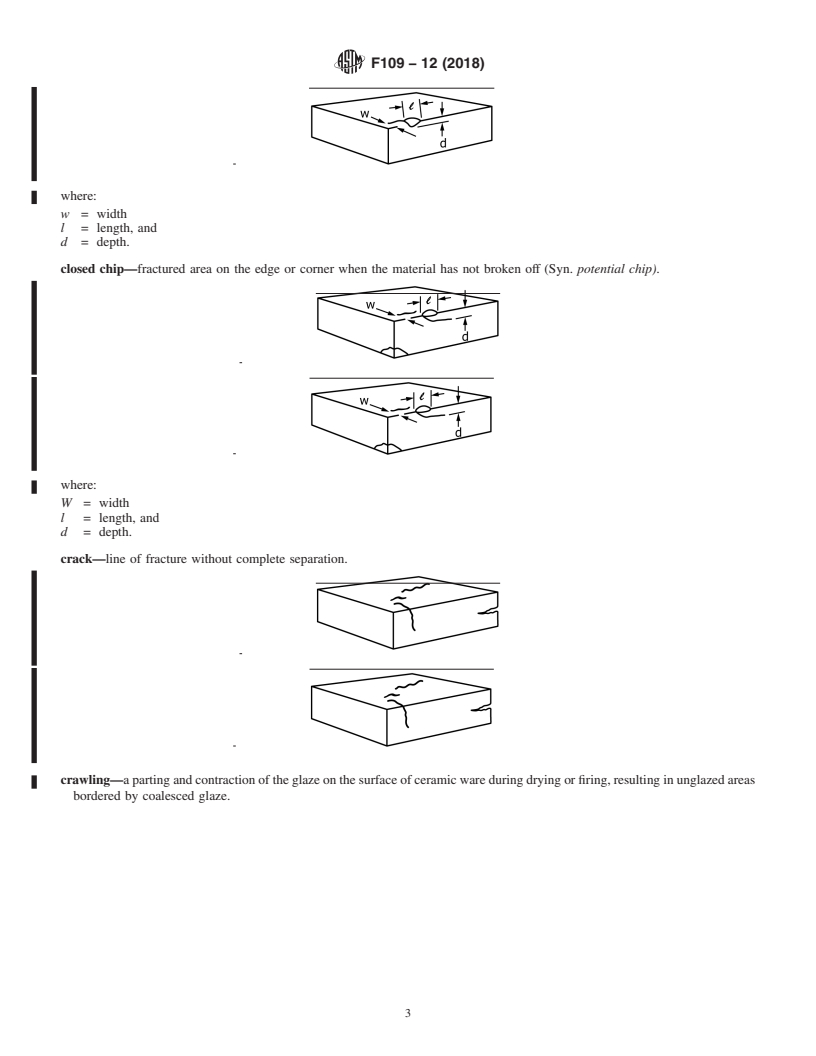
chip—area along an edge or corner where the material has broken off.
2
---------------------- Page: 2 ----------------------
F109 − 12 (2018)
where:
w = width
l = length, and
d = depth.
closed chip—fractured area on the edge or corner when the material has not broken off (Syn. potential chip).
where:
W = width
l = length, and
d = depth.
crack—line of fracture without complete separation.
crawling—a parting and contraction of the glaze on the surface of ceramic ware during drying or firing, resulting in unglazed areas
bordered by coalesced glaze.
3
---------------------- Page: 3 ----------------------
F109 − 12 (2018)
crazing—the cracking that occurs in fired glazes or other ceramic coatings as a result of tensile stresses, may also occur in the
surface portion of uncoated (unglazed) whiteware bodies.
4
---------------------- Page: 4 ----------------------
F109 − 12 (2018)
fin—fine feather-edge protrusion from the surface (Syn. flash).
flow line—one or more streaks distinguished by a difference in light reflectance from the surrounding area, charateristic of
injection-molded parts. (See also weld mark.)
grinding mark—a pattern of fine striations or scoring, usually directional, resulting from machining, as distinct from surface
marks
hole—a deep depression or void, the bottom of which is not visible by normal (20/20) vision under 200 fc illumination.
5
---------------------- Page: 5 ----------------------
F109 − 12 (2018)
inclusion—embedded foreign material or a stain other than from normal composition or forming, or both (see blemish).
kink—a type of waviness occurring interior to the edges, not to be confused with the more abrupt departures as ridges or surface
marks. (See also waviness.)
lump—a raised area on the surface having the appearance of
...


Questions, Comments and Discussion
Ask us and Technical Secretary will try to provide an answer. You can facilitate discussion about the standard in here.