ASTM C1053-00
(Specification)Standard Specification for Borosilicate Glass Pipe and Fittings for Drain, Waste, and Vent (DWV) Applications
Standard Specification for Borosilicate Glass Pipe and Fittings for Drain, Waste, and Vent (DWV) Applications
SCOPE
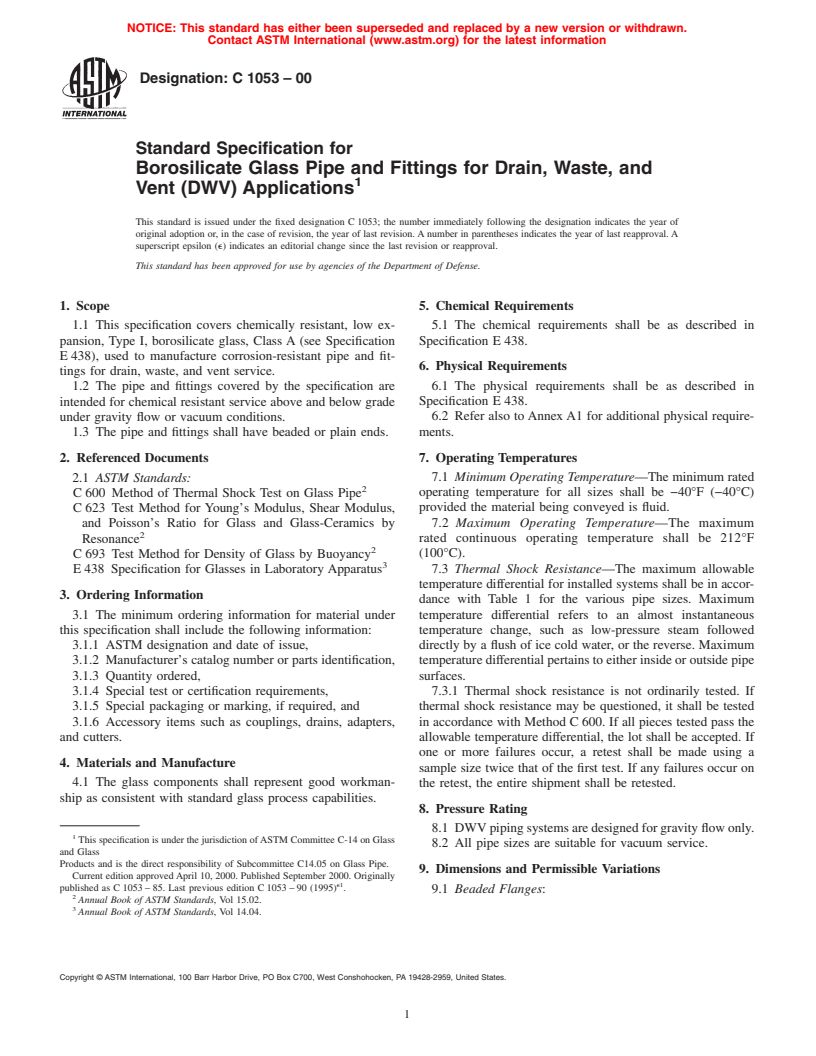
1.1 This specification covers chemical resistant, low expansion, Type I, borosilicate glass, Class A (see Specification E438), used to manufacture corrosion-resistant pipe and fittings for drain, waste, and vent service.
1.2 The pipe and fittings covered by the specification are intended for chemical resistant service above and below grade under gravity flow or vacuum conditions.
1.3 The pipe and fittings shall have beaded or plain ends.
General Information
Relations
Standards Content (Sample)
NOTICE: This standard has either been superseded and replaced by a new version or withdrawn.
Contact ASTM International (www.astm.org) for the latest information
Designation: C 1053 – 00
Standard Specification for
Borosilicate Glass Pipe and Fittings for Drain, Waste, and
Vent (DWV) Applications
This standard is issued under the fixed designation C1053; the number immediately following the designation indicates the year of
original adoption or, in the case of revision, the year of last revision.Anumber in parentheses indicates the year of last reapproval.A
superscript epsilon (e) indicates an editorial change since the last revision or reapproval.
This standard has been approved for use by agencies of the Department of Defense.
1. Scope 5. Chemical Requirements
1.1 This specification covers chemically resistant, low ex- 5.1 The chemical requirements shall be as described in
pansion, Type I, borosilicate glass, Class A (see Specification Specification E438.
E438), used to manufacture corrosion-resistant pipe and fit-
6. Physical Requirements
tings for drain, waste, and vent service.
1.2 The pipe and fittings covered by the specification are 6.1 The physical requirements shall be as described in
Specification E438.
intended for chemical resistant service above and below grade
under gravity flow or vacuum conditions. 6.2 Refer also toAnnexA1 for additional physical require-
ments.
1.3 The pipe and fittings shall have beaded or plain ends.
2. Referenced Documents 7. Operating Temperatures
7.1 Minimum Operating Temperature—The minimum rated
2.1 ASTM Standards:
C600 Method of Thermal Shock Test on Glass Pipe operating temperature for all sizes shall be −40°F (−40°C)
provided the material being conveyed is fluid.
C623 Test Method for Young’s Modulus, Shear Modulus,
and Poisson’s Ratio for Glass and Glass-Ceramics by 7.2 Maximum Operating Temperature—The maximum
rated continuous operating temperature shall be 212°F
Resonance
C693 Test Method for Density of Glass by Buoyancy (100°C).
7.3 Thermal Shock Resistance—The maximum allowable
E438 Specification for Glasses in Laboratory Apparatus
temperature differential for installed systems shall be in accor-
3. Ordering Information
dance with Table 1 for the various pipe sizes. Maximum
3.1 The minimum ordering information for material under temperature differential refers to an almost instantaneous
this specification shall include the following information: temperature change, such as low-pressure steam followed
3.1.1 ASTM designation and date of issue, directly by a flush of ice cold water, or the reverse. Maximum
3.1.2 Manufacturer’s catalog number or parts identification, temperaturedifferentialpertainstoeitherinsideoroutsidepipe
3.1.3 Quantity ordered, surfaces.
3.1.4 Special test or certification requirements, 7.3.1 Thermal shock resistance is not ordinarily tested. If
3.1.5 Special packaging or marking, if required, and thermal shock resistance may be questioned, it shall be tested
3.1.6 Accessory items such as couplings, drains, adapters, in accordance with Method C600. If all pieces tested pass the
and cutters. allowable temperature differential, the lot shall be accepted. If
one or more failures occur, a retest shall be made using a
4. Materials and Manufacture
sample size twice that of the first test. If any failures occur on
4.1 The glass components shall represent good workman-
the retest, the entire shipment shall be retested.
ship as consistent with standard glass process capabilities.
8. Pressure Rating
8.1 DWVpipingsystemsaredesignedforgravityflowonly.
This specification is under the jurisdiction ofASTM Committee C-14 on Glass
8.2 All pipe sizes are suitable for vacuum service.
and Glass
Products and is the direct responsibility of Subcommittee C14.05 on Glass Pipe.
9. Dimensions and Permissible Variations
Current edition approvedApril 10, 2000. Published September 2000. Originally
e1
published as C1053–85. Last previous edition C1053–90 (1995) .
9.1 Beaded Flanges:
Annual Book of ASTM Standards, Vol 15.02.
Annual Book of ASTM Standards, Vol 14.04.
Copyright © ASTM International, 100 Barr Harbor Drive, PO Box C700, West Conshohocken, PA 19428-2959, United States.
C 1053
TABLE 1 Maximum Temperature Differential for Thermal Shock
Sudden Temperature
Pipe Size, in. (mm)
Difference, Max °F (°C)
1 ⁄2–3 (38–76) 200 (93)
4 (102) 175 (78)
6 (152) 160 (71)
9.1.1 Flange Face Flatness—Maximum permissible devia-
tion from a flat plane across the face of a flange on all sizes
shall be ⁄16 in. (1.6 mm).
9.1.2 Flange Face Squareness—Flange faces of both pipe
and fittings shall be square to the pipe centerline within the
Wall Thick-
A (OD) B (OD)
limits prescribed in Table 2.
A
Size, in. ness, Length, ft
9.1.2.1 Squareness of straight pipe lengths shall be mea-
Diameter, in. Diameter, in.
in.
sured by placing the pipe on rollers, located approximately 2
1 ⁄2 2.06 1.84 0.17 5 and 10
in. (51 mm) from each end, and butting one end against a flat
2 2.58 2.34 0.17 5 and 10
plate perpendicular to the axis of the rollers. The pipe shall be 3 3.69 3.41 0.20 5 and 10
4 4.84 4.53 0.27 5 and 10
rotated and length variation read with a suitable mechanism,
6 7.12 6.66 0.33 5 and 10
suchasadialindicator.Themaximumreadingshallnotexceed
A
Length includes coupling allowance.
that shown in Table 2 for the respective pipe size.
A
Nominal OD Over EPS
9.1.2.2 Pipe fittings shall be measured for flange squareness
1 13
1 ⁄2 in. 2 ⁄16
byagagehavingflatplatesconstructedattheanglerequiredby
2in. 3 ⁄16
that fitting. One flange shall be firmly placed on one plate, and
3in. 5
4in. 6 ⁄4
any difference between the remaining flange face and the other
6in. 8 ⁄16
surface plate shall be measured with Feller gages. Differences
A
Pipe with EPS (expanded polystyrene) covering for underground service;
shallnotexceedtheamountshowninTable2fortherespective
lengths of 5 ft only.
fitting size.
FIG. 1 Standard Specifications for Straight Lengths of Pipe
9.1.3 Flange Dimensions and Specifications—Beaded
flange dimensions shall be as required by the manufacturer for
the system.
9.2 Bow:
9.2.1 Bow for All Pipe Diameters—Bow shall be measured
by supporting the pipe in “V” blocks approximately 2 in. from
each end with a dial gage at midlength, rotating the pipe full
360°.Thetotaldialdeflectiondividedbytwoisthemeasureof
bow, which shall not exceed 0.25% of the pipe length.
9.3 Dimensions of All Pipe and Fittings: A
A Dimension ,in.
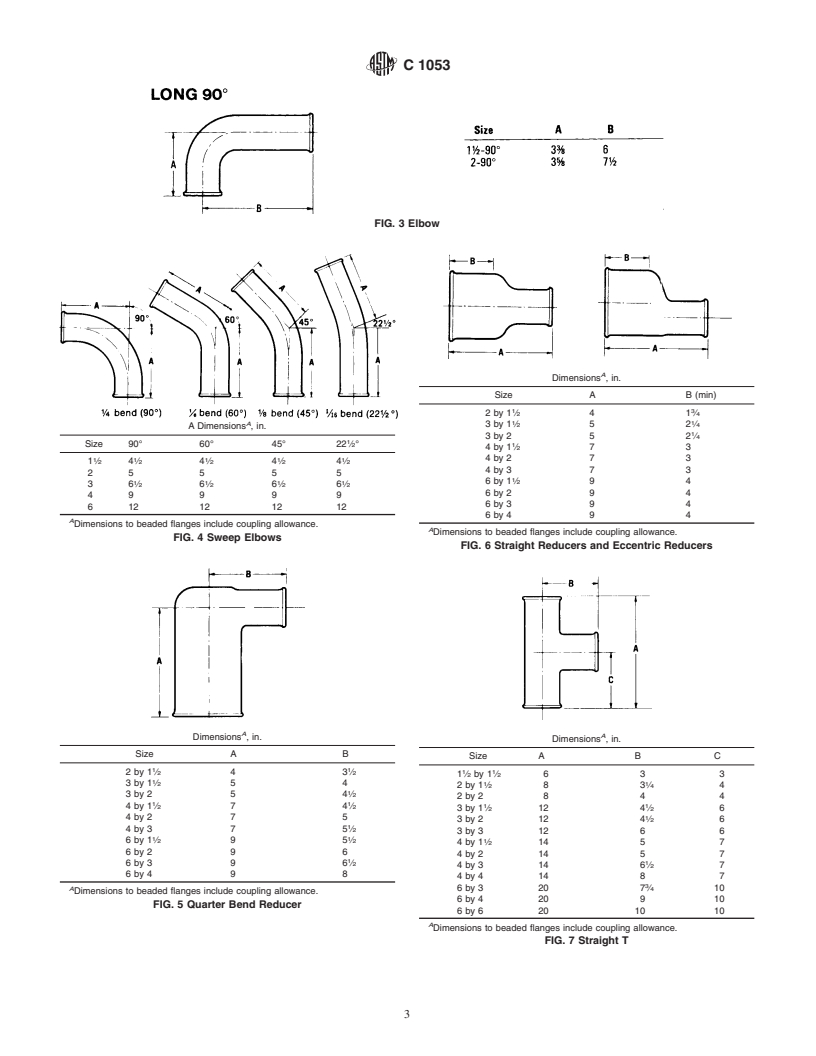
9.3.1 Dimensional specifications for pipe and common fit-
Size 90° 60° 45° 22 ⁄2°
tingsshallbeasshowninthemanufacturer’sliterature.Typical
1 1
1 ⁄232 ⁄2 2
configurations are as illustrated in Figs. 1-45.
1 3 1 1
23 ⁄4 2 ⁄4 2 ⁄4 2 ⁄4
1 3 3
35 3 ⁄2 2 ⁄4 2 ⁄4
1 1 1
10. Inspection
47 4 ⁄2 3 ⁄4 3 ⁄4
6— — 7 —
10.1 Inspection of the material shall be made at the point of
A
Dimensions to beaded flanges include coupling allowance.
deliveryunlessotherwiseagreeduponbythepurchaserandthe
FIG. 2 Elbows
seller.
11. Packaging
items packed in containers conforming to all construction
11.1 Pipe, fittings, and hardware shall be so packaged as to
requirements of consolidated freight classification as to burst-
prevent damage during transportation and handling. Those
ingtests,sizelimit,andgrossmassshallbeconsideredasbeing
properly packed.
TABLE 2 Flange Face Squareness
Squareness 11.2 All hardware items shall be packed in such a way as to
Nominal Pipe Size, in. Measurement,
preventcontactwithglasscomponents.Sometypicalhardware
Max, in.
items are shown in Appendix X1.
1 1
1 ⁄2 to 2 ⁄32
3 ⁄64
4 ⁄16
12. Keywords
6 ⁄64
12.1 borosilicate; components; fittings; glass; pipe
C 1053
FIG. 3 Elbow
A
Dimensions ,in.
Size A B (min)
1 3
2by1 ⁄2 41 ⁄4
1 1
A
3by1 ⁄2 52 ⁄4
A Dimensions ,in.
3by2 5 2 ⁄4
Size 90° 60° 45° 22 ⁄2° 1
4by1 ⁄2 73
1 1 1 1 1 4by2 7 3
1 ⁄2 4 ⁄2 4 ⁄2 4 ⁄2 4 ⁄2
4by3 7 3
25 5 5 5
1 1 1 1 6by1 ⁄2 94
36 ⁄2 6 ⁄2 6 ⁄2 6 ⁄2
6by2 9 4
49 9 9 9
6by3 9 4
612 12 12 12
6by4 9 4
A
Dimensions to beaded flanges include coupling allowance.
A
Dimensions to beaded flanges include coupling allowance.
FIG. 4 Sweep Elbows
FIG. 6 Straight Reducers and Eccentric Reducers
A
A
Dimensions ,in.
Dimensions ,in.
Size A B
Size A B C
1 1
2by1 ⁄2 43 ⁄2 1 1
1 ⁄2 by 1 ⁄263 3
3by1 ⁄2 54 1 1
2by1 ⁄2 83 ⁄4 4
3by2 5 4 ⁄2
2by2 8 4 4
1 1
4by1 ⁄2 74 ⁄2 1 1
3by1 ⁄2 12 4 ⁄2 6
4by2 7 5
3by2 12 4 ⁄2 6
4by3 7 5 ⁄2
3by3 12 6 6
1 1
6by1 ⁄2 95 ⁄2
4by1 ⁄2 14 5 7
6by2 9 6
4by2 14 5 7
6by3 9 6 ⁄2 1
4by3 14 6 ⁄2 7
6by4 9 8
4by4 14 8 7
A
6by3 20 7 ⁄4 10
Dimensions to beaded flanges include coupling allowance.
6by4 20 9 10
FIG. 5 Quarter Bend Reducer
6 by 6 20 10 10
A
Dimensions to beaded flanges include coupling allowance.
FIG. 7 Straight T
C 1053
FIG. 8 Test T with Clean-Out
A
Dimensions ,in.
Size A B C
1 1 1
...


Questions, Comments and Discussion
Ask us and Technical Secretary will try to provide an answer. You can facilitate discussion about the standard in here.