ASTM E539-19
(Test Method)Standard Test Method for Analysis of Titanium Alloys by Wavelength Dispersive X-Ray Fluorescence Spectrometry
Standard Test Method for Analysis of Titanium Alloys by Wavelength Dispersive X-Ray Fluorescence Spectrometry
SIGNIFICANCE AND USE
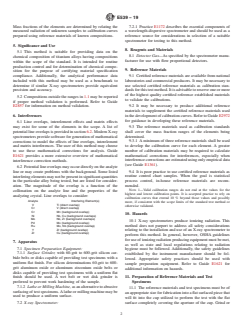
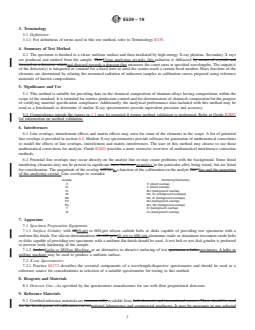
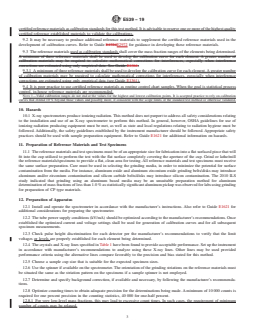
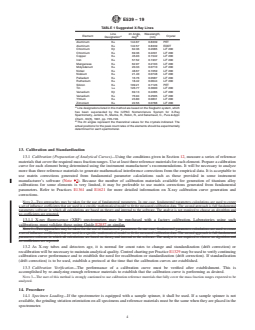
5.1 This method is suitable for providing data on the chemical composition of titanium alloys having compositions within the scope of the standard. It is intended for routine production control and for determination of chemical composition for the purpose of certifying material specification compliance. Additionally, the analytical performance data included with this method may be used as a benchmark to determine if similar X-ray spectrometers provide equivalent precision and accuracy.
5.2 Compositions outside the ranges in 1.1 may be reported if proper method validation is performed. Refer to Guide E2857 for information on method validation.
SCOPE
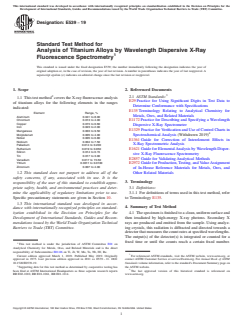
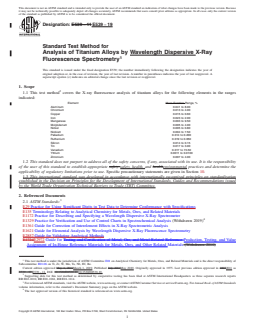
1.1 This test method2 covers the X-ray fluorescence analysis of titanium alloys for the following elements in the ranges indicated:
Element
Range, %
Aluminum
0.041 to 8.00
Chromium
0.013 to 4.00
Copper
0.015 to 0.60
Iron
0.023 to 2.00
Manganese
0.003 to 9.50
Molybdenum
0.005 to 4.00
Nickel
0.005 to 0.80
Niobium
0.004 to 7.50
Palladium
0.014 to 0.200
Ruthenium
0.019 to 0.050
Silicon
0.014 to 0.15
Tin
0.017 to 3.00
Vanadium
0.017 to 15.50
Yttrium
0.0011 to 0.0100
Zirconium
0.007 to 4.00
1.2 This standard does not purport to address all of the safety concerns, if any, associated with its use. It is the responsibility of the user of this standard to establish appropriate safety, health, and environmental practices and determine the applicability of regulatory limitations prior to use. Specific precautionary statements are given in Section 10.
1.3 This international standard was developed in accordance with internationally recognized principles on standardization established in the Decision on Principles for the Development of International Standards, Guides and Recommendations issued by the World Trade Organization Technical Barriers to Trade (TBT) Committee.
General Information
- Status
- Published
- Publication Date
- 28-Feb-2019
- Technical Committee
- E01 - Analytical Chemistry for Metals, Ores, and Related Materials
- Drafting Committee
- E01.06 - Ti, Zr, W, Mo, Ta, Nb, Hf, Re
Relations
- Effective Date
- 01-Mar-2019
- Effective Date
- 01-Jan-2020
- Effective Date
- 01-Oct-2019
- Effective Date
- 15-May-2019
- Effective Date
- 15-May-2016
- Effective Date
- 01-Jul-2015
- Effective Date
- 15-May-2015
- Effective Date
- 15-Feb-2015
- Effective Date
- 15-Aug-2014
- Effective Date
- 01-Apr-2014
- Effective Date
- 15-Feb-2014
- Effective Date
- 01-Dec-2013
- Effective Date
- 15-Nov-2011
- Effective Date
- 01-Nov-2011
- Effective Date
- 15-Sep-2011
Overview
ASTM E539-19 is the international standard test method for the analysis of titanium alloys by wavelength dispersive X-ray fluorescence spectrometry (WDXRF). Developed by ASTM International, this standard provides a reliable procedure for determining the chemical composition of titanium alloys, ensuring accuracy in material specification compliance and production control. The method is essential in industries where precise elemental analysis is critical for quality assurance, certification, and regulatory requirements.
Wavelength dispersive X-ray fluorescence spectrometry is a powerful analytical technique that enables rapid, non-destructive multi-element analysis. By calibrating the instrument with certified reference materials, laboratories can obtain accurate mass fractions of major and trace elements in titanium alloys.
Key Topics
- Analytical Scope: Covers the determination of aluminum, chromium, copper, iron, manganese, molybdenum, nickel, niobium, palladium, ruthenium, silicon, tin, vanadium, yttrium, and zirconium in titanium alloys within specified concentration ranges.
- Specimen Preparation: Emphasizes the need for a clean, flat specimen surface, typically achieved via grinding or machining, to prevent contamination and ensure measurement consistency.
- Calibration Requirements: Stresses the importance of using appropriate certified reference materials and generating calibration curves that fully cover the elements’ expected concentration ranges.
- Interference Correction: Identifies typical spectral overlaps and matrix effects, recommending the use of mathematical correction methods and modern spectrometer software for improved accuracy.
- Safety Considerations: Notes that X-ray spectrometers produce ionizing radiation and directs users to follow regulatory and manufacturer safety guidelines.
- Precision and Bias Benchmarking: Contains performance data for method validation and comparison, helping labs assess instrument equivalency and maintain data quality.
Applications
- Production Quality Control: ASTM E539-19 is widely used for routine analysis in manufacturing environments to monitor and control the chemical composition of titanium alloys, ensuring product consistency and fitness for use.
- Material Certification: The test method provides data required for certification to industry standards, supporting compliance documentation and customer specifications.
- Reference and Method Validation: Laboratories use the analytical results as benchmarks to validate new instruments, alternative test methods, and to compare inter-laboratory performance.
- Research and Development: The standard supports alloy development, process optimization, and investigative studies requiring robust, reproducible elemental analysis.
Related Standards
- ASTM E29: Practice for using significant digits in test data to determine conformance with specifications.
- ASTM E135: Terminology relating to analytical chemistry for metals, ores, and related materials.
- ASTM E1172: Practice for describing and specifying a wavelength dispersive X-ray spectrometer.
- ASTM E1361: Guide for correction of interelement effects in X-ray spectrometric analysis.
- ASTM E1621: Guide for elemental analysis by wavelength dispersive X-ray fluorescence spectrometry.
- ASTM E2857: Guide for validating analytical methods.
- Guide E1724E2972: Guidance on reference materials for metals and ores (withdrawn, relevant for historical context).
Practical Value
Implementing ASTM E539-19 ensures that titanium alloys are accurately characterized and conform to stringent material specifications. The method’s repeatability, scalability for high throughput, and its acceptance as an international standard make it invaluable for laboratories, manufacturers, and certification bodies seeking reliable, reproducible chemical analysis for titanium alloys using wavelength dispersive X-ray fluorescence spectrometry.
Keywords: ASTM E539-19, titanium alloys analysis, wavelength dispersive X-ray fluorescence spectrometry, WDXRF, elemental analysis, quality control, alloy certification, chemical composition, ASTM standard.
Buy Documents
ASTM E539-19 - Standard Test Method for Analysis of Titanium Alloys by Wavelength Dispersive X-Ray Fluorescence Spectrometry
REDLINE ASTM E539-19 - Standard Test Method for Analysis of Titanium Alloys by Wavelength Dispersive X-Ray Fluorescence Spectrometry
Get Certified
Connect with accredited certification bodies for this standard

ECOCERT
Organic and sustainability certification.

Element Materials Technology
Materials testing and product certification.

Eurofins Food Testing Global
Global leader in food, environment, and pharmaceutical product testing.
Sponsored listings
Frequently Asked Questions
ASTM E539-19 is a standard published by ASTM International. Its full title is "Standard Test Method for Analysis of Titanium Alloys by Wavelength Dispersive X-Ray Fluorescence Spectrometry". This standard covers: SIGNIFICANCE AND USE 5.1 This method is suitable for providing data on the chemical composition of titanium alloys having compositions within the scope of the standard. It is intended for routine production control and for determination of chemical composition for the purpose of certifying material specification compliance. Additionally, the analytical performance data included with this method may be used as a benchmark to determine if similar X-ray spectrometers provide equivalent precision and accuracy. 5.2 Compositions outside the ranges in 1.1 may be reported if proper method validation is performed. Refer to Guide E2857 for information on method validation. SCOPE 1.1 This test method2 covers the X-ray fluorescence analysis of titanium alloys for the following elements in the ranges indicated: Element Range, % Aluminum 0.041 to 8.00 Chromium 0.013 to 4.00 Copper 0.015 to 0.60 Iron 0.023 to 2.00 Manganese 0.003 to 9.50 Molybdenum 0.005 to 4.00 Nickel 0.005 to 0.80 Niobium 0.004 to 7.50 Palladium 0.014 to 0.200 Ruthenium 0.019 to 0.050 Silicon 0.014 to 0.15 Tin 0.017 to 3.00 Vanadium 0.017 to 15.50 Yttrium 0.0011 to 0.0100 Zirconium 0.007 to 4.00 1.2 This standard does not purport to address all of the safety concerns, if any, associated with its use. It is the responsibility of the user of this standard to establish appropriate safety, health, and environmental practices and determine the applicability of regulatory limitations prior to use. Specific precautionary statements are given in Section 10. 1.3 This international standard was developed in accordance with internationally recognized principles on standardization established in the Decision on Principles for the Development of International Standards, Guides and Recommendations issued by the World Trade Organization Technical Barriers to Trade (TBT) Committee.
SIGNIFICANCE AND USE 5.1 This method is suitable for providing data on the chemical composition of titanium alloys having compositions within the scope of the standard. It is intended for routine production control and for determination of chemical composition for the purpose of certifying material specification compliance. Additionally, the analytical performance data included with this method may be used as a benchmark to determine if similar X-ray spectrometers provide equivalent precision and accuracy. 5.2 Compositions outside the ranges in 1.1 may be reported if proper method validation is performed. Refer to Guide E2857 for information on method validation. SCOPE 1.1 This test method2 covers the X-ray fluorescence analysis of titanium alloys for the following elements in the ranges indicated: Element Range, % Aluminum 0.041 to 8.00 Chromium 0.013 to 4.00 Copper 0.015 to 0.60 Iron 0.023 to 2.00 Manganese 0.003 to 9.50 Molybdenum 0.005 to 4.00 Nickel 0.005 to 0.80 Niobium 0.004 to 7.50 Palladium 0.014 to 0.200 Ruthenium 0.019 to 0.050 Silicon 0.014 to 0.15 Tin 0.017 to 3.00 Vanadium 0.017 to 15.50 Yttrium 0.0011 to 0.0100 Zirconium 0.007 to 4.00 1.2 This standard does not purport to address all of the safety concerns, if any, associated with its use. It is the responsibility of the user of this standard to establish appropriate safety, health, and environmental practices and determine the applicability of regulatory limitations prior to use. Specific precautionary statements are given in Section 10. 1.3 This international standard was developed in accordance with internationally recognized principles on standardization established in the Decision on Principles for the Development of International Standards, Guides and Recommendations issued by the World Trade Organization Technical Barriers to Trade (TBT) Committee.
ASTM E539-19 is classified under the following ICS (International Classification for Standards) categories: 71.040.50 - Physicochemical methods of analysis; 77.120.50 - Titanium and titanium alloys. The ICS classification helps identify the subject area and facilitates finding related standards.
ASTM E539-19 has the following relationships with other standards: It is inter standard links to ASTM E539-11, ASTM E135-20, ASTM E2972-15(2019), ASTM E135-19, ASTM E135-16, ASTM E135-15a, ASTM E135-15, ASTM E2972-15, ASTM E135-14b, ASTM E135-14a, ASTM E135-14, ASTM E135-13a, ASTM E1172-87(2011), ASTM E2857-11, ASTM E135-11b. Understanding these relationships helps ensure you are using the most current and applicable version of the standard.
ASTM E539-19 is available in PDF format for immediate download after purchase. The document can be added to your cart and obtained through the secure checkout process. Digital delivery ensures instant access to the complete standard document.
Standards Content (Sample)
This international standard was developed in accordance with internationally recognized principles on standardization established in the Decision on Principles for the
Development of International Standards, Guides and Recommendations issued by the World Trade Organization Technical Barriers to Trade (TBT) Committee.
Designation: E539 − 19
Standard Test Method for
Analysis of Titanium Alloys by Wavelength Dispersive X-Ray
Fluorescence Spectrometry
This standard is issued under the fixed designation E539; the number immediately following the designation indicates the year of
original adoption or, in the case of revision, the year of last revision. A number in parentheses indicates the year of last reapproval. A
superscript epsilon (´) indicates an editorial change since the last revision or reapproval.
1. Scope 2. Referenced Documents
2.1 ASTM Standards:
1.1 Thistestmethod coverstheX-rayfluorescenceanalysis
E29 Practice for Using Significant Digits in Test Data to
of titanium alloys for the following elements in the ranges
Determine Conformance with Specifications
indicated:
E135 Terminology Relating to Analytical Chemistry for
Element Range, %
Metals, Ores, and Related Materials
Aluminum 0.041 to 8.00
Chromium 0.013 to 4.00
E1172 Practice for Describing and Specifying a Wavelength
Copper 0.015 to 0.60
Dispersive X-Ray Spectrometer
Iron 0.023 to 2.00
E1329 Practice for Verification and Use of Control Charts in
Manganese 0.003 to 9.50
Molybdenum 0.005 to 4.00 Spectrochemical Analysis (Withdrawn 2019)
Nickel 0.005 to 0.80
E1361 Guide for Correction of Interelement Effects in
Niobium 0.004 to 7.50
X-Ray Spectrometric Analysis
Palladium 0.014 to 0.200
Ruthenium 0.019 to 0.050
E1621 Guide for ElementalAnalysis by Wavelength Disper-
Silicon 0.014 to 0.15
sive X-Ray Fluorescence Spectrometry
Tin 0.017 to 3.00
E2857 Guide for Validating Analytical Methods
Vanadium 0.017 to 15.50
Yttrium 0.0011 to 0.0100
E2972 Guide for Production, Testing, and ValueAssignment
Zirconium 0.007 to 4.00
of In-House Reference Materials for Metals, Ores, and
1.2 This standard does not purport to address all of the Other Related Materials
safety concerns, if any, associated with its use. It is the
3. Terminology
responsibility of the user of this standard to establish appro-
priate safety, health, and environmental practices and deter-
3.1 Definitions:
mine the applicability of regulatory limitations prior to use. 3.1.1 For definitions of terms used in this test method, refer
Specific precautionary statements are given in Section 10.
to Terminology E135.
1.3 This international standard was developed in accor-
4. Summary of Test Method
dance with internationally recognized principles on standard-
ization established in the Decision on Principles for the 4.1 The specimen is finished to a clean, uniform surface and
then irradiated by high-energy X-ray photons. Secondary X
Development of International Standards, Guides and Recom-
rays are produced and emitted from the sample. Using analyz-
mendations issued by the World Trade Organization Technical
ing crystals, this radiation is diffracted and directed towards a
Barriers to Trade (TBT) Committee.
detectorthatmeasuresthecountratesatspecifiedwavelengths.
The output(s) of the detector(s) is integrated or counted for a
fixed time or until the counts reach a certain fixed number.
This test method is under the jurisdiction of ASTM Committee E01 on
Analytical Chemistry for Metals, Ores, and Related Materials and is the direct
responsibility of Subcommittee E01.06 on Ti, Zr, W, Mo, Ta, Nb, Hf, Re.
Current edition approved March 1, 2019. Published May 2019. Originally For referenced ASTM standards, visit the ASTM website, www.astm.org, or
approved in 1975. Last previous edition approved in 2011 as E539 – 11. DOI: contact ASTM Customer Service at service@astm.org. For Annual Book of ASTM
10.1520/E0539-19. Standards volume information, refer to the standard’s Document Summary page on
Supporting data for this test method as determined by cooperative testing has the ASTM website.
been filed at ASTM International Headquarters as three separate research reports The last approved version of this historical standard is referenced on
RR:E02-1010, RR:E01-1061, RR:E01-1114. www.astm.org.
Copyright © ASTM International, 100 Barr Harbor Drive, PO Box C700, West Conshohocken, PA 19428-2959. United States
E539 − 19
Mass fractions of the elements are determined by relating the 7.2.1 Practice E1172 describes the essential components of
measured radiation of unknown samples to calibration curves a wavelength-dispersive spectrometer and should be used as a
prepared using reference materials of known compositions. reference source for considerations in selection of a suitable
spectrometer for testing to this method.
5. Significance and Use
8. Reagents and Materials
5.1 This method is suitable for providing data on the
8.1 Detector Gas—As specified by the spectrometer manu-
chemical composition of titanium alloys having compositions
facturer for use with flow proportional detectors.
within the scope of the standard. It is intended for routine
production control and for determination of chemical compo-
9. Reference Materials
sition for the purpose of certifying material specification
compliance. Additionally, the analytical performance data 9.1 Certified reference materials are available from national
laboratories and commercial producers. It may be necessary to
included with this method may be used as a benchmark to
determine if similar X-ray spectrometers provide equivalent use selected certified reference materials as calibration stan-
dardsforthistestmethod.Itisadvisabletoreserveoneormore
precision and accuracy.
of the highest quality certified reference established materials
5.2 Compositions outside the ranges in 1.1 may be reported
to validate the calibrations.
if proper method validation is performed. Refer to Guide
E2857 for information on method validation. 9.2 It may be necessary to produce additional reference
materials to supplement the certified reference materials used
6. Interferences inthedevelopmentofcalibrationcurves.RefertoGuideE2972
for guidance in developing these reference materials.
6.1 Line overlaps, interelement effects and matrix effects
may exist for some of the elements in the scope. A list of 9.3 The reference materials used as calibration standards
potentiallineoverlapsisprovidedinsection6.2.ModernX-ray shall cover the mass fraction ranges of the elements being
spectrometers provide software for generation of mathematical determined.
corrections to model the effects of line overlaps, interelement 9.3.1 Aminimum of three reference materials shall be used
to develop the calibration curve for each element. A greater
and matrix interferences. The user of this method may choose
to use these mathematical corrections for analysis. Guide number of calibration materials may be required to calculate
mathematical corrections for interferences, especially when
E1621 provides a more extensive overview of mathematical
interference correction methods. interferencecorrectionsareestimatedusingonlyempiricaldata
(see Guide E1361).
6.2 Potential line overlaps may occur directly on the analyte
line or may create problems with the background. Some listed 9.4 It is poor practice to use certified reference materials as
routine control chart samples. When the goal is statistical
interferingelementsmaynotbepresentinsignificantquantities
in the particular alloy being tested, but are listed for consider- process control, in-house reference materials are recom-
mended.
ation. The magnitude of the overlap is a function of the
NOTE 1—Valid calibration ranges do not end at the values for the
collimation on the analyte line and the properties of the
highest and lowest calibration points. It is accepted practice to rely on
analyzing crystal. Line overlaps to consider:
calibration curves that extend 10 % beyond those values and possibly
Analyte Interfering Element(s)
more, if consistent with the scope limits of the standard test method or
V Ti (direct overlap)
otherwise validated.
Cr V (direct overlap)
Cr Mn (background overlap)
10. Hazards
Ni Nb, Cu (background overlaps)
Mo Nb, Zr (background overlaps)
10.1 X-ray spectrometers produce ionizing radiation. This
Pd Mo (background overlap)
method does not purport to address all safety considerations
Ru Mo, Nb (background overlap)
Y Zr (background overlap)
relating to the installation and use of an X-ray spectrometer to
Zr Cu (background overlap)
perform this method. In general, however, OSHA guidelines
foruseofionizingradiationproducingequipmentmustbemet,
7. Apparatus
as well as state and local regulations relating to radiation
7.1 Specimen Preparation Equipment:
hygiene must be followed. Additionally, the safety guidelines
7.1.1 Surface Grinder, with 60-grit to 600-grit silicon car-
established by the instrument manufacturer should be fol-
bide belts or disks capable of providing test specimens with a
lowed. Appropriate safety practices should be used with
uniform flat finish. For silicon determinations 60-grit to 600-
sample preparation equipment. Refer to Guide E1621 for
grit aluminum oxide or aluminum zirconium oxide belts or
additional information on hazards.
disks capable of providing test specimens with a uniform flat
finish should be used. A wet belt or wet disk grinder is 11. Preparation of Reference Materials and Test
preferred to prevent work hardening of the sample. Specimens
7.1.2 Lathe or Milling Machine,asanalternativetoabrasive
11.1 The reference materials and test specimens must be of
surfacing of test specimens.Alathe or milling machine may be
anappropriatesizeforfabricationintoaflatsurfacedpiecethat
used to produce a uniform surface.
will fit into the cup utilized to perform the test with the flat
7.2 X-ray Spectrometer: surface completely covering the aperture of the cup. Grind or
E539 − 19
lathe/mill the reference materials/specimens to provide a flat, used provided performance criteria using the alternative lines
clean area for testing. All reference materials and test speci- compare favorably to the precision and bias stated for this
mens must receive the same surface preparation. Care must be method.
used in selecting the grinding media, in order to minimize the
12.5 Choose a sample cup size that is suitable for the
potential for surface contamination from the media. For
expected specimen sizes.
instance, aluminum oxide and aluminum zirconium oxide
12.6 Use the spinner if available on the spectrometer. The
grindingbelts/disksmayintroducealuminumand/orzirconium
orientation of the grinding striations on the reference materials
contamination and silicon carbide belts/disks may introduce
must be situated the same as the striation pattern on the
silicon contamination. The 2010 ILS study indicated that
specimens if a sample spinner is not employed.
grinding using an aluminum based media may be an unsuitable
preparation method for aluminum determination of mass frac-
12.7 Determine and specify background correction, if avail-
tions of less than 1.0 % as statistically significant aluminum
able and necessary, by following the manufacturer’s recom-
pickup was observed for labs using grinding for preparation of
mendations.
CP type materials.
12.8 Optimize counting times to obtain adequate precision
for the determinations being made. A minimum of 10 000
12. Preparation of Apparatus
counts is required for one percent precision in the counting
12.1 Installandoperatethespectrometerinaccordancewith
statistics, 40 000 for one-half percent.
the manufacturer’s instructions.Also refer to Guide E1621 for
12.8.1 For very low-level mass fractions, this may lead to
additional considerations for preparing the spectrometer.
excessive count times. In such cases, the requirement of
12.2 The tube power supply conditions (kV/mA) should be
minimum number of counts may be relaxed.
optimized according to the manufacturer’s recommendations.
Once established the optimized current and voltage settings
13. Calibration and Standardization
shall be used for generation of calibration curves and for all
13.1 Calibration (Preparation of Analytical Curves)—
subsequent specimen measurements.
Using the conditions given in Section 12, measure a series of
12.3 Checkpulseheightdiscriminationforeachdetectorper
reference materials that cover the required mass fraction
the manufacturer’s recommendations to verify that the limit
ranges. Use at least three reference materials for each element.
voltages or levels are properly established for each element
Prepare a calibration curve for each element being determined
being determined.
using the instrument manufacturer’s recommendations. It will
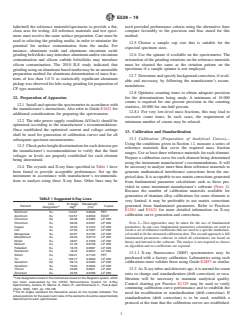
12.4 The crystals and X-ray lines specified in Table 1 have
be necessary to analyze more than three reference materials to
been found to provide acceptable performance. Set up the
generate mathematical interference corrections from the em-
instrument in accordance with manufacturer’s recommenda-
pirical data. It is acceptable to use matrix corrections generated
tions to analyze using these X-ray lines. Other lines may be
from fundamental parameter calculations such as those pro-
vided in some instrument manufacturer’s software (Note 2).
Because the number of calibration materials available for
generation of titanium alloy calibrations for some elements is
TABLE 1 Suggested X-Ray Lines
very limited, it may be preferable to use matrix corrections
Line 2θ Angle, Wavelength,
generated from fundamental parameters. Refer to Practices
Element Crystal
A B
Designation deg (nm)
E1361 and E1621 for more detailed information on X-ray
Aluminum Kα 144.67 0.8339 PET
calibration curve generation and corrections.
Aluminum Kα 142.57 0.8339 EDDT
Chromium Kβ 62.36 0.2085 LiF 200
NOTE 2—Two approaches may be taken for the use of fundamental
Chromium Kα 69.36 0.2291 LiF 200
Copper Kα 45.03 0.1542 LiF 200 parameters. In one case, fundamental parameters calculations are used to
Iron Kα 57.52 0.1937 LiF 200
create a set of influence coefficients that are used in a specific mathemati-
Manganese Kα 62.97 0.2103 LiF 200
cal model to fit the measured calibration data.The second approach is full
Molybdenum Kα 20.33 0.0710 LiF 200
fundamental parameters software in which all calculations are based on
Nickel Kα 48.67 0.1659 LiF 200
theory and internal to the software. The analyst is not required to choose
Niobium Kα 21.40 0.0748 LiF 200
an algorithm and no coefficients are reported.
Palladium Kα 16.76 0.0587 LiF 200
Ruthenium Kα 18.42 0.0644 LiF 200
13.1.1 X-ray fluorescence (XRF) spectrometers may be
Silicon Kα 109.21 0.7126 PET
purchased with a factory calibration. Laboratories using such
Tin Lα 126.77 0.3600 LiF 200
Vanadium Kβ 69.13 0.2285 LiF 200
calibrations must validate these using Guide E2857 or similar.
Vanadium Kα 76.94 0.2505 LiF 200
Yttrium Kα 23.80 0.0831 LiF 200
13.2 AsX-raytubesanddetectorsage,itisnormalforcount
Zirconium Kα 22.55 0.0788 LiF 200
rates to change and standardization (drift correction) or reca-
A
LinedesignationslistedinthismethodarebasedontheSiegbahnsystem,which
libration will be necessary to maintain analytical quality.
has been superseded by the IUPAC Nomenclature System for X-Ray
Control charting per Practice E1329 may be used to verify
Spectrometry, Jenkins, R., Manne, R., Robin, R., and Senemaud, C., Pure & Appl.
Chem., 63(5), 1991, pp. 735-746. continuing calibration curve performance and to establish the
B
The 2θ angles represent the theoretical values for the crystals indicated. The
need for recalibration or standardization (drift correction). If
actual positions for the peak count rates of the elements should be experimentally
standardization (drift correction) is to be used, establish a
determined for each spectrometer.
protocol at the time that the calibration curves are established.
E539 − 19
13.3 Calibration Verification—The performance of a cali- Method, unless an alternative rounding method is specified by
bration curve must be verified after establishment. This is the customer or applicable material specification.
accomplished by re-analyzing enough reference materials to
establish that the calibration curve is performing as desired.
16. Precision and Bias
NOTE 3—The user of this method is strongly cautioned to use
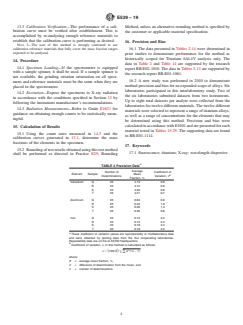
16.1 The data presented in Tables 2-14 were determined in
calibration reference materials that fully cover the mass fraction ranges
expected to be analyzed.
prior studies to demonstrate performance for the method as
historically scoped for Titanium 6Al-4V analysis only. The
14. Procedure
data in Table 2 and Table 14 are supported by the research
14.1 Specimen Loading—If the spectrometer is equipped
report RR:E02-1010. The data in Tables 3-13 are supported by
with a sample spinner, it shall be used. If a sample spinner is
the research report RR:E01-1061.
not available, the grinding striation orientation on all speci-
16.2 A new study was performed in 2010 to demonstrate
mens and reference materials must be the same when they are
method precision and bias for an expanded scope of alloys. Six
placed in the spectrometer.
laboratories participated in this interlaboratory study. Two of
14.2 Excitation—Expose the specimens to X-ray radiation
the six laboratories submitted datasets from two instruments.
in accordance with the conditions specified in Section 12 by
Up to eight total datasets per analyte were collected from the
following the instrument manufacturer’s recommendations.
laboratories for twelve different materials.The twelve different
14.3 Radiation Measurements—Refer to Guide E1621 for
materials were selected to represent a range of titanium alloys,
guidance on obtaining enough counts to be statistically mean-
as well as a range of concentrations for the elements that may
ingful.
be determined using this method. Precision and bias were
calculatedinaccordancewithE1601andarepresentedforeach
15. Calculation of Results
material tested in Tables 15-29. The supporting data are found
15.1 Using the count rates measured in 14.3 and the
in RR:E01-1114.
calibration curves generated in 13.1, determine the mass
fractions of the elements in the specimen.
17. Keywords
15.2 Roundingoftestresultsobtainedusingthistestmethod
17.1 fluorescence; titanium; X-ray; wavelength dispersive
shall be performed as directed in Practice E29, Rounding
A
TABLE 2 Precision Data
Average
Number of Coefficient of
Element Sample Mass
B
Determinations Variation, v
Fraction, %
Vanadium Q 25 4.19 0.8
R 25 4.12 0.9
S 25 4.20 0.8
T 25 4.21 0.7
Aluminum Q 25 6.84 0.9
R 25 6.33 1.0
S
...
This document is not an ASTM standard and is intended only to provide the user of an ASTM standard an indication of what changes have been made to the previous version. Because
it may not be technically possible to adequately depict all changes accurately, ASTM recommends that users consult prior editions as appropriate. In all cases only the current version
of the standard as published by ASTM is to be considered the official document.
Designation: E539 − 11 E539 − 19
Standard Test Method for
Analysis of Titanium Alloys by Wavelength Dispersive X-Ray
Fluorescence Spectrometry
This standard is issued under the fixed designation E539; the number immediately following the designation indicates the year of
original adoption or, in the case of revision, the year of last revision. A number in parentheses indicates the year of last reapproval. A
superscript epsilon (´) indicates an editorial change since the last revision or reapproval.
1. Scope
1.1 This test method covers the X-ray fluorescence analysis of titanium alloys for the following elements in the ranges
indicated:
Element Mass Fraction Range, %
Aluminum 0.041 to 8.00
Chromium 0.013 to 4.00
Copper 0.015 to 0.60
Iron 0.023 to 2.00
Manganese 0.003 to 9.50
Molybdenum 0.005 to 4.00
Nickel 0.005 to 0.80
Niobium 0.004 to 7.50
Palladium 0.014 to 0.200
Ruthenium 0.019 to 0.050
Silicon 0.014 to 0.15
Tin 0.017 to 3.00
Vanadium 0.017 to 15.50
Yttrium 0.0011 to 0.0100
Zirconium 0.007 to 4.00
1.2 This standard does not purport to address all of the safety concerns, if any, associated with its use. It is the responsibility
of the user of this standard to establish appropriate safety safety, health, and healthenvironmental practices and determine the
applicability of regulatory limitations prior to use. Specific precautionary statements are given in Section 10.
1.3 This international standard was developed in accordance with internationally recognized principles on standardization
established in the Decision on Principles for the Development of International Standards, Guides and Recommendations issued
by the World Trade Organization Technical Barriers to Trade (TBT) Committee.
2. Referenced Documents
2.1 ASTM Standards:
E29 Practice for Using Significant Digits in Test Data to Determine Conformance with Specifications
E135 Terminology Relating to Analytical Chemistry for Metals, Ores, and Related Materials
E1172 Practice for Describing and Specifying a Wavelength Dispersive X-Ray Spectrometer
E1329 Practice for Verification and Use of Control Charts in Spectrochemical Analysis (Withdrawn 2019)
E1361 Guide for Correction of Interelement Effects in X-Ray Spectrometric Analysis
E1621 Guide for Elemental Analysis by Wavelength Dispersive X-Ray Fluorescence Spectrometry
E2857 Guide for Validating Analytical Methods
E1724E2972 Guide for Testing and Certification of Metal, Ore, and Metal-Related Reference Production, Testing, and Value
Assignment of In-House Reference Materials for Metals, Ores, and Other Related Materials (Withdrawn 2010)
This test method is under the jurisdiction of ASTM Committee E01 on Analytical Chemistry for Metals, Ores, and Related Materials and is the direct responsibility of
Subcommittee E01.06 on Ti, Zr, W, Mo, Ta, Nb, Hf, Re.
Current edition approved May 1, 2011March 1, 2019. Published July 2011May 2019. Originally approved in 1975. Last previous edition approved in 20072011 as
E539 – 07.E539 – 11. DOI: 10.1520/E0539-11.10.1520/E0539-19.
Supporting data for this test method as determined by cooperative testing has been filed at ASTM International Headquarters as three separate research reports
RR:E02-1010, RR:E01-1061, RR:E01-1114.
For referenced ASTM standards, visit the ASTM website, www.astm.org, or contact ASTM Customer Service at service@astm.org. For Annual Book of ASTM Standards
volume information, refer to the standard’s Document Summary page on the ASTM website.
The last approved version of this historical standard is referenced on www.astm.org.
Copyright © ASTM International, 100 Barr Harbor Drive, PO Box C700, West Conshohocken, PA 19428-2959. United States
E539 − 19
3. Terminology
3.1 Definitions:
3.1.1 For definitions of terms used in this test method, refer to Terminology E135.
4. Summary of Test Method
4.1 The specimen is finished to a clean, uniform surface and then irradiated by high-energy X-ray photons. Secondary X rays
are produced and emitted from the sample. This Using analyzing crystals, this radiation is diffracted by means of crystals and
focused on a detector, whichand directed towards a detector that measures the count rates at specified wavelengths. The output(s)
of the detector(s) is integrated or counted for a fixed time or until the counts reach a certain fixed number. Mass fractions of the
elements are determined by relating the measured radiation of unknown samples to calibration curves prepared using reference
materials of known compositions.
5. Significance and Use
5.1 This method is suitable for providing data on the chemical composition of titanium alloys having compositions within the
scope of the standard. It is intended for routine production control and for determination of chemical composition for the purpose
of certifying material specification compliance. Additionally, the analytical performance data included with this method may be
used as a benchmark to determine if similar X-ray spectrometers provide equivalent precision and accuracy.
5.2 Compositions outside the ranges in 1.1 may be reported if proper method validation is performed. Refer to Guide E2857
for information on method validation.
6. Interferences
6.1 Line overlaps, interelement effects and matrix effects may exist for some of the elements in the scope. A list of potential
line overlaps is provided in section 6.2. Modern X-ray spectrometers provide software for generation of mathematical corrections
to model the effects of line overlaps, interelement and matrix interferences. The user of this method may choose to use these
mathematical corrections for analysis. Guide E1621 provides a more extensive overview of mathematical interference correction
methods.
6.2 Potential line overlaps may occur directly on the analyte line or may create problems with the background. Some listed
interfering elements may not be present in significant mass fractions quantities in the particular alloy being tested, but are listed
for consideration. The magnitude of the overlap will be is a function of the collimation on the analyte line. line and the properties
of the analyzing crystal. Line overlaps to consider:
Analyte Interfering Element(s)
V Ti (direct overlap)
Cr V (direct overlap)
Cr Mn (background overlap)
Ni Nb, Cu (background overlaps)
Mo Nb, Zr (background overlaps)
Pd Mo (background overlap)
Ru Mo, Nb (background overlap)
Y Zr (background overlap)
Zr Cu (background overlap)
7. Apparatus
7.1 Specimen Preparation Equipment:
7.1.1 Surface Grinder, with 6060-grit to 600-grit silicon carbide belts or disks capable of providing test specimens with a
uniform flat finish. For silicon determinations 60–600 grit 60-grit to 600-grit aluminum oxide or aluminum zirconium oxide belts
or disks capable of providing test specimens with a uniform flat finish should be used. A wet belt or wet disk grinder is preferred
to prevent work hardening of the sample.
7.1.2 Lathe, Lathe or Milling Machine, as an alternative to abrasive surfacing of test specimens a lathe specimens. A lathe or
milling machine may be used to produce a uniform surface.
7.2 X-ray Spectrometer:
7.2.1 Practice E1172 describes the essential components of a wavelength-dispersive spectrometer and should be used as a
reference source for considerations in selection of a suitable spectrometer for testing to this method.
8. Reagents and Materials
8.1 Detector Gas—As specified by the spectrometer manufacturer for use with flow proportional detectors.
9. Reference Materials
9.1 Certified reference materials are commercially available from both domestic and international sources. These should be used
for the development of calibration curves.national laboratories and commercial producers. It may be necessary to use selected
E539 − 19
certified reference materials as calibration standards for this test method. It is advisable to reserve one or more of the highest quality
certified reference established materials to validate the calibrations.
9.2 It may be necessary to produce additional reference materials to supplement the certified reference materials used in the
development of calibration curves. Refer to Guide E1724E2972 for guidance in developing these reference materials.
9.3 The reference materials used as calibration standards shall cover the mass fraction ranges of the elements being determined.
A minimum of three reference materials shall be used to develop the calibration curve for each element. A greater number of
calibration materials may be required to calculate mathematical corrections for interferences, especially when interference
corrections are estimated using only empirical data. See Guide E1361.
9.3.1 A minimum of three reference materials shall be used to develop the calibration curve for each element. A greater number
of calibration materials may be required to calculate mathematical corrections for interferences, especially when interference
corrections are estimated using only empirical data (see Guide E1361).
9.4 It is poor practice to use certified reference materials as routine control chart samples. When the goal is statistical process
control, in-house reference materials are recommended.
NOTE 1—Valid calibration ranges do not end at the values for the highest and lowest calibration points. It is accepted practice to rely on calibration
curves that extend 10 % beyond those values and possibly more, if consistent with the scope limits of the standard test method or otherwise validated.
10. Hazards
10.1 X-ray spectrometers produce ionizing radiation. This method does not purport to address all safety considerations relating
to the installation and use of an X-ray spectrometer to perform this method. In general, however, OSHA guidelines for use of
ionizing radiation producing equipment must be met, as well as state and local regulations relating to radiation hygiene must be
followed. Additionally, the safety guidelines established by the instrument manufacturer should be followed. Appropriate safety
practices should be used with sample preparation equipment. Refer to Guide E1621 for additional information on hazards.
11. Preparation of Reference Materials and Test Specimens
11.1 The reference materials and test specimens must be of an appropriate size for fabrication into a flat surfaced piece that will
fit into the cup utilized to perform the test with the flat surface completely covering the aperture of the cup. Grind or lathe/mill
the reference materials/specimens to provide a flat, clean area for testing. All reference materials and test specimens must receive
the same surface preparation. Care must be used in selecting the grinding media, in order to minimize the potential for surface
contamination from the media. For instance, aluminum oxide and aluminum zirconium oxide grinding belts/disks may introduce
aluminum and/or zirconium contamination and silicon carbide belts/disks may introduce silicon contamination. The 2010 ILS
study indicated that grinding using an aluminum based media may be an unsuitable preparation method for aluminum
determination of mass fractions of less than 1.0 % as statistically significant aluminum pickup was observed for labs using grinding
for preparation of CP type materials.
12. Preparation of Apparatus
12.1 Install and operate the spectrometer in accordance with the manufacturer’s instructions. Also refer to Guide E1621 for
additional considerations for preparing the spectrometer.
12.2 The tube power supply conditions (kV/mA) should be optimized according to the manufacturer’s recommendations. Once
established the optimized current and voltage settings shall be used for generation of calibration curves and for all subsequent
specimen measurements.
12.3 Check pulse height discrimination for each detector per the manufacturer’s recommendations to verify that the limit
voltages or levels are properly established for each element being determined.
12.4 The crystals and X-ray lines specified in Table 1 have been found to provide acceptable performance. Set up the instrument
in accordance with manufacturer’s recommendations to analyze using these X-ray lines. Other lines may be used provided
performance criteria using the alternative lines compare favorably to the precision and bias stated for this method.
12.5 Choose a sample cup size that is suitable for the expected specimen sizes.
12.6 Use the spinner if available on the spectrometer. The orientation of the grinding striations on the reference materials must
be situated the same as the striation pattern on the specimens if a sample spinner is not employed.
12.7 Determine and specify background correction, if available and necessary, by following the manufacturer’s recommenda-
tions.
12.8 Optimize counting times to obtain adequate precision for the determinations being made. A minimum of 10 000 counts is
required for one percent precision in the counting statistics, 40 000 for one-half percent.
12.8.1 For very low-level mass fractions, this may lead to excessive count times. In such cases, the requirement of minimum
number of counts may be relaxed.
E539 − 19
TABLE 1 Suggested X-Ray Lines
Line 2θ Angle, Wavelength,
Element Crystal
A B
Designation deg (nm)
Aluminum Kα 144.67 0.8339 PET
Aluminum Kα 142.57 0.8339 EDDT
Chromium Kβ 62.36 0.2085 LiF 200
Chromium Kα 69.36 0.2291 LiF 200
Copper Kα 45.03 0.1542 LiF 200
Iron Kα 57.52 0.1937 LiF 200
Manganese Kα 62.97 0.2103 LiF 200
Molybdenum Kα 20.33 0.0710 LiF 200
Nickel Kα 48.67 0.1659 LiF 200
Niobium Kα 21.40 0.0748 LiF 200
Palladium Kα 16.76 0.0587 LiF 200
Ruthenium Kα 18.42 0.0644 LiF 200
Silicon Kα 109.21 0.7126 PET
Tin Lα 126.77 0.3600 LiF 200
Vanadium Kβ 69.13 0.2285 LiF 200
Vanadium Kα 76.94 0.2505 LiF 200
Yttrium Kα 23.80 0.0831 LiF 200
Zirconium Kα 22.55 0.0788 LiF 200
A
Line designations listed in this method are based on the Siegbahn system, which
has been superseded by the IUPAC Nomenclature System for X-Ray
Spectrometry, Jenkins, R., Manne, R., Robin, R., and Senemaud, C., Pure & Appl.
Chem., 63(5), 1991, pp. 735-746.
B
The 2θ angles represent the theoretical values for the crystals indicated. The
actual positions for the peak count rates of the elements should be experimentally
determined for each spectrometer.
13. Calibration and Standardization
13.1 Calibration (Preparation of Analytical Curves)—Using the conditions given in Section 12, measure a series of reference
materials that cover the required mass fraction ranges. Use at least three reference materials for each element. Prepare a calibration
curve for each element being determined using the instrument manufacturer’s recommendations. It will be necessary to analyze
more than three reference materials to generate mathematical interference corrections from the empirical data. It is acceptable to
use matrix corrections generated from fundamental parameter calculations such as those provided in some instrument
manufacturer’s software (Note 12). Because the number of calibration materials available for generation of titanium alloy
calibrations for some elements is very limited, it may be preferable to use matrix corrections generated from fundamental
parameters. Refer to Practices E1361 and E1621 for more detailed information on X-ray calibration curve generation and
corrections.
NOTE 2—Two approaches may be taken for the use of fundamental parameters. In one case, fundamental parameters calculations are used to create
a set of influence coefficients that are used in a specific mathematical model to fit the measured calibration data. The second approach is full fundamental
parameters software in which all calculations are based on theory and internal to the software. The analyst is not required to choose an algorithm and
no coefficients are reported.
13.1.1 X-ray fluorescence (XRF) spectrometers may be purchased with a factory calibration. Laboratories using such
calibrations must validate these using Guide E2857 or similar.
NOTE 1—Two approaches may be taken for the use of fundamental parameters. In one case, fundamental parameters calculations are used to create
a set of influence coefficients that are used in a specific mathematical model to fit the measured calibration data. The second approach is full fundamental
parameters software in which all calculations are based on theory and internal to the software. The analyst is not required to choose an algorithm and
no coefficients are reported.
13.2 As X-ray tubes and detectors age, it is normal for count rates to change and standardization (drift correction) or
recalibration will be necessary to maintain analytical quality. Control charting per Practice E1329 may be used to verify continuing
calibration curve performance and to establish the need for recalibration or standardization (drift correction). If standardization
(drift correction) is to be used, establish a protocol at the time that the calibration curves are established.
13.3 Calibration Verification—The performance of a calibration curve must be verified after establishment. This is
accomplished by re-analyzing enough reference materials to establish that the calibration curve is performing as desired.
NOTE 3—The user of this method is strongly cautioned to use calibration reference materials that fully cover the mass fraction ranges expected to be
analyzed.
14. Procedure
14.1 Specimen Loading—If the spectrometer is equipped with a sample spinner, it shall be used. If a sample spinner is not
available, the grinding striation orientation on all specimens and reference materials must be the same when they are placed in the
spectrometer.
E539 − 19
14.2 Excitation—Expose the specimens to XX-ray radiation in accordance with the conditions specified in Section 12 by
following the instrument manufacturer’s recommendations.
14.3 Radiation Measurements—Refer to Guide E1621 for guidance on obtaining enough counts to be statistically meaningful.
15. Calculation of Results
15.1 Using the count rates measured in 14.3 and the calibration curves generated in 13.1, determine the mass fractions of the
elements in the specimen.
15.2 Rounding of test results obtained using this test method shall be performed as directed in Practice E29, Rounding Method,
unless an alternative rounding method is specified by the customer or applicable material specification.
16. Precision and Bias
16.1 The data presented in Tables 2-14 were determined in prior studies made to demonstrate method performance for the
method as historically scoped for Titanium 6Al-4V analysis only. The data in Table 2 and Table 14 are supported by the research
report RR:E02-1010. The data in Tables 3-13 are supported by the research report RR:E01-1061.
16.2 A new study was performed in 2010 in order to demonstrate method precision and bias for an expanded scope of alloys.
Six laboratories participated in this interlaboratory study. Two of the six laboratories submitted datasets from two instruments. Up
to eight total datasets per analyte were col
...
Questions, Comments and Discussion
Ask us and Technical Secretary will try to provide an answer. You can facilitate discussion about the standard in here.
Loading comments...