ASTM E251-92(2009)
(Test Method)Standard Test Methods for Performance Characteristics of Metallic Bonded Resistance Strain Gages
Standard Test Methods for Performance Characteristics of Metallic Bonded Resistance Strain Gages
SIGNIFICANCE AND USE
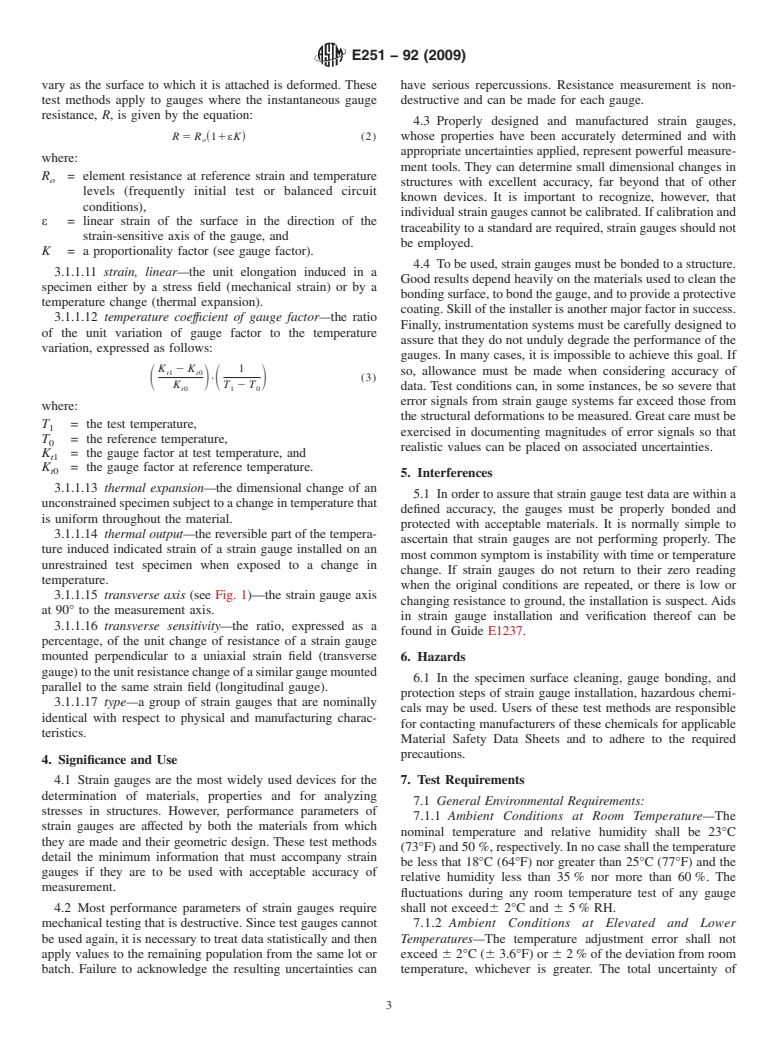
Strain gauges are the most widely used devices for the determination of materials, properties and for analyzing stresses in structures. However, performance parameters of strain gauges are affected by both the materials from which they are made and their geometric design. These test methods detail the minimum information that must accompany strain gauges if they are to be used with acceptable accuracy of measurement.
Most performance parameters of strain gauges require mechanical testing that is destructive. Since test gauges cannot be used again, it is necessary to treat data statistically and then apply values to the remaining population from the same lot or batch. Failure to acknowledge the resulting uncertainties can have serious repercussions. Resistance measurement is non-destructive and can be made for each gauge.
Properly designed and manufactured strain gauges, whose properties have been accurately determined and with appropriate uncertainties applied, represent powerful measurement tools. They can determine small dimensional changes in structures with excellent accuracy, far beyond that of other known devices. It is important to recognize, however, that individual strain gauges cannot be calibrated. If calibration and traceability to a standard are required, strain gauges should not be employed.
To be used, strain gauges must be bonded to a structure. Good results depend heavily on the materials used to clean the bonding surface, to bond the gauge, and to provide a protective coating. Skill of the installer is another major factor in success. Finally, instrumentation systems must be carefully designed to assure that they do not unduly degrade the performance of the gauges. In many cases, it is impossible to achieve this goal. If so, allowance must be made when considering accuracy of data. Test conditions can, in some instances, be so severe that error signals from strain gauge systems far exceed those from the structural deformations to be measured....
SCOPE
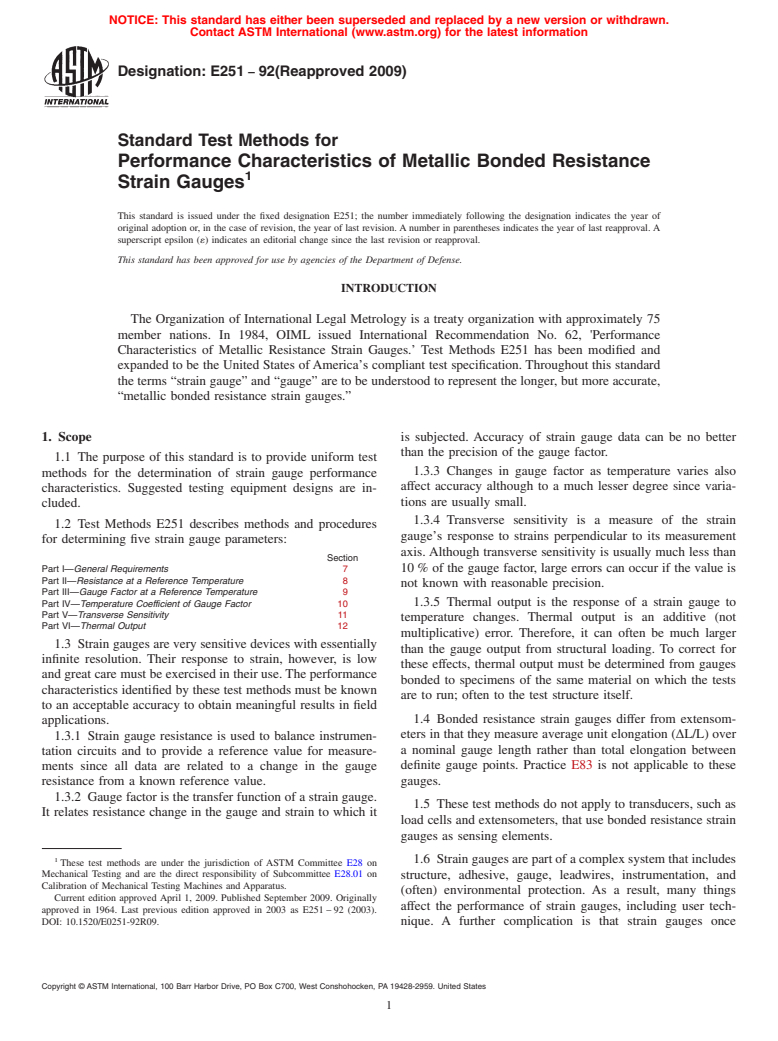
1.1 The purpose of this standard is to provide uniform test methods for the determination of strain gauge performance characteristics. Suggested testing equipment designs are included.
1.2 Test Methods E 251 describes methods and procedures for determining five strain gauge parameters:
Section Part I—General Requirements 7 Part II—Resistance at a Reference Temperature 8 Part III—Gauge Factor at a Reference Temperature 9 Part IV—Temperature Coefficient of Gauge Factor10 Part V—Transverse Sensitivity11 Part VI—Thermal Output12
1.3 Strain gauges are very sensitive devices with essentially infinite resolution. Their response to strain, however, is low and great care must be exercised in their use. The performance characteristics identified by these test methods must be known to an acceptable accuracy to obtain meaningful results in field applications.
1.3.1 Strain gauge resistance is used to balance instrumentation circuits and to provide a reference value for measurements since all data are related to a change in the gauge resistance from a known reference value.
1.3.2 Gauge factor is the transfer function of a strain gauge. It relates resistance change in the gauge and strain to which it is subjected. Accuracy of strain gauge data can be no better than the precision of the gauge factor.
1.3.3 Changes in gauge factor as temperature varies also affect accuracy although to a much lesser degree since variations are usually small.
1.3.4 Transverse sensitivity is a measure of the strain gauge's response to strains perpendicular to its measurement axis. Although transverse sensitivity is usually much less than 10 % of the gauge factor, large errors can occur if the value is not known with reasonable precision.
1.3.5 Thermal output is the response of a strain gauge to temperature changes. Thermal output is an additive (not multiplicative) error. Therefore, it can often be much larger than the gauge output from stru...
General Information
Relations
Standards Content (Sample)
NOTICE: This standard has either been superseded and replaced by a new version or withdrawn.
Contact ASTM International (www.astm.org) for the latest information
Designation: E251 − 92(Reapproved 2009)
Standard Test Methods for
Performance Characteristics of Metallic Bonded Resistance
1
Strain Gauges
This standard is issued under the fixed designation E251; the number immediately following the designation indicates the year of
original adoption or, in the case of revision, the year of last revision.Anumber in parentheses indicates the year of last reapproval.A
superscript epsilon (´) indicates an editorial change since the last revision or reapproval.
This standard has been approved for use by agencies of the Department of Defense.
INTRODUCTION
The Organization of International Legal Metrology is a treaty organization with approximately 75
member nations. In 1984, OIML issued International Recommendation No. 62, 'Performance
Characteristics of Metallic Resistance Strain Gauges.’ Test Methods E251 has been modified and
expanded to be the United States ofAmerica’s compliant test specification. Throughout this standard
the terms “strain gauge” and “gauge” are to be understood to represent the longer, but more accurate,
“metallic bonded resistance strain gauges.”
1. Scope is subjected. Accuracy of strain gauge data can be no better
than the precision of the gauge factor.
1.1 The purpose of this standard is to provide uniform test
1.3.3 Changes in gauge factor as temperature varies also
methods for the determination of strain gauge performance
affect accuracy although to a much lesser degree since varia-
characteristics. Suggested testing equipment designs are in-
cluded. tions are usually small.
1.3.4 Transverse sensitivity is a measure of the strain
1.2 Test Methods E251 describes methods and procedures
gauge’s response to strains perpendicular to its measurement
for determining five strain gauge parameters:
axis.Although transverse sensitivity is usually much less than
Section
Part I—General Requirements 7 10% of the gauge factor, large errors can occur if the value is
Part II—Resistance at a Reference Temperature 8
not known with reasonable precision.
Part III—Gauge Factor at a Reference Temperature 9
1.3.5 Thermal output is the response of a strain gauge to
Part IV—Temperature Coefficient of Gauge Factor 10
Part V—Transverse Sensitivity 11
temperature changes. Thermal output is an additive (not
Part VI—Thermal Output 12
multiplicative) error. Therefore, it can often be much larger
1.3 Strain gauges are very sensitive devices with essentially
than the gauge output from structural loading. To correct for
infinite resolution. Their response to strain, however, is low
these effects, thermal output must be determined from gauges
and great care must be exercised in their use.The performance
bonded to specimens of the same material on which the tests
characteristics identified by these test methods must be known
are to run; often to the test structure itself.
to an acceptable accuracy to obtain meaningful results in field
1.4 Bonded resistance strain gauges differ from extensom-
applications.
eters in that they measure average unit elongation (∆L/L) over
1.3.1 Strain gauge resistance is used to balance instrumen-
tation circuits and to provide a reference value for measure- a nominal gauge length rather than total elongation between
definite gauge points. Practice E83 is not applicable to these
ments since all data are related to a change in the gauge
resistance from a known reference value. gauges.
1.3.2 Gauge factor is the transfer function of a strain gauge.
1.5 These test methods do not apply to transducers, such as
It relates resistance change in the gauge and strain to which it
load cells and extensometers, that use bonded resistance strain
gauges as sensing elements.
1
1.6 Straingaugesarepartofacomplexsystemthatincludes
These test methods are under the jurisdiction of ASTM Committee E28 on
Mechanical Testing and are the direct responsibility of Subcommittee E28.01 on
structure, adhesive, gauge, leadwires, instrumentation, and
Calibration of Mechanical Testing Machines and Apparatus.
(often) environmental protection. As a result, many things
Current edition approved April 1, 2009. Published September 2009. Originally
affect the performance of strain gauges, including user tech-
approved in 1964. Last previous edition approved in 2003 as E251–92 (2003).
DOI: 10.1520/E0251-92R09. nique. A further complication is that strain gauges once
Copyright © ASTM International, 100 Barr Harbor Drive, PO Box C700, West Conshohocken, PA 19428-2959. United States
1
---------------------- Page: 1 ----------------------
E251 − 92 (2009)
installed normally cannot be reinstalled in another location.
Therefore, gauge characteristics can be stated only on a
statistical basis.
1.7 This standard does not purport to address all of the
safety concerns, if any, associated with its use. It is the
responsibility of the user of this standar
...


Questions, Comments and Discussion
Ask us and Technical Secretary will try to provide an answer. You can facilitate discussion about the standard in here.