ASTM D5182-19
(Test Method)Standard Test Method for Evaluating the Scuffing Load Capacity of Oils (FZG Visual Method)
Standard Test Method for Evaluating the Scuffing Load Capacity of Oils (FZG Visual Method)
SIGNIFICANCE AND USE
5.1 The transmission of power in many automotive and industrial applications is accomplished through the use of geared systems. At higher operating speeds it is well known that the lubricant/additive system can be a significant factor in preventing scuffing (adhesive wear) damage to gears. This test method is used to screen the scuffing load capacity of oils used to lubricate spur and helical (parallel axis) gear units.
5.2 The test method is limited by the capabilities of the equipment (test rig and gears), and the performance observed may not directly relate to scuffing performance observed with spiral bevel on hypoid gearing. It is also limited to discriminating between oils with mild EP additives or less. Lubricants containing higher levels of additives, that is, those meeting the requirements of API GL4 or GL5, generally exceed the maximum load capacity of the test rig and, therefore, cannot be distinguished for their scuffing capabilities by this test method.
SCOPE
1.1 This test method, the Forschungstelle für Záhnräder und Getriebebau (Research Site for Gears and Transmissions) Visual Method, commonly referred to as the FZG Visual Method, is intended to measure the scuffing load capacity of oils used to lubricate hardened steel gears. Scoring, a form of abrasive wear, is also included as a failure criteria in this test method. It is primarily used to assess the resistance to scuffing of mild additive treated oils such as industrial gear oils, transmission fluids, and hydraulic fluids. High EP type oils, for example, those oils meeting the requirements of API GL-4 and GL-5, generally exceed the capacity of the test rig and, therefore, cannot be differentiated with this test method.
1.2 The values stated in SI units are to be regarded as standard. No other units of measurement are included in this standard.
1.3 This standard does not purport to address all of the safety concerns, if any, associated with its use. It is the responsibility of the user of this standard to establish appropriate safety, health, and environmental practices and determine the applicability of regulatory limitations prior to use. For specific safety information, see Section 7, Section 8, 9.2, 9.3.1, and Annex A1.
1.4 This international standard was developed in accordance with internationally recognized principles on standardization established in the Decision on Principles for the Development of International Standards, Guides and Recommendations issued by the World Trade Organization Technical Barriers to Trade (TBT) Committee.
General Information
- Status
- Published
- Publication Date
- 30-Nov-2019
- Technical Committee
- D02 - Petroleum Products, Liquid Fuels, and Lubricants
- Drafting Committee
- D02.L0.11 - Tribological Properties of Industrial Fluids and Lubricates
Relations
- Effective Date
- 01-Dec-2019
- Effective Date
- 01-Nov-2015
- Effective Date
- 01-Jun-2013
- Effective Date
- 01-May-2012
- Effective Date
- 01-Dec-2010
- Effective Date
- 01-Jul-2010
- Effective Date
- 01-Jan-2010
- Effective Date
- 15-Nov-2009
- Effective Date
- 01-Jun-2007
- Effective Date
- 01-May-2005
- Effective Date
- 01-Dec-2004
- Effective Date
- 10-Dec-2002
- Effective Date
- 10-Oct-2002
- Effective Date
- 10-Jun-2001
- Effective Date
- 10-Jun-2001
Overview
ASTM D5182-19 is the Standard Test Method for Evaluating the Scuffing Load Capacity of Oils using the FZG Visual Method. Developed by ASTM International, this standard provides a key procedure for assessing the scuffing load capacity of oils used in lubricating hardened steel gears, particularly in spur and helical (parallel axis) gear units. The test method is widely utilized in both automotive and industrial sectors to determine the ability of lubricants such as industrial gear oils, transmission fluids, and hydraulic fluids to resist scuffing and scoring-a specific form of adhesive and abrasive gear wear.
Key Topics
- Purpose: To measure the resistance of lubricating oils to scuffing (adhesive wear) and scoring under increasing loads using an FZG Gear Test Machine.
- FZG Visual Method: This method visually inspects hardened steel test gears after exposure to progressive load stages and identifies the occurrence of scuffing or scoring as failure criteria.
- Scope of Applicability: This method is best suited for oils with mild EP (extreme pressure) additives. Oils meeting higher EP requirements (such as API GL-4 or GL-5) often exceed the rig’s capability and thus cannot be fully distinguished by this test.
- Test Equipment: Utilizes a four-square configuration FZG test rig to apply controlled torque to test gears, with heating/cooling elements to maintain oil temperature and a timer to regulate each load stage.
- Inspection and Results: Failure is defined when the cumulative width of scuffing or scoring across gear teeth reaches a specified threshold. Results are used for screening and benchmarking lubricants with similar additive levels.
- Safety: The method involves the use of high-speed, highly loaded rotating gears and emphasizes proper safety practices and guarding.
Applications
ASTM D5182-19 serves a variety of practical roles in the lubricants and gear manufacturing industries:
- Product Development: Lubricant formulators use the test as a screening tool during oil development to ensure effective scuffing resistance in spur and helical gear oils, transmission fluids, and hydraulic oils.
- Quality Assurance: Manufacturers utilize the standard method to benchmark performance and maintain consistent oil quality during production.
- Comparative Analysis: The standard allows for comparative evaluation of oils with mild EP additive content, providing a reliable means to differentiate performance within this class.
- Equipment Reliability: By specifying oils that pass FZG scuffing tests, equipment operators can reduce the risk of premature gear failure due to scuffing and scoring, thus improving operational reliability.
- Industrial and Automotive Sectors: The method is particularly relevant for industries relying on gear-driven machinery at higher operating speeds, where lubricants play a critical role in protecting gear surfaces from wear.
Related Standards
For a comprehensive approach to lubricants and gear wear analysis, ASTM D5182-19 is frequently referenced alongside the following:
- ASTM D235: Specification for Mineral Spirits, often used as a cleaning solvent in test preparations.
- ASTM G40: Terminology relating to wear and erosion, providing definitions relevant to wear testing.
- DIN 51 354: The German standard detailing the FZG gear test machine and its operation.
- API GL-4 / GL-5: Performance requirements for gear oils with higher levels of extreme pressure additives.
- Other ASTM Gear Oil Standards: Including those that assess wear, pitting, or performance in different gear types and operating conditions.
Keywords: FZG test, scuffing load capacity, ASTM D5182-19, gear oil performance, adhesive wear, scoring, transmission fluids, industrial gear oils, lubricant additive testing, spur gear, helical gear, gear wear resistance.
Buy Documents
ASTM D5182-19 - Standard Test Method for Evaluating the Scuffing Load Capacity of Oils (FZG Visual Method)
REDLINE ASTM D5182-19 - Standard Test Method for Evaluating the Scuffing Load Capacity of Oils (FZG Visual Method)
Get Certified
Connect with accredited certification bodies for this standard

ABS Quality Evaluations Inc.
American Bureau of Shipping quality certification.

Element Materials Technology
Materials testing and product certification.

ABS Group Brazil
ABS Group certification services in Brazil.
Sponsored listings
Frequently Asked Questions
ASTM D5182-19 is a standard published by ASTM International. Its full title is "Standard Test Method for Evaluating the Scuffing Load Capacity of Oils (FZG Visual Method)". This standard covers: SIGNIFICANCE AND USE 5.1 The transmission of power in many automotive and industrial applications is accomplished through the use of geared systems. At higher operating speeds it is well known that the lubricant/additive system can be a significant factor in preventing scuffing (adhesive wear) damage to gears. This test method is used to screen the scuffing load capacity of oils used to lubricate spur and helical (parallel axis) gear units. 5.2 The test method is limited by the capabilities of the equipment (test rig and gears), and the performance observed may not directly relate to scuffing performance observed with spiral bevel on hypoid gearing. It is also limited to discriminating between oils with mild EP additives or less. Lubricants containing higher levels of additives, that is, those meeting the requirements of API GL4 or GL5, generally exceed the maximum load capacity of the test rig and, therefore, cannot be distinguished for their scuffing capabilities by this test method. SCOPE 1.1 This test method, the Forschungstelle für Záhnräder und Getriebebau (Research Site for Gears and Transmissions) Visual Method, commonly referred to as the FZG Visual Method, is intended to measure the scuffing load capacity of oils used to lubricate hardened steel gears. Scoring, a form of abrasive wear, is also included as a failure criteria in this test method. It is primarily used to assess the resistance to scuffing of mild additive treated oils such as industrial gear oils, transmission fluids, and hydraulic fluids. High EP type oils, for example, those oils meeting the requirements of API GL-4 and GL-5, generally exceed the capacity of the test rig and, therefore, cannot be differentiated with this test method. 1.2 The values stated in SI units are to be regarded as standard. No other units of measurement are included in this standard. 1.3 This standard does not purport to address all of the safety concerns, if any, associated with its use. It is the responsibility of the user of this standard to establish appropriate safety, health, and environmental practices and determine the applicability of regulatory limitations prior to use. For specific safety information, see Section 7, Section 8, 9.2, 9.3.1, and Annex A1. 1.4 This international standard was developed in accordance with internationally recognized principles on standardization established in the Decision on Principles for the Development of International Standards, Guides and Recommendations issued by the World Trade Organization Technical Barriers to Trade (TBT) Committee.
SIGNIFICANCE AND USE 5.1 The transmission of power in many automotive and industrial applications is accomplished through the use of geared systems. At higher operating speeds it is well known that the lubricant/additive system can be a significant factor in preventing scuffing (adhesive wear) damage to gears. This test method is used to screen the scuffing load capacity of oils used to lubricate spur and helical (parallel axis) gear units. 5.2 The test method is limited by the capabilities of the equipment (test rig and gears), and the performance observed may not directly relate to scuffing performance observed with spiral bevel on hypoid gearing. It is also limited to discriminating between oils with mild EP additives or less. Lubricants containing higher levels of additives, that is, those meeting the requirements of API GL4 or GL5, generally exceed the maximum load capacity of the test rig and, therefore, cannot be distinguished for their scuffing capabilities by this test method. SCOPE 1.1 This test method, the Forschungstelle für Záhnräder und Getriebebau (Research Site for Gears and Transmissions) Visual Method, commonly referred to as the FZG Visual Method, is intended to measure the scuffing load capacity of oils used to lubricate hardened steel gears. Scoring, a form of abrasive wear, is also included as a failure criteria in this test method. It is primarily used to assess the resistance to scuffing of mild additive treated oils such as industrial gear oils, transmission fluids, and hydraulic fluids. High EP type oils, for example, those oils meeting the requirements of API GL-4 and GL-5, generally exceed the capacity of the test rig and, therefore, cannot be differentiated with this test method. 1.2 The values stated in SI units are to be regarded as standard. No other units of measurement are included in this standard. 1.3 This standard does not purport to address all of the safety concerns, if any, associated with its use. It is the responsibility of the user of this standard to establish appropriate safety, health, and environmental practices and determine the applicability of regulatory limitations prior to use. For specific safety information, see Section 7, Section 8, 9.2, 9.3.1, and Annex A1. 1.4 This international standard was developed in accordance with internationally recognized principles on standardization established in the Decision on Principles for the Development of International Standards, Guides and Recommendations issued by the World Trade Organization Technical Barriers to Trade (TBT) Committee.
ASTM D5182-19 is classified under the following ICS (International Classification for Standards) categories: 21.200 - Gears; 75.100 - Lubricants, industrial oils and related products. The ICS classification helps identify the subject area and facilitates finding related standards.
ASTM D5182-19 has the following relationships with other standards: It is inter standard links to ASTM D5182-97(2014), ASTM G40-15, ASTM G40-13, ASTM G40-12, ASTM G40-10b, ASTM G40-10a, ASTM G40-10, ASTM G40-09, ASTM D235-02(2007), ASTM G40-05, ASTM G40-04, ASTM D235-02, ASTM G40-02, ASTM G40-01, ASTM G40-99. Understanding these relationships helps ensure you are using the most current and applicable version of the standard.
ASTM D5182-19 is available in PDF format for immediate download after purchase. The document can be added to your cart and obtained through the secure checkout process. Digital delivery ensures instant access to the complete standard document.
Standards Content (Sample)
This international standard was developed in accordance with internationally recognized principles on standardization established in the Decision on Principles for the
Development of International Standards, Guides and Recommendations issued by the World Trade Organization Technical Barriers to Trade (TBT) Committee.
Designation: D5182 − 19
Standard Test Method for
Evaluating the Scuffing Load Capacity of Oils (FZG Visual
Method)
This standard is issued under the fixed designation D5182; the number immediately following the designation indicates the year of
original adoption or, in the case of revision, the year of last revision. A number in parentheses indicates the year of last reapproval. A
superscript epsilon (´) indicates an editorial change since the last revision or reapproval.
1. Scope* 2. Referenced Documents
2.1 ASTM Standards:
1.1 This test method, the Forschungstelle für Záhnräder und
D235 Specification for Mineral Spirits (Petroleum Spirits)
Getriebebau (Research Site for Gears and Transmissions)
(Hydrocarbon Dry Cleaning Solvent)
Visual Method, commonly referred to as the FZG Visual
G40 Terminology Relating to Wear and Erosion
Method, is intended to measure the scuffing load capacity of
2.2 DIN Standard:
oils used to lubricate hardened steel gears. Scoring, a form of
DIN 51 354 Teil 1 FZG Zahnrad Verspannungs Prüf
abrasive wear, is also included as a failure criteria in this test
maschine—Allgemeine Arbeitsgrundlagen
method. It is primarily used to assess the resistance to scuffing
of mild additive treated oils such as industrial gear oils,
3. Terminology
transmission fluids, and hydraulic fluids. High EPtype oils, for
3.1 Definitions:
example, those oils meeting the requirements ofAPI GL-4 and
3.1.1 See also Terminology G40.
GL-5, generally exceed the capacity of the test rig and,
3.1.2 abrasive wear, n—wear due to hard particles or hard
therefore, cannot be differentiated with this test method.
protuberances forced against and moving along a solid surface.
1.2 The values stated in SI units are to be regarded as
3.1.3 adhesive wear (scuffıng), n—wear due to localized
standard. No other units of measurement are included in this
bonding between contacting solid surfaces leading to material
standard. transfer between the two surfaces or loss from either surface.
3.1.4 scoring, n—asevereformofwearcharacterizedbythe
1.3 This standard does not purport to address all of the
formationofextensivegroovesandscratchesinthedirectionof
safety concerns, if any, associated with its use. It is the
sliding.
responsibility of the user of this standard to establish appro-
3.1.5 scratches, n—the result of mechanical removal or
priate safety, health, and environmental practices and deter-
displacement, or both, of material from a surface by the action
mine the applicability of regulatory limitations prior to use.
of abrasive particles or protuberances sliding across the sur-
For specific safety information, see Section 7, Section 8, 9.2,
faces.
9.3.1, and Annex A1.
1.4 This international standard was developed in accor- 3.2 Definitions of Terms Specific to This Standard:
dance with internationally recognized principles on standard- 3.2.1 polishing, n—amildformofabrasivewearresultingin
minor loss of material and typically characterized by a smooth
ization established in the Decision on Principles for the
finish and removal of all or part of the initial grinding marks.
Development of International Standards, Guides and Recom-
mendations issued by the World Trade Organization Technical
4. Summary of Test Method
Barriers to Trade (TBT) Committee.
4.1 An FZG Gear Test Machine is operated at constant
speed (1450 rpm) for a fixed period (21700 revolutions—
approximately 15 min) at successively increasing loads until
the failure criteria is reached; the initial oil temperature is
90 °C beginning at load stage four (see Table 1). The test gears
This test method is under the jurisdiction of ASTM Committee D02 on
Petroleum Products, Liquid Fuels, and Lubricants and is the direct responsibility of For referenced ASTM standards, visit the ASTM website, www.astm.org, or
Subcommittee D02.L0.11 on Tribological Properties of Industrial Fluids and contact ASTM Customer Service at service@astm.org. For Annual Book of ASTM
Lubricates. Standards volume information, refer to the standard’s Document Summary page on
Current edition approved Dec. 1, 2019. Published December 2019. Originally the ASTM website.
approved in 1991. Last previous edition approved in 2014 as D5182 – 97 (2014). Available from Beuth Verlag GmbH (DIN-- DIN Deutsches Institut fur
DOI: 10.1520/D5182-19. Normung e.V.), Burggrafenstrasse 6, 10787, Berlin, Germany.
*A Summary of Changes section appears at the end of this standard
Copyright © ASTM International, 100 Barr Harbor Drive, PO Box C700, West Conshohocken, PA 19428-2959. United States
D5182 − 19
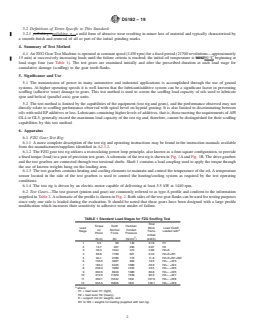
TABLE 1 Standard Load Stages for FZG Scuffing Test
Total
Torque Tooth Hertzian
Load Work Load Clutch
on Normal Contact
A
Stage Trans- Loaded with
Pinion Force Pressure
mitted
(N·m) (N) (N/mm ) (kW·h)
1 3.3 99 146 0.19 H1
2 13.7 407 295 0.97 H2
3 35.3 1044 474 2.96 H2+K
4 60.8 1799 621 6.43 H2+K+W1
5 94.1 2786 773 11.8 H2+K+W1+W2
6 135.5 4007 929 19.5 H2+.+W3
7 183.4 5435 1080 29.9 H2+.+W4
8 239.3 7080 1232 43.5 H2+.+W5
9 302.0 8949 1386 60.8 H2+.+W6
10 372.6 11029 1539 82.0 H2+.+W7
11 450.1 13342 1691 107.0 H2+.+W8
12 534.5 15826 1841 138.1 H2+.+W9
A
where:
H1 = load lever H1 (light),
H2 = load lever H2 (heavy),
K = support rod for weights, and
A. Diagram of a Typical FZG Test Rig
W1 to W9 = weights for loading (supplied with test rig).
are examined initially and after the prescribed duration at each
load stage for cumulative damage (scuffing) to the gear tooth
flanks.
5. Significance and Use
5.1 The transmission of power in many automotive and
industrial applications is accomplished through the use of
geared systems. At higher operating speeds it is well known
that the lubricant/additive system can be a significant factor in B. Schematic Section of an FZG Test Rig
preventing scuffing (adhesive wear) damage to gears. This test
FIG. 1 FZG Test Rig
method is used to screen the scuffing load capacity of oils used
to lubricate spur and helical (parallel axis) gear units.
5.2 The test method is limited by the capabilities of the
equipment (test rig and gears), and the performance observed
6.1.3 The test gearbox contains heating and cooling ele-
may not directly relate to scuffing performance observed with
ments to maintain and control the temperature of the oil. A
spiral bevel on hypoid gearing. It is also limited to discrimi-
temperature sensor located in the side of the test gearbox is
nating between oils with mild EP additives or less. Lubricants
used to control the heating/cooling system as required by the
containing higher levels of additives, that is, those meeting the
test operating conditions.
requirements of API GL4 or GL5, generally exceed the
6.1.4 The test rig is driven by an electric motor capable of
maximum load capacity of the test rig and, therefore, cannot be
delivering at least 5.5 kW at 1440 rpm.
distinguished for their scuffing capabilities by this test method.
6.2 Test Gears—The test gearset (pinion and gear) are
commonly referred to as type A profile and conform to the
6. Apparatus
information supplied in Table 2. A schematic of the profile is
6.1 FZG Gear Test Rig:
shown in Fig. 2. Both sides of the test gear flanks can be used
6.1.1 A more complete description of the test rig and
for testing purposes since only one side is loaded during the
operating instructions may be found in the instruction manuals
evaluation. It should be noted that these gears have been
available from the manufacturers/suppliers identified in
designedwithalargeprofilemodificationwhichincreasestheir
A2.1.2.
sensitivity to adhesive wear modes of failure.
6.1.2 The FZG gear test rig utilizes a recirculating power
6.3 Timer Mechanism—Asuitable timer or revolution coun-
loop principle, also known as a four-square configuration, to
ter must be used to control the number of revolutions during
provide a fixed torque (load) to a pair of precision test gears.A
each load stage of the test. The timer should be capable of
schematic of the test rig is shown in Fig. 1A and Fig. 1B. The
shutting down the test rig at the appropriate time.
drive gearbox and the test gearbox are connected through two
torsional shafts. Shaft 1 contains a load coupling used to apply 6.4 Hot Plate—A hot plate or suitable heating device is
the torque through the use of known weights hung on the required to warm the gears to 60 °C to 80 °C for assembly on
loading arm. to the shafts.
D5182 − 19
TABLE 2 Detail Data for the “A” Profile Gears
after the oil has been drained from the gearbox and prior to
Parameter Value Units disassembling the test gears.) It is recommended that the
Center Distance 91.5 mm gearbox be flushed twice with Stoddard solvent to remove all
Effective Tooth Width 20.0 mm
traces of the previous test oil. After draining the solvent from
Pitch Circle Diameter:
thetestgearboxtheunitshouldbeairdriedtoremovealltraces
Pinion 73.2 mm
Gear 109.8 mm of solvent. (Warning—Be sure the gearbox temperature has
Tip Diameter:
decreased below 60 °C prior to adding the Stoddard solvent.)
Pinion 88.7 mm
Gear 112.5 mm
9.3 Assembly of Test Gears—The test gears, spacers, and
Module 4.5 mm
bearings are heated on a hot plate or other device to approxi-
Number of Teeth:
mately 60 °C to 80 °C. Install the test gears on the shafts with
Pinion 16
Gear 24
the alignment marks in the position shown in Fig.
...
This document is not an ASTM standard and is intended only to provide the user of an ASTM standard an indication of what changes have been made to the previous version. Because
it may not be technically possible to adequately depict all changes accurately, ASTM recommends that users consult prior editions as appropriate. In all cases only the current version
of the standard as published by ASTM is to be considered the official document.
Designation: D5182 − 97 (Reapproved 2014) D5182 − 19
Standard Test Method for
Evaluating the Scuffing Load Capacity of Oils (FZG Visual
Method)
This standard is issued under the fixed designation D5182; the number immediately following the designation indicates the year of
original adoption or, in the case of revision, the year of last revision. A number in parentheses indicates the year of last reapproval. A
superscript epsilon (´) indicates an editorial change since the last revision or reapproval.
1. Scope Scope*
1.1 This test method, the Forschungstelle für Záhnräder und Getriebebau (Research Site for Gears and Transmissions) Visual
Method, commonly referred to as the FZG Visual Method, is intended to measure the scuffing load capacity of oils used to lubricate
hardened steel gears. Scoring, a form of abrasive wear, is also included as a failure criteria in this test method. It is primarily used
to assess the resistance to scuffing of mild additive treated oils such as industrial gear oils, transmission fluids, and hydraulic fluids.
High EP type oils, for example, those oils meeting the requirements of API GL-4 and GL-5, generally exceed the capacity of the
test rig and, therefore, cannot be differentiated with this test method.
1.2 The values stated in SI units are to be regarded as standard. No other units of measurement are included in this standard.
1.3 This standard does not purport to address all of the safety concerns, if any, associated with its use. It is the responsibility
of the user of this standard to establish appropriate safety safety, health, and healthenvironmental practices and determine the
applicability of regulatory limitations prior to use. For specific safety information, see Section 7, Section 8, 9.2, 9.3.1, and Annex
A1.
1.4 This international standard was developed in accordance with internationally recognized principles on standardization
established in the Decision on Principles for the Development of International Standards, Guides and Recommendations issued
by the World Trade Organization Technical Barriers to Trade (TBT) Committee.
2. Referenced Documents
2.1 ASTM Standards:
D235 Specification for Mineral Spirits (Petroleum Spirits) (Hydrocarbon Dry Cleaning Solvent)
G40 Terminology Relating to Wear and Erosion
2.2 DIN Standard:
DIN 51 354 Teil 1 FZG Zahnrad Verspannungs Prüf maschine—Allgemeine Arbeitsgrundlagen
3. Terminology
3.1 Definitions:
3.1.1 See also Terminology G40.
3.1.2 abrasive wear—wear, n—wear due to hard particles or hard protuberances forced against and moving along a solid
surface.
3.1.3 adhesive wear (scuffıng)—(scuffıng), n—wear due to localized bonding between contacting solid surfaces leading to
material transfer between the two surfaces or loss from either surface.
3.1.4 scoring—scoring, n—a severe form of wear characterized by the formation of extensive grooves and scratches in the
direction of sliding.
3.1.5 scratches—scratches, n—the result of mechanical removal or displacement, or both, of material from a surface by the
action of abrasive particles or protuberances sliding across the surfaces.
This test method is under the jurisdiction of ASTM Committee D02 on Petroleum Products, Liquid Fuels, and Lubricants and is the direct responsibility of Subcommittee
D02.L0.11 on TribiologicalTribological Properties of Industrial Fluids and Lubricates.
Current edition approved Jan. 1, 2014Dec. 1, 2019. Published February 2014December 2019. Originally approved in 1991. Last previous edition approved in 20082014
as D5182–97(2008).D5182 – 97 (2014). DOI: 10.1520/D5182-97R14.10.1520/D5182-19.
For referenced ASTM standards, visit the ASTM website, www.astm.org, or contact ASTM Customer Service at service@astm.org. For Annual Book of ASTM Standards
volume information, refer to the standard’s Document Summary page on the ASTM website.
Available from Beuth Verlag GmbH (DIN-- DIN Deutsches Institut fur Normung e.V.), Burggrafenstrasse 6, 10787, Berlin, Germany.
*A Summary of Changes section appears at the end of this standard
Copyright © ASTM International, 100 Barr Harbor Drive, PO Box C700, West Conshohocken, PA 19428-2959. United States
D5182 − 19
3.2 Definitions of Terms Specific to This Standard:
3.2.1 polishing—polishing, n—a mild form of abrasive wear resulting in minor loss of material and typically characterized by
a smooth finish and removal of all or part of the initial grinding marks.
4. Summary of Test Method
4.1 An FZG Gear Test Machine is operated at constant speed (1450 rpm) for a fixed period (21700 revolutions—approximately
15 min) at successively increasing loads until the failure criteria is reached; the initial oil temperature is 90°C90 °C beginning at
load stage four (see Table 1). The test gears are examined initially and after the prescribed duration at each load stage for
cumulative damage (scuffing) to the gear tooth flanks.
5. Significance and Use
5.1 The transmission of power in many automotive and industrial applications is accomplished through the use of geared
systems. At higher operating speeds it is well known that the lubricant/additive system can be a significant factor in preventing
scuffing (adhesive wear) damage to gears. This test method is used to screen the scuffing load capacity of oils used to lubricate
spur and helical (parallel axis) gear units.
5.2 The test method is limited by the capabilities of the equipment (test rig and gears), and the performance observed may not
directly relate to scuffing performance observed with spiral bevel on hypoid gearing. It is also limited to discriminating between
oils with mild EP additives or less. Lubricants containing higher levels of additives, that is, those meeting the requirements of API
GL4 or GL5, generally exceed the maximum load capacity of the test rig and, therefore, cannot be distinguished for their scuffing
capabilities by this test method.
6. Apparatus
6.1 FZG Gear Test Rig:
6.1.1 A more complete description of the test rig and operating instructions may be found in the instruction manuals available
from the manufacturers/suppliers identified in A2.1.2.
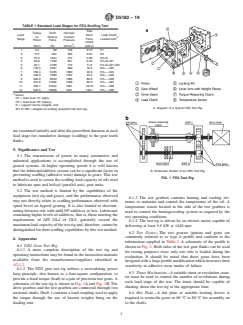
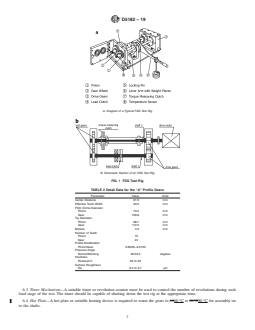
6.1.2 The FZG gear test rig utilizes a recirculating power loop principle, also known as a four-square configuration, to provide
a fixed torque (load) to a pair of precision test gears. A schematic of the test rig is shown in Fig. 1A and Fig. 1B. The drive gearbox
and the test gearbox are connected through two torsional shafts. Shaft 1 contains a load coupling used to apply the torque through
the use of known weights hung on the loading arm.
6.1.3 The test gearbox contains heating and cooling elements to maintain and control the temperature of the oil. A temperature
sensor located in the side of the test gearbox is used to control the heating/cooling system as required by the test operating
conditions.
6.1.4 The test rig is driven by an electric motor capable of delivering at least 5.5 kW at 1440 rpm.
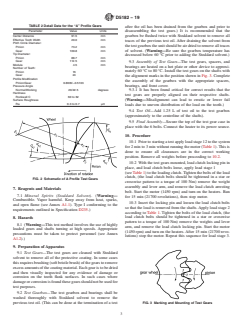
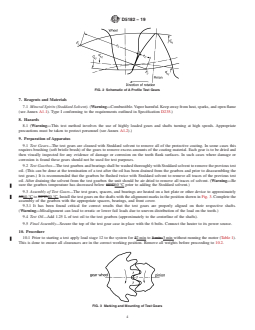
6.2 Test Gears—The test gearset (pinion and gear) are commonly referred to as type A profile and conform to the information
supplied in Table 2. A schematic of the profile is shown in Fig. 2. Both sides of the test gear flanks can be used for testing purposes
since only one side is loaded during the evaluation. It should be noted that these gears have been designed with a large profile
modification which increases their sensitivity to adhesive wear modes of failure.
TABLE 1 Standard Load Stages for FZG Scuffing Test
Total
Torque Tooth Hertzian
Load Work Load Clutch
on Normal Contact
A
Stage Trans- Loaded with
Pinion Force Pressure
mitted
(N·m) (N) (N/mm ) (kW·h)
1 3.3 99 146 0.19 H1
2 13.7 407 295 0.97 H2
3 35.3 1044 474 2.96 H2+K
4 60.8 1799 621 6.43 H2+K+W1
5 94.1 2786 773 11.8 H2+K+W1+W2
6 135.5 4007 929 19.5 H2+.+W3
7 183.4 5435 1080 29.9 H2+.+W4
8 239.3 7080 1232 43.5 H2+.+W5
9 302.0 8949 1386 60.8 H2+.+W6
10 372.6 11029 1539 82.0 H2+.+W7
11 450.1 13342 1691 107.0 H2+.+W8
12 534.5 15826 1841 138.1 H2+.+W9
A
where:
H1 = load lever H1 (light),
H2 = load lever H2 (heavy),
K = support rod for weights, and
W1 to W9 = weights for loading (supplied with test rig).
D5182 − 19
A. Diagram of a Typical FZG Test Rig
B. Schematic Section of an FZG Test Rig
FIG. 1 FZG Test Rig
TABLE 2 Detail Data for the “A” Profile Gears
Parameter Value Units
Center Distance 91.5 mm
Effective Tooth Width 20.0 mm
Pitch Circle Diameter:
Pinion 73.2 mm
Gear 109.8 mm
Tip Diameter:
Pinion 88.7 mm
Gear 112.5 mm
Module 4.5 mm
Number of Teeth:
Pinion 16
Gear 24
Profile Modification
Pinion/Gear 0.8635/−0.5103
Pressure Angle
Normal/Working 20/22.5 degrees
Hardness
Rockwell C 60 to 62
Surface Roughness
Ra 0.3 to 0.7 μm
6.3 Timer Mechanism—A suitable timer or revolution counter must be used to control the number of revolutions during each
load stage of the test. The timer should be capable of shutting down the test rig at the appropriate time.
6.4 Hot Plate—A hot plate or suitable heating device is required to warm the gears to 6060 °C to 80°C80 °C for assembly on
to the shafts.
D5182 − 19
FIG. 2 Schematic of A Profile Test Gears
7. Reagents and Materials
7.1 Mineral Spirits (Stoddard Solvent). (Warning—Combustible. Vapor harmful. Keep away from heat, sparks, and open flame
(see Annex A1.1). Type I conforming to the requirements outlined in Specification D235.)
8. Hazards
8.1 (Warning—This test method involves the use of highly loaded gears and shafts turning at high speeds. Appropriate
precautions must be taken to protect personnel (see Annex A1.2).)
9. Prepara
...
Questions, Comments and Discussion
Ask us and Technical Secretary will try to provide an answer. You can facilitate discussion about the standard in here.
Loading comments...