ASTM F205-94(2015)
(Test Method)Standard Test Method for Measuring Diameter of Fine Wire by Weighing
Standard Test Method for Measuring Diameter of Fine Wire by Weighing
ABSTRACT
This test method establishes the apparatuses required, specimen preparation steps, and standard procedures and calculations involved in the measurement of the average diameter of fine wires by means of weighing a known length. This applies particularly to wires of specified sizes used in electron devices and lamps.
SCOPE
1.1 This test method covers the measurement of the average diameter of fine wire by weighing a known length; it applies particularly to sizes up to 0.13 mm used in electron devices and lamps.
1.2 The values stated in SI units are to be regarded as standard. No other units of measurement are included in this standard.
1.3 This standard does not purport to address all of the safety concerns, if any, associated with its use. It is the responsibility of the user of this standard to establish appropriate safety and health practices and determine the applicability of regulatory limitations prior to use.
General Information
Relations
Buy Standard
Standards Content (Sample)
NOTICE: This standard has either been superseded and replaced by a new version or withdrawn.
Contact ASTM International (www.astm.org) for the latest information
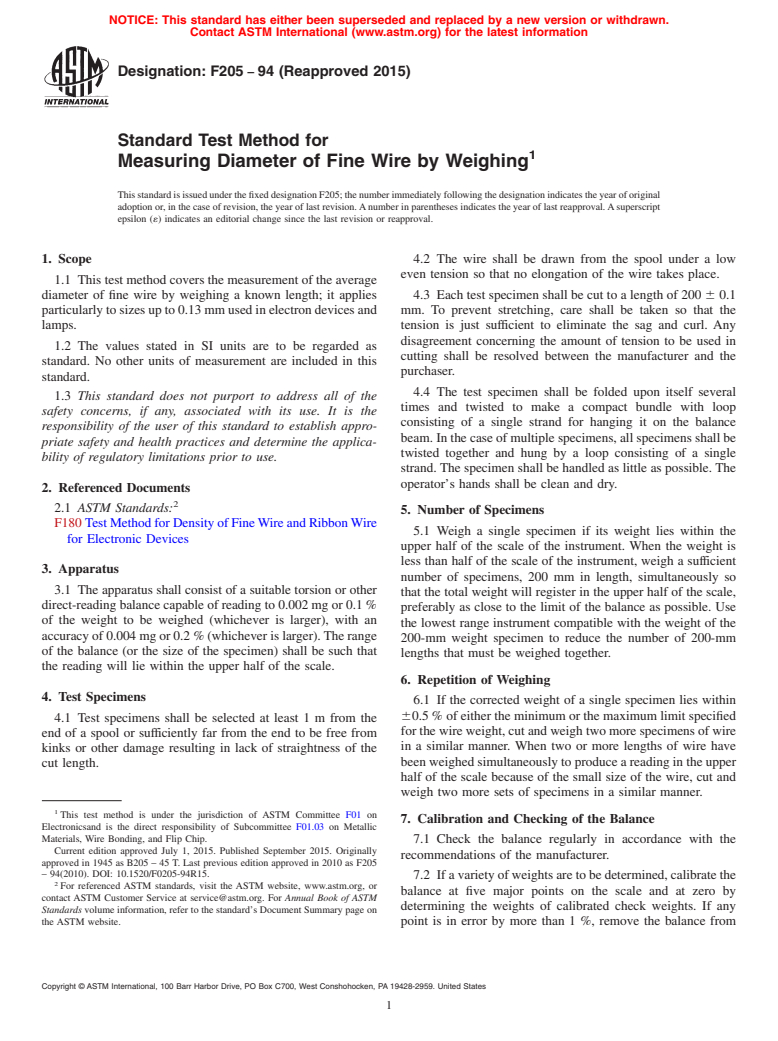
Designation: F205 − 94 (Reapproved 2015)
Standard Test Method for
Measuring Diameter of Fine Wire by Weighing
ThisstandardisissuedunderthefixeddesignationF205;thenumberimmediatelyfollowingthedesignationindicatestheyearoforiginal
adoptionor,inthecaseofrevision,theyearoflastrevision.Anumberinparenthesesindicatestheyearoflastreapproval.Asuperscript
epsilon (´) indicates an editorial change since the last revision or reapproval.
1. Scope 4.2 The wire shall be drawn from the spool under a low
even tension so that no elongation of the wire takes place.
1.1 Thistestmethodcoversthemeasurementoftheaverage
diameter of fine wire by weighing a known length; it applies 4.3 Each test specimen shall be cut to a length of 200 6 0.1
particularlytosizesupto0.13mmusedinelectrondevicesand mm. To prevent stretching, care shall be taken so that the
lamps. tension is just sufficient to eliminate the sag and curl. Any
disagreement concerning the amount of tension to be used in
1.2 The values stated in SI units are to be regarded as
cutting shall be resolved between the manufacturer and the
standard. No other units of measurement are included in this
purchaser.
standard.
4.4 The test specimen shall be folded upon itself several
1.3 This standard does not purport to address all of the
times and twisted to make a compact bundle with loop
safety concerns, if any, associated with its use. It is the
consisting of a single strand for hanging it on the balance
responsibility of the user of this standard to establish appro-
beam.Inthecaseofmultiplespecimens,allspecimensshallbe
priate safety and health practices and determine the applica-
twisted together and hung by a loop consisting of a single
bility of regulatory limitations prior to use.
strand.The specimen shall be handled as little as possible.The
operator’s hands shall be clean and dry.
2. Referenced Documents
2.1 ASTM Standards:
5. Number of Specimens
F180TestMethodforDensityofFineWireandRibbonWire
5.1 Weigh a single specimen if its weight lies within the
for Electronic Devices
upper half of the scale of the instrument. When the weight is
less than half of the scale of the instrument, weigh a sufficient
3. Apparatus
number of specimens, 200 mm in length, simultaneously so
3.1 The apparatus shall consist of a suitable torsion or other
that the total weight will register in the upper half of the scale,
direct-readingbalancecapableofreadingto0.002mgor0.1%
preferably as close to the limit of the balance as possible. Use
of the weight to be weighed (whichever is larger), with an
the lowest range instrument compatible with the weight of the
accuracyof0.004mgor0.2%(whicheverislarger).Therange
200-mm weight specimen to reduce the number of 200-mm
of the balance (or the size of the specimen) shall be such that
lengths that must be weighed together.
the reading will lie within the upper half of the scale.
6. Repetition of Weighing
4. Test Specimens
6.1 If the corrected weight of a single specimen lies within
60.5%ofeithertheminimumorthemaximumlimitspecified
4.1 Test specimens shall be selected at least 1 m from the
forthewireweight,cutandweightwomorespecimensofwire
end of a spool or sufficiently far from the end to be free from
in a similar manner. When two or more lengths of wire have
kinks or other damage resulting in lack of straightness of the
beenweighedsimultaneouslytoproduceareadingintheupper
cut length.
half of the scale because of the small size of the wire, cut and
weigh two more sets of specimens in a similar manner.
This test method is under the jurisdiction of ASTM Committee F01 on
7. Calibration and Checking of the Balance
Electronicsand is the direct responsibility of Subcommittee F01.03 on Metallic
Materials, Wire Bonding, and Flip Chip.
7.1 Check the balance regularly in accordance with the
Current edition approved July 1, 2015. Published September 2015. Originally
recommendations of the manufacturer.
approved in 1945 as B205 – 45 T. Last previous edition approved in 2010 as F205
– 94(2010). DOI: 10.1520/F0205-94R15.
7.2 Ifavarietyofweightsaretobedetermined,calibratethe
For referenced ASTM standards, visit the ASTM website, www.astm.org, or
balance at five major points on the scale and at zero by
contact ASTM Customer Service at service@astm.org. For Annual Book of ASTM
determining the weights of calibrated check weights. If any
Standards volume information, refer to the standard’s Document Summary page on
the ASTM website. point is in error by more than 1 %, remove the balance from
Copyright © ASTM International, 100 Barr Harbor Drive, PO Box C700, West Conshohocken, PA 19428-2959. United States
F205 − 94 (2015)
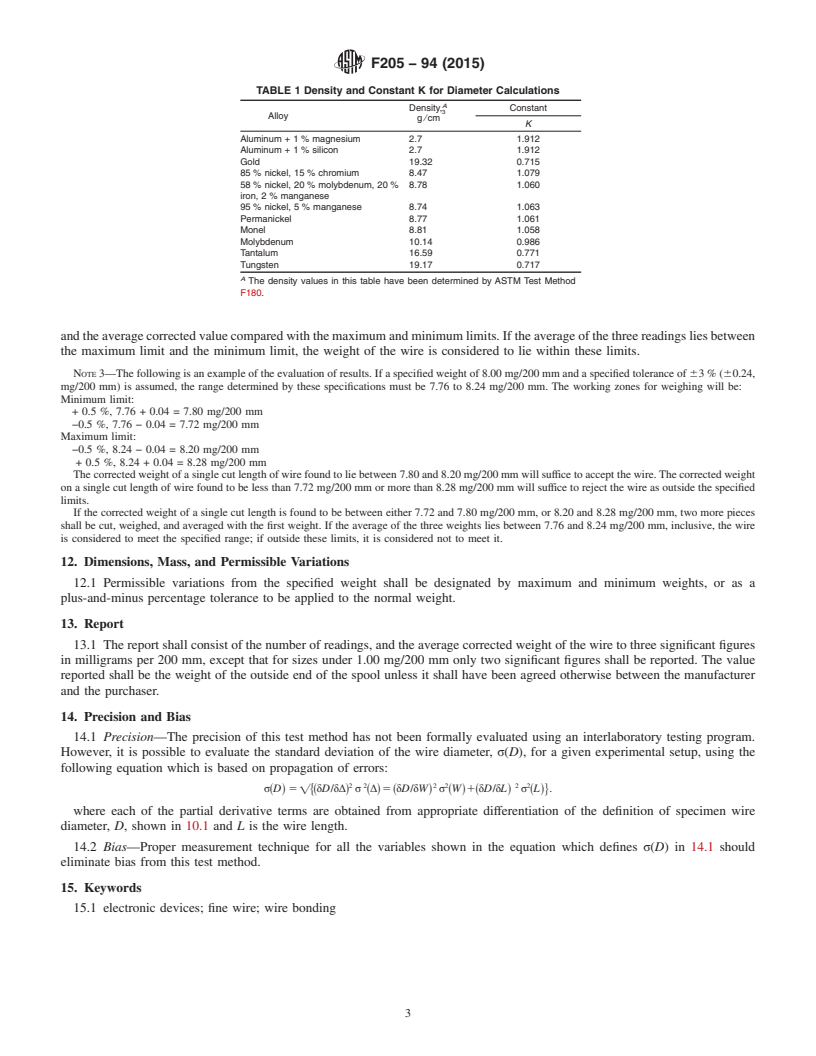
TABLE 1 Density and Constant K for Diameter Calculations
serviceandrepairit.Applycorrectionsdeterminedbychecking
A
to the apparent readings to obtain corrected weights. Obtain Density, Constant
Alloy
g⁄cm
corrections applied to apparent weights by interpolation be- K
tween the closest calibrated points, one above and one below Aluminum + 1 % magnesium 2.7 1.912
Aluminum + 1 % silicon 2.7 1.912
the reading.
Gold 19.32 0.715
85 % nickel, 15 % chromium 8.47 1.079
7.3 If the amount of work to be weighed at one point on the
58 % nickel, 20 % molybdenum, 20 % 8.78 1.060
scale justifies it, the balance may be calibrated with a standard
iron, 2 % manganese
weight(orcombinationofweights)deviatingbynotmorethan 95 % nickel, 5 % manganese 8.74 1.063
Permanickel 8.77 1.061
10% from that of the weight to be determined. In this case,
Monel 8.81 1.058
adjust the balance so that the balance reads the known weight
Molybdenum 10.14 0.986
Tantalum 16.59 0.771
of the check weight correctly when it is in balance, thereby
Tungsten 19.17 0.717
reducing the correction to zero.
A
The density values in this table have been determined by ASTM Test Method
7.4 Calibrate the balance, at zero under no load, or at
F180.
positive values when loaded to check weights, by using the
average of three consecutive readings, taken under conditions
11. Interpretation of Results
specified in 7.2 or 7.3, whichever is applicable.
11.1 If a single specimen or a single set of specimens is
weighed, and its corrected weight, or average weight when
8. Calibration with Standard Weights
multiple specimens are used, is found to lie between the point
8.1 Check weights are subject to change of mass due to
0.5%abovetheminimumlimitand0.5%belowthemaximum
wear from handling and use, and from chemical action result-
limit, the wire shall be considered to meet the specified limits.
ing from exposure. Depending on use, but not less than twice
11.2 If the corrected wire weight is under 0.5% below
...
This document is not an ASTM standard and is intended only to provide the user of an ASTM standard an indication of what changes have been made to the previous version. Because
it may not be technically possible to adequately depict all changes accurately, ASTM recommends that users consult prior editions as appropriate. In all cases only the current version
of the standard as published by ASTM is to be considered the official document.
´1
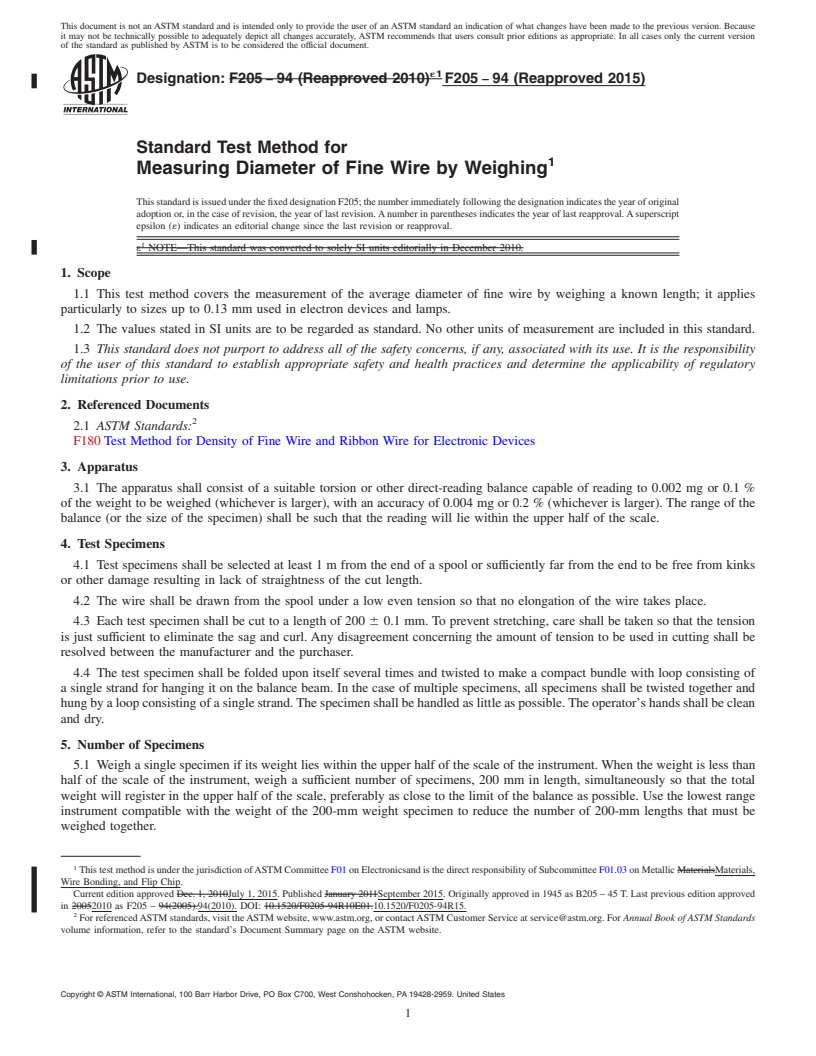
Designation: F205 − 94 (Reapproved 2010) F205 − 94 (Reapproved 2015)
Standard Test Method for
Measuring Diameter of Fine Wire by Weighing
This standard is issued under the fixed designation F205; the number immediately following the designation indicates the year of original
adoption or, in the case of revision, the year of last revision. A number in parentheses indicates the year of last reapproval. A superscript
epsilon (´) indicates an editorial change since the last revision or reapproval.
ε NOTE—This standard was converted to solely SI units editorially in December 2010.
1. Scope
1.1 This test method covers the measurement of the average diameter of fine wire by weighing a known length; it applies
particularly to sizes up to 0.13 mm used in electron devices and lamps.
1.2 The values stated in SI units are to be regarded as standard. No other units of measurement are included in this standard.
1.3 This standard does not purport to address all of the safety concerns, if any, associated with its use. It is the responsibility
of the user of this standard to establish appropriate safety and health practices and determine the applicability of regulatory
limitations prior to use.
2. Referenced Documents
2.1 ASTM Standards:
F180 Test Method for Density of Fine Wire and Ribbon Wire for Electronic Devices
3. Apparatus
3.1 The apparatus shall consist of a suitable torsion or other direct-reading balance capable of reading to 0.002 mg or 0.1 %
of the weight to be weighed (whichever is larger), with an accuracy of 0.004 mg or 0.2 % (whichever is larger). The range of the
balance (or the size of the specimen) shall be such that the reading will lie within the upper half of the scale.
4. Test Specimens
4.1 Test specimens shall be selected at least 1 m from the end of a spool or sufficiently far from the end to be free from kinks
or other damage resulting in lack of straightness of the cut length.
4.2 The wire shall be drawn from the spool under a low even tension so that no elongation of the wire takes place.
4.3 Each test specimen shall be cut to a length of 200 6 0.1 mm. To prevent stretching, care shall be taken so that the tension
is just sufficient to eliminate the sag and curl. Any disagreement concerning the amount of tension to be used in cutting shall be
resolved between the manufacturer and the purchaser.
4.4 The test specimen shall be folded upon itself several times and twisted to make a compact bundle with loop consisting of
a single strand for hanging it on the balance beam. In the case of multiple specimens, all specimens shall be twisted together and
hung by a loop consisting of a single strand. The specimen shall be handled as little as possible. The operator’s hands shall be clean
and dry.
5. Number of Specimens
5.1 Weigh a single specimen if its weight lies within the upper half of the scale of the instrument. When the weight is less than
half of the scale of the instrument, weigh a sufficient number of specimens, 200 mm in length, simultaneously so that the total
weight will register in the upper half of the scale, preferably as close to the limit of the balance as possible. Use the lowest range
instrument compatible with the weight of the 200-mm weight specimen to reduce the number of 200-mm lengths that must be
weighed together.
This test method is under the jurisdiction of ASTM Committee F01 on Electronicsand is the direct responsibility of Subcommittee F01.03 on Metallic MaterialsMaterials,
Wire Bonding, and Flip Chip.
Current edition approved Dec. 1, 2010July 1, 2015. Published January 2011September 2015. Originally approved in 1945 as B205 – 45 T. Last previous edition approved
in 20052010 as F205 – 94(2005).94(2010). DOI: 10.1520/F0205-94R10E01.10.1520/F0205-94R15.
For referenced ASTM standards, visit the ASTM website, www.astm.org, or contact ASTM Customer Service at service@astm.org. For Annual Book of ASTM Standards
volume information, refer to the standard’s Document Summary page on the ASTM website.
Copyright © ASTM International, 100 Barr Harbor Drive, PO Box C700, West Conshohocken, PA 19428-2959. United States
F205 − 94 (2015)
6. Repetition of Weighing
6.1 If the corrected weight of a single specimen lies within 60.5 % of either the minimum or the maximum limit specified for
the wire weight, cut and weigh two more specimens of wire in a similar manner. When two or more lengths of wire have been
weighed simultaneously to produce a reading in the upper half of the scale because of the small size of the wire, cut and weigh
two more sets of specimens in a similar manner.
7. Calibration and Checking of the Balance
7.1 Check the balance regularly in accordance with the recommendations of the manufacturer.
7.2 If a variety of weights are to be determined, calibrate the balance at five major points on the scale and at zero by determining
the weights of calibrated check weights. If any point is in error by more than 1 %, remove the balance from service and repair it.
Apply corrections determined by checking to the apparent readings to obtain corrected weights. Obtain corrections applied to
apparent weights by interpolation between the closest calibrated points, one above and one below the reading.
7.3 If the amount of work to be weighed at one point on the scale justifies it, the balance may be calibrated with a standard
weight (or combination of weights) deviating by not more than 10 % from that of the weight to be determined. In this case, adjust
the balance so that the balance reads the known weight of the check weight correctly when it is in balance, thereby reducing the
correction to zero.
7.4 Calibrate the balance, at zero under no load, or at positive values when loaded to check weights, by using the average of
three consecutive readings, taken under conditions specified in 7.2 or 7.3, whichever is applicable.
8. Calibration with Standard Weights
8.1 Check weights are subject to change of mass due to wear from handling and use, and from chemical action resulting from
exposure. Depending on use, but not less than twice a year, compare the calibrated check weights with the primary weights,
calibrated by the National Institute of Standards and Technology, and apply the necessary corrections.
8.2 The primary standard check weights shall be NIST Class M, or equivalent, for weight determinations of 2.00 mg or less,
and Class S, or equivalent, for weight determinations over 2.00 mg.
9. Procedure
9.1 Handle and use the balance as recommended by the manufacturer. Direct particular attention to requirements for careful
handling, protection from vibration and atmospheric dust, errors induced by temperature changes, and the necessity for avoiding
paralax in reading.
10. Calculation
10.1 Calculate the average diameter of the wire fr
...


Questions, Comments and Discussion
Ask us and Technical Secretary will try to provide an answer. You can facilitate discussion about the standard in here.