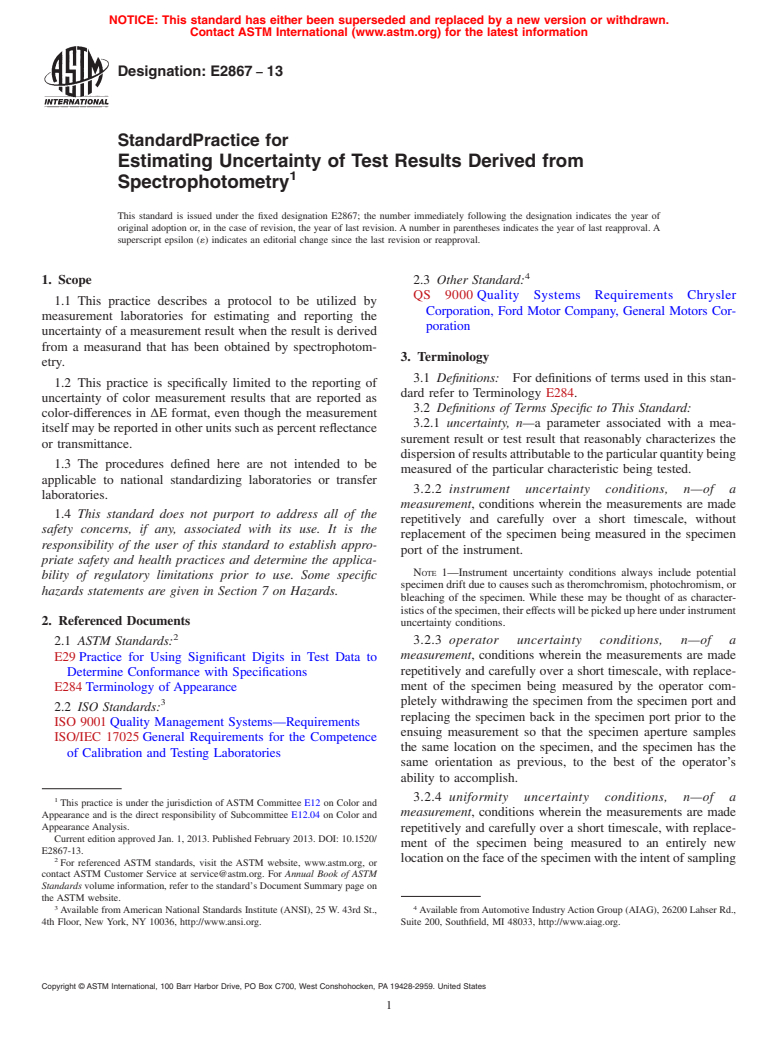
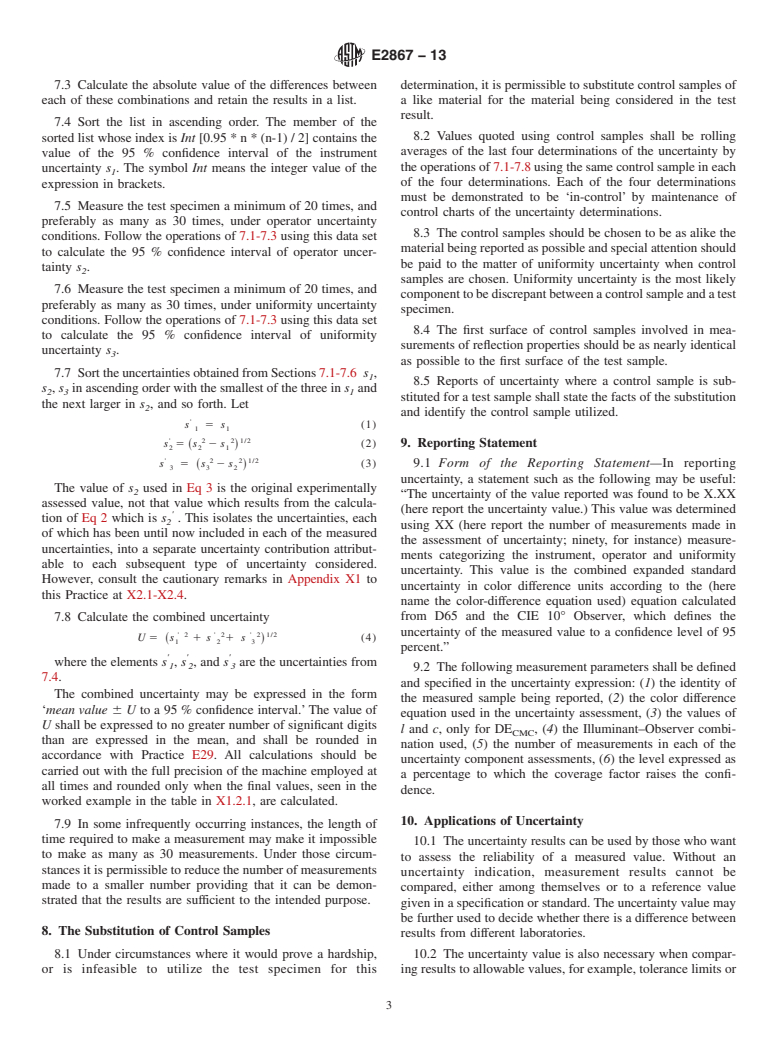
ASTM E2867-13
(Practice)Standard Practice for Estimating Uncertainty of Test Results Derived from Spectrophotometry
Standard Practice for Estimating Uncertainty of Test Results Derived from Spectrophotometry
SIGNIFICANCE AND USE
5.1 Many competent measurement laboratories comply with accepted quality system requirements such as ISO 9001, QS 9000, or ISO 17025. When using standard test methods, the measurement results should agree with those from other similar laboratories within the combined uncertainty limits of the laboratories’ measurement systems. It is for this reason that quality system requirements demand that a statement of the uncertainty of the test results accompany every test result.
5.2 Preparation of uncertainty estimates is a requirement for laboratory certification under ISO 17025. This practice describes the procedures by which such uncertainty estimates may be calculated.
SCOPE
1.1 This practice describes a protocol to be utilized by measurement laboratories for estimating and reporting the uncertainty of a measurement result when the result is derived from a measurand that has been obtained by spectrophotometry.
1.2 This practice is specifically limited to the reporting of uncertainty of color measurement results that are reported as color-differences in ΔE format, even though the measurement itself may be reported in other units such as percent reflectance or transmittance.
1.3 The procedures defined here are not intended to be applicable to national standardizing laboratories or transfer laboratories.
1.4 This standard does not purport to address all of the safety concerns, if any, associated with its use. It is the responsibility of the user of this standard to establish appropriate safety and health practices and determine the applicability of regulatory limitations prior to use. Some specific hazards statements are given in Section 7 on Hazards.
General Information
Relations
Standards Content (Sample)
NOTICE: This standard has either been superseded and replaced by a new version or withdrawn.
Contact ASTM International (www.astm.org) for the latest information
Designation: E2867 − 13
StandardPractice for
Estimating Uncertainty of Test Results Derived from
Spectrophotometry
This standard is issued under the fixed designation E2867; the number immediately following the designation indicates the year of
original adoption or, in the case of revision, the year of last revision. A number in parentheses indicates the year of last reapproval. A
superscript epsilon (´) indicates an editorial change since the last revision or reapproval.
1. Scope 2.3 Other Standard:
QS 9000 Quality Systems Requirements Chrysler
1.1 This practice describes a protocol to be utilized by
Corporation, Ford Motor Company, General Motors Cor-
measurement laboratories for estimating and reporting the
poration
uncertainty of a measurement result when the result is derived
from a measurand that has been obtained by spectrophotom-
3. Terminology
etry.
3.1 Definitions: For definitions of terms used in this stan-
1.2 This practice is specifically limited to the reporting of
dard refer to Terminology E284.
uncertainty of color measurement results that are reported as
3.2 Definitions of Terms Specific to This Standard:
color-differences in ∆E format, even though the measurement
3.2.1 uncertainty, n—a parameter associated with a mea-
itself may be reported in other units such as percent reflectance
surement result or test result that reasonably characterizes the
or transmittance.
dispersionofresultsattributabletotheparticularquantitybeing
1.3 The procedures defined here are not intended to be
measured of the particular characteristic being tested.
applicable to national standardizing laboratories or transfer
3.2.2 instrument uncertainty conditions, n—of a
laboratories.
measurement, conditions wherein the measurements are made
1.4 This standard does not purport to address all of the
repetitively and carefully over a short timescale, without
safety concerns, if any, associated with its use. It is the
replacement of the specimen being measured in the specimen
responsibility of the user of this standard to establish appro-
port of the instrument.
priate safety and health practices and determine the applica-
NOTE 1—Instrument uncertainty conditions always include potential
bility of regulatory limitations prior to use. Some specific
specimen drift due to causes such as theromchromism, photochromism, or
hazards statements are given in Section 7 on Hazards.
bleaching of the specimen. While these may be thought of as character-
isticsofthespecimen,theireffectswillbepickeduphereunderinstrument
2. Referenced Documents
uncertainty conditions.
3.2.3 operator uncertainty conditions, n—of a
2.1 ASTM Standards:
measurement, conditions wherein the measurements are made
E29 Practice for Using Significant Digits in Test Data to
repetitively and carefully over a short timescale, with replace-
Determine Conformance with Specifications
ment of the specimen being measured by the operator com-
E284 Terminology of Appearance
3 pletely withdrawing the specimen from the specimen port and
2.2 ISO Standards:
replacing the specimen back in the specimen port prior to the
ISO 9001 Quality Management Systems—Requirements
ensuing measurement so that the specimen aperture samples
ISO/IEC 17025 General Requirements for the Competence
the same location on the specimen, and the specimen has the
of Calibration and Testing Laboratories
same orientation as previous, to the best of the operator’s
ability to accomplish.
3.2.4 uniformity uncertainty conditions, n—of a
This practice is under the jurisdiction of ASTM Committee E12 on Color and
measurement, conditions wherein the measurements are made
Appearance and is the direct responsibility of Subcommittee E12.04 on Color and
Appearance Analysis.
repetitively and carefully over a short timescale, with replace-
Current edition approved Jan. 1, 2013. Published February 2013. DOI: 10.1520/
ment of the specimen being measured to an entirely new
E2867-13.
2 locationonthefaceofthespecimenwiththeintentofsampling
For referenced ASTM standards, visit the ASTM website, www.astm.org, or
contact ASTM Customer Service at service@astm.org. For Annual Book of ASTM
Standards volume information, refer to the standard’s Document Summary page on
the ASTM website.
3 4
Available fromAmerican National Standards Institute (ANSI), 25 W. 43rd St., Available fromAutomotive IndustryAction Group (AIAG), 26200 Lahser Rd.,
4th Floor, New York, NY 10036, http://www.ansi.org. Suite 200, Southfield, MI 48033, http://www.aiag.org.
Copyright © ASTM International, 100 Barr Harbor Drive, PO Box C700, West Conshohocken, PA 19428-2959. United States
E2867 − 13
the entire surface of the specimen, or as much of the surface as quality system requirements demand that a statement of the
is practical, by the end of the repetitive sampling run. uncertainty of the test results accompany every test result.
3.2.5 instrument uncertainty, n—the results of an uncer- 5.2 Preparation of uncertainty estimates is a requirement for
tainty analysis of a measurement system made under instru-
laboratory certification under ISO 17025. This practice de-
ment uncertainty conditions. scribes the procedures by which such uncertainty estimates
may be calculated.
3.2.6 operator uncertainty, n—the results of an uncertainty
analysis of a measurement system made under operator uncer-
6. Concepts in Reporting Uncertainty of Test Results
tainty conditions.
6.1 Acommonly cited definition (1, 2) paraphrased to form
3.2.7 uniformity uncertainty, n—theresultsofanuncertainty
a single citation defines uncertainty as “a parameter, associated
analysis of a measurement system made under uniformity
with the measurement result, or test result, that characterizes
uncertainty conditions.
the dispersion of values that could reasonably be attributed to
3.2.8 expanded uncertainty, n—uncertainty reported as a
the quantity subject to measurement or characteristic subject to
multiple of the standard uncertainty.
test.” This definition emphasizes uncertainty as an attribute of
3.2.9 measurement system, n—the entirety of variable fac- an individual test result, not as a property defining statistical
tors that could affect the precision, accuracy, or uncertainty of
variation of test results.
a measurement result. These include the instrument, the
6.2 The methodology for classification of uncertainty types
operator, the environmental conditions, the quality of the
has been classified as Type A and Type B as discussed in
transfer standard, the specimen aperture size, as well as other
references (2) and (3). TypeAestimates of uncertainty include
factors.
estimates based upon knowledge of the statistical character of
3.2.10 standard uncertainty, n—uncertainty reported as the
the measurement results, or estimates based upon statistical
standard deviation of the estimated value of the quantity analysis of replicate measurement results. The latter may
subject to measurement.
include results from control sample monitoring programs, or
proficiency testing. Type B estimates of uncertainty include
3.2.11 95 % confidence interval, n—the 95 percentile value
estimates from calibration certificates and manufacturer’s
of an ascending-ordered distribution of differences between
specifications. TypeAare evaluated by statistical methods and
multiple measurement results of a derived parameter charac-
Type B by non-statistical methods.
terized by a color measurement system.
3.2.11.1 Discussion—This value is the cumulative distribu- 6.3 The goal of reporting uncertainty is to account for all
tion between zero and the stated value of the measurand that
potentialcausescontributingtouncertaintyinthemeasurement
contains 95 % of all the measurement results made by this result. Uncertainty for a single measurement result is then
procedure.
2 2 2 1/2
s 1s 1 .1 s
~ !
1 2 n
where s is the estimate of the uncertainty of the first factor
4. Summary of Practice
contributing to variance, s the second, and so on, through all
4.1 This practice establishes a protocol for measurement
n components of variance.
laboratories to assess the uncertainty of their measurement
6.4 Uncertainty in this practice shall be reported as the 95%
system from test specimens or from control samples of
confidence interval of the largest component of all the compo-
materials similar in both first-surface characteristics and color
nents of uncertainty assessed.
to those being measured and reported.
6.5 The minimum components contributing to variance
4.2 Where control samples are used, the process will be to
shall be the instrument uncertainty, the operator uncertainty,
establishcontrolsamplesrepresentativeofthetypeofmaterials
the uniformity uncertainty, and the uncertainty of the traceabil-
tobemeasured.Controlsampleswillbeprocessedtoassessthe
ity scheme.
various uncertainty components of measurement results, the
resultsretainedinacontrolchart,andtherollingaverageofthe
7. Procedure
uncertainty components of the control samples used as a
7.1 Measure the test specimen a minimum of 20 times, and
surrogate for assessing the uncertainty of a similar specimen.
preferably as many as 30 times, under instrument uncertainty
4.3 Some of the components of uncertainty for color mea-
conditions. Make all measurements in compliance with the
surement result are instrument uncertainty, operator
manufacturer’s recommendations including prior standardiza-
uncertainty, and uniformity (of the specimen) uncertainty.
tion of the instrument using a white tile, a black tile, or light
trap, and a grey tile, if required.
5. Significance and Use
7.2 There will be n*(n - 1) / 2 possible differences between
5.1 Manycompetentmeasurementlaboratoriescomplywith
the n measurement results taken two-at-a-time in all possible
accepted quality system requirements such as ISO 9001, QS
combinations.
9000, or ISO 17025. When using standard test methods, the
measurementresultsshouldagreewiththosefromothersimilar
laboratories within the combined uncertainty limits of the
The boldface numbers in parentheses refer to a list of references at the end of
laboratories’ measurement systems. It is for this reason that this standard.
E2867 − 13
7.3 Calculate the absolute value of the differences between determination, it is permissible to substitute control samples of
each of these combinations and retain the results in a list. a like material for the material being considered in the test
result.
7.4 Sort the list in ascending order. The member of the
8.2 Values quoted using control samples shall be rolling
sorted list whose index is Int [0.95*n* (n-1) / 2] contains the
averages of the last four determinations of the uncertainty by
value of the 95 % confidence interval of the instrument
the operations of 7.1-7.8 using the same control sample in each
uncertainty s . The symbol Int means the integer
...


Questions, Comments and Discussion
Ask us and Technical Secretary will try to provide an answer. You can facilitate discussion about the standard in here.