ASTM A897/A897M-15
(Specification)Standard Specification for Austempered Ductile Iron Castings
Standard Specification for Austempered Ductile Iron Castings
ABSTRACT
This specification covers ductile iron castings that are subsequently heat treated by an austempering process. The chemical composition requirements may be agreed upon between the manufacturer, heat treater, and the purchaser. Requirements for the microstructure constituents such as graphite, ausferrite (acicular ferrite and high carbon, stable austenite), pearlite, and martensite are prescribed. The iron shall conform to the mechanical property requirements including tensile strength, yield strength, elongation, impact energy, and Brinell hardness. Castings shall be heat treated by an austempering process detailed in this specification. The standard specimens for tension and Charpy impact tests are illustrated.
SCOPE
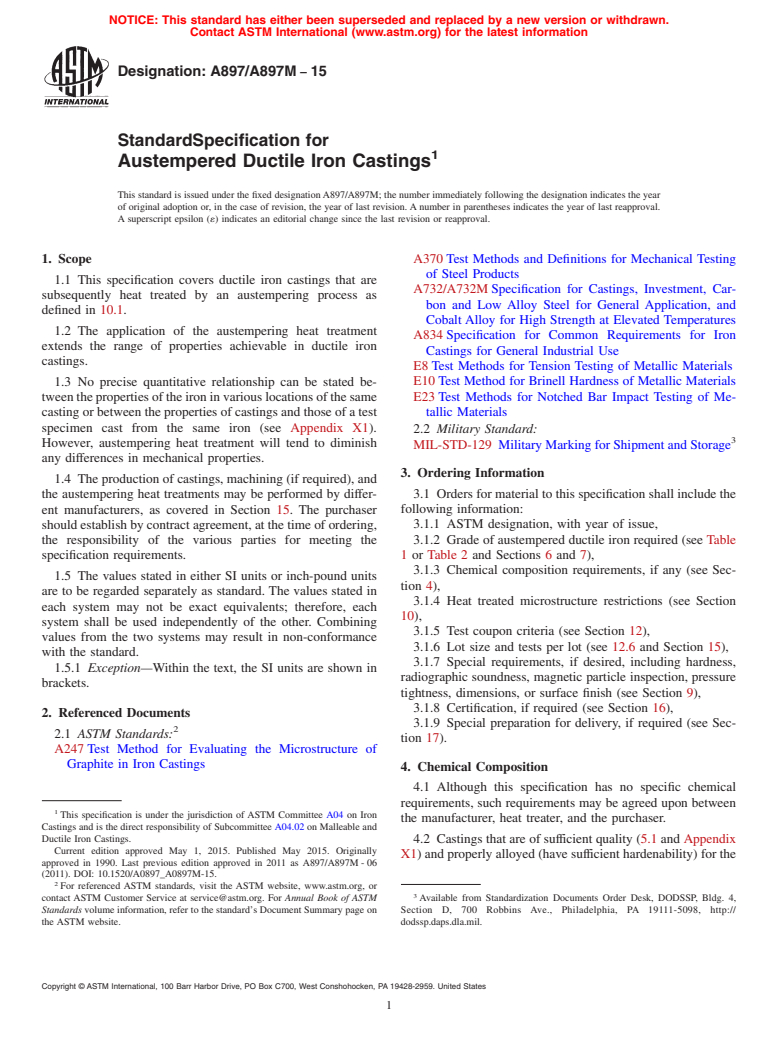
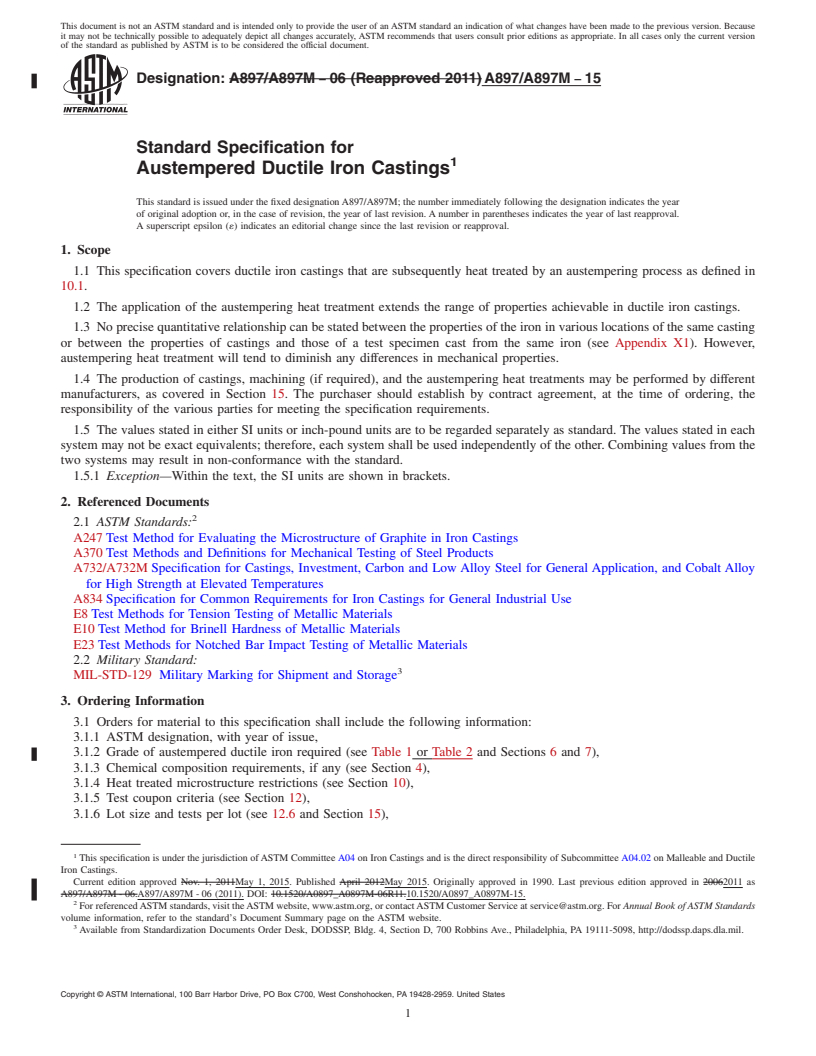
1.1 This specification covers ductile iron castings that are subsequently heat treated by an austempering process as defined in 10.1.
1.2 The application of the austempering heat treatment extends the range of properties achievable in ductile iron castings.
1.3 No precise quantitative relationship can be stated between the properties of the iron in various locations of the same casting or between the properties of castings and those of a test specimen cast from the same iron (see Appendix X1). However, austempering heat treatment will tend to diminish any differences in mechanical properties.
1.4 The production of castings, machining (if required), and the austempering heat treatments may be performed by different manufacturers, as covered in Section 15. The purchaser should establish by contract agreement, at the time of ordering, the responsibility of the various parties for meeting the specification requirements.
1.5 The values stated in either SI units or inch-pound units are to be regarded separately as standard. The values stated in each system may not be exact equivalents; therefore, each system shall be used independently of the other. Combining values from the two systems may result in non-conformance with the standard.
1.5.1 Exception—Within the text, the SI units are shown in brackets.
General Information
Relations
Buy Standard
Standards Content (Sample)
NOTICE: This standard has either been superseded and replaced by a new version or withdrawn.
Contact ASTM International (www.astm.org) for the latest information
Designation: A897/A897M −15
StandardSpecification for
1
Austempered Ductile Iron Castings
This standard is issued under the fixed designationA897/A897M; the number immediately following the designation indicates the year
of original adoption or, in the case of revision, the year of last revision. A number in parentheses indicates the year of last reapproval.
A superscript epsilon (´) indicates an editorial change since the last revision or reapproval.
1. Scope A370 Test Methods and Definitions for Mechanical Testing
of Steel Products
1.1 This specification covers ductile iron castings that are
A732/A732M Specification for Castings, Investment, Car-
subsequently heat treated by an austempering process as
bon and Low Alloy Steel for General Application, and
defined in 10.1.
Cobalt Alloy for High Strength at Elevated Temperatures
1.2 The application of the austempering heat treatment
A834 Specification for Common Requirements for Iron
extends the range of properties achievable in ductile iron
Castings for General Industrial Use
castings.
E8 Test Methods for Tension Testing of Metallic Materials
1.3 No precise quantitative relationship can be stated be- E10 Test Method for Brinell Hardness of Metallic Materials
E23 Test Methods for Notched Bar Impact Testing of Me-
tweenthepropertiesoftheironinvariouslocationsofthesame
casting or between the properties of castings and those of a test tallic Materials
specimen cast from the same iron (see Appendix X1).
2.2 Military Standard:
3
However, austempering heat treatment will tend to diminish
MIL-STD-129 Military Marking for Shipment and Storage
any differences in mechanical properties.
3. Ordering Information
1.4 The production of castings, machining (if required), and
3.1 Orders for material to this specification shall include the
the austempering heat treatments may be performed by differ-
ent manufacturers, as covered in Section 15. The purchaser following information:
3.1.1 ASTM designation, with year of issue,
should establish by contract agreement, at the time of ordering,
the responsibility of the various parties for meeting the 3.1.2 Grade of austempered ductile iron required (see Table
1 or Table 2 and Sections 6 and 7),
specification requirements.
3.1.3 Chemical composition requirements, if any (see Sec-
1.5 The values stated in either SI units or inch-pound units
tion 4),
are to be regarded separately as standard. The values stated in
3.1.4 Heat treated microstructure restrictions (see Section
each system may not be exact equivalents; therefore, each
10),
system shall be used independently of the other. Combining
3.1.5 Test coupon criteria (see Section 12),
values from the two systems may result in non-conformance
3.1.6 Lot size and tests per lot (see 12.6 and Section 15),
with the standard.
3.1.7 Special requirements, if desired, including hardness,
1.5.1 Exception—Within the text, the SI units are shown in
radiographic soundness, magnetic particle inspection, pressure
brackets.
tightness, dimensions, or surface finish (see Section 9),
3.1.8 Certification, if required (see Section 16),
2. Referenced Documents
3.1.9 Special preparation for delivery, if required (see Sec-
2
2.1 ASTM Standards:
tion 17).
A247 Test Method for Evaluating the Microstructure of
Graphite in Iron Castings
4. Chemical Composition
4.1 Although this specification has no specific chemical
requirements, such requirements may be agreed upon between
1
This specification is under the jurisdiction of ASTM Committee A04 on Iron
the manufacturer, heat treater, and the purchaser.
Castings and is the direct responsibility of Subcommittee A04.02 on Malleable and
Ductile Iron Castings.
4.2 Castings that are of sufficient quality (5.1 and Appendix
Current edition approved May 1, 2015. Published May 2015. Originally
X1) and properly alloyed (have sufficient hardenability) for the
approved in 1990. Last previous edition approved in 2011 as A897/A897M - 06
(2011). DOI: 10.1520/A0897_A0897M-15.
2
For referenced ASTM standards, visit the ASTM website, www.astm.org, or
3
contact ASTM Customer Service at service@astm.org. For Annual Book of ASTM Available from Standardization Documents Order Desk, DODSSP, Bldg. 4,
Standards volume information, refer to the standard’s Document Summary page on Section D, 700 Robbins Ave., Philadelphia, PA 19111-5098, http://
the ASTM website. dodssp.daps.dla.mil.
Copyright © ASTM International, 100 Barr Harbor Drive, PO Box C700, West Conshohocken, PA 19428-2959. United States
1
---------------------- Page: 1 ----------------------
A897/A897M − 15
TABLE 1 Mechanical Property Requirements of Grades1–5
Inch-pound units Grade 1 Grade 2 Grade 3 Grade 4 Grade 5
130/90/09 150/110/07 175/125/04 200/155/02 230/185/01
Tensile strength, min, ksi 130 150 175 200 230
Yield strength, min, ksi 90 110 125 155 185
Elongation in 2 in., min,
...
This document is not an ASTM standard and is intended only to provide the user of an ASTM standard an indication of what changes have been made to the previous version. Because
it may not be technically possible to adequately depict all changes accurately, ASTM recommends that users consult prior editions as appropriate. In all cases only the current version
of the standard as published by ASTM is to be considered the official document.
Designation: A897/A897M − 06 (Reapproved 2011) A897/A897M − 15
Standard Specification for
1
Austempered Ductile Iron Castings
This standard is issued under the fixed designation A897/A897M; the number immediately following the designation indicates the year
of original adoption or, in the case of revision, the year of last revision. A number in parentheses indicates the year of last reapproval.
A superscript epsilon (´) indicates an editorial change since the last revision or reapproval.
1. Scope
1.1 This specification covers ductile iron castings that are subsequently heat treated by an austempering process as defined in
10.1.
1.2 The application of the austempering heat treatment extends the range of properties achievable in ductile iron castings.
1.3 No precise quantitative relationship can be stated between the properties of the iron in various locations of the same casting
or between the properties of castings and those of a test specimen cast from the same iron (see Appendix X1). However,
austempering heat treatment will tend to diminish any differences in mechanical properties.
1.4 The production of castings, machining (if required), and the austempering heat treatments may be performed by different
manufacturers, as covered in Section 15. The purchaser should establish by contract agreement, at the time of ordering, the
responsibility of the various parties for meeting the specification requirements.
1.5 The values stated in either SI units or inch-pound units are to be regarded separately as standard. The values stated in each
system may not be exact equivalents; therefore, each system shall be used independently of the other. Combining values from the
two systems may result in non-conformance with the standard.
1.5.1 Exception—Within the text, the SI units are shown in brackets.
2. Referenced Documents
2
2.1 ASTM Standards:
A247 Test Method for Evaluating the Microstructure of Graphite in Iron Castings
A370 Test Methods and Definitions for Mechanical Testing of Steel Products
A732/A732M Specification for Castings, Investment, Carbon and Low Alloy Steel for General Application, and Cobalt Alloy
for High Strength at Elevated Temperatures
A834 Specification for Common Requirements for Iron Castings for General Industrial Use
E8 Test Methods for Tension Testing of Metallic Materials
E10 Test Method for Brinell Hardness of Metallic Materials
E23 Test Methods for Notched Bar Impact Testing of Metallic Materials
2.2 Military Standard:
3
MIL-STD-129 Military Marking for Shipment and Storage
3. Ordering Information
3.1 Orders for material to this specification shall include the following information:
3.1.1 ASTM designation, with year of issue,
3.1.2 Grade of austempered ductile iron required (see Table 1 or Table 2 and Sections 6 and 7),
3.1.3 Chemical composition requirements, if any (see Section 4),
3.1.4 Heat treated microstructure restrictions (see Section 10),
3.1.5 Test coupon criteria (see Section 12),
3.1.6 Lot size and tests per lot (see 12.6 and Section 15),
1
This specification is under the jurisdiction of ASTM Committee A04 on Iron Castings and is the direct responsibility of Subcommittee A04.02 on Malleable and Ductile
Iron Castings.
Current edition approved Nov. 1, 2011May 1, 2015. Published April 2012May 2015. Originally approved in 1990. Last previous edition approved in 20062011 as
A897/A897M - 06.A897/A897M - 06 (2011). DOI: 10.1520/A0897_A0897M-06R11.10.1520/A0897_A0897M-15.
2
For referenced ASTM standards, visit the ASTM website, www.astm.org, or contact ASTM Customer Service at service@astm.org. For Annual Book of ASTM Standards
volume information, refer to the standard’s Document Summary page on the ASTM website.
3
Available from Standardization Documents Order Desk, DODSSP, Bldg. 4, Section D, 700 Robbins Ave., Philadelphia, PA 19111-5098, http://dodssp.daps.dla.mil.
Copyright © ASTM International, 100 Barr Harbor Drive, PO Box C700, West Conshohocken, PA 19428-2959. United States
1
---------------------- Page: 1 ----------------------
A897/A897M − 15
TABLE 1 Mechanical Property Requirements of Grades
Inch-pound units Grade Grade Grade Grade Grade Grade
110/70/11 130/90/09 150/110/07 175/125/04 200/155/02 230/185/01
Tensile strength, min, ksi 110 130 150 175 200 230
Yield strength, min, ksi 70 90 110 125 155 185
Elongation in 2 in., min, % 11 9 7 4 2 1
A
Impact energy, ft-lb 80 75 60 45 25 15
2B
Typical hardness, HBW, kg/mm 241–302 269–341 302–375 341–444 388–477 402–512
TABLE 1 Mechanical Property Requirements of Grades 1 – 5
Inch-pound units Grade 1 Grad
...


Questions, Comments and Discussion
Ask us and Technical Secretary will try to provide an answer. You can facilitate discussion about the standard in here.