ASTM F2203-02e1
(Test Method)Standard Test Method for Linear Measurement Using Precision Steel Rule
Standard Test Method for Linear Measurement Using Precision Steel Rule
SCOPE
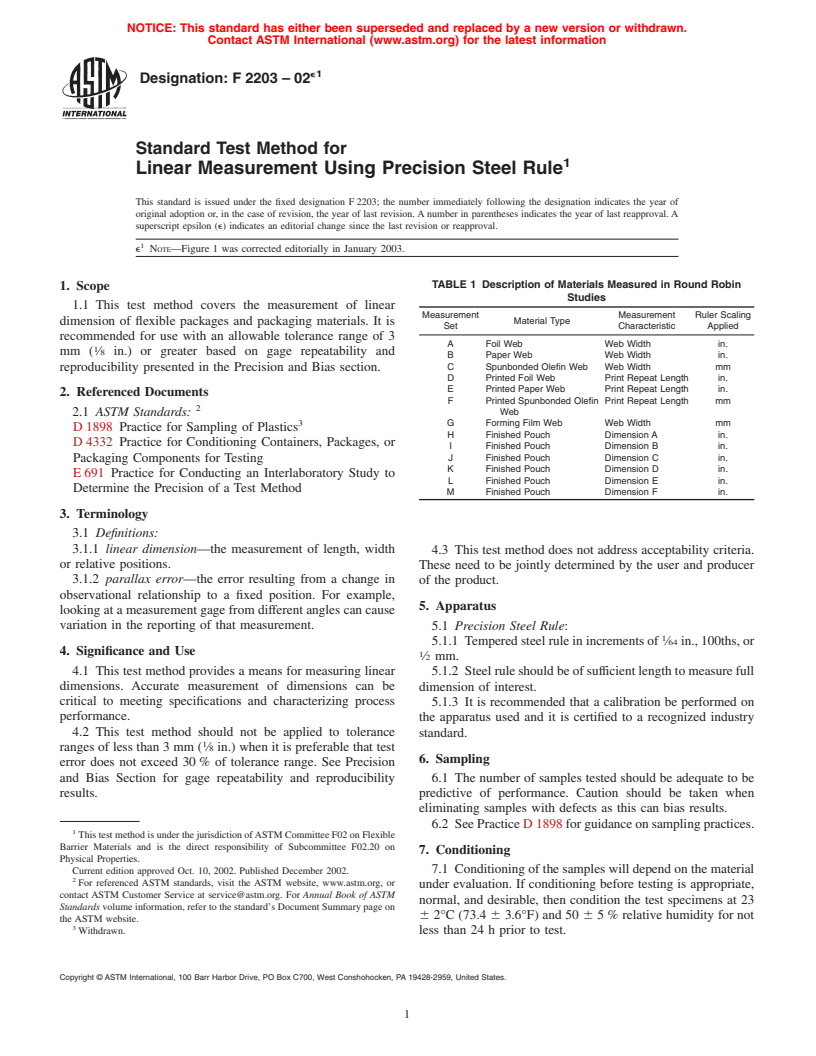
1.1 This test method covers the measurement of linear dimension of flexible packages and packaging materials. It is recommended for use with an allowable tolerance range of 3 mm (1/8 in.) or greater based on gage repeatability and reproducibility presented in the Precision and Bias section.
General Information
Relations
Standards Content (Sample)
NOTICE: This standard has either been superseded and replaced by a new version or withdrawn.
Contact ASTM International (www.astm.org) for the latest information
e1
Designation:F2203–02
Standard Test Method for
1
Linear Measurement Using Precision Steel Rule
This standard is issued under the fixed designation F 2203; the number immediately following the designation indicates the year of
original adoption or, in the case of revision, the year of last revision. A number in parentheses indicates the year of last reapproval. A
superscript epsilon (e) indicates an editorial change since the last revision or reapproval.
1
e NOTE—Figure 1 was corrected editorially in January 2003.
TABLE 1 Description of Materials Measured in Round Robin
1. Scope
Studies
1.1 This test method covers the measurement of linear
Measurement Measurement Ruler Scaling
Material Type
dimension of flexible packages and packaging materials. It is
Set Characteristic Applied
recommended for use with an allowable tolerance range of 3
A Foil Web Web Width in.
1
mm ( ⁄8 in.) or greater based on gage repeatability and
B Paper Web Web Width in.
reproducibility presented in the Precision and Bias section. C Spunbonded Olefin Web Web Width mm
D Printed Foil Web Print Repeat Length in.
E Printed Paper Web Print Repeat Length in.
2. Referenced Documents
F Printed Spunbonded Olefin Print Repeat Length mm
2
2.1 ASTM Standards: Web
3 G Forming Film Web Web Width mm
D 1898 Practice for Sampling of Plastics
H Finished Pouch Dimension A in.
D 4332 Practice for Conditioning Containers, Packages, or
I Finished Pouch Dimension B in.
J Finished Pouch Dimension C in.
Packaging Components for Testing
K Finished Pouch Dimension D in.
E 691 Practice for Conducting an Interlaboratory Study to
L Finished Pouch Dimension E in.
Determine the Precision of a Test Method
M Finished Pouch Dimension F in.
3. Terminology
3.1 Definitions:
3.1.1 linear dimension—the measurement of length, width
4.3 This test method does not address acceptability criteria.
or relative positions. These need to be jointly determined by the user and producer
3.1.2 parallax error—the error resulting from a change in
of the product.
observational relationship to a fixed position. For example,
5. Apparatus
looking at a measurement gage from different angles can cause
variation in the reporting of that measurement.
5.1 Precision Steel Rule:
1
5.1.1 Tempered steel rule in increments of ⁄64 in., 100ths, or
4. Significance and Use
1
⁄2 mm.
4.1 This test method provides a means for measuring linear
5.1.2 Steel rule should be of sufficient length to measure full
dimensions. Accurate measurement of dimensions can be
dimension of interest.
critical to meeting specifications and characterizing process
5.1.3 It is recommended that a calibration be performed on
performance. the apparatus used and it is certified to a recognized industry
4.2 This test method should not be applied to tolerance
standard.
1
ranges of less than 3 mm ( ⁄8 in.) when it is preferable that test
6. Sampling
error does not exceed 30 % of tolerance range. See Precision
and Bias Section for gage repeatability and reproducibility 6.1 The number of samples tested should be adequate to be
results. predictive of performance. Caution should be taken when
eliminating samples with defects as this can bias results.
6.2 SeePracticeD 1898forguidanceonsamplingpractices.
1
This test method is under the jurisdiction ofASTM Committee F02 on Flexible
Barrier Materials and is the direct responsibility of Subcommittee F02.20 on
7. Conditioning
Physical Properties.
7.1 Conditioning of the samples will depend on the material
Current edition approved Oct. 10, 2002. Published December 2002.
2
For referenced ASTM standards, visit the ASTM website, www.astm.org, or
under evaluation. If conditioning before testing is appropriate,
contact ASTM Customer Service at service@astm.org. For Annual Book of ASTM
normal, and desirable, then condition the test specimens at 23
Standards volume information, refer to the standard’s Document Summary page on
6 2°C (73.4 6 3.6°F) and 50 6 5 % relative humidity for not
the ASTM website.
3
Withdrawn. less than 24 h prior to test.
Copyright © ASTM International, 100 Barr Harbor Drive, PO Box C700, West Conshohocken, PA 19428-2959, United States.
1
---------------------- Page: 1 ----------------------
e1
F2203–02
TABLE 2 Summary of Interlaboratory Results by Measurement Set
Repeatability Reproducibility 95 % 95 %
Measurement Average Standard Standard Repeatability Reproducibility
Set mm Deviation Deviation Limit Limit
s s r R
r R
A 266.85 0.162 0.204 0.459 0.576
B 777.30 0.324 0.424 0.917 1.200
C 826.25 0.167 0.267 0.472 0.756
D 82.42 0.132 0.199 0.374 0.564
E 279.47 0.000 0.162 0.000 0.459
F 379.78 0.204 0.319 0.578 0.903
G 326.78 0.204 0.387 0.578 1.094
H 133.57 0.162 0.253 0.459 0.717
I 253.65 0.094 0.284 0.265 0.803
J 9.97 0.162 0.280 0.459 0.791
K 18.10 0.162 0.204 0.459 0.576
L 114.41 0.229 0.339 0.648 0.959
M 225.91 0.229 0.298 0.648
...


Questions, Comments and Discussion
Ask us and Technical Secretary will try to provide an answer. You can facilitate discussion about the standard in here.