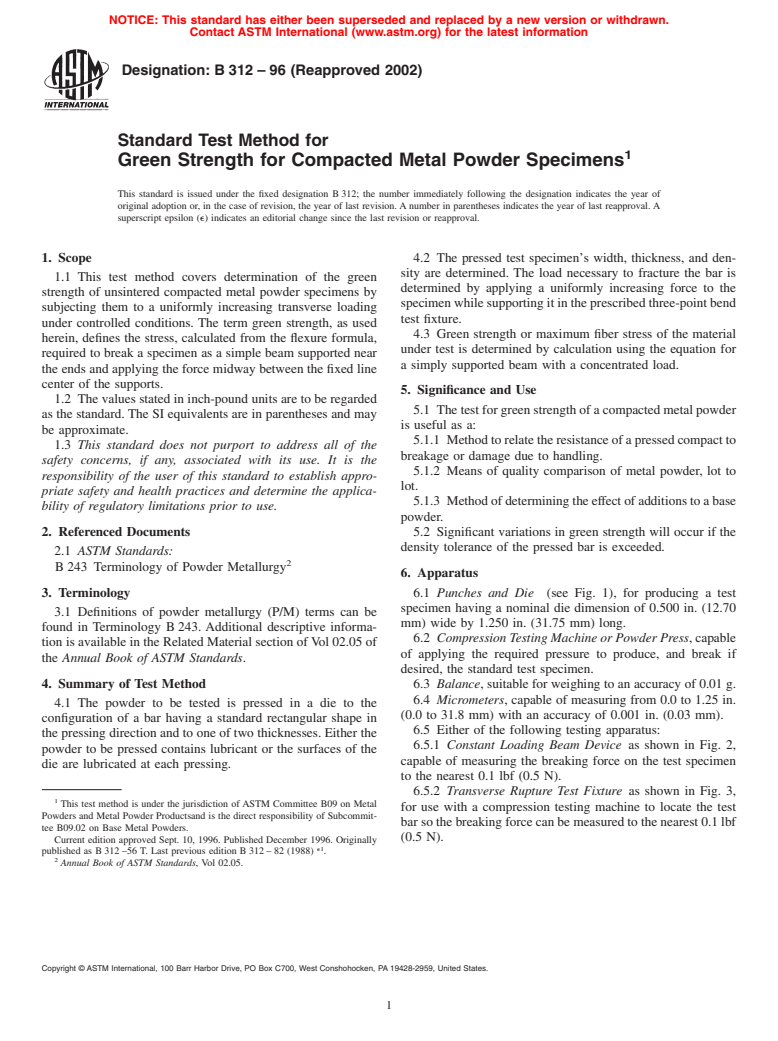
ASTM B312-96(2002)
(Test Method)Standard Test Method for Green Strength for Compacted Metal Powder Specimens
Standard Test Method for Green Strength for Compacted Metal Powder Specimens
SIGNIFICANCE AND USE
The test for green strength of a compacted metal powder is useful as a:
5.1.1 Method to relate the resistance of a pressed compact to breakage or damage due to handling.
5.1.2 Means of quality comparison of metal powder, lot to lot.
5.1.3 Method of determining the effect of additions to a base powder.
Significant variations in green strength will occur if the density tolerance of the pressed bar is exceeded.
SCOPE
1.1 This test method covers determination of the green strength of unsintered compacted metal powder specimens by subjecting them to a uniformly increasing transverse loading under controlled conditions. The term green strength, as used herein, defines the stress, calculated from the flexure formula, required to break a specimen as a simple beam supported near the ends and applying the force midway between the fixed line center of the supports.
1.2 The values stated in inch-pound units are to be regarded as the standard. The SI equivalents are in parentheses and may be approximate.
1.3 This standard does not purport to address all of the safety concerns, if any, associated with its use. It is the responsibility of the user of this standard to establish appropriate safety and health practices and determine the applicability of regulatory limitations prior to use.
General Information
Relations
Standards Content (Sample)
NOTICE: This standard has either been superseded and replaced by a new version or withdrawn.
Contact ASTM International (www.astm.org) for the latest information
Designation:B312–96 (Reapproved 2002)
Standard Test Method for
1
Green Strength for Compacted Metal Powder Specimens
This standard is issued under the fixed designation B 312; the number immediately following the designation indicates the year of
original adoption or, in the case of revision, the year of last revision. A number in parentheses indicates the year of last reapproval. A
superscript epsilon (e) indicates an editorial change since the last revision or reapproval.
1. Scope 4.2 The pressed test specimen’s width, thickness, and den-
sity are determined. The load necessary to fracture the bar is
1.1 This test method covers determination of the green
determined by applying a uniformly increasing force to the
strength of unsintered compacted metal powder specimens by
specimenwhilesupportingitintheprescribedthree-pointbend
subjecting them to a uniformly increasing transverse loading
test fixture.
under controlled conditions. The term green strength, as used
4.3 Green strength or maximum fiber stress of the material
herein, defines the stress, calculated from the flexure formula,
under test is determined by calculation using the equation for
required to break a specimen as a simple beam supported near
a simply supported beam with a concentrated load.
the ends and applying the force midway between the fixed line
center of the supports.
5. Significance and Use
1.2 The values stated in inch-pound units are to be regarded
5.1 Thetestforgreenstrengthofacompactedmetalpowder
as the standard. The SI equivalents are in parentheses and may
is useful as a:
be approximate.
5.1.1 Methodtorelatetheresistanceofapressedcompactto
1.3 This standard does not purport to address all of the
breakage or damage due to handling.
safety concerns, if any, associated with its use. It is the
5.1.2 Means of quality comparison of metal powder, lot to
responsibility of the user of this standard to establish appro-
lot.
priate safety and health practices and determine the applica-
5.1.3 Methodofdeterminingtheeffectofadditionstoabase
bility of regulatory limitations prior to use.
powder.
2. Referenced Documents 5.2 Significant variations in green strength will occur if the
density tolerance of the pressed bar is exceeded.
2.1 ASTM Standards:
2
B 243 Terminology of Powder Metallurgy
6. Apparatus
3. Terminology 6.1 Punches and Die (see Fig. 1), for producing a test
specimen having a nominal die dimension of 0.500 in. (12.70
3.1 Definitions of powder metallurgy (P/M) terms can be
mm) wide by 1.250 in. (31.75 mm) long.
found in Terminology B 243. Additional descriptive informa-
6.2 CompressionTestingMachineorPowderPress, capable
tion is available in the Related Material section of Vol 02.05 of
of applying the required pressure to produce, and break if
the Annual Book of ASTM Standards.
desired, the standard test specimen.
4. Summary of Test Method 6.3 Balance, suitable for weighing to an accuracy of 0.01 g.
6.4 Micrometers, capable of measuring from 0.0 to 1.25 in.
4.1 The powder to be tested is pressed in a die to the
(0.0 to 31.8 mm) with an accuracy of 0.001 in. (0.03 mm).
configuration of a bar having a standard rectangular shape in
6.5 Either of the following testing apparatus:
the pressing direction and to one of two thicknesses. Either the
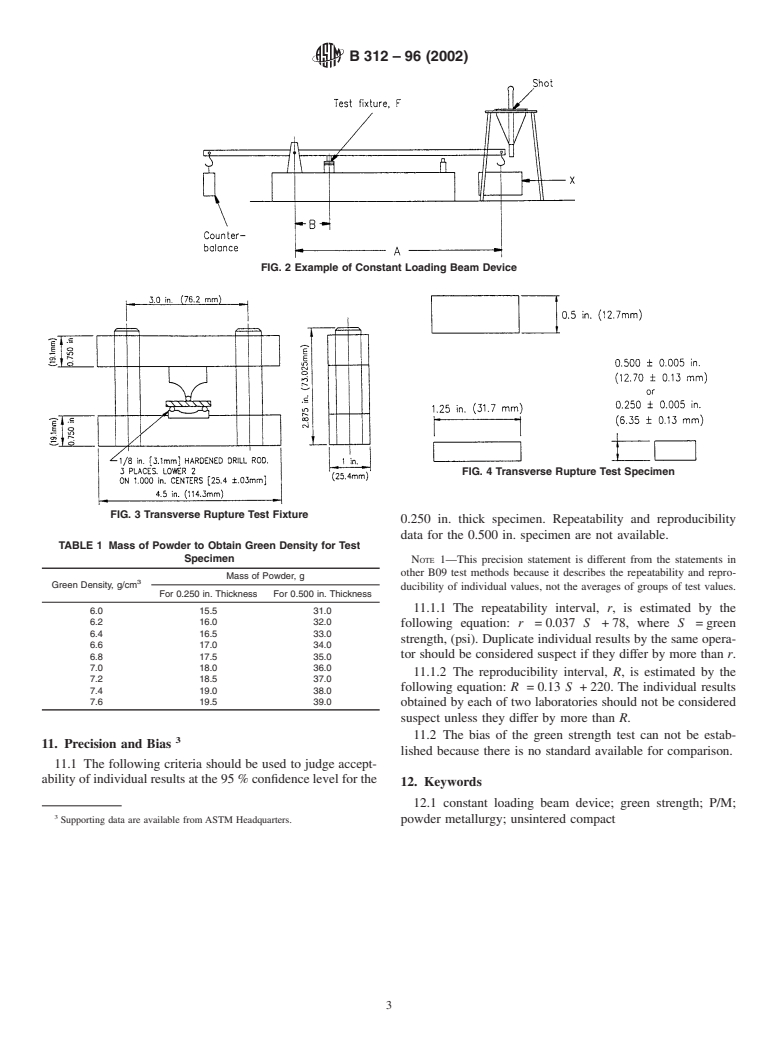
6.5.1 Constant Loading Beam Device as shown in Fig. 2,
powder to be pressed contains lubricant or the surfaces of the
capable of measuring the breaking force on the test specimen
die are lubricated at each pressing.
to the nearest 0.1 lbf (0.5 N).
6.5.2 Transverse Rupture Test Fixture as shown in Fig. 3,
1
This test method is under the jurisdiction of ASTM Committee B09 on Metal
for use with a compression testing machine to locate the test
Powders and Metal Powder Productsand is the direct responsibility of Subcommit-
bar so the breaking force can be measured to the nearest 0.1 lbf
tee B09.02 on Base Metal Powders.
(0.5 N).
Current edition approved Sept. 10, 1996. Published December 1996. Originally
e1
published as B 312 –56 T. Last previous edition B 312 – 82 (1988) .
2
Annual Book of ASTM Standards, Vol 02.05.
Copyright © ASTM International, 100 Barr Harbor Drive, PO Box C700, West Conshohocken, PA 19428-2959, United States.
1
---------------------- Page: 1 ----------------------
B312–96 (2002)
uniformlydistributed.Applypressurefrombothendsbymeans
of the following arrangement: Insert the upper punch, and
place the die, supported on two spacers, between the platens of
the press. Apply a preliminary pressure of 5000 psi (34 MPa)
to the upper punch, while the die barrel is supported by the
spacers; then release the pressure and remove the spacers.With
the spacers removed, apply the final compacting pressure at a
rate of 60 000 6 5000 psi (414 6 34 MPa)/min.
8.4 Use a compacting pressure that will produce the correct
thickness of 0.250 6 0.005 in.
...


Questions, Comments and Discussion
Ask us and Technical Secretary will try to provide an answer. You can facilitate discussion about the standard in here.