ISO 12406:2010
(Main)Surface chemical analysis — Secondary-ion mass spectrometry — Method for depth profiling of arsenic in silicon
Surface chemical analysis — Secondary-ion mass spectrometry — Method for depth profiling of arsenic in silicon
ISO 12406:2010 specifies a secondary-ion mass spectrometric method using magnetic-sector or quadrupole mass spectrometers for depth profiling of arsenic in silicon, and using stylus profilometry or optical interferometry for depth calibration. This method is applicable to single-crystal, poly-crystal or amorphous silicon specimens with arsenic atomic concentrations between 1 x 10¹⁶ atoms/cm3 and 2,5 x 10²¹ atoms/cm3, and to crater depths of 50 nm or deeper.
Analyse chimique des surfaces — Spectrométrie de masse des ions secondaires — Dosage de l'arsenic dans le silicium par profilage d'épaisseur
General Information
- Status
- Published
- Publication Date
- 07-Nov-2010
- Technical Committee
- ISO/TC 201/SC 6 - Secondary ion mass spectrometry
- Drafting Committee
- ISO/TC 201/SC 6 - Secondary ion mass spectrometry
- Current Stage
- 9093 - International Standard confirmed
- Start Date
- 05-Oct-2021
- Completion Date
- 12-Feb-2026
Overview
ISO 12406:2010 specifies a standardized secondary‑ion mass spectrometry (SIMS) method for quantitative depth profiling of arsenic in silicon. It covers SIMS measurement using magnetic‑sector or quadrupole mass spectrometers and requires depth calibration by stylus profilometry or optical interferometry. The method applies to single‑crystal, polycrystalline or amorphous silicon with arsenic atomic concentrations from 1 × 10^16 to 2.5 × 10^21 atoms/cm^3 and to sputter crater depths of 50 nm or deeper.
Key topics and requirements
- Instrumentation: Use of magnetic‑sector or quadrupole SIMS systems; caesium (Cs+) or oxygen (O2+) primary ion beams; detection of appropriate As and Si secondary‑ion species.
- Depth calibration: Crater depth must be measured by stylus profilometry or optical interferometry (note: optical interferometry is generally applicable in the ~0.2 µm to 5 µm range).
- Concentration calibration: Use certified reference materials (CRMs) or traceable ion‑implanted materials to determine relative‑sensitivity factors (RSFs). At publication, available CRMs included NIST SRM 2134 and NMIJ CRM 5603‑a.
- Measurement practice: Optimize primary‑ion current and scan area to avoid detector saturation (pulse pile‑up); alternate arsenic and silicon ion measurements cyclically; maintain instrument stability and consistent transmission settings between reference and test measurements.
- Quality controls: Follow documented instrument alignment and vacuum practices to minimize interfering background signals (e.g., SiOx species), and use traceable depth standards for profilometer calibration.
Practical applications
- Semiconductor process control and failure analysis for arsenic‑doped silicon devices.
- Implant dose verification and dopant profiling in research and production wafers.
- Metrology and calibration labs performing absolute concentration and depth‑scale verification for SIMS instruments.
- Materials science studies of dopant diffusion, junction depth, and implantation profiles in silicon substrates.
Who should use this standard
- SIMS laboratory managers and operators in semiconductor fabs and contract analytical labs.
- Instrument manufacturers, calibration laboratories and national metrology institutes.
- Quality assurance engineers and R&D teams requiring traceable arsenic depth profiles and standardized reporting.
Related standards
- ISO 14237:2010 - SIMS determination of boron in silicon
- ISO 18114:2003 - RSF determination from ion‑implanted reference materials
- ISO 18115‑1 - Surface chemical analysis vocabulary
Keywords: ISO 12406:2010, SIMS depth profiling, arsenic in silicon, secondary‑ion mass spectrometry, depth calibration, stylus profilometry, optical interferometry, NIST SRM 2134, RSF.
Get Certified
Connect with accredited certification bodies for this standard

ECOCERT
Organic and sustainability certification.

Eurofins Food Testing Global
Global leader in food, environment, and pharmaceutical product testing.

Intertek Bangladesh
Intertek certification and testing services in Bangladesh.
Sponsored listings
Frequently Asked Questions
ISO 12406:2010 is a standard published by the International Organization for Standardization (ISO). Its full title is "Surface chemical analysis — Secondary-ion mass spectrometry — Method for depth profiling of arsenic in silicon". This standard covers: ISO 12406:2010 specifies a secondary-ion mass spectrometric method using magnetic-sector or quadrupole mass spectrometers for depth profiling of arsenic in silicon, and using stylus profilometry or optical interferometry for depth calibration. This method is applicable to single-crystal, poly-crystal or amorphous silicon specimens with arsenic atomic concentrations between 1 x 10¹⁶ atoms/cm3 and 2,5 x 10²¹ atoms/cm3, and to crater depths of 50 nm or deeper.
ISO 12406:2010 specifies a secondary-ion mass spectrometric method using magnetic-sector or quadrupole mass spectrometers for depth profiling of arsenic in silicon, and using stylus profilometry or optical interferometry for depth calibration. This method is applicable to single-crystal, poly-crystal or amorphous silicon specimens with arsenic atomic concentrations between 1 x 10¹⁶ atoms/cm3 and 2,5 x 10²¹ atoms/cm3, and to crater depths of 50 nm or deeper.
ISO 12406:2010 is classified under the following ICS (International Classification for Standards) categories: 71.040.40 - Chemical analysis. The ICS classification helps identify the subject area and facilitates finding related standards.
ISO 12406:2010 is available in PDF format for immediate download after purchase. The document can be added to your cart and obtained through the secure checkout process. Digital delivery ensures instant access to the complete standard document.
Standards Content (Sample)
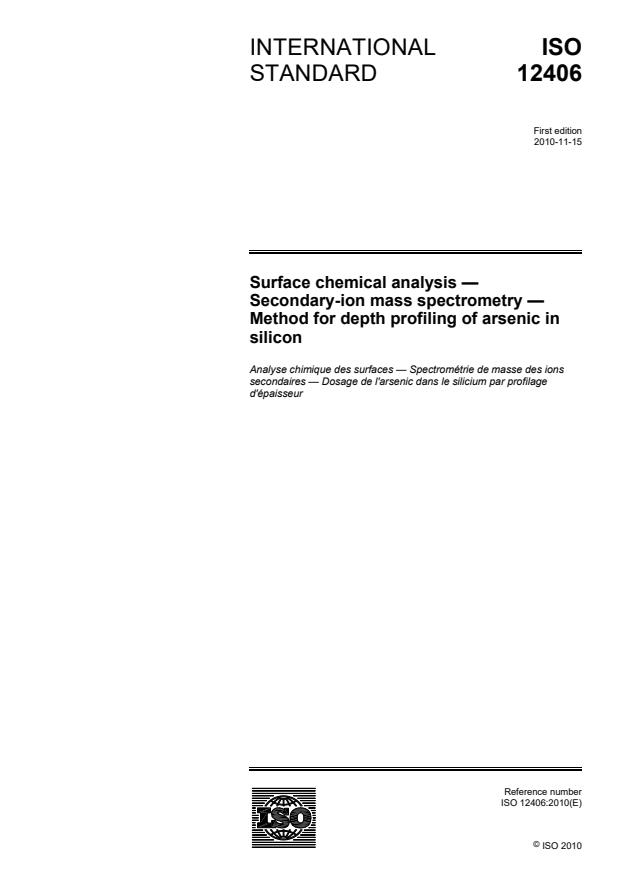
INTERNATIONAL ISO
STANDARD 12406
First edition
2010-11-15
Surface chemical analysis —
Secondary-ion mass spectrometry —
Method for depth profiling of arsenic in
silicon
Analyse chimique des surfaces — Spectrométrie de masse des ions
secondaires — Dosage de l'arsenic dans le silicium par profilage
d'épaisseur
Reference number
©
ISO 2010
PDF disclaimer
This PDF file may contain embedded typefaces. In accordance with Adobe's licensing policy, this file may be printed or viewed but
shall not be edited unless the typefaces which are embedded are licensed to and installed on the computer performing the editing. In
downloading this file, parties accept therein the responsibility of not infringing Adobe's licensing policy. The ISO Central Secretariat
accepts no liability in this area.
Adobe is a trademark of Adobe Systems Incorporated.
Details of the software products used to create this PDF file can be found in the General Info relative to the file; the PDF-creation
parameters were optimized for printing. Every care has been taken to ensure that the file is suitable for use by ISO member bodies. In
the unlikely event that a problem relating to it is found, please inform the Central Secretariat at the address given below.
© ISO 2010
All rights reserved. Unless otherwise specified, no part of this publication may be reproduced or utilized in any form or by any means,
electronic or mechanical, including photocopying and microfilm, without permission in writing from either ISO at the address below or
ISO's member body in the country of the requester.
ISO copyright office
Case postale 56 • CH-1211 Geneva 20
Tel. + 41 22 749 01 11
Fax + 41 22 749 09 47
E-mail copyright@iso.org
Web www.iso.org
Published in Switzerland
ii © ISO 2010 – All rights reserved
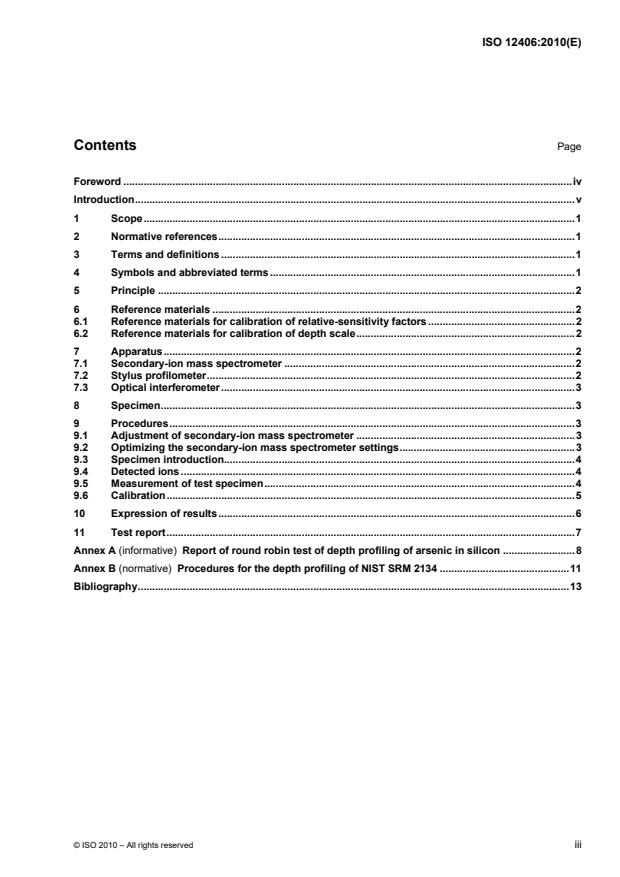
Contents Page
Foreword .iv
Introduction.v
1 Scope.1
2 Normative references.1
3 Terms and definitions .1
4 Symbols and abbreviated terms .1
5 Principle .2
6 Reference materials .2
6.1 Reference materials for calibration of relative-sensitivity factors .2
6.2 Reference materials for calibration of depth scale.2
7 Apparatus.2
7.1 Secondary-ion mass spectrometer .2
7.2 Stylus profilometer.2
7.3 Optical interferometer.3
8 Specimen.3
9 Procedures.3
9.1 Adjustment of secondary-ion mass spectrometer .3
9.2 Optimizing the secondary-ion mass spectrometer settings.3
9.3 Specimen introduction.4
9.4 Detected ions .4
9.5 Measurement of test specimen.4
9.6 Calibration.5
10 Expression of results.6
11 Test report.7
Annex A (informative) Report of round robin test of depth profiling of arsenic in silicon .8
Annex B (normative) Procedures for the depth profiling of NIST SRM 2134 .11
Bibliography.13
Foreword
ISO (the International Organization for Standardization) is a worldwide federation of national standards bodies
(ISO member bodies). The work of preparing International Standards is normally carried out through ISO
technical committees. Each member body interested in a subject for which a technical committee has been
established has the right to be represented on that committee. International organizations, governmental and
non-governmental, in liaison with ISO, also take part in the work. ISO collaborates closely with the
International Electrotechnical Commission (IEC) on all matters of electrotechnical standardization.
International Standards are drafted in accordance with the rules given in the ISO/IEC Directives, Part 2.
The main task of technical committees is to prepare International Standards. Draft International Standards
adopted by the technical committees are circulated to the member bodies for voting. Publication as an
International Standard requires approval by at least 75 % of the member bodies casting a vote.
Attention is drawn to the possibility that some of the elements of this document may be the subject of patent
rights. ISO shall not be held responsible for identifying any or all such patent rights.
ISO 12406 was prepared by Technical Committee ISO/TC 201, Surface chemical analysis, Subcommittee
SC 6, Secondary ion mass spectrometry.
iv © ISO 2010 – All rights reserved
Introduction
This International Standard was prepared for the quantitative depth profiling of arsenic in silicon by
secondary-ion mass spectrometry (SIMS).
For quantitative depth profiling, calibration is necessary both for the concentration and depth scales of the
profile measured. A procedure for the determination of boron atomic concentration in silicon has been
established as an International Standard, ISO 14237. A procedure for depth profiling of boron in silicon has
been established as an International Standard, ISO 17560. A procedure for the determination of
relative-sensitivity factors (RSFs) from ion-implanted reference materials has been established as an
International Standard, ISO 18114. A vocabulary of general terms and terms used for spectroscopy in surface
chemical analysis has been established as an International Standard, ISO 18115-1. The procedure for the
quantitative depth profiling of arsenic in silicon makes use of these other International Standards.
In this International Standard, procedures are described for depth profiling of arsenic in single-crystal,
poly-crystal or amorphous silicon using SIMS, and for depth scale calibration using stylus profilometry or
optical interferometry.
INTERNATIONAL STANDARD ISO 12406:2010(E)
Surface chemical analysis — Secondary-ion mass
spectrometry — Method for depth profiling of arsenic in silicon
1 Scope
This International Standard specifies a secondary-ion mass spectrometric method using magnetic-sector or
quadrupole mass spectrometers for depth profiling of arsenic in silicon, and using stylus profilometry or optical
interferometry for depth calibration. This method is applicable to single-crystal, poly-crystal or amorphous
16 21 3
silicon specimens with arsenic atomic concentrations between 1 × 10 atoms/cm and 2,5 × 10 atoms/cm ,
and to crater depths of 50 nm or deeper.
2 Normative references
The following referenced documents are indispensable for the application of this document. For dated
references, only the edition cited applies. For undated references, the latest edition of the referenced
document (including any amendments) applies.
ISO 14237:2010, Surface chemical analysis — Secondary-ion mass spectrometry — Determination of boron
atomic concentration in silicon using uniformly doped materials
ISO 18114:2003, Surface chemical analysis — Secondary-ion mass spectrometry — Determination of relative
sensitivity factors from ion-implanted reference materials
ISO 18115-1, Surface chemical analysis — Vocabulary — Part 1: General terms and terms used in
spectroscopy
3 Terms and definitions
For the purposes of this document, the terms and definitions given in ISO 18115-1 apply.
4 Symbols and abbreviated terms
C total arsenic atomic concentration at measurement cycle, i, expressed in atoms per cubic centimetre
i
(atoms/cm )
d depth over which depth profile is integrated to determine RSF, expressed in centimetres (cm)
d depth for measurement cycle, i, expressed in centimetres (cm)
i
d crater depth, expressed in centimetres (cm)
t
I ion intensity of arsenic species at measurement cycle, i, expressed in counts/s
i
Si
I ion intensity of silicon matrix species at measurement cycle, i, expressed in counts/s
i
I mean background ion intensity of the arsenic-ion species, expressed in counts/s
BG
J ion intensity ratio of arsenic to silicon at measurement cycle, i
i
J mean background ion intensity ratio of arsenic to silicon
BG
n total number of measurement cycles
imp −3
RSF relative-sensitivity factor of implanted arsenic in certified reference material (CRM) (cm )
T total sputtering time, expressed in seconds (s)
As
t starting time of arsenic-ion acquisition at measurement cycle, i, expressed in seconds (s)
i
As
Δt duration of arsenic-ion acquisition in each measurement cycle, expressed in seconds (s)
Φ implanted dose of arsenic in CRM, expressed in atoms per square centimetre (atoms/cm )
5 Principle
A caesium ion beam or oxygen ion beam is scanned over the specimen surface and the emitted secondary
ions of arsenic and silicon are mass-analysed and detected from a gated region in the scanned region of the
ion beam. The intensities of these mass-analysed signals are monitored as a function of sputtering time. The
depth of the crater formed by the ion beam is measured by stylus profilometry or optical interferometry for
depth scale calibration.
NOTE Optical interferometry is generally applicable to crater depths in the range from 0,2 µm to 5 µm.
6 Reference materials
6.1 Reference materials for calibration of relative-sensitivity factors
A reference material is used for the determination of the arsenic atomic concentration of a test specimen. The
reference material shall be a CRM of silicon implanted with arsenic or a secondary reference material of
ion-implanted arsenic in silicon, the dose of which is traceable to a CRM.
NOTE At the time of publication of this International Standard, NIST standard reference material 2134 (referred to
hereinafter as NIST SRM) and NMIJ CRM 5603-a are the only CRMs of arsenic available.
6.2 Reference materials for calibration of depth scale
For stylus profilometry calibration, reference materials that are traceable to the SI system shall be used.
7 Apparatus
7.1 Secondary-ion mass spectrometer
Follow the specification and procedures in Clause 5 of ISO 14237:2010.
7.2 Stylus profilometer
Use a stylus profilometer with the sensitivity and tip shape suitable for the crater shapes measured.
2 © ISO 2010 – All rights reserved
7.3 Optical interferometer
Use an optical interferometer with the sensitivity and functions suitable for the crater shapes measured.
8 Specimen
The specimen shall be cut into an appropriate size for analysis and degreased and washed, if necessary.
NOTE The accuracy of a crater depth measurement is largely influenced by surface roughness. A mirror-polished
wafer is preferable if accurate determination of the depth scale is necessary.
9 Procedures
9.1 Adjustment of secondary-ion mass spectrometer
9.1.1 For caesium-ion beam use, see Table 1. For oxygen-ion beam use, see Table 2. Other conditions not
shown in this clause shall be set according to the manufacturer's instructions or a local documented
procedure.
9.1.2 For the primary-ion beam, the beam current and scan region can be varied from specimen to
specimen (see 9.5.2). However, when oxygen-gas is introduced in the chamber during oxygen-beam
irradiation, the oxygen pressure and all the primary-ion beam irradiation conditions shall be the same for the
measurements of all specimens.
Table 1 — Measurement conditions for caesium-ion beam
+
Primary-ion species Cs
Secondary-ion polarity Negative
>3 times the linear dimension of the analysed region in
Primary-ion scan region
all directions
Analysed region Centred in the primary-ion scan region
Table 2 — Measurement conditions for oxygen-ion beam
+
Primary-ion species O
Secondary-ion polarity Positive
>3 times the linear dimension of the analysed region in
Primary-ion scan region
all directions
Analysed region Centred in the primary-ion scan region
9.2 Optimizing the secondary-ion mass spectrometer settings
9.2.1 Set the required instrument parameters and align the ion optics according to the manufacturer's
instructions or a local documented procedure.
9.2.2 Ensure the stability of the primary-ion current and the mass spectrometer according to the
manufacturer's instructions or a local documented procedure.
9.2.3 For a mass spectrometer whose transmission can be varied, use the same transmission for the
measurements of reference materials and test specimens.
9.3 Specimen introduction
Immediately prior to introduction of the specimens into the SIMS apparatus, dust particles should be removed
from the surfaces with a high purity pressurized gas, such as nitrogen. A commercial pressurized duster can
also be used, but it may contaminate the sample surface. After introducing the specimens into the analysis
chamber, analysis shall not start until the pressure has recovered to the normal value recommended by the
manufacturer or a local documented procedure.
29 30 16
NOTE Residual gases in the analysis chamber can produce a Si Si O background signal, which interferes with
75 ±
the As signal. This background can be reduced by improving the vacuum in the analysis chamber.
9.4 Detected ions
75 − 75 28 − 75 30 −
9.4.1 If a caesium-ion beam is used, As and/or As Si and/or As Si shall be detected as
75 +
secondary-ion species of arsenic. If an oxygen-ion beam is used, As shall be detected as secondary-ion
species of arsenic.
29 30 16
NOTE When an oxygen-ion beam is used, a Si Si O background signal is produced that interferes with the
75 ±
As signal. Specimen offset voltage (detection of secondary-ion with high energy) or high mass resolution operation are
effective for decreasing the background signal.
9.4.2 The ion species of silicon which has an appropriate ion intensity shall be detected, following the
manufacturer's instructions or a local documented procedure.
28 ±
If the instrument has an electrometer detection mode, it is recommended to select Si as the reference ion
± 30 ±
for As using the electrometer. If only a pulse-counting detector is available, Si should be selected as the
± − − −
reference ion for As . For AsSi detection, either Si or Si are suitable reference ions, as determined in a
2 3
round-robin study described in Reference [2] and Annex A. A variety of isotopic species with different count
rates can be selected for measurement as reference ions because silicon has three stable isotopes. For pulse
counting mode, the isotopic species, the primary-ion beam current and the secondary-ion transmission should
be selected so that instantaneous count rates for all measured species are less than 5 × 10 counts/s
throughout the depth profile.
NOTE When an amorphous silicon specimen is analysed, it is noted that Si-H cluster i
...


Questions, Comments and Discussion
Ask us and Technical Secretary will try to provide an answer. You can facilitate discussion about the standard in here.
Loading comments...