ASTM F2469-05
(Test Method)Standard Test Method for Measuring Optical Angular Deviation of Transparent Parts Using the Double-Exposure Method
Standard Test Method for Measuring Optical Angular Deviation of Transparent Parts Using the Double-Exposure Method
SIGNIFICANCE AND USE
The optical angular deviation of transparent parts, such as aircraft windshields, canopies, cabin windows, and visors, can be measured using these methods. Angular deviation in a windscreen or visor can cause objects to appear at a location different from where they actually are. Variations in angular deviation can be used to characterize distortion and magnification in transparent parts. Also, angular deviation measurements made from the typical right and left eye positions for a windscreen or other transparent medium can be used to determine binocular disparity differences (see Test Method F 1181).
SCOPE
1.1 This test method covers the measurement of the optical angular deviation of a light ray imposed by transparent parts such as a commercial or military aircraft windshield, canopy or cabin window.
1.2 The values stated in SI units are to be regarded as the standard. The values given in parentheses are for information only.
This standard does not purport to address all of the safety concerns, if any, associated with its use. It is the responsibility of the user of this standard to establish appropriate safety and health practices and determine the applicability of regulatory limitations prior to use.
General Information
Relations
Standards Content (Sample)
NOTICE: This standard has either been superseded and replaced by a new version or withdrawn.
Contact ASTM International (www.astm.org) for the latest information.
Designation:F2469–05
Standard Test Method for
Measuring Optical Angular Deviation of Transparent Parts
Using the Double-Exposure Method
This standard is issued under the fixed designation F2469; the number immediately following the designation indicates the year of
original adoption or, in the case of revision, the year of last revision. A number in parentheses indicates the year of last reapproval. A
superscript epsilon (´) indicates an editorial change since the last revision or reapproval.
1. Scope 3.1.3 grid board—an optical evaluation tool used to detect
the presence of distortion in transparent parts. It is usually, but
1.1 This test method covers the measurement of the optical
not always, a vertical rectangular backboard with horizontal
angular deviation of a light ray imposed by transparent parts
and vertical intersecting lines with maximum contrast between
such as a commercial or military aircraft windshield, canopy or
the white lines and the black background.
cabin window.
3.1.4 installed angle—the transparency (windscreen,
1.2 The values stated in SI units are to be regarded as the
canopy, or cabin window) orientation as installed in the
standard. The values given in parentheses are for information
aircraft, defined by the angle between a horizontal line (line-
only.
of-sight) and a plane tangent to the surface of the transparency
1.3 This standard does not purport to address all of the
(see Fig. 1).
safety concerns, if any, associated with its use. It is the
responsibility of the user of this standard to establish appro-
4. Summary of Test Method
priate safety and health practices and determine the applica-
4.1 The transparent part is mounted, preferably at the
bility of regulatory limitations prior to use.
installed angle, a specified distance from a grid board test
2. Referenced Documents pattern. A camera is placed so as to record a double exposure
photograph of the grid pattern as viewed through the transpar-
2.1 ASTM Standards:
encyfromthedesigneyeorotherviewingpositionspecifiedby
F801 TestMethodforMeasuringOpticalAngularDeviation
the procuring agency.The image is then measured to assess the
of Transparent Parts
level of optical deviation present. This method basically
F1181 Test Method for Measuring Binocular Disparity in
measures the amount of angular deviation present in a trans-
Transparent Parts
parent part compared to a reference part (if required), which is
3. Terminology referred to as a compensator plate. If the part to be measured is
essentially flat and mounted such that its surface is perpendicu-
3.1 Definitions:
lar to the camera axis then no compensator/reference part is
3.1.1 angular deviation—the angular displacement of a
required. This is an alternate method to Test Method F801.
light ray from its original path caused by non-parallelism of
opposite surfaces as it passes through a transparent material,
5. Significance and Use
which is expressed in units of angle (degree, minutes of arc,
5.1 The optical angular deviation of transparent parts, such
milliradians) and is a function of the angle of incidence at each
as aircraft windshields, canopies, cabin windows, and visors,
surface of the material and the index of refraction of the
can be measured using these methods. Angular deviation in a
material.
windscreen or visor can cause objects to appear at a location
3.1.2 design eye—thereferencepointinaircraftdesignfrom
different from where they actually are. Variations in angular
which all visual or optical anthropometrical design consider-
deviation can be used to characterize distortion and magnifi-
ations are taken.
cation in transparent parts. Also, angular deviation measure-
ments made from the typical right and left eye positions for a
This test method is under the jurisdiction of ASTM Committee F07 on
windscreen or other transparent medium can be used to
Aerospace and Aircraft and is the direct responsibility of Subcommittee F07.08 on
determine binocular disparity differences (see Test Method
Transparent Enclosures and Materials.
Current edition approved Mar. 1, 2005. Published March 2005. DOI: 10.1520/ F1181).
F2469-05.
For referenced ASTM standards, visit the ASTM website, www.astm.org, or
6. Apparatus
contact ASTM Customer Service at service@astm.org. For Annual Book of ASTM
6.1 Test Room—The test room must be large enough to
Standards volume information, refer to the standard’s Document Summary page on
the ASTM website. properly locate the required testing equipment.
Copyright © ASTM International, 100 Barr Harbor Drive, PO Box C700, West Conshohocken, PA 19428-2959, United States.
F2469–05
FIG. 1 Example of Installed Angle Geometry
6.1.1 The walls, ceiling, and floor shall have low reflec- 6.2.3 Type 3—The grid board is a rigid sheet of material
tance. A flat black paint or coating is preferred. which has a grid pattern printed on the front surface. Details of
the grid lines, pattern, and lighting shall be as specified by the
6.2 Grid Board—The grid board provides a defined pattern
procuring activity.
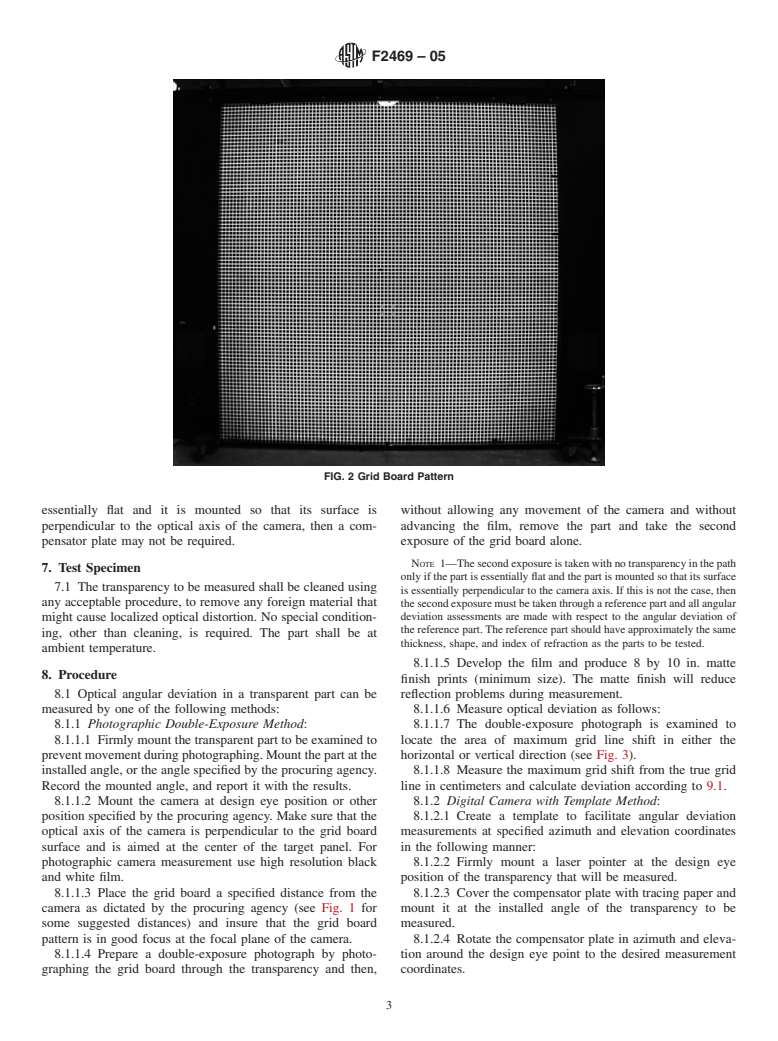
against which the transparent part is examined (see Fig. 2).
Grid boards are of the following types: 6.2.4 Type 4—The grid board shall have a width and height
large enough so that the area of the part to be imaged can be
6.2.1 Type 1—The grid board is composed of white strings
superimposed within the perimeter of the grid board. Details of
held taut, each spaced at a specific interval, with the strings
the grid square size shall be as specified by the procuring
stretched vertically and horizontally. The grid board frame and
agency. The recommended grid line spacing is not less than
background shall have a flat black finish to reduce light
1.27 cm ( ⁄2 in.), or more than 2.54 cm (1 in.).
reflection. A bank of fluorescent lights at each side provides
illumination of the strings.
6.3 Camera—The camera is used to photograph optical
deviation through the transparency using a double-exposure
6.2.1.1 Type 1a—The string board is composed of white
method. It is recommended that a large format camera be used,
strings held taut, each spaced at a specific interval, with the
although a digital camera is acceptable. The camera shall be
strings stretched horizontally only. The string board frame and
firmly mounted at design eye (or position specified by the
background shall have a flat black finish to reduce light
procuring agency) to prevent any movement during the pho-
reflection. A bank of fluorescent lights at each side provides
tographic exposure.
even illumination of the strings. This can also be used outside
under natural sunlight conditions.
6.4 Compensator Plate—This is a transparent reference that
6.2.2 Type 2—The grid board is a transparent sheet having possesses the same basic characteristics of the transparency
that will be measured, that is, thickness, shape, index of
anopaque,flatblackoutersurfaceexceptforthegridlines.The
grid lines remain transparent, and when backlit with fluores- refraction. If the measurement area is small, a flat plate of glass
may be used. The purpose of the compensator plate is to
cent or incandescent lights, provide a bright grid pattern
against a black background with excellent contrast character- compensate for lateral displacement of the reference image of
istics. the double-exposure images. If the part to be measured is
F2469–05
FIG. 2 Grid Board Pattern
essentially flat and it is mounted so that its surface is without allowing any movement of the camera and without
perpendicular to the optical axis of the camera, then a com- advancing the film, remove the part and take the second
pensator plate may not be required. exposure of the grid board alone.
NOTE 1—The second exposure is taken with no transparency in
...


Questions, Comments and Discussion
Ask us and Technical Secretary will try to provide an answer. You can facilitate discussion about the standard in here.