ASTM F377-94a(1999)
(Practice)Standard Practice for Calibration of Braking/Tractive Measuring Devices for Testing Tires
Standard Practice for Calibration of Braking/Tractive Measuring Devices for Testing Tires
SCOPE
1.1 This practice covers the calibration of the following:
1.1.1 Reference load cells by using certified weights,
1.1.2 Calibration platform systems by using a reference load cell, and
1.1.3 Static calibration of braking/tractive force on locked wheels of tire test trailers, instrumented vehicles, and laboratory tire testing machines by using the calibration platform system as a calibration fixture.
1.2 The values stated in SI units are to be regarded as standard. The values in parentheses are for information only.
1.3 This standard does not purport to address all of the safety concerns, if any, associated with its use. It is the responsibility of the user of this standard to establish appropriate safety and health practices and determine the applicability of regulatory limitations prior to use.
General Information
Relations
Standards Content (Sample)
NOTICE: This standard has either been superceded and replaced by a new version or discontinued.
Contact ASTM International (www.astm.org) for the latest information.
Designation: F 377 – 94a (Reapproved 1999)
Standard Practice for
Calibration of Braking/Tractive Measuring Devices for
Testing Tires
This standard is issued under the fixed designation F 377; the number immediately following the designation indicates the year of
original adoption or, in the case of revision, the year of last revision. A number in parentheses indicates the year of last reapproval. A
superscript epsilon (e) indicates an editorial change since the last revision or reapproval.
1. Scope Technology (NIST), or they may be sent to NIST for calibra-
tion. Practice E 74 may be used as an alternative method for
1.1 This practice covers the calibration of the following:
load-cell calibration.
1.1.1 Reference load cells by using certified weights,
3.2 The calibrated reference-load cell is used to calibrate the
1.1.2 Calibration platform systems by using a reference load
calibration-platform systems.
cell, and
3.3 The tire test trailer, instrumented vehicle, or laboratory
1.1.3 Static calibration of braking/tractive force on locked
tire testing machine is calibrated with the calibration platform
wheels of tire test trailers, instrumented vehicles, and labora-
(see Test Method E 556).
tory tire testing machines by using the calibration platform
system as a calibration fixture.
4. Significance and Use
1.2 The values stated in SI units are to be regarded as
4.1 The practice may be used for the following:
standard. The values in parentheses are for information only.
4.1.1 Calibration of test trailers used in tire testing,
1.3 This standard does not purport to address all of the
4.1.2 Calibration of instrumented braking and driving trac-
safety concerns, if any, associated with its use. It is the
tion vehicles used in tire testing,
responsibility of the user of this standard to establish appro-
4.1.3 Calibration of torque axles and hubs on automobiles
priate safety and health practices and determine the applica-
used to measure braking or acceleration forces, and
bility of regulatory limitations prior to use.
4.1.4 Calibration of laboratory tire-testing machines where
2. Referenced Documents the tire-road interface friction force is measured.
2.1 ASTM Standards:
5. Apparatus
E 74 Practice for Calibration of Force-Measuring Instru-
5.1 The calibration system shall consist of three basic
ments for Verifying the Force Indication of Testing Ma-
2 components as follows:
chines
3 5.1.1 Platform—The platform on which the test wheel is
E 178 Practice for Dealing with Outlying Observations
placed shall have a flat top able to support the entire tire patch
E 556 Test Method for Calibrating a Wheel Force or Torque
4 width, but no less than 152 mm (6 in.) wide by 254 mm (10 in.)
Transducer Using a Calibration Platform (User Level)
long with a high friction surface. The platform shall be
3. Summary of Practice supported by air or by an arrangement of bearings permitting
longitudinal motion, and capable of sustaining a vertical load
3.1 Reference-load cells are calibrated according to a dead-
equal to the largest anticipated wheel load. The longitudinal
weight procedure using Class F weights, the calibration of
movement shall be a minimum of 127 mm (5 in.), limited only
which is traceable to the National Institute of Standards and
by the stroke of the horizontal-drive mechanism.
5.1.2 Horizontal-Drive Mechanism—A force or
displacement-type driving system capable of developing a
1 force of 80 % of the wheel load shall be provided. The force
This practice is under the jurisdiction of ASTM Committee F-9 on Tires and is
shall be applied along the longitudinal centerline of the
the direct responsibility of Subcommittee F09.10 on Structural Integrity.
Current edition approved Dec. 15, 1994. Published February 1995. Originally
platform.
published as F 377 – 74. Last previous edition F 377 – 94.
5.1.3 Force Transducer— A force transducer shall link the
Annual Book of ASTM Standards, Vol 03.01.
horizontal-drive mechanism to the platform. The force trans-
Annual Book of ASTM Standards, Vol 14.02.
Annual Book of ASTM Standards, Vol 04.03. ducer shall have a capacity equal to or greater than 80 % of the
Copyright © ASTM International, 100 Barr Harbor Drive, PO Box C700, West Conshohocken, PA 19428-2959, United States.
NOTICE: This standard has either been superceded and replaced by a new version or discontinued.
Contact ASTM International (www.astm.org) for the latest information.
F 377
wheel load, but with a capacity of at least 4448 N (1000 lbf). 7. Procedures
The force transducer shall be mounted in a manner appropriate
7.1 Two procedures are covered. The first is for calibration
of its type to ensure that cross-axis forces cannot adversely
of the reference-load cell; the second is for calibration of the
affect the accuracy.
calibration platform. Repeat these calibrations when either
system breaks down, drifts (greater than 0.20 % of full scale
6. Calibration of Braking/Tractive Force on a Locked
based on calibration network), or when any component is
Wheel (Fig. 1)
changed or altered (see ASTM Manual 7). Record the ambient
6.1 Turn on the test vehicle system instrumentation and
temperature during load cell calibration. Obtain the tempera-
calibration system instrumentation suitably in advance to allow ture characteristics of the reference-load cell from the manu-
warm-up before attempting calibration. Check the system
facturer and use to correct the load-cell calibration information
stability with the calibration network in accordance with 7.1
when applying the force-plate calibrator.
where applicable.
7.2 Reference Load Cell Calibration:
6.2 Position the test vehicle with the test tire resting on the
7.2.1 Connect the load cell and the indicator.
geometric center of the platform. As necessary, to maintain
7.2.2 Set the bridge-excitation voltage and gain, or its
normal vehicle orientation and to prevent movement, place
equivalent, in accordance with the instructions on the unit
blocks with a high friction surface under the other vehicle being used.
wheels so that the vehicle will remain level with the platform.
7.2.3 Adjust the “bridge zero,” or its equivalent, to “zero.”
In the case of a trailer, the hitch point may be supported. Be certain that the load cell is not being stressed.
6.3 Level the platform to within ⁄2° and align it within 3° of
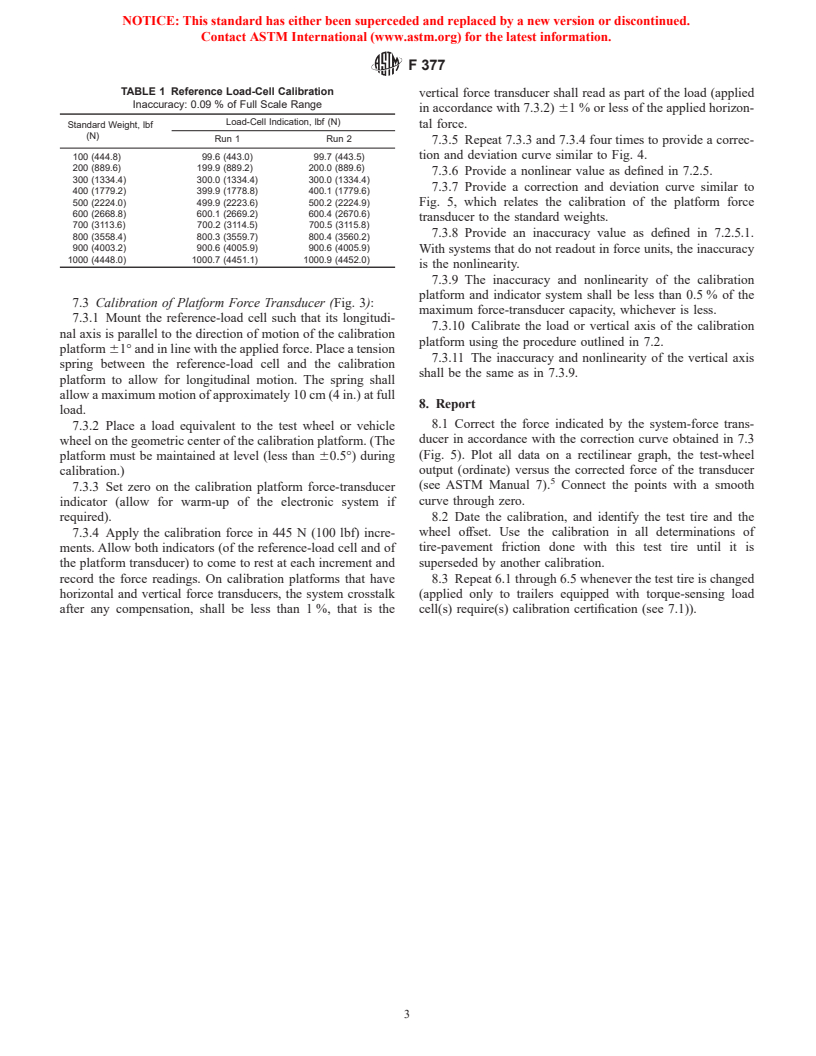
7.2.4 Using Class F weights traceable to NIST, make a
the trailer or vehicle longitudinal axis. As appropriate, engage dead-weight calibration on the load cell (see Table 1 for
the brakes of the towing vehicle and block the platform to
results). Do not use values less than 10 % of full scale for this
prevent slippage. graph. See Practice E 178 for a method of determination of
6.4 Ensure that the system-force transducer is not stressed
outliers.
by lifting the test wheel from the platform (or for an air- 7.2.5 Provide a correction curve similar to Fig. 2 as follows:
supported platform by unbraking the test wheel). Lock the test
7.2.5.1 Provide an inaccuracy value defined as the maxi-
wheel brake and attempt to rotate the wheel to ensure brake mum deviation from the actual load expressed as a percent of
engagement, lower the test wheel on
...


Questions, Comments and Discussion
Ask us and Technical Secretary will try to provide an answer. You can facilitate discussion about the standard in here.