ASTM E209-18
(Practice)Standard Practice for Compression Tests of Metallic Materials at Elevated Temperatures with Conventional or Rapid Heating Rates and Strain Rates
Standard Practice for Compression Tests of Metallic Materials at Elevated Temperatures with Conventional or Rapid Heating Rates and Strain Rates
ABSTRACT
This practice covers compression test in which the specimen is heated to a constant and uniform temperature and held at temperature while an axial force is applied at a controlled rate of strain. Machines used for compression testing shall conform to the requirements prescribed. The apparatus and method for heating the specimens are not specified. The procedure for temperature control, temperature measurement, strain rate during test, and strain measurement are presented in detail. The complete compression-test system consisting of jig, strain instrument, and recorders should be qualified, in accordance with the requirements prescribed.
SIGNIFICANCE AND USE
4.1 Significance—The data obtained from a compression test may include the yield strength, the yield point, Young’s modulus, the stress-strain curve, and the compressive strength (see Terminology E6). In the case of a material that does not fail in compression by a shattering fracture, compressive strength is a value that is dependent on total strain and specimen geometry.
4.2 Use—Compressive properties are of interest in the analyses of structures subject to compressive or bending loads or both and in the analyses of metal working and fabrication processes that involve large compressive deformation such as forging and rolling. For brittle or nonductile metals that fracture in tension at stresses below the yield strength, compression tests offer the possibility of extending the strain range of the stress-strain data. While the compression test is not complicated by necking as is the tension test for certain metallic materials, buckling and barreling can complicate results and should be minimized
SCOPE
1.1 This practice covers compression test in which the specimen is heated to a constant and uniform temperature and held at temperature while an axial force is applied at a controlled rate of strain.
1.2 In metals with extremely high proportional limit or low modulus of elasticity, 1.5 % total strain under load could be reached before the 0.2 %-offset yield strength is reached. In this event the end point of the test may be reported as the 0.2 percent-offset yield strength unless rupture occurs before that point.
1.3 For acceptable compression tests it is imperative that the specimens not buckle before the end point is reached. For this reason the equipment and procedures shall be designed to maintain uniform loading and axial alignment.
1.4 Preferred conditions of testing are recommended so that data from different sources conducting the tests will be comparable.
1.5 The values stated in inch-pound units are to be regarded as standard. The values given in parentheses are mathematical conversions to SI units that are provided for information only and are not considered standard.
1.6 This standard does not purport to address all of the safety concerns, if any, associated with its use. It is the responsibility of the user of this standard to establish appropriate safety, health, and environmental practices and determine the applicability of regulatory limitations prior to use.
1.7 This international standard was developed in accordance with internationally recognized principles on standardization established in the Decision on Principles for the Development of International Standards, Guides and Recommendations issued by the World Trade Organization Technical Barriers to Trade (TBT) Committee.
General Information
- Status
- Published
- Publication Date
- 31-Jan-2018
- Technical Committee
- E28 - Mechanical Testing
- Drafting Committee
- E28.04 - Uniaxial Testing
Relations
- Effective Date
- 01-Feb-2018
- Effective Date
- 01-Jun-2014
- Effective Date
- 01-Jun-2010
- Effective Date
- 01-Jun-2010
- Effective Date
- 01-Jan-2010
- Effective Date
- 01-Nov-2009
- Refers
ASTM E9-09 - Standard Test Methods of Compression Testing of Metallic Materials at Room Temperature - Effective Date
- 01-Nov-2009
- Effective Date
- 15-May-2009
- Effective Date
- 15-May-2009
- Effective Date
- 01-Apr-2009
- Effective Date
- 01-Apr-2009
- Refers
ASTM E21-09 - Standard Test Methods for Elevated Temperature Tension Tests of Metallic Materials - Effective Date
- 01-Apr-2009
- Effective Date
- 01-Jan-2009
- Effective Date
- 01-Dec-2008
- Effective Date
- 01-Oct-2008
Overview
ASTM E209-18: Standard Practice for Compression Tests of Metallic Materials at Elevated Temperatures provides comprehensive guidance for conducting compression tests on metallic specimens under elevated temperature conditions. This standard covers procedures for testing metals when heated to a constant, uniform temperature, followed by the application of controlled axial force at specified strain rates. ASTM E209-18 outlines equipment qualification, temperature control, strain rate management, and reporting requirements, ensuring compatibility and comparability of test data from different laboratories and facilities.
Compression testing at elevated temperatures is essential for evaluating mechanical properties such as compressive strength, yield strength, stress-strain behavior, and Young’s modulus. These properties are critical for designing and analyzing structures or components exposed to significant thermal and compressive loads.
Key Topics
- Test Procedures: Guidance on heating the specimen, applying axial loading, and controlling strain rates during compression testing of metals at high temperatures.
- Temperature Control: Detailed recommendations for maintaining constant and uniform temperature within strict variance limits through conventional and rapid heating methods.
- Strain Rate Management: Specification of both conventional and rapid strain rates to ensure reliable and comparable mechanical property data.
- Apparatus Qualification: Requirements for the complete compression test system, including jigs, strain instruments, and recorders, with procedures to verify system accuracy at room and elevated temperatures.
- Specimen Preparation: Recommendations for specimen size, shape, and preparation to ensure representativeness and minimize the risk of buckling or other errors.
- Strain Measurement: Use of extensometers and instructions for accurate strain data acquisition.
- Reporting Requirements: Minimum and additional data reporting to support design and analysis, including temperature, strain rate, material description, and observed properties.
Applications
ASTM E209-18 is widely used across industries for research, development, and quality assurance of metallic materials, particularly where high-temperature compressive loads are expected. Typical applications include:
- Aerospace and Automotive: Evaluation of metallic components and structural members exposed to elevated temperatures and compressive or bending stresses.
- Manufacturing and Metal Forming: Support for analysis and design of processes involving compressive deformation, such as forging and rolling.
- Energy Sector: Assessment of materials used in power plants, turbines, and heat exchangers, where metals must retain strength at elevated temperatures.
- Materials Science Research: Generation of stress-strain data beyond tensile limits, especially for brittle or non-ductile metals that otherwise fracture early under tension.
Proper application of this standard helps engineers and researchers obtain reliable compressive properties, prevent specimen buckling, and ensure safety in critical high-temperature environments.
Related Standards
For comprehensive mechanical testing of metallic materials, ASTM E209-18 should be used in conjunction with the following standards:
- ASTM E4: Practices for Force Verification of Testing Machines
- ASTM E6: Terminology Relating to Methods of Mechanical Testing
- ASTM E9: Test Methods of Compression Testing of Metallic Materials at Room Temperature
- ASTM E21: Test Methods for Elevated Temperature Tension Tests of Metallic Materials
- ASTM E83: Practice for Verification and Classification of Extensometer Systems
Aligning with these related ASTM standards ensures compliance, data integrity, and facilitates the comparison of results across different laboratories and testing programs.
Keywords: ASTM E209-18, compression tests, elevated temperature, metallic materials, strain rate, temperature control, compressive strength, yield strength, mechanical testing standards, material qualification.
Buy Documents
ASTM E209-18 - Standard Practice for Compression Tests of Metallic Materials at Elevated Temperatures with Conventional or Rapid Heating Rates and Strain Rates
REDLINE ASTM E209-18 - Standard Practice for Compression Tests of Metallic Materials at Elevated Temperatures with Conventional or Rapid Heating Rates and Strain Rates
Get Certified
Connect with accredited certification bodies for this standard

Element Materials Technology
Materials testing and product certification.

Inštitut za kovinske materiale in tehnologije
Institute of Metals and Technology. Materials testing, metallurgical analysis, NDT.
Sponsored listings
Frequently Asked Questions
ASTM E209-18 is a standard published by ASTM International. Its full title is "Standard Practice for Compression Tests of Metallic Materials at Elevated Temperatures with Conventional or Rapid Heating Rates and Strain Rates". This standard covers: ABSTRACT This practice covers compression test in which the specimen is heated to a constant and uniform temperature and held at temperature while an axial force is applied at a controlled rate of strain. Machines used for compression testing shall conform to the requirements prescribed. The apparatus and method for heating the specimens are not specified. The procedure for temperature control, temperature measurement, strain rate during test, and strain measurement are presented in detail. The complete compression-test system consisting of jig, strain instrument, and recorders should be qualified, in accordance with the requirements prescribed. SIGNIFICANCE AND USE 4.1 Significance—The data obtained from a compression test may include the yield strength, the yield point, Young’s modulus, the stress-strain curve, and the compressive strength (see Terminology E6). In the case of a material that does not fail in compression by a shattering fracture, compressive strength is a value that is dependent on total strain and specimen geometry. 4.2 Use—Compressive properties are of interest in the analyses of structures subject to compressive or bending loads or both and in the analyses of metal working and fabrication processes that involve large compressive deformation such as forging and rolling. For brittle or nonductile metals that fracture in tension at stresses below the yield strength, compression tests offer the possibility of extending the strain range of the stress-strain data. While the compression test is not complicated by necking as is the tension test for certain metallic materials, buckling and barreling can complicate results and should be minimized SCOPE 1.1 This practice covers compression test in which the specimen is heated to a constant and uniform temperature and held at temperature while an axial force is applied at a controlled rate of strain. 1.2 In metals with extremely high proportional limit or low modulus of elasticity, 1.5 % total strain under load could be reached before the 0.2 %-offset yield strength is reached. In this event the end point of the test may be reported as the 0.2 percent-offset yield strength unless rupture occurs before that point. 1.3 For acceptable compression tests it is imperative that the specimens not buckle before the end point is reached. For this reason the equipment and procedures shall be designed to maintain uniform loading and axial alignment. 1.4 Preferred conditions of testing are recommended so that data from different sources conducting the tests will be comparable. 1.5 The values stated in inch-pound units are to be regarded as standard. The values given in parentheses are mathematical conversions to SI units that are provided for information only and are not considered standard. 1.6 This standard does not purport to address all of the safety concerns, if any, associated with its use. It is the responsibility of the user of this standard to establish appropriate safety, health, and environmental practices and determine the applicability of regulatory limitations prior to use. 1.7 This international standard was developed in accordance with internationally recognized principles on standardization established in the Decision on Principles for the Development of International Standards, Guides and Recommendations issued by the World Trade Organization Technical Barriers to Trade (TBT) Committee.
ABSTRACT This practice covers compression test in which the specimen is heated to a constant and uniform temperature and held at temperature while an axial force is applied at a controlled rate of strain. Machines used for compression testing shall conform to the requirements prescribed. The apparatus and method for heating the specimens are not specified. The procedure for temperature control, temperature measurement, strain rate during test, and strain measurement are presented in detail. The complete compression-test system consisting of jig, strain instrument, and recorders should be qualified, in accordance with the requirements prescribed. SIGNIFICANCE AND USE 4.1 Significance—The data obtained from a compression test may include the yield strength, the yield point, Young’s modulus, the stress-strain curve, and the compressive strength (see Terminology E6). In the case of a material that does not fail in compression by a shattering fracture, compressive strength is a value that is dependent on total strain and specimen geometry. 4.2 Use—Compressive properties are of interest in the analyses of structures subject to compressive or bending loads or both and in the analyses of metal working and fabrication processes that involve large compressive deformation such as forging and rolling. For brittle or nonductile metals that fracture in tension at stresses below the yield strength, compression tests offer the possibility of extending the strain range of the stress-strain data. While the compression test is not complicated by necking as is the tension test for certain metallic materials, buckling and barreling can complicate results and should be minimized SCOPE 1.1 This practice covers compression test in which the specimen is heated to a constant and uniform temperature and held at temperature while an axial force is applied at a controlled rate of strain. 1.2 In metals with extremely high proportional limit or low modulus of elasticity, 1.5 % total strain under load could be reached before the 0.2 %-offset yield strength is reached. In this event the end point of the test may be reported as the 0.2 percent-offset yield strength unless rupture occurs before that point. 1.3 For acceptable compression tests it is imperative that the specimens not buckle before the end point is reached. For this reason the equipment and procedures shall be designed to maintain uniform loading and axial alignment. 1.4 Preferred conditions of testing are recommended so that data from different sources conducting the tests will be comparable. 1.5 The values stated in inch-pound units are to be regarded as standard. The values given in parentheses are mathematical conversions to SI units that are provided for information only and are not considered standard. 1.6 This standard does not purport to address all of the safety concerns, if any, associated with its use. It is the responsibility of the user of this standard to establish appropriate safety, health, and environmental practices and determine the applicability of regulatory limitations prior to use. 1.7 This international standard was developed in accordance with internationally recognized principles on standardization established in the Decision on Principles for the Development of International Standards, Guides and Recommendations issued by the World Trade Organization Technical Barriers to Trade (TBT) Committee.
ASTM E209-18 is classified under the following ICS (International Classification for Standards) categories: 77.040.10 - Mechanical testing of metals. The ICS classification helps identify the subject area and facilitates finding related standards.
ASTM E209-18 has the following relationships with other standards: It is inter standard links to ASTM E209-00(2010), ASTM E4-14, ASTM E83-10a, ASTM E4-10, ASTM E83-10, ASTM E4-09a, ASTM E9-09, ASTM E6-09b, ASTM E6-09be1, ASTM E4-09, ASTM E6-09a, ASTM E21-09, ASTM E6-09, ASTM E4-08, ASTM E6-08a. Understanding these relationships helps ensure you are using the most current and applicable version of the standard.
ASTM E209-18 is available in PDF format for immediate download after purchase. The document can be added to your cart and obtained through the secure checkout process. Digital delivery ensures instant access to the complete standard document.
Standards Content (Sample)
This international standard was developed in accordance with internationally recognized principles on standardization established in the Decision on Principles for the
Development of International Standards, Guides and Recommendations issued by the World Trade Organization Technical Barriers to Trade (TBT) Committee.
Designation: E209 − 18
Standard Practice for
Compression Tests of Metallic Materials at Elevated
Temperatures with Conventional or Rapid Heating Rates
and Strain Rates
This standard is issued under the fixed designation E209; the number immediately following the designation indicates the year of
original adoption or, in the case of revision, the year of last revision.Anumber in parentheses indicates the year of last reapproval.A
superscript epsilon (´) indicates an editorial change since the last revision or reapproval.
1. Scope 2. Referenced Documents
1.1 This practice covers compression test in which the 2.1 ASTM Standards:
specimen is heated to a constant and uniform temperature and E4Practices for Force Verification of Testing Machines
held at temperature while an axial force is applied at a E6Terminology Relating to Methods of MechanicalTesting
controlled rate of strain. E9Test Methods of Compression Testing of Metallic Mate-
rials at Room Temperature
1.2 In metals with extremely high proportional limit or low
E21TestMethodsforElevatedTemperatureTensionTestsof
modulus of elasticity, 1.5% total strain under load could be
Metallic Materials
reached before the 0.2%-offset yield strength is reached. In
E83Practice for Verification and Classification of Exten-
this event the end point of the test may be reported as the 0.2
someter Systems
percent-offset yield strength unless rupture occurs before that
point.
3. Apparatus
1.3 Foracceptablecompressiontestsitisimperativethatthe
3.1 Testing Machines—Machinesusedforcompressiontest-
specimens not buckle before the end point is reached. For this
ing shall conform to the requirements of Practices E4.
reason the equipment and procedures shall be designed to
3.2 Bearing Blocks and Loading Adapters—Load both ends
maintain uniform loading and axial alignment.
of the compression specimens through bearing blocks or
1.4 Preferred conditions of testing are recommended so that
through pin-type adapters that are part of the compression-
data from different sources conducting the tests will be
testing assembly. Bearing blocks may be designed with flat
comparable.
bearing faces for sheet- or bar-type specimens. Sheet speci-
1.5 The values stated in inch-pound units are to be regarded mens may also be loaded through pin-type adapters that are
as standard. The values given in parentheses are mathematical
clamped rigidly to the grip sections of specimens designed for
conversions to SI units that are provided for information only theseadapters (1). Themainrequirementisthatthemethodof
and are not considered standard.
applying the force be consistent with maintaining axial align-
mentanduniformloadingonthespecimenthroughoutthetest.
1.6 This standard does not purport to address all of the
When bearing blocks with flat faces are used, the load-bearing
safety concerns, if any, associated with its use. It is the
surfacesshouldbesmoothandparallelwithinverycloselimits.
responsibility of the user of this standard to establish appro-
Thetoleranceforparallelismforthesesurfacesshouldbeequal
priate safety, health, and environmental practices and deter-
to or closer than that specified for the loaded ends of the
mine the applicability of regulatory limitations prior to use.
specimens. The design of the equipment should provide
1.7 This international standard was developed in accor-
adequate rigidity so that parallelism is maintained during
dance with internationally recognized principles on standard-
heating and loading. The bearing blocks or pin-type adapters
ization established in the Decision on Principles for the
should be made of a material that is sufficiently hard at the
Development of International Standards, Guides and Recom-
testing temperature to resist plastic indentation at maximum
mendations issued by the World Trade Organization Technical
force. They should also be of a material or coated with a
Barriers to Trade (TBT) Committee.
material that is sufficiently oxidation resistant at the maximum
1 2
ThispracticeisunderthejurisdictionofASTMCommitteeE28onMechanical For referenced ASTM standards, visit the ASTM website, www.astm.org, or
TestingandisthedirectresponsibilityofSubcommitteeE28.04onUniaxialTesting. contact ASTM Customer Service at service@astm.org. For Annual Book of ASTM
Current edition approved Feb. 1, 2018 Published March 2018. Originally Standards volume information, refer to the standard’s Document Summary page on
approvedin1963.Lastpreviousedition,approvedin2010asE209–00(2010).DOI: the ASTM website.
10.1520/E0209-18. Boldface numbers in parentheses refer to references at the end of this practice.
Copyright © ASTM International, 100 Barr Harbor Drive, PO Box C700, West Conshohocken, PA 19428-2959. United States
E209 − 18
testing temperature to prevent the formation of an oxide testingjigshavebeenevaluatedspecificallyforperformancein
coating that would cause misalignment. In any compression elevated-temperature tests (2, 3). The preferred type depends
testitisimportantthatthespecimenbecarefullycenteredwith on the material, its thickness, and the temperatures involved.
respect to the bearing blocks, which in turn should be centered For moderately elevated temperatures, one of the room-
with respect to the testing machine heads. temperaturedesignsmaybeusedinanoveninwhichtheairis
circulated to provide uniform heating. One design for side-
NOTE 1—Bearing blocks with straight cylindrical or threaded holes
support plates that has been found satisfactory for use at
depending on specimen design may be used for bar-type specimens
temperatures up to 1000 °F (538 °C) when lubricated with
providing the apparatus qualifies in accordance with Section 10.
graphiteisshowninFig.1(a) (4).Longitudinalgroovesarecut
NOTE 2—Bearing blocks of an adjustable type to provide parallel
loading surfaces are discussed inTest Methods E9. Bearing blocks with a ineachplatewiththegroovesoffsetacrossthethicknessofthe
spherical seat for the upper block are also shown.
specimen.Theseplatesaremadeoftitaniumcarbide.Atypeof
side-support plate that has been used in compression jigs to
3.3 Subpresses—A subpress or other alignment device is
1800°F(982°C)isshowninFig.1(b) (4).Thisisanassembly
necessary in order to maintain suitable alignment when testing
ofsmalltitaniumcarbideballsbackedupbyatitaniumcarbide
specimens that are not laterally supported, unless the testing
plate. The balls protrude through holes in the front retaining
machinehasbeendesignedspecificallyforaxialalignmentand
plate.Theholesfortheballsarelargeenoughtoallowrotation
uniform application of force in elevated-temperature compres-
andtranslationofeachballwhileatthesametimeretainingthe
sion testing.Asubpress for room-temperature testing is shown
balls in the plate assembly. The spacing of the balls, which is
in Test Methods E9. For elevated-temperature compression
normally about ⁄8 in. (3.2 mm), determines the minimum
testing, the subpress must accommodate the heating and
specimen thickness that can be tested without buckling be-
loading devices and the temperature-sensing elements. The
tween the balls. Rational values of the ball spacing can be
design of the subpress is largely dependent on the size and
obtained from calculations based upon the plastic buckling of
strength of the specimens, the temperatures to be used, the
simply supported plates where the plate width can be taken as
environment, and other factors. It must be designed so the ram
the ball spacing. Another type of jig has a number of leaf-
does not jam or tilt the frame as a result of heating or
springsupportsoneachsideofthespecimen (3, 5).Thisdesign
application of force. If the bearing faces of the subpress, the
islimitedtoatemperaturerangeinwhichthemetalleaf-spring
opposite faces of both bearing blocks, and the ends of the
elements can support the specimen satisfactorily. Jigs for use
specimen are respectively plane and parallel within very close
with specimens that are heated by self resistance are discussed
limits, it is unnecessary to use adjustable or spherical seats. In
in (1, 6) and (7), which also provide quantitative information
any case, the specimen should be properly centered in the
on the effects of lubrication, lateral-support pressure, spring
subpress.
constant, and misalignment.
3.4 Compression Testing Jigs—Whentestingsheetmaterial,
3.4.2 The side-support plates are assembled in a frame that
buckling of the specimen during application of compessive
is part of the jig.Atypical frame and jig assembly is shown in
forces must be prevented. This may be accomplished by using
Fig.2.Afurnaceisplacedaroundthejigafterthespecimenand
a jig containing side-support plates that bear against the faces
extensometerareassembledinthejig.Theholesinthesupport
of the specimen. The jig must afford a suitable combination of
blocks are for auxiliary cartridge-type heaters.
lateral-support pressure and spring constant to prevent buck-
lingwithoutinterferingwithaxialdeformationofthespecimen
4. Significance and Use
(1). Although suitable combinations vary somewhat with
4.1 Significance—The data obtained from a compression
variations in specimen material and thickness, testing
test may include the yield strength, the yield point, Young’s
temperature, and accuracy of alignment, acceptable results can
modulus, the stress-strain curve, and the compressive strength
be obtained with rather wide ranges of lateral-support pressure
(see Terminology E6). In the case of a material that does not
and spring constant for any given test conditions. Generally,
the higher the spring constant of the jig, the lower the
lateral-support pressure that is required. Proper adjustment of
these test variables may be established in preliminary verifi-
cation tests for the equipment (Section 10).
3.4.1 This practice does not intend to designate specific
compressionjigsfortestingsheetmetals,butmerelytoprovide
a few illustrations and references to jigs that have been used
successfully. Many other jigs are acceptable provided they
prevent buckling and pass the qualification tests set forth in
Section 10. Satisfactory results have been obtained in room-
temperature testing using the jigs illustrated in Test Methods
E9. These jigs usually require that the specimen be lubricated
to permit normal compression on loading. For elevated-
temperature testing, modified jigs that accommodate the heat-
ingandstrain-measuringequipmentaswellasthetemperature-
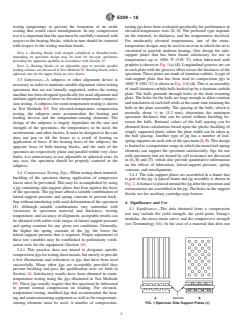
sensing elements must be used. A number of compression- FIG. 1 Specimen Side Support Plates (4)
E209 − 18
metallic materials, buckling and barreling can complicate
results and should be minimized
5. Heating Apparatus
5.1 Theapparatusandmethodforheatingthespecimensare
not specified, but in present practice the following are mainly
used.
5.1.1 The resistance of the specimen gage length to the
passage of an electric current,
5.1.2 Resistance heating supplemented by radiant heating,
5.1.3 Radiant heating,
5.1.4 Induction heating, or
5.1.5 Convection heating with circulating-air furnace.
5.2 Theapparatusmustbesuitableforheatingthespecimen
under the conditions specified in Section 6.
6. Test Specimen
6.1 Thesizeandshapeofthetestspecimenshouldbebased
on three requirements as follows:
6.1.1 The specimen should be representative of the material
being investigated and should be taken from the material
produced in the form and condition in which it will be used,
6.1.2 The specimen should be adapted to meet the require-
ments on temperature control and rates of heating and
straining, and
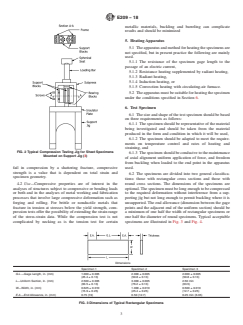
FIG. 2 Typical Compression Testing Jig for Sheet Specimens
6.1.3 Thespecimenshouldbeconducivetothemaintenance
Mounted on Support Jig (3)
of axial alignment uniform application of force, and freedom
from buckling when loaded to the end point in the apparatus
used.
fail in compression by a shattering fracture, compressive
strength is a value that is dependent on total strain and
6.2 The specimens are divided into two general classifica-
specimen geometry.
tions: those with rectangular cross sections and those with
4.2 Use—Compressive properties are of interest in the round cross sections. The dimensions of the specimens are
analyses of structures subject to compressive or bending loads
optional.Thespecimenmustbelongenoughtobecompressed
or both and in the analyses of metal working and fabrication to the required deformation without interference from a sup-
processes that involve large compressive deformation such as porting jig but not long enough to permit buckling where it is
forging and rolling. For brittle or nonductile metals that unsupported. The end allowance (dimension between the gage
fracture in tension at stresses below the yield strength, com- points and the adjacent end of the uniform section) should be
pression tests offer the possibility of extending the strain range a minimum of one half the width of rectangular specimens or
of the stress-strain data. While the compression test is not one half the diameter of round specimens. Typical acceptable
complicated by necking as is the tension test for certain specimens are illustrated in Fig. 3 and Fig. 4.
Dimensions
Specimen 1 Specimen 2 Specimen 3
G.L.—Gage Length, in. (mm) 1.000 ± 0.005 2.000 ± 0.005 2.000 ± 0.005
(25.4 ± 0.13) (50.8 ± 0.13) (50.8 ± 0.13)
L—Uniform Section, in. (mm) 2.500 ± 0.005 3.000 ± 0.005 2.50 min
(63.5 ± 0.13) (76.2 ± 0.13) (63.5)
W—Width, in. (mm) 0.625 ± 0.010 1.000 ± 0.010 0.500 ± 0.010
(15.9 ± 0.25) (25.4 ± 0.25) (12.7 ± 0.25)
E.A.—End Allowance, in. (mm) 0.75 (19) 0.50 (12.7) 0.25 min (6.35)
FIG. 3 Dimensions of Typical Rectangular Specimens
E209 − 18
Dimensions
Specimen 1 Specimen 2 Specimen 3
G.L.—Gage Length, in. 1.000 ± 0.005 2.000 ± 0.005 1.000 ± 0.005
(25.4 ± 0.13) (50.8 ± 0.13) (25.4 ± 0.13)
L—Uniform Section, in. 1.500 ± 0.005 3.375 ± 0.05 1.500 ± 0.005
(38.1 ± 0.13) (85.8 ± 1.27) (38.1 ± 0.13)
D—Diameter, in. 0.500 ± 0.010 1.125 ± 0.010 0.375 ± 0.010
(12.7 ± 0.25) (28.6 ± 0.25) (9.5 ± 0.25)
E.A.—End Allowance, in. 0.25 (6.35) 0.69 (17.5) 0.25 (6.35)
NOTE 1—Specimen 3, because of its smaller diameter, is especially suitable for tests in which rapid heating is desired.
FIG. 4 Dimensions of Typical Round Specimens
6.3 When the dimensions of the test material permit, round should retain its lubricating properties for the duration of the
specimens should be used. Round specimens should be de- test. Molybdenum disulfide and graphite are examples of
signed to be free from buckling up to the end point of the test lubricants that are used.
without lateral support. Rectangular specimens up to 0.250 in.
6.8 Specimendimensionsabove0.100in.(2.54mm)should
(6.35 mm) thick normally require lateral support; with greater
be measured to the nearest 0.001 in. (0.025 mm) or less;
thicknesses lateral support may not be required in well-aligned
dimensions under 0.100 in. (2.54 mm) should be measured to
equipment. The methods covered by this specification are
the nearest 1% or less.The average cross-sectional area of the
normally satisfactory for testing sheet specimens down to
gage length should be used for calculation of stress.
0.020 in. (0.51 mm) thick. With smaller thicknesses inaccura-
cies resulting from buckling and nonuniform straining tend to
7. Temperature Control
increase; consequently, extra care in the design, construction,
7.1 Conventional Heating—When a conventional-heating
and use of the test equipment is required to obtain valid results
rate is desired, variations in indicated temperature within the
for specimens in this thickness range. All compression speci-
gage length of the specimen should not exceed the following
mensshouldbeexaminedaftertheyaretested;anyevidenceof
limits during a test:
buckling invalidates the results for that specimen.
Allowable
6.4 The width and thickness of rectangular specimens and
Variation, °F
(°C), plus
diameter of round specimens at any point in the gage length
Test Temperature and minus
shouldnotvaryfromtheaveragebymorethan0.001in.(0.025
mm) for dimensions up to 1 in. (25.4 mm) or by more than
Up to and including 1800 °F (982 °C) 5 (3)
0.1% for dimensions above 1 in.
Over 1800 °F (982 °C) up to and including 2800 °F (1538 °C) 10 (5.5)
6.5 The ends of end-loaded specimens should be parallel
Over 2800 °F (1538 °C) up to and including 3500 °F (1927 °C) 20 (11)
within 0.00025 in. (0.0064 mm) for widths, thicknesses, and
diameters up to ⁄2 in. (12.7 mm) and within 0.05 percent for
Over 3500 °F (1927 °C) 35 (19.5)
widths,thicknesses,
...
This document is not an ASTM standard and is intended only to provide the user of an ASTM standard an indication of what changes have been made to the previous version. Because
it may not be technically possible to adequately depict all changes accurately, ASTM recommends that users consult prior editions as appropriate. In all cases only the current version
of the standard as published by ASTM is to be considered the official document.
Designation: E209 − 00 (Reapproved 2010) E209 − 18
Standard Practice for
Compression Tests of Metallic Materials at Elevated
Temperatures with Conventional or Rapid Heating Rates
and Strain Rates
This standard is issued under the fixed designation E209; the number immediately following the designation indicates the year of
original adoption or, in the case of revision, the year of last revision. A number in parentheses indicates the year of last reapproval. A
superscript epsilon (´) indicates an editorial change since the last revision or reapproval.
1. Scope
1.1 This practice covers compression test in which the specimen is heated to a constant and uniform temperature and held at
temperature while an axial force is applied at a controlled rate of strain.
1.2 This practice covers compression test in which the specimen is heated to a constant and uniform temperature and held at
temperature while an axial force is applied at a controlled rate of strain.In metals with extremely high proportional limit or low
modulus of elasticity, 1.5 % total strain under load could be reached before the 0.2 %-offset yield strength is reached. In this event
the end point
NOTE 1—In metals with extremely high elastic limit or low modulus of elasticity it is conceivable that 1.5 percent total strain under load could be
reached before the 0.2 percent-offset yield strength is reached. In this event the 0.2 percent-offset yield strength will be the end point of the test unless
rupture occurs before that point.
NOTE 2—For acceptable compression tests it is imperative that the specimens not buckle before the end point is reached. For this reason the equipment
and procedures, as discussed in this recommended practice, must be designed to maintain uniform loading and axial alignment.of the test may be
reported as the 0.2 percent-offset yield strength unless rupture occurs before that point.
1.3 For acceptable compression tests it is imperative that the specimens not buckle before the end point is reached. For this
reason the equipment and procedures shall be designed to maintain uniform loading and axial alignment.
1.4 Preferred conditions of testing are recommended so that data from different sources conducting the tests will be comparable.
1.5 The values stated in inch-pound units are to be regarded as standard. The values given in parentheses are mathematical
conversions to SI units that are provided for information only and are not considered standard.
1.6 This standard does not purport to address all of the safety concerns, if any, associated with its use. It is the responsibility
of the user of this standard to establish appropriate safety safety, health, and healthenvironmental practices and determine the
applicability of regulatory limitations prior to use.
1.7 This international standard was developed in accordance with internationally recognized principles on standardization
established in the Decision on Principles for the Development of International Standards, Guides and Recommendations issued
by the World Trade Organization Technical Barriers to Trade (TBT) Committee.
2. Referenced Documents
2.1 ASTM Standards:
E4 Practices for Force Verification of Testing Machines
E6 Terminology Relating to Methods of Mechanical Testing
E9 Test Methods of Compression Testing of Metallic Materials at Room Temperature
E21 Test Methods for Elevated Temperature Tension Tests of Metallic Materials
E83 Practice for Verification and Classification of Extensometer Systems
3. Apparatus
3.1 Testing Machines—Machines used for compression testing shall conform to the requirements of Practices E4.
This practice is under the jurisdiction of ASTM Committee E28 on Mechanical Testing and is the direct responsibility of Subcommittee E28.04 on Uniaxial Testing.
Current edition approved Sept. 1, 2010Feb. 1, 2018 Published November 2010March 2018. Originally approved in 1963. Last previous edition, approved in 20052010
as E209– 05.00(2010). DOI: 10.1520/E0209-00R10.10.1520/E0209-18.
For referenced ASTM standards, visit the ASTM website, www.astm.org, or contact ASTM Customer Service at service@astm.org. For Annual Book of ASTM Standards
volume information, refer to the standard’s Document Summary page on the ASTM website.
Copyright © ASTM International, 100 Barr Harbor Drive, PO Box C700, West Conshohocken, PA 19428-2959. United States
E209 − 18
3.2 Bearing Blocks and Loading Adapters—Load both ends of the compression specimens through bearing blocks or through
pin-type adapters that are part of the compression-testing assembly. Bearing blocks may be designed with flat bearing faces for
sheet- or bar-type specimens. Sheet specimens may also be loaded through pin-type adapters that are clamped rigidly to the grip
sections of specimens designed for these adapters (1). The main requirement is that the method of applying the force be consistent
with maintaining axial alignment and uniform loading on the specimen throughout the test. When bearing blocks with flat faces
are used, the load-bearing surfaces should be smooth and parallel within very close limits. The tolerance for parallelism for these
surfaces should be equal to or closer than that specified for the loaded ends of the specimens. The design of the equipment should
provide adequate rigidity so that parallelism is maintained during heating and loading. The bearing blocks or pin-type adapters
should be made of a material that is sufficiently hard at the testing temperature to resist plastic indentation at maximum force. They
should also be of a material or coated with a material that is sufficiently oxidation resistant at the maximum testing temperature
to prevent the formation of an oxide coating that would cause misalignment. In any compression test it is important that the
specimen be carefully centered with respect to the bearing blocks, which in turn should be centered with respect to the testing
machine heads.
NOTE 1—Bearing blocks with straight cylindrical or threaded holes depending on specimen design may be used for bar-type specimens providing the
apparatus qualifies in accordance with Section 910.
NOTE 2—Bearing blocks of an adjustable type to provide parallel loading surfaces are discussed in Test Methods E9. Bearing blocks with a spherical
seat for the upper block are also shown.
3.3 Subpresses—A subpress or other alignment device is necessary in order to maintain suitable alignment when testing
specimens that are not laterally supported, unless the testing machine has been designed specifically for axial alignment and
uniform application of force in elevated-temperature compression testing. A subpress for room-temperature testing is shown in Test
Methods E9. For elevated-temperature compression testing, the subpress must accommodate the heating and loading devices and
the temperature-sensing elements. The design of the subpress is largely dependent on the size and strength of the specimens, the
temperatures to be used, the environment, and other factors. It must be designed so the ram does not jam or tilt the frame as a result
of heating or application of force. If the bearing faces of the subpress, the opposite faces of both bearing blocks, and the ends of
the specimen are respectively plane and parallel within very close limits, it is unnecessary to use adjustable or spherical seats. In
any case, the specimen should be properly centered in the subpress.
3.4 Compression Testing Jigs—When testing sheet material, buckling of the specimen during application of compessive forces
must be prevented. This may be accomplished by using a jig containing side-support plates that bear against the faces of the
specimen. The jig must afford a suitable combination of lateral-support pressure and spring constant to prevent buckling without
interfering with axial deformation of the specimen (1). Although suitable combinations vary somewhat with variations in specimen
material and thickness, testing temperature, and accuracy of alignment, acceptable results can be obtained with rather wide ranges
of lateral-support pressure and spring constant for any given test conditions. Generally, the higher the spring constant of the jig,
the lower the lateral-support pressure that is required. Proper adjustment of these test variables may be established in preliminary
verification tests for the equipment (Section 910).
3.4.1 This practice does not intend to designate specific compression jigs for testing sheet metals, but merely to provide a few
illustrations and references to jigs that have been used successfully. Many other jigs are acceptable provided they prevent buckling
and pass the qualification tests set forth in Section 910. Satisfactory results have been obtained in room-temperature testing using
the jigs illustrated in Test Methods E9. These jigs usually require that the specimen be lubricated to permit normal compression
on loading. For elevated-temperature testing, modified jigs that accommodate the heating and strain-measuring equipment as well
as the temperature-sensing elements must be used. A number of compression-testing jigs have been evaluated specifically for
performance in elevated-temperature tests (2, 3). The preferred type depends on the material, its thickness, and the temperatures
involved. For moderately elevated temperatures, one of the room-temperature designs may be used in an oven in which the air is
circulated to provide uniform heating. One design for side-support plates that has been found satisfactory for use at temperatures
up to 1000°F (538°C) 1000 °F (538 °C) when lubricated with graphite is shown in Fig. 1(a) (4). Longitudinal grooves are cut in
each plate with the grooves offset across the thickness of the specimen. These plates are made of titanium carbide. A type of
side-support plate that has been used in compression jigs to 1800°F (982°C) 1800 °F (982 °C) is shown in Fig. 1(b) (4). This is
an assembly of small titanium carbide balls backed up by a titanium carbide plate. The balls protrude through holes in the front
retaining plate. The holes for the balls are large enough to allow rotation and translation of each ball while at the same time
retaining the balls in the plate assembly. The spacing of the balls, which is normally about ⁄8 in. (3.2 mm), determines the minimum
specimen thickness that can be tested without buckling between the balls. Rational values of the ball spacing can be obtained from
calculations based upon the plastic buckling of simply supported plates where the plate width can be taken as the ball spacing.
Another type of jig has a number of leaf-spring supports on each side of the specimen (3, 5). This design is limited to a temperature
range in which the metal leaf-spring elements can support the specimen satisfactorily. Jigs for use with specimens that are heated
by self resistance are discussed in Ref (1, 6) and (7,), which also provide quantitative information on the effects of lubrication,
lateral-support pressure, spring constant, and misalignment.
Boldface numbers in parentheses refer to references at the end of this practice.
E209 − 18
FIG. 1 Specimen Side Support Plates (Ref (44))
3.4.2 The side-support plates are assembled in a frame that is part of the jig. A typical frame and jig assembly is shown in Fig.
2. A furnace is placed around the jig after the specimen and extensometer are assembled in the jig. The holes in the support blocks
are for auxiliary cartridge-type heaters.
4. Significance and Use
4.1 Significance—The data obtained from a compression test may include the yield strength, the yield point, Young’s modulus,
the stress-strain curve, and the compressive strength (see Terminology E6). In the case of a material that does not fail in
compression by a shattering fracture, compressive strength is a value that is dependent on total strain and specimen geometry.
4.2 Use—Compressive properties are of interest in the analyses of structures subject to compressive or bending loads or both
and in the analyses of metal working and fabrication processes that involve large compressive deformation such as forging and
rolling. For brittle or nonductile metals that fracture in tension at stresses below the yield strength, compression tests offer the
possibility of extending the strain range of the stress-strain data. While the compression test is not complicated by necking as is
the tension test for certain metallic materials, buckling and barreling can complicate results and should be minimized
FIG. 2 Typical Compression Testing Jig for Sheet Specimens Mounted on Support Jig (Ref (33))
E209 − 18
5. Heating Apparatus
5.1 The apparatus and method for heating the specimens are not specified, but in present practice the following are mainly used.
5.1.1 The resistance of the specimen gage length to the passage of an electric current,
5.1.2 Resistance heating supplemented by radiant heating,
5.1.3 Radiant heating,
5.1.4 Induction heating, or
5.1.5 Convection heating with circulating-air furnace.
5.2 The apparatus must be suitable for heating the specimen under the conditions specified in Section 56.
6. Test Specimen
6.1 The size and shape of the test specimen should be based on three requirements as follows:
6.1.1 The specimen should be representative of the material being investigated and should be taken from the material produced
in the form and condition in which it will be used,
6.1.2 The specimen should be adapted to meet the requirements on temperature control and rates of heating and straining, and
6.1.3 The specimen should be conducive to the maintenance of axial alignment uniform application of force, and freedom from
buckling when loaded to the end point in the apparatus used.
6.2 The specimens are divided into two general classifications: those with rectangular cross sections and those with round cross
sections. The dimensions of the specimens are optional. The specimen must be long enough to be compressed to the required
deformation without interference from a supporting jig but not long enough to permit buckling where it is unsupported. The end
allowance (dimension between the gage points and the adjacent end of the uniform section) should be a minimum of one half the
width of rectangular specimens or one half the diameter of round specimens. Typical acceptable specimens are illustrated in Fig.
3 and Fig. 4.
6.3 When the dimensions of the test material permit, round specimens should be used. Round specimens should be designed
to be free from buckling up to the end point of the test without lateral support. Rectangular specimens up to 0.250 in. (6.35 mm)
thick normally require lateral support; with greater thicknesses lateral support may not be required in well-aligned equipment. The
methods covered by this specification are normally satisfactory for testing sheet specimens down to 0.020 in. (0.51 mm) thick. With
smaller thicknesses inaccuracies resulting from buckling and nonuniform straining tend to increase; consequently, extra care in the
design, construction, and use of the test equipment is required to obtain valid results for specimens in this thickness range. All
compression specimens should be examined after they are tested; any evidence of buckling invalidates the results for that
specimen.
6.4 The width and thickness of rectangular specimens and diameter of round specimens at any point in the gage length should
not vary from the average by more than 0.001 in. (0.025 mm) for dimensions up to 1 in. (25.4 mm) or by more than 0.1 percent
0.1 % for dimensions above 1 in.
6.5 The ends of end-loaded specimens should be parallel within 0.00025 in. (0.0064 mm) for widths, thicknesses, and diameters
1 1
up to ⁄2 in. (12.7 mm) and within 0.05 percent for widths, thicknesses, and diameters above ⁄2 in. (12.7 mm). The ends of
end-loaded specimens should be perpendicular to the sides within ⁄4 of a degree. All machined surfaces should have an average
surface finish of 63 μ in. μin. or better. Rectangular specimens should have a width of material, equal to at least the thickness of
the specimen, machined from all sheared or stamped edges.
Dimensions
Specimen 1 Specimen 2 Specimen 3
G.L.—Gage Length, in. (mm) 1.000 ± 0.005 2.000 ± 0.005 2.000 ± 0.005
(25.4 ± 0.13) (50.8 ± 0.13) (50.8 ± 0.13)
L—Uniform Section, in. (mm) 2.500 ± 0.005 3.000 ± 0.005 2.50 min
(63.5 ± 0.13) (76.2 ± 0.13) (63.5)
W—Width, in. (mm) 0.625 ± 0.010 1.000 ± 0.010 0.500 ± 0.010
(15.9 ± 0.25) (25.4 ± 0.25) (12.7 ± 0.25)
E.A.—End Allowance, in. (mm) 0.75 (19) 0.50 (12.7) 0.25 min (6.35)
FIG. 3 Dimensions of Typical Rectangular Specimens
E209 − 18
Dimensions
Specimen 1 Specimen 2 Specimen 3
G.L.—Gage Length, in. 1.000 ± 0.005 2.000 ± 0.005 1.000 ± 0.005
(25.4 ± 0.13) (50.8 ± 0.13) (25.4 ± 0.13)
L—Uniform Section, in. 1.500 ± 0.005 3.375 ± 0.05 1.500 ± 0.005
(38.1 ± 0.13) (85.8 ± 1.27) (38.1 ± 0.13)
D—Diameter, in. 0.500 ± 0.010 1.125 ± 0.010 0.375 ± 0.010
(12.7 ± 0.25) (28.6 ± 0.25) (9.5 ± 0.25)
E.A.—End Allowance, in. 0.25 (6.35) 0.69 (17.5) 0.25 (6.35)
NOTE 1—Specimen 3, because of its smaller diameter, is especially suitable for tests in which rapid heating is desired.
FIG. 4 Dimensions of Typical Round Specimens
6.6 Shouldered specimens may be used in lieu of specimens with uniform width or diameter, provided the method of applying
force is consistent with requirements of axial alignment, uniform application of force, and freedom from buckling.
6.7 The surfaces of the rectangular specimens in contact with the supporting jig should be lubricated to reduce friction. The
lubricant should have negligible reaction with the surface of the specimen for the test temperature and time ch
...
Questions, Comments and Discussion
Ask us and Technical Secretary will try to provide an answer. You can facilitate discussion about the standard in here.
Loading comments...