ASTM A537/A537M-20
(Specification)Standard Specification for Pressure Vessel Plates, Heat-Treated, Carbon-Manganese-Silicon Steel
Standard Specification for Pressure Vessel Plates, Heat-Treated, Carbon-Manganese-Silicon Steel
ABSTRACT
This specification covers the standard for heat-treated carbon manganese-silicon steel plates intended for fusion welded pressure vessels and structures. The steel shall be killed and undergo normalization, quenching and tempering. Heat and product analyses shall be performed on the materials and results shall conform to the required values in chemical composition in carbon, manganese, phosphorus, sulfur, silicon, copper, nickel, chromium and molybdenum. Mechanical testing like tension test shall be done on the plates and shall conform to the required tensile strength, yield strength, and elongation.
SCOPE
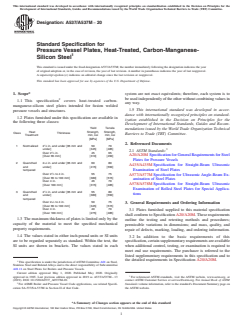
1.1 This specification2 covers heat-treated carbon-manganese-silicon steel plates intended for fusion welded pressure vessels and structures.
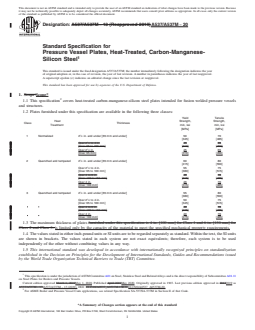
1.2 Plates furnished under this specification are available in the following three classes:
Class
Heat
Treatment
Thickness
Yield
Strength,
min, ksi
[MPa]
Tensile
Strength,
min, ksi
[MPa]
1
Normalized
21/2 in. and under [65 mm and under]
50
[345]
70
[485]
Over 21/2 in.
[Over 65 mm]
45
[310]
65
[450]
2
Quenched and tempered
21/2 in. and under [65 mm and under]
60
[415]
80
[550]
Over 21/2 to 4 in.
[Over 65 to 100 mm]
55
[380]
75
[515]
Over 4 in.
[Over 100 mm]
46
[315]
70
[485]
3
Quenched and tempered
21/2 in. and under [65 mm and under]
55
[380]
80
[550]
Over 21/2 to 4 in.
[Over 65 to 100 mm]
50
[345]
75
[515]
Over 4 in.
[Over 100 mm]
40
[275]
70
[485]
1.3 The maximum thickness of plates is limited only by the capacity of the material to meet the specified mechanical property requirements.
1.4 The values stated in either inch-pound units or SI units are to be regarded separately as standard. Within the text, the SI units are shown in brackets. The values stated in each system are not exact equivalents; therefore, each system is to be used independently of the other without combining values in any way.
1.5 This international standard was developed in accordance with internationally recognized principles on standardization established in the Decision on Principles for the Development of International Standards, Guides and Recommendations issued by the World Trade Organization Technical Barriers to Trade (TBT) Committee.
General Information
- Status
- Published
- Publication Date
- 30-Apr-2020
- Technical Committee
- A01 - Steel, Stainless Steel and Related Alloys
- Drafting Committee
- A01.11 - Steel Plates for Boilers and Pressure Vessels
Relations
- Effective Date
- 01-May-2020
- Effective Date
- 01-Nov-2023
- Effective Date
- 01-Nov-2023
- Effective Date
- 01-Nov-2023
- Effective Date
- 01-Mar-2018
- Effective Date
- 15-Nov-2017
- Effective Date
- 01-Nov-2017
- Effective Date
- 01-Nov-2015
- Effective Date
- 01-Oct-2014
- Effective Date
- 01-Oct-2013
- Effective Date
- 01-Mar-2012
- Effective Date
- 01-Mar-2012
- Effective Date
- 01-Mar-2012
- Effective Date
- 01-Nov-2011
- Effective Date
- 01-Oct-2010
Overview
ASTM A537/A537M-20 is a widely recognized standard developed by ASTM International for pressure vessel plates made from heat-treated carbon-manganese-silicon steel. These steel plates are engineered for use in fusion welded pressure vessels and other structural applications where high strength, toughness, and reliable performance under pressure are critical. The specification outlines requirements regarding chemical composition, mechanical properties, manufacturing processes, and testing procedures to ensure safety and consistency in pressure vessel production.
This standard supports industries by defining stringent quality criteria, making it a crucial reference for manufacturers, fabricators, and end-users involved with pressure vessels and welded steel structures.
Key Topics
Scope and Classification:
The standard covers carbon-manganese-silicon steel plates intended for fusion welded pressure vessels. Plates are supplied in three classes, differentiated by heat treatment and mechanical property requirements.- Class 1: Normalized
- Class 2 and 3: Quenched and tempered
Chemical Composition:
The steel must meet precise requirements for carbon, manganese, phosphorus, sulfur, silicon, copper, nickel, chromium, and molybdenum content.Mechanical Properties:
Mechanical testing ensures compliance with specified minimum yield strength, tensile strength, and elongation:- Yield strength from 40 to 60 ksi (275 to 415 MPa), varying by plate class and thickness
- Tensile strength from 65 to 100 ksi (450 to 690 MPa)
Heat Treatment:
All plates undergo specific thermal processes:- Class 1: Normalized
- Classes 2 and 3: Quenched and tempered at defined minimum temperatures
Supplementary Requirements:
Optional additional tests provide flexibility for unique applications, such as impact testing, vacuum deoxidization, ultrasonic and magnetic particle inspections.
Applications
ASTM A537/A537M-20 carbon-manganese-silicon steel plates play a vital role in safety-critical applications where pressure resistance and toughness are required. Common uses include:
- Pressure Vessels:
For storage and transport of gases and liquids under pressure, such as in the oil, gas, and chemical processing industries. - Boilers:
Used in high-pressure steam or power generation boilers. - Industrial Tanks:
Construction of large welded tanks for industrial fluids. - Structural Components:
Critical load-bearing structures in industrial and energy facilities.
These plates are selected for their ability to withstand high pressures, resist brittle fracture, and maintain mechanical integrity after welding.
Related Standards
Several related standards are relevant for users of ASTM A537/A537M-20, providing complementary requirements and procedures:
- ASTM A20/A20M: General requirements for steel plates for pressure vessels
- ASTM A435/A435M: Straight-beam ultrasonic examination of steel plates
- ASTM A577/A577M: Ultrasonic angle-beam examination of steel plates
- ASTM A578/A578M: Straight-beam ultrasonic examination for special applications
For those involved in ASME applications, Specification SA-537/SA-537M in the ASME Boiler and Pressure Vessel Code offers additional guidance for compliance and code acceptance.
Keywords: ASTM A537, pressure vessel steel plate, heat-treated carbon-manganese-silicon steel, pressure vessel plates, quenched and tempered steel, normalized steel, fusion welded pressure vessels, mechanical properties, chemical composition, industrial standards.
Buy Documents
ASTM A537/A537M-20 - Standard Specification for Pressure Vessel Plates, Heat-Treated, Carbon-Manganese-Silicon Steel
REDLINE ASTM A537/A537M-20 - Standard Specification for Pressure Vessel Plates, Heat-Treated, Carbon-Manganese-Silicon Steel
Get Certified
Connect with accredited certification bodies for this standard

Element Materials Technology
Materials testing and product certification.

Inštitut za kovinske materiale in tehnologije
Institute of Metals and Technology. Materials testing, metallurgical analysis, NDT.
Sponsored listings
Frequently Asked Questions
ASTM A537/A537M-20 is a technical specification published by ASTM International. Its full title is "Standard Specification for Pressure Vessel Plates, Heat-Treated, Carbon-Manganese-Silicon Steel". This standard covers: ABSTRACT This specification covers the standard for heat-treated carbon manganese-silicon steel plates intended for fusion welded pressure vessels and structures. The steel shall be killed and undergo normalization, quenching and tempering. Heat and product analyses shall be performed on the materials and results shall conform to the required values in chemical composition in carbon, manganese, phosphorus, sulfur, silicon, copper, nickel, chromium and molybdenum. Mechanical testing like tension test shall be done on the plates and shall conform to the required tensile strength, yield strength, and elongation. SCOPE 1.1 This specification2 covers heat-treated carbon-manganese-silicon steel plates intended for fusion welded pressure vessels and structures. 1.2 Plates furnished under this specification are available in the following three classes: Class Heat Treatment Thickness Yield Strength, min, ksi [MPa] Tensile Strength, min, ksi [MPa] 1 Normalized 21/2 in. and under [65 mm and under] 50 [345] 70 [485] Over 21/2 in. [Over 65 mm] 45 [310] 65 [450] 2 Quenched and tempered 21/2 in. and under [65 mm and under] 60 [415] 80 [550] Over 21/2 to 4 in. [Over 65 to 100 mm] 55 [380] 75 [515] Over 4 in. [Over 100 mm] 46 [315] 70 [485] 3 Quenched and tempered 21/2 in. and under [65 mm and under] 55 [380] 80 [550] Over 21/2 to 4 in. [Over 65 to 100 mm] 50 [345] 75 [515] Over 4 in. [Over 100 mm] 40 [275] 70 [485] 1.3 The maximum thickness of plates is limited only by the capacity of the material to meet the specified mechanical property requirements. 1.4 The values stated in either inch-pound units or SI units are to be regarded separately as standard. Within the text, the SI units are shown in brackets. The values stated in each system are not exact equivalents; therefore, each system is to be used independently of the other without combining values in any way. 1.5 This international standard was developed in accordance with internationally recognized principles on standardization established in the Decision on Principles for the Development of International Standards, Guides and Recommendations issued by the World Trade Organization Technical Barriers to Trade (TBT) Committee.
ABSTRACT This specification covers the standard for heat-treated carbon manganese-silicon steel plates intended for fusion welded pressure vessels and structures. The steel shall be killed and undergo normalization, quenching and tempering. Heat and product analyses shall be performed on the materials and results shall conform to the required values in chemical composition in carbon, manganese, phosphorus, sulfur, silicon, copper, nickel, chromium and molybdenum. Mechanical testing like tension test shall be done on the plates and shall conform to the required tensile strength, yield strength, and elongation. SCOPE 1.1 This specification2 covers heat-treated carbon-manganese-silicon steel plates intended for fusion welded pressure vessels and structures. 1.2 Plates furnished under this specification are available in the following three classes: Class Heat Treatment Thickness Yield Strength, min, ksi [MPa] Tensile Strength, min, ksi [MPa] 1 Normalized 21/2 in. and under [65 mm and under] 50 [345] 70 [485] Over 21/2 in. [Over 65 mm] 45 [310] 65 [450] 2 Quenched and tempered 21/2 in. and under [65 mm and under] 60 [415] 80 [550] Over 21/2 to 4 in. [Over 65 to 100 mm] 55 [380] 75 [515] Over 4 in. [Over 100 mm] 46 [315] 70 [485] 3 Quenched and tempered 21/2 in. and under [65 mm and under] 55 [380] 80 [550] Over 21/2 to 4 in. [Over 65 to 100 mm] 50 [345] 75 [515] Over 4 in. [Over 100 mm] 40 [275] 70 [485] 1.3 The maximum thickness of plates is limited only by the capacity of the material to meet the specified mechanical property requirements. 1.4 The values stated in either inch-pound units or SI units are to be regarded separately as standard. Within the text, the SI units are shown in brackets. The values stated in each system are not exact equivalents; therefore, each system is to be used independently of the other without combining values in any way. 1.5 This international standard was developed in accordance with internationally recognized principles on standardization established in the Decision on Principles for the Development of International Standards, Guides and Recommendations issued by the World Trade Organization Technical Barriers to Trade (TBT) Committee.
ASTM A537/A537M-20 is classified under the following ICS (International Classification for Standards) categories: 77.140.50 - Flat steel products and semi-products. The ICS classification helps identify the subject area and facilitates finding related standards.
ASTM A537/A537M-20 has the following relationships with other standards: It is inter standard links to ASTM A537/A537M-13(2019), ASTM A578/A578M-17(2023), ASTM A577/A577M-17(2023), ASTM A435/A435M-17(2023), ASTM A20/A20M-18, ASTM A20/A20M-17, ASTM A578/A578M-17, ASTM A20/A20M-15, ASTM A20/A20M-14, ASTM A20/A20M-13, ASTM A577/A577M-90(2012), ASTM A435/A435M-90(2012), ASTM A578/A578M-07(2012), ASTM A20/A20M-11, ASTM A20/A20M-10. Understanding these relationships helps ensure you are using the most current and applicable version of the standard.
ASTM A537/A537M-20 is available in PDF format for immediate download after purchase. The document can be added to your cart and obtained through the secure checkout process. Digital delivery ensures instant access to the complete standard document.
Standards Content (Sample)
This international standard was developed in accordance with internationally recognized principles on standardization established in the Decision on Principles for the
Development of International Standards, Guides and Recommendations issued by the World Trade Organization Technical Barriers to Trade (TBT) Committee.
Designation:A537/A537M −20
Standard Specification for
Pressure Vessel Plates, Heat-Treated, Carbon-Manganese-
Silicon Steel
This standard is issued under the fixed designationA537/A537M; the number immediately following the designation indicates the year
of original adoption or, in the case of revision, the year of last revision. A number in parentheses indicates the year of last reapproval.
A superscript epsilon (´) indicates an editorial change since the last revision or reapproval.
This standard has been approved for use by agencies of the U.S. Department of Defense.
1. Scope* system are not exact equivalents; therefore, each system is to
beusedindependentlyoftheotherwithoutcombiningvaluesin
1.1 This specification covers heat-treated carbon-
any way.
manganese-silicon steel plates intended for fusion welded
1.5 This international standard was developed in accor-
pressure vessels and structures.
dance with internationally recognized principles on standard-
1.2 Plates furnished under this specification are available in
ization established in the Decision on Principles for the
the following three classes:
Development of International Standards, Guides and Recom-
Yield Tensile
mendations issued by the World Trade Organization Technical
Heat Strength, Strength,
Class Thickness
Barriers to Trade (TBT) Committee.
Treatment min, ksi min, ksi
[MPa] [MPa]
2. Referenced Documents
1 Normalized 2 ⁄2 in. and under [65 mm and 50 70
under] [345] [485]
2.1 ASTM Standards:
Over 2 ⁄2 in. 45 65
A20/A20M SpecificationforGeneralRequirementsforSteel
[Over 65 mm] [310] [450]
Plates for Pressure Vessels
2 Quenched 2 ⁄2 in. and under [65 mm and 60 80
A435/A435M Specification for Straight-Beam Ultrasonic
and under] [415] [550]
Examination of Steel Plates
tempered
Over 2 ⁄2to4in. 55 75
A577/A577M Specification for Ultrasonic Angle-Beam Ex-
[Over 65 to 100 mm] [380] [515]
amination of Steel Plates
Over 4 in. 46 70
A578/A578M Specification for Straight-Beam Ultrasonic
[Over 100 mm] [315] [485]
Examination of Rolled Steel Plates for Special Applica-
3 Quenched 2 ⁄2 in. and under [65 mm and 55 80
tions
and under] [380] [550]
tempered
Over 2 ⁄2to4in. 50 75
3. General Requirements and Ordering Information
[Over 65 to 100 mm] [345] [515]
Over 4 in. 40 70
3.1 Plates furnished supplied to this material specification
[Over 100 mm] [275] [485]
shall conform to Specification A20/A20M.These requirements
1.3 The maximum thickness of plates is limited only by the
outline the testing and retesting methods and procedures;
capacity of the material to meet the specified mechanical
permissible variations in dimensions; and mass, quality, and
property requirements.
repair of defects, marking, loading, and ordering information.
1.4 The values stated in either inch-pound units or SI units
3.2 In addition to the basic requirements of this
are to be regarded separately as standard. Within the text, the
specification, certain supplementary requirements are available
SI units are shown in brackets. The values stated in each
when additional control, testing, or examination is required to
meet end use requirements. The purchaser is referred to the
listed supplementary requirements in this specification and to
the detailed requirements in Specification A20/A20M.
This specification is under the jurisdiction of ASTM Committee A01 on Steel,
Stainless Steel and Related Alloys and is the direct responsibility of Subcommittee
A01.11 on Steel Plates for Boilers and Pressure Vessels.
Current edition approved May 1, 2020. Published May 2020. Originally
approved in 1965. Last previous edition approved in 2019 as A537/A537M – 13 For referenced ASTM standards, visit the ASTM website, www.astm.org, or
(2019). DOI: 10.1520/A0537_A0537M-20. contact ASTM Customer Service at service@astm.org. For Annual Book of ASTM
For ASME Boiler and Pressure Vessel Code applications, see related Specifi- Standards volume information, refer to the standard’s Document Summary page on
cation SA-537/SA-537M in Section II of that Code. the ASTM website.
*A Summary of Changes section appears at the end of this standard
Copyright © ASTM International, 100 Barr Harbor Drive, PO Box C700, West Conshohocken, PA 19428-2959. United States
A537/A537M−20
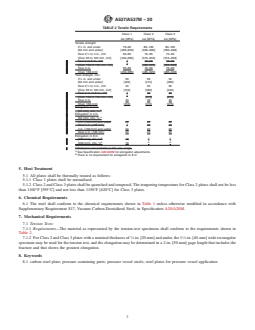
TABLE 1 Chemical Requirements TABLE 2 Tensile Requirements
Element Composition, % Class 1 Class 2 Class 3
A
Carbon, max 0.24 ksi [MPa] ksi [MPa] ksi [MPa]
Manganese:
Tensile strength:
B
1 ⁄2 in. [40 mm] and under in thickness:
2 ⁄2 in. and under 70–90 80–100 80–100
Heat analysis 0.70–1.35
[65 mm and under] [485–620] [550–690] [550–690]
Product analysis 0.64–1.46
Over 2 ⁄2 to 4 in., incl 65–85 75–95 75–95
Over 1 ⁄2 in. [40 mm] in thickness:
[Over 65 to 100 mm, incl] [450–585] [515–655] [515–655]
Heat analysis 1.00–1.60
Over 4 in. 65–85 70–90 70–90
Product analysis 0.92–1.72
[Over 100 mm] [450–585] [485–620] [485–620]
A
Phosphorus, max 0.025
Yield strength, min:
A
Sulfur, max 0.025
2 ⁄2 in. and under 50 60 55
Silicon:
[65 mm and under] [345] [415] [380]
Heat analysis 0.15–0.50 1
Over 2 ⁄2 to 4 in., incl 45 55 50
Product analysis 0.13–0.55
[Over 65 to 100 mm, incl] [310] [380] [3
...
This document is not an ASTM standard and is intended only to provide the user of an ASTM standard an indication of what changes have been made to the previous version. Because
it may not be technically possible to adequately depict all changes accurately, ASTM recommends that users consult prior editions as appropriate. In all cases only the current version
of the standard as published by ASTM is to be considered the official document.
Designation: A537/A537M − 13 (Reapproved 2019) A537/A537M − 20
Standard Specification for
Pressure Vessel Plates, Heat-Treated, Carbon-Manganese-
Silicon Steel
This standard is issued under the fixed designation A537/A537M; the number immediately following the designation indicates the year
of original adoption or, in the case of revision, the year of last revision. A number in parentheses indicates the year of last reapproval.
A superscript epsilon (´) indicates an editorial change since the last revision or reapproval.
This standard has been approved for use by agencies of the U.S. Department of Defense.
1. Scope Scope*
1.1 This specification covers heat-treated carbon-manganese-silicon steel plates intended for fusion welded pressure vessels
and structures.
1.2 Plates furnished under this specification are available in the following three classes:
Yield Tensile
Heat Strength, Strength,
Class Thickness
Treatment min, ksi min, ksi
[MPa] [MPa]
1 Normalized 2 ⁄2 in. and under [65 mm and under] 50 70
[345] [485]
Over 2 ⁄2 to 4 in. 45 65
[Over 65 to 100 mm] [310] [450]
Over 2 ⁄2 in. 45 65
[Over 65 mm] [310] [450]
2 Quenched and tempered 2 ⁄2 in. and under [65 mm and under] 60 80
[415] [550]
Over 2 ⁄2 to 4 in. 55 75
[Over 65 to 100 mm] [380] [515]
Over 4 to 6 in. 46 70
[Over 100 to 150 mm] [315] [485]
Over 4 in. 46 70
[Over 100 mm] [315] [485]
3 Quenched and tempered 2 ⁄2 in. and under [65 mm and under] 55 80
[380] [550]
Over 2 ⁄2 to 4 in. 50 75
[Over 65 to 100 mm] [345] [515]
Over 4 to 6 in. 40 70
[Over 100 to 150 mm] [275] [485]
Over 4 in. 40 70
[Over 100 mm] [275] [485]
1.3 The maximum thickness of plates furnished under this specification is 4 in. [100 mm] for Class 1 and 6 in. [150 mm] for
Class 2 and Class 3. is limited only by the capacity of the material to meet the specified mechanical property requirements.
1.4 The values stated in either inch-pound units or SI units are to be regarded separately as standard. Within the text, the SI units
are shown in brackets. The values stated in each system are not exact equivalents; therefore, each system is to be used
independently of the other without combining values in any way.
1.5 This international standard was developed in accordance with internationally recognized principles on standardization
established in the Decision on Principles for the Development of International Standards, Guides and Recommendations issued
by the World Trade Organization Technical Barriers to Trade (TBT) Committee.
This specification is under the jurisdiction of ASTM Committee A01 on Steel, Stainless Steel and Related Alloys and is the direct responsibility of Subcommittee A01.11
on Steel Plates for Boilers and Pressure Vessels.
Current edition approved March 1, 2019May 1, 2020. Published April 2019May 2020. Originally approved in 1965. Last previous edition approved in 20132019 as
A537/A537M – 13.A537/A537M – 13 (2019). DOI: 10.1520/A0537_A0537M-13R19.10.1520/A0537_A0537M-20.
For ASME Boiler and Pressure Vessel Code applications, see related Specification SA-537/SA-537M in Section II of that Code.
*A Summary of Changes section appears at the end of this standard
Copyright © ASTM International, 100 Barr Harbor Drive, PO Box C700, West Conshohocken, PA 19428-2959. United States
A537/A537M − 20
2. Referenced Documents
2.1 ASTM Standards:
A20/A20M Specification for General Requirements for Steel Plates for Pressure Vessels
A435/A435M Specification for Straight-Beam Ultrasonic Examination of Steel Plates
A577/A577M Specification for Ultrasonic Angle-Beam Examination of Steel Plates
A578/A578M Specification for Straight-Beam Ultrasonic Examination of Rolled Steel Plates for Special Applications
3. General Requirements and Ordering Information
3.1 Plates furnished supplied to this material specification shall conform to Specification A20/A20M. These requirements
outline the testing and retesting methods and procedures; permissible variations in dimensions; and mass, quality, and repair of
defects, marking, loading, and ordering information.
3.2 In addition to the basic requirements of this specification, certain supplementary requirements are available when additional
control, testing, or examination is required to meet end use requirements. The purchaser is referred to the listed supplementary
requirements in this specification and to the detailed requirements in Specification A20/A20M.
3.3 If the requirements of this specification are in conflict with the requirements of Specification A20/A20M, the requirements
of this specification shall prevail.
4. Manufacture
4.1 Steelmaking Practice—The steel shall be killed and conform to the fine austenitic grain size requirement of Specification
A20/A20M.
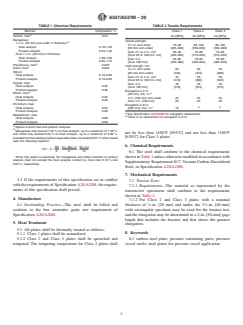
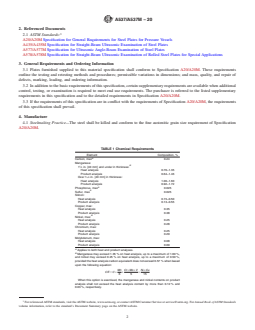
TABLE 1 Chemical Requirements
Element Composition, %
A
Carbon, max 0.24
Manganese:
B
1 ⁄2 in. [40 mm] and under in thickness:
Heat analysis 0.70–1.35
Product analysis 0.64–1.46
Over 1 ⁄2 in. [40 mm] in thickness:
Heat analysis 1.00–1.60
Product analysis 0.92–1.72
A
Phosphorus, max 0.025
A
Sulfur, max 0.025
Silicon:
Heat analysis 0.15–0.50
Product analysis 0.13–0.55
Copper, max:
Heat analysis 0.35
Product analysis 0.38
B
Nickel, max:
Heat analysis 0.25
Product analysis 0.28
Chromium, max:
Heat analysis 0.25
Product analysis 0.29
Molybdenum, max:
Heat analysis 0.08
Product analysis 0.09
A
Applies to both heat and product analyses.
B
Manganese may exceed 1.35 % on heat analysis, up to a maximum of 1.60 %,
and nickel may exceed 0.25 % on heat analysis, up to a maximum of 0.50 %,
provided
...



Questions, Comments and Discussion
Ask us and Technical Secretary will try to provide an answer. You can facilitate discussion about the standard in here.
Loading comments...