ASTM D2843-16
(Test Method)Standard Test Method for Density of Smoke from the Burning or Decomposition of Plastics
Standard Test Method for Density of Smoke from the Burning or Decomposition of Plastics
SIGNIFICANCE AND USE
5.1 Tests made on a material under conditions herein prescribed are of considerable value in comparing the relative smoke obscuration characteristics of plastics.
5.2 This test method serves to determine the extent to which plastic materials are likely to smoke under conditions of active burning and decomposition in the presence of flame.
Note 2: One study4 suggested that visual and instrumental observations from this test compare well with the visual observations of the smoke generated by plastic materials when added to a freely burning large outdoor fire.
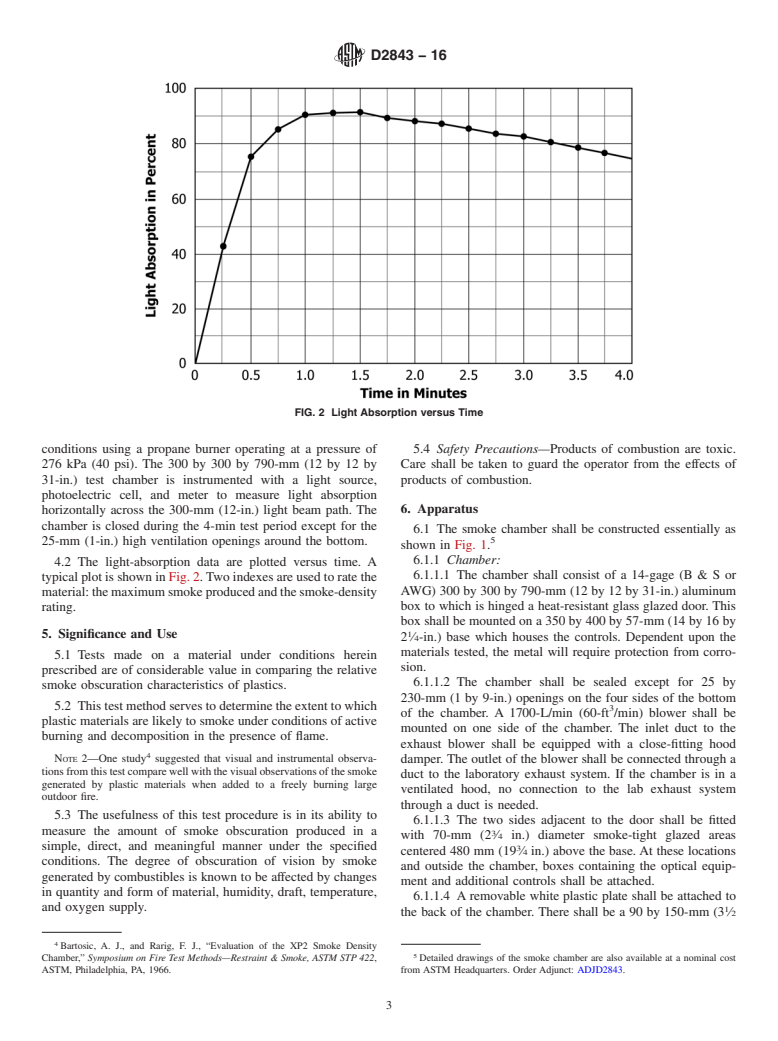
5.3 The usefulness of this test procedure is in its ability to measure the amount of smoke obscuration produced in a simple, direct, and meaningful manner under the specified conditions. The degree of obscuration of vision by smoke generated by combustibles is known to be affected by changes in quantity and form of material, humidity, draft, temperature, and oxygen supply.
5.4 Safety Precautions—Products of combustion are toxic. Care shall be taken to guard the operator from the effects of products of combustion.
SCOPE
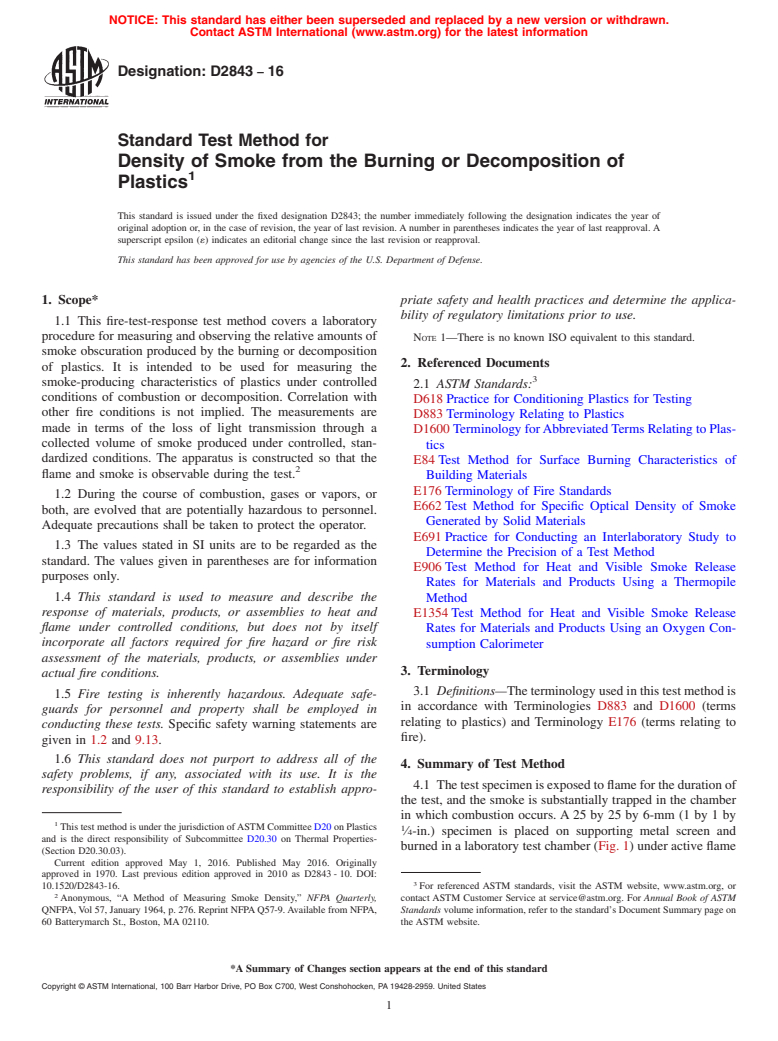
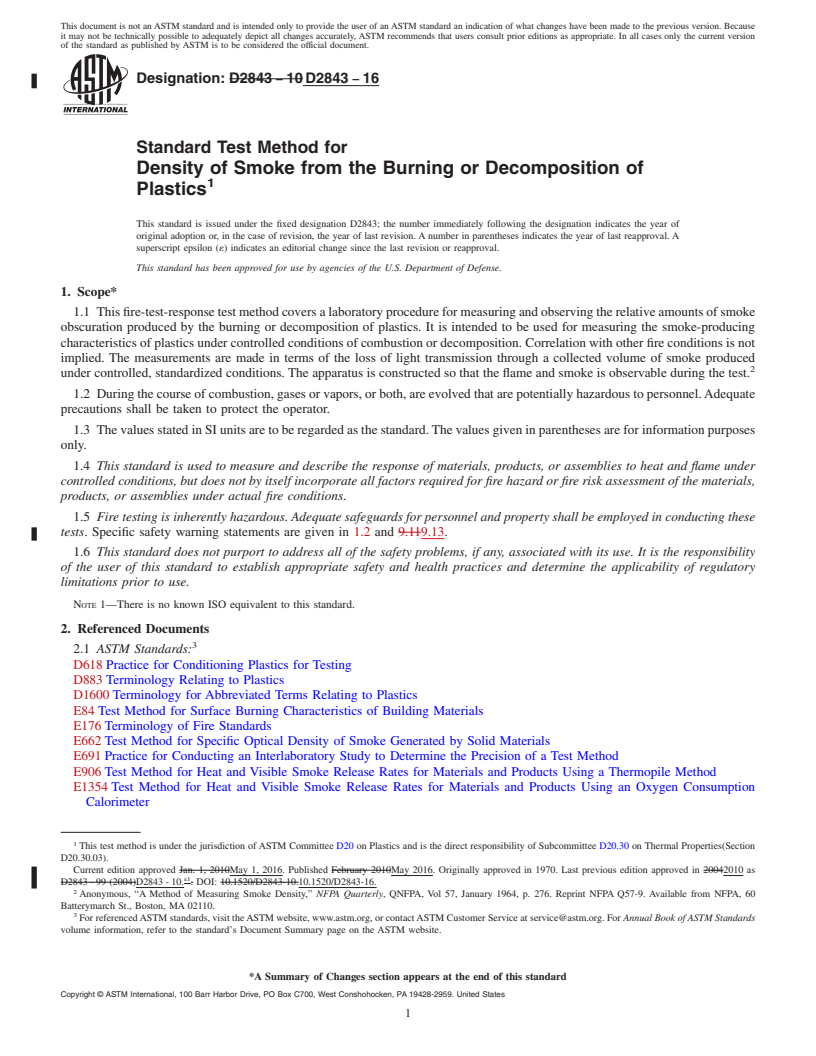
1.1 This fire-test-response test method covers a laboratory procedure for measuring and observing the relative amounts of smoke obscuration produced by the burning or decomposition of plastics. It is intended to be used for measuring the smoke-producing characteristics of plastics under controlled conditions of combustion or decomposition. Correlation with other fire conditions is not implied. The measurements are made in terms of the loss of light transmission through a collected volume of smoke produced under controlled, standardized conditions. The apparatus is constructed so that the flame and smoke is observable during the test.2
1.2 During the course of combustion, gases or vapors, or both, are evolved that are potentially hazardous to personnel. Adequate precautions shall be taken to protect the operator.
1.3 The values stated in SI units are to be regarded as the standard. The values given in parentheses are for information purposes only.
1.4 This standard is used to measure and describe the response of materials, products, or assemblies to heat and flame under controlled conditions, but does not by itself incorporate all factors required for fire hazard or fire risk assessment of the materials, products, or assemblies under actual fire conditions.
1.5 Fire testing is inherently hazardous. Adequate safeguards for personnel and property shall be employed in conducting these tests. Specific safety warning statements are given in 1.2 and 9.13.
1.6 This standard does not purport to address all of the safety problems, if any, associated with its use. It is the responsibility of the user of this standard to establish appropriate safety and health practices and determine the applicability of regulatory limitations prior to use.
Note 1: There is no known ISO equivalent to this standard.
General Information
Relations
Buy Standard
Standards Content (Sample)
NOTICE: This standard has either been superseded and replaced by a new version or withdrawn.
Contact ASTM International (www.astm.org) for the latest information
Designation: D2843 − 16
Standard Test Method for
Density of Smoke from the Burning or Decomposition of
1
Plastics
This standard is issued under the fixed designation D2843; the number immediately following the designation indicates the year of
original adoption or, in the case of revision, the year of last revision. A number in parentheses indicates the year of last reapproval. A
superscript epsilon (´) indicates an editorial change since the last revision or reapproval.
This standard has been approved for use by agencies of the U.S. Department of Defense.
1. Scope* priate safety and health practices and determine the applica-
bility of regulatory limitations prior to use.
1.1 This fire-test-response test method covers a laboratory
procedure for measuring and observing the relative amounts of
NOTE 1—There is no known ISO equivalent to this standard.
smoke obscuration produced by the burning or decomposition
2. Referenced Documents
of plastics. It is intended to be used for measuring the
3
smoke-producing characteristics of plastics under controlled
2.1 ASTM Standards:
conditions of combustion or decomposition. Correlation with
D618 Practice for Conditioning Plastics for Testing
other fire conditions is not implied. The measurements are
D883 Terminology Relating to Plastics
made in terms of the loss of light transmission through a
D1600 Terminology forAbbreviatedTerms Relating to Plas-
collected volume of smoke produced under controlled, stan-
tics
dardized conditions. The apparatus is constructed so that the
E84 Test Method for Surface Burning Characteristics of
2
flame and smoke is observable during the test.
Building Materials
E176 Terminology of Fire Standards
1.2 During the course of combustion, gases or vapors, or
E662 Test Method for Specific Optical Density of Smoke
both, are evolved that are potentially hazardous to personnel.
Generated by Solid Materials
Adequate precautions shall be taken to protect the operator.
E691 Practice for Conducting an Interlaboratory Study to
1.3 The values stated in SI units are to be regarded as the
Determine the Precision of a Test Method
standard. The values given in parentheses are for information
E906 Test Method for Heat and Visible Smoke Release
purposes only.
Rates for Materials and Products Using a Thermopile
1.4 This standard is used to measure and describe the
Method
response of materials, products, or assemblies to heat and
E1354 Test Method for Heat and Visible Smoke Release
flame under controlled conditions, but does not by itself
Rates for Materials and Products Using an Oxygen Con-
incorporate all factors required for fire hazard or fire risk
sumption Calorimeter
assessment of the materials, products, or assemblies under
3. Terminology
actual fire conditions.
3.1 Definitions—Theterminologyusedinthistestmethodis
1.5 Fire testing is inherently hazardous. Adequate safe-
in accordance with Terminologies D883 and D1600 (terms
guards for personnel and property shall be employed in
relating to plastics) and Terminology E176 (terms relating to
conducting these tests. Specific safety warning statements are
fire).
given in 1.2 and 9.13.
1.6 This standard does not purport to address all of the
4. Summary of Test Method
safety problems, if any, associated with its use. It is the
4.1 Thetestspecimenisexposedtoflameforthedurationof
responsibility of the user of this standard to establish appro-
the test, and the smoke is substantially trapped in the chamber
in which combustion occurs. A 25 by 25 by 6-mm (1 by 1 by
1
This test method is under the jurisdiction ofASTM Committee D20 on Plastics
1
⁄4-in.) specimen is placed on supporting metal screen and
and is the direct responsibility of Subcommittee D20.30 on Thermal Properties-
burned in a laboratory test chamber (Fig. 1) under active flame
(Section D20.30.03).
Current edition approved May 1, 2016. Published May 2016. Originally
approved in 1970. Last previous edition approved in 2010 as D2843 - 10. DOI:
3
10.1520/D2843-16. For referenced ASTM standards, visit the ASTM website, www.astm.org, or
2
Anonymous, “A Method of Measuring Smoke Density,” NFPA Quarterly, contact ASTM Customer Service at service@astm.org. For Annual Book of ASTM
QNFPA,Vol 57, January 1964, p. 276. Reprint NFPAQ57-9.Available from NFPA, Standards volume information, refer to the standard’s Document Summary page on
60 Batterymarch St., Boston, MA 02110. the ASTM website.
*A Summary of Changes section appears at the end of this standard
Copyright © ASTM International, 100 Barr Harbor Drive, PO Box C700, West Conshohocken, PA 19428-2959. United States
1
---------------------- Page: 1 ----------------------
D2843 − 16
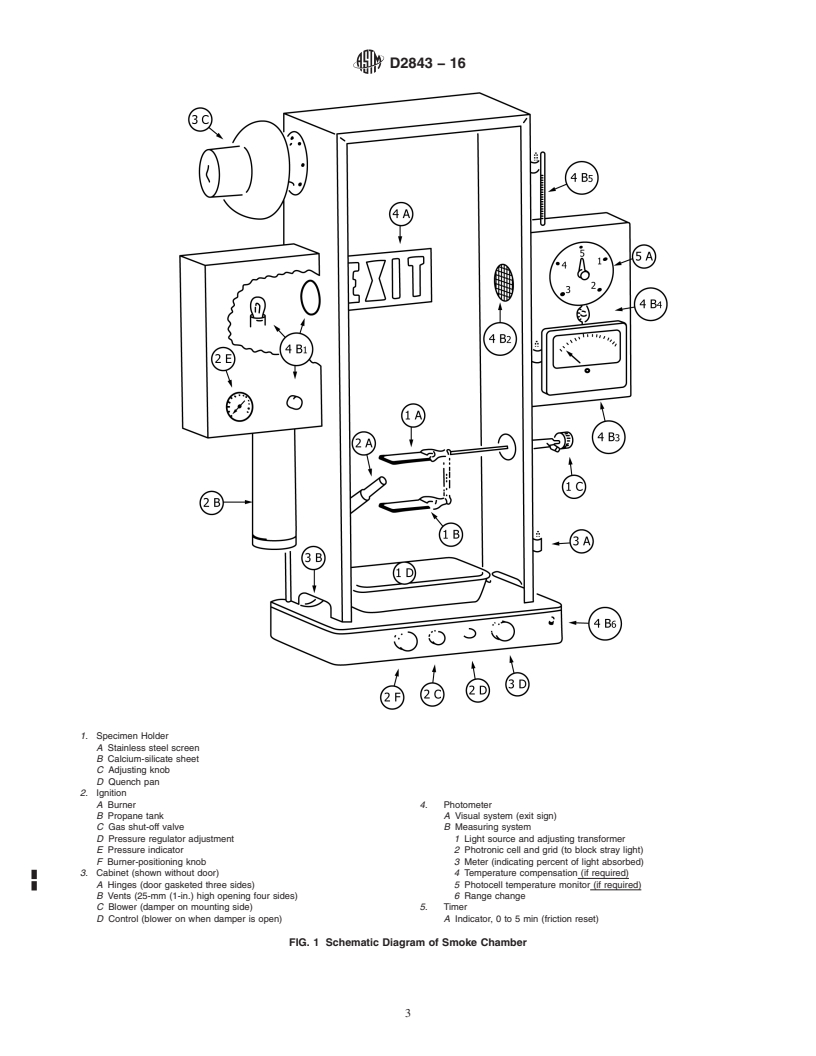
1. Specimen Holder
A Stainless steel screen
B Calcium-silicate sheet
C Adjusting knob
D Quench pan
2. Ignition
A Burner 4. Photometer
B Propane tank A Visual system (exit sign)
C Gas shu
...
This document is not an ASTM standard and is intended only to provide the user of an ASTM standard an indication of what changes have been made to the previous version. Because
it may not be technically possible to adequately depict all changes accurately, ASTM recommends that users consult prior editions as appropriate. In all cases only the current version
of the standard as published by ASTM is to be considered the official document.
Designation: D2843 − 10 D2843 − 16
Standard Test Method for
Density of Smoke from the Burning or Decomposition of
1
Plastics
This standard is issued under the fixed designation D2843; the number immediately following the designation indicates the year of
original adoption or, in the case of revision, the year of last revision. A number in parentheses indicates the year of last reapproval. A
superscript epsilon (´) indicates an editorial change since the last revision or reapproval.
This standard has been approved for use by agencies of the U.S. Department of Defense.
1. Scope*
1.1 This fire-test-response test method covers a laboratory procedure for measuring and observing the relative amounts of smoke
obscuration produced by the burning or decomposition of plastics. It is intended to be used for measuring the smoke-producing
characteristics of plastics under controlled conditions of combustion or decomposition. Correlation with other fire conditions is not
implied. The measurements are made in terms of the loss of light transmission through a collected volume of smoke produced
2
under controlled, standardized conditions. The apparatus is constructed so that the flame and smoke is observable during the test.
1.2 During the course of combustion, gases or vapors, or both, are evolved that are potentially hazardous to personnel. Adequate
precautions shall be taken to protect the operator.
1.3 The values stated in SI units are to be regarded as the standard. The values given in parentheses are for information purposes
only.
1.4 This standard is used to measure and describe the response of materials, products, or assemblies to heat and flame under
controlled conditions, but does not by itself incorporate all factors required for fire hazard or fire risk assessment of the materials,
products, or assemblies under actual fire conditions.
1.5 Fire testing is inherently hazardous. Adequate safeguards for personnel and property shall be employed in conducting these
tests. Specific safety warning statements are given in 1.2 and 9.119.13.
1.6 This standard does not purport to address all of the safety problems, if any, associated with its use. It is the responsibility
of the user of this standard to establish appropriate safety and health practices and determine the applicability of regulatory
limitations prior to use.
NOTE 1—There is no known ISO equivalent to this standard.
2. Referenced Documents
3
2.1 ASTM Standards:
D618 Practice for Conditioning Plastics for Testing
D883 Terminology Relating to Plastics
D1600 Terminology for Abbreviated Terms Relating to Plastics
E84 Test Method for Surface Burning Characteristics of Building Materials
E176 Terminology of Fire Standards
E662 Test Method for Specific Optical Density of Smoke Generated by Solid Materials
E691 Practice for Conducting an Interlaboratory Study to Determine the Precision of a Test Method
E906 Test Method for Heat and Visible Smoke Release Rates for Materials and Products Using a Thermopile Method
E1354 Test Method for Heat and Visible Smoke Release Rates for Materials and Products Using an Oxygen Consumption
Calorimeter
1
This test method is under the jurisdiction of ASTM Committee D20 on Plastics and is the direct responsibility of Subcommittee D20.30 on Thermal Properties(Section
D20.30.03).
Current edition approved Jan. 1, 2010May 1, 2016. Published February 2010May 2016. Originally approved in 1970. Last previous edition approved in 20042010 as
ε1
D2843 - 99 (2004)D2843 - 10. . DOI: 10.1520/D2843-10.10.1520/D2843-16.
2
Anonymous, “A Method of Measuring Smoke Density,” NFPA Quarterly, QNFPA, Vol 57, January 1964, p. 276. Reprint NFPA Q57-9. Available from NFPA, 60
Batterymarch St., Boston, MA 02110.
3
For referenced ASTM standards, visit the ASTM website, www.astm.org, or contact ASTM Customer Service at service@astm.org. For Annual Book of ASTM Standards
volume information, refer to the standard’s Document Summary page on the ASTM website.
*A Summary of Changes section appears at the end of this standard
Copyright © ASTM International, 100 Barr Harbor Drive, PO Box C700, West Conshohocken, PA 19428-2959. United States
1
---------------------- Page: 1 ----------------------
D2843 − 16
3. Terminology
3.1 Definitions—The terminology used in this test method is in accordance with Terminologies D883 and D1600 (terms relating
to plastics) and Terminology E176 (terms relating to fire).
4. Summary of Test Method
4.1 The test specimen is exposed to flame for the duration of the test, and the smoke is substantially trapped in the cham
...


Questions, Comments and Discussion
Ask us and Technical Secretary will try to provide an answer. You can facilitate discussion about the standard in here.