ASTM E831-19
(Test Method)Standard Test Method for Linear Thermal Expansion of Solid Materials by Thermomechanical Analysis
Standard Test Method for Linear Thermal Expansion of Solid Materials by Thermomechanical Analysis
SIGNIFICANCE AND USE
5.1 Coefficients of linear thermal expansion are used, for example, for design purposes and to determine if failure by thermal stress may occur when a solid body composed of two different materials is subjected to temperature variations.
5.2 This test method is comparable to Test Method D3386 for testing electrical insulation materials, but it covers a more general group of solid materials and it defines test conditions more specifically. This test method uses a smaller specimen and substantially different apparatus than Test Methods E228 and D696.
5.3 This test method may be used in research, specification acceptance, regulatory compliance, and quality assurance.
SCOPE
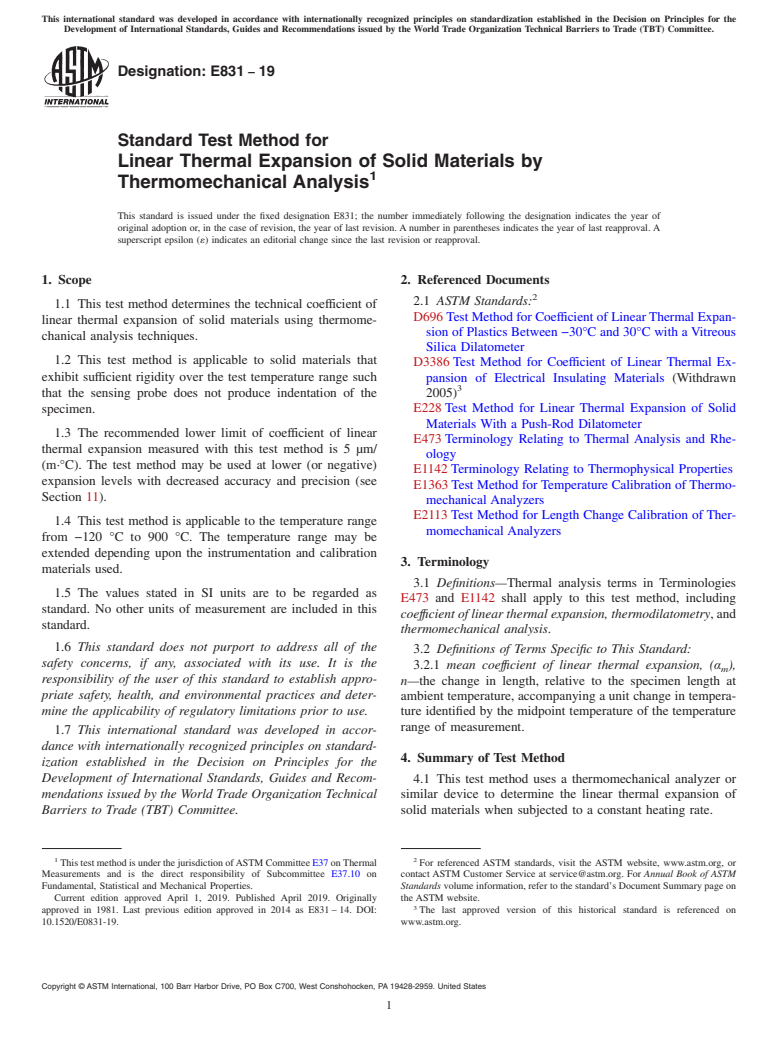
1.1 This test method determines the technical coefficient of linear thermal expansion of solid materials using thermomechanical analysis techniques.
1.2 This test method is applicable to solid materials that exhibit sufficient rigidity over the test temperature range such that the sensing probe does not produce indentation of the specimen.
1.3 The recommended lower limit of coefficient of linear thermal expansion measured with this test method is 5 μm/(m·°C). The test method may be used at lower (or negative) expansion levels with decreased accuracy and precision (see Section 11).
1.4 This test method is applicable to the temperature range from −120 °C to 900 °C. The temperature range may be extended depending upon the instrumentation and calibration materials used.
1.5 The values stated in SI units are to be regarded as standard. No other units of measurement are included in this standard.
1.6 This standard does not purport to address all of the safety concerns, if any, associated with its use. It is the responsibility of the user of this standard to establish appropriate safety, health, and environmental practices and determine the applicability of regulatory limitations prior to use.
1.7 This international standard was developed in accordance with internationally recognized principles on standardization established in the Decision on Principles for the Development of International Standards, Guides and Recommendations issued by the World Trade Organization Technical Barriers to Trade (TBT) Committee.
General Information
Relations
Buy Standard
Standards Content (Sample)
This international standard was developed in accordance with internationally recognized principles on standardization established in the Decision on Principles for the
Development of International Standards, Guides and Recommendations issued by the World Trade Organization Technical Barriers to Trade (TBT) Committee.
Designation: E831 − 19
Standard Test Method for
Linear Thermal Expansion of Solid Materials by
Thermomechanical Analysis
This standard is issued under the fixed designation E831; the number immediately following the designation indicates the year of
original adoption or, in the case of revision, the year of last revision.Anumber in parentheses indicates the year of last reapproval.A
superscript epsilon (´) indicates an editorial change since the last revision or reapproval.
1. Scope 2. Referenced Documents
2.1 ASTM Standards:
1.1 This test method determines the technical coefficient of
D696TestMethodforCoefficientofLinearThermalExpan-
linear thermal expansion of solid materials using thermome-
sion of Plastics Between −30°C and 30°C with a Vitreous
chanical analysis techniques.
Silica Dilatometer
1.2 This test method is applicable to solid materials that
D3386Test Method for Coefficient of Linear Thermal Ex-
exhibit sufficient rigidity over the test temperature range such
pansion of Electrical Insulating Materials (Withdrawn
that the sensing probe does not produce indentation of the
2005)
specimen. E228Test Method for Linear Thermal Expansion of Solid
Materials With a Push-Rod Dilatometer
1.3 The recommended lower limit of coefficient of linear
E473Terminology Relating to Thermal Analysis and Rhe-
thermal expansion measured with this test method is 5 µm/
ology
(m·°C). The test method may be used at lower (or negative)
E1142Terminology Relating to Thermophysical Properties
expansion levels with decreased accuracy and precision (see
E1363Test Method forTemperature Calibration ofThermo-
Section 11).
mechanical Analyzers
E2113Test Method for Length Change Calibration of Ther-
1.4 This test method is applicable to the temperature range
momechanical Analyzers
from −120 °C to 900 °C. The temperature range may be
extended depending upon the instrumentation and calibration
3. Terminology
materials used.
3.1 Definitions—Thermal analysis terms in Terminologies
1.5 The values stated in SI units are to be regarded as
E473 and E1142 shall apply to this test method, including
standard. No other units of measurement are included in this
coeffıcient of linear thermal expansion, thermodilatometry,and
standard.
thermomechanical analysis.
1.6 This standard does not purport to address all of the
3.2 Definitions of Terms Specific to This Standard:
safety concerns, if any, associated with its use. It is the
3.2.1 mean coeffıcient of linear thermal expansion, (α ),
m
responsibility of the user of this standard to establish appro-
n—the change in length, relative to the specimen length at
priate safety, health, and environmental practices and deter- ambient temperature, accompanying a unit change in tempera-
mine the applicability of regulatory limitations prior to use. ture identified by the midpoint temperature of the temperature
range of measurement.
1.7 This international standard was developed in accor-
dance with internationally recognized principles on standard-
4. Summary of Test Method
ization established in the Decision on Principles for the
Development of International Standards, Guides and Recom-
4.1 This test method uses a thermomechanical analyzer or
mendations issued by the World Trade Organization Technical
similar device to determine the linear thermal expansion of
Barriers to Trade (TBT) Committee. solid materials when subjected to a constant heating rate.
1 2
ThistestmethodisunderthejurisdictionofASTMCommitteeE37onThermal For referenced ASTM standards, visit the ASTM website, www.astm.org, or
Measurements and is the direct responsibility of Subcommittee E37.10 on contact ASTM Customer Service at service@astm.org. For Annual Book of ASTM
Fundamental, Statistical and Mechanical Properties. Standards volume information, refer to the standard’s Document Summary page on
Current edition approved April 1, 2019. Published April 2019. Originally the ASTM website.
approved in 1981. Last previous edition approved in 2014 as E831–14. DOI: The last approved version of this historical standard is referenced on
10.1520/E0831-19. www.astm.org.
Copyright © ASTM International, 100 Barr Harbor Drive, PO Box C700, West Conshohocken, PA 19428-2959. United States
E831 − 19
4.2 The change of the specimen length is electronically signals, or both. The minimum output signals required for
recorded as a function of temperature.The coefficient of linear thermomechanical analysis are a change in linear dimension,
thermal expansion can be calculated from these recorded data. temperature and time.
6.2 Cooling Capability, to sustain a subambient specimen
5. Significance and Use
temperature(ifsubambientmeasurementsaretobemade)orto
5.1 Coefficients of linear thermal expansion are used, for
hasten cool down of the specimen from elevated temperatures.
example, for design purposes and to determine if failure by
6.3 Micrometer, or other length-measuring device with a
thermal stress may occur when a solid body composed of two
range of up to 10 mm to determine specimen dimensions to
different materials is subjected to temperature variations.
within 625 µm.
5.2 This test method is comparable to Test Method D3386
for testing electrical insulation materials, but it covers a more
7. Test Specimens
general group of solid materials and it defines test conditions
7.1 Specimens shall be between 2 mm and 10 mm in length
more specifically. This test method uses a smaller specimen
and have flat and parallel ends to within 625 µm. Lateral
and substantially different apparatus than Test Methods E228
dimensions shall not exceed 10 mm.
and D696.
NOTE 2—Specimens of other dimensions may be used but dimensions
5.3 This test method may be used in research, specification
shall be reported.
acceptance, regulatory compliance, and quality assurance.
NOTE 3—It has been found with some materials that this level of
flatness and parallelness cannot be attained. Specimens that do not meet
6. Apparatus
these requirements may result in increased imprecision.
6.1 Thermomechanical Analyzers (TMA)—The essential in-
7.2 The specimens are ordinarily measured as received.
strumentation required providing minimum thermomechanical
Where some heat or mechanical treatment is applied to the
analytical or thermodilatometric capability for this test method
specimen prior to test, this should be noted in the report.
includes:
NOTE 4—Some materials, particularly composites, may require heat
6.1.1 Rigid Specimen Holder, of inert, low coefficient of
treatment to condition the specimen prior to test to relieve stresses or
expansion material (≤0.5 µm/(m·°C)) to center the specimen in
distortions. Such heat treatment must be included in the report.
the furnace and to fix the specimen to mechanical ground.
6.1.2 Rigid Expansion Probe, of inert, low coefficient of 8. Calibration
expansion material (≤0.5 µm/(m·°C)) that contacts the speci-
8.1 Prepare the instrument for operation according to the
men with an applied compressive force.
procedures in the manufacturer’s operation manual.
6.1.3 Sensing Element, linear over a minimum range of 2
8.2 Calibrate the temperature signal using Test Method
mm to measure the displacement of the rigid expansion probe
E1363.
to within 650 nm resulting from changes in length of the
specimen. 8.3 Calibrate the length change signal using Test Method
6.1.4 Weight or Force Transducer, to generate a constant E2113 at the same heating rate as that to be used for the test
forceof1mNto100mN(0.1gto10g)thatisappliedthrough specimens. The observed expansion must be corrected for the
the rigid expansion probe to the specimen. differenceinexpansionbetweenthespecimenholderandprobe
6.1.5 Furnace, capable of providing uniform controlled obtainedfromablankruninwhichnosampleoraspecimenof
the material of construction of the probe is run (see 10.1).
heating (cooling) of a specimen to a constant temperature or at
a constant rate between 2 °C/min and 10 °C/min within the
9. Procedure
applicable temperatures range of between –150 °C and 1000
°C.
9.1 Measure the initial specimen length in the direction of
6.1.6 Temperature Controller, capable of executing a spe-
the expansion test to 625 µm at 20 °C to 25 °C.
cific temperature program by operating the furnace between
NOTE 5—Direct readout of zero position and specimen length using the
selected temperature limits at a rate of temperature change of
analyzersensingelement,whereavailable,withasufficientrangehasbeen
2°C/minto10°C/minconstanttowithin 60.1°C/minoratan
found to be an accurate means of length determination.
isothermal temperature constant to 60.5 °C.
9.2 Place the specimen in the specimen holder under the
6.1.7 Temperature Sensor,thatcanbeattachedto,incontact
probe. Place the specimen temperature sensor in contact with
with, or reproducibly positioned in close proximity to the
the specimen or as near to the specimen as possible.
specimen capable of indicating temperature to 60.5 °C.
9.3 Move the furnace to enclose the specimen holder. If
6.1.8 A means of sustaining an environment around the
measurements at subambient temperature are to be made, cool
specimen of inert gas at a purge gas rate of 10 mL/min to 50
the specimen to at least 20 °C below the lowest temperature of
mL/min.
interest. The refrigerant used for cooling shall not come into
NOTE 1—Typically, greater than 99% pure nitrogen, argon, or helium
direct contact with the specimen.
is used when oxidation in air is a concern. Unless effects of moisture are
to be studied, use of dry purge gas is recommended and is essential for
9.4 Apply an appropriate load force to the sensi
...
This document is not an ASTM standard and is intended only to provide the user of an ASTM standard an indication of what changes have been made to the previous version. Because
it may not be technically possible to adequately depict all changes accurately, ASTM recommends that users consult prior editions as appropriate. In all cases only the current version
of the standard as published by ASTM is to be considered the official document.
Designation: E831 − 14 E831 − 19
Standard Test Method for
Linear Thermal Expansion of Solid Materials by
Thermomechanical Analysis
This standard is issued under the fixed designation E831; the number immediately following the designation indicates the year of
original adoption or, in the case of revision, the year of last revision. A number in parentheses indicates the year of last reapproval. A
superscript epsilon (´) indicates an editorial change since the last revision or reapproval.
1. Scope
1.1 This test method determines the technical coefficient of linear thermal expansion of solid materials using thermomechanical
analysis techniques.
1.2 This test method is applicable to solid materials that exhibit sufficient rigidity over the test temperature range such that the
sensing probe does not produce indentation of the specimen.
1.3 The recommended lower limit of coefficient of linear thermal expansion measured with this test method is 5 μm/(m·°C). The
test method may be used at lower (or negative) expansion levels with decreased accuracy and precision (see Section 11).
1.4 This test method is applicable to the temperature range from −120 °C to 900°C. 900 °C. The temperature range may be
extended depending upon the instrumentation and calibration materials used.
1.5 The values stated in SI units are to be regarded as standard. No other units of measurement are included in this standard.
1.6 This test method is related to ISO 11359-2 but is significantly different in technical detail.
1.6 This standard does not purport to address all of the safety problems,concerns, if any, associated with its use. It is the
responsibility of the user of this standard to establish appropriate safety safety, health, and healthenvironmental practices and
determine the applicability of regulatory limitations prior to use.
1.7 This international standard was developed in accordance with internationally recognized principles on standardization
established in the Decision on Principles for the Development of International Standards, Guides and Recommendations issued
by the World Trade Organization Technical Barriers to Trade (TBT) Committee.
2. Referenced Documents
2.1 ASTM Standards:
D696 Test Method for Coefficient of Linear Thermal Expansion of Plastics Between −30°C and 30°C with a Vitreous Silica
Dilatometer
D3386 Test Method for Coefficient of Linear Thermal Expansion of Electrical Insulating Materials (Withdrawn 2005)
E228 Test Method for Linear Thermal Expansion of Solid Materials With a Push-Rod Dilatometer
E473 Terminology Relating to Thermal Analysis and Rheology
E1142 Terminology Relating to Thermophysical Properties
E1363 Test Method for Temperature Calibration of Thermomechanical Analyzers
E2113 Test Method for Length Change Calibration of Thermomechanical Analyzers
2.2 ISO Standards:
ISO 11359-2 Plastics—Thermomechanical Analysis (TMA)—Part 2: Determination of Coefficient of Linear Thermal Expansion
and Glass Transition Temperature
3. Terminology
3.1 Definitions—Thermal analysis terms in Terminologies E473 and E1142 shall apply to this test method, including coeffıcient
of linear thermal expansion, thermodilatometry, and thermomechanical analysis.
This test method is under the jurisdiction of ASTM Committee E37 on Thermal Measurements and is the direct responsibility of Subcommittee E37.10 on Fundamental,
Statistical and Mechanical Properties.
Current edition approved Aug. 1, 2014April 1, 2019. Published August 2014April 2019. Originally approved in 1981. Last previous edition approved in 20132014 as
E831 – 13.E831 – 14. DOI: 10.1520/E0831-14.10.1520/E0831-19.
For referenced ASTM standards, visit the ASTM website, www.astm.org, or contact ASTM Customer Service at service@astm.org. For Annual Book of ASTM Standards
volume information, refer to the standard’s Document Summary page on the ASTM website.
The last approved version of this historical standard is referenced on www.astm.org.
Copyright © ASTM International, 100 Barr Harbor Drive, PO Box C700, West Conshohocken, PA 19428-2959. United States
E831 − 19
3.2 Definitions of Terms Specific to This Standard:
3.2.1 mean coeffıcient of linear thermal expansion, (α )—), n—the change in length, relative to the specimen length at ambient
m
temperature, accompanying a unit change in temperature identified by the midpoint temperature of the temperature range of
measurement.
4. Summary of Test Method
4.1 This test method uses a thermomechanical analyzer or similar device to determine the linear thermal expansion of solid
materials when subjected to a constant heating rate.
4.2 The change of the specimen length is electronically recorded as a function of temperature. The coefficient of linear thermal
expansion can be calculated from these recorded data.
5. Significance and Use
5.1 Coefficients of linear thermal expansion are used, for example, for design purposes and to determine if failure by thermal
stress may occur when a solid body composed of two different materials is subjected to temperature variations.
5.2 This test method is comparable to Test Method D3386 for testing electrical insulation materials, but it covers a more general
group of solid materials and it defines test conditions more specifically. This test method uses a smaller specimen and substantially
different apparatus than Test Methods E228 and D696.
5.3 This test method may be used in research, specification acceptance, regulatory compliance, and quality assurance.
6. Apparatus
6.1 Thermomechanical Analyzers (TMA)—The essential instrumentation required providing minimum thermomechanical
analytical or thermodilatometric capability for this test method includes:
6.1.1 Rigid Specimen Holder, of inert, low expansivity coefficient of expansion material (≤0.5 μm/(m·°C)) to center the
specimen in the furnace and to fix the specimen to mechanical ground.
6.1.2 Rigid Expansion Probe, of inert, low expansivity coefficient of expansion material (≤0.5 μm/(m·°C)) that contacts the
specimen with an applied compressive force.
6.1.3 Sensing Element, linear over a minimum range of 2 mm to measure the displacement of the rigid expansion probe to within
650 nm resulting from changes in length of the specimen.
6.1.4 Weight or Force Transducer, to generate a constant force of 1 mN to 100 mmNN (0.1 g to 10 g) that is applied through
the rigid expansion probe to the specimen.
6.1.5 Furnace, capable of providing uniform controlled heating (cooling) of a specimen to a constant temperature or at a
constant rate between 2 °C/min and 10°C/min 10 °C/min within the applicable temperatures range of between –150 °C and
1000°C.1000 °C.
6.1.6 Temperature Controller, capable of executing a specific temperature program by operating the furnace between selected
temperature limits at a rate of temperature change of 2 °C/min to 10°C/min 10 °C/min constant to within 60.1°C/min 60.1 °C/min
or at an isothermal temperature constant to 60.5°C.60.5 °C.
6.1.7 Temperature Sensor, that can be attached to, in contact with, or reproducibly positioned in close proximity to the specimen
capable of indicating temperature to 60.5°C.60.5 °C.
6.1.8 A means of sustaining an environment around the specimen of inert gas at a purge gas rate of 10 mL/min to 50 mL/min.
NOTE 1—Typically, greater than 99 % pure nitrogen, argon, or helium is used when oxidation in air is a concern. Unless effects of moisture are to be
studied, use of dry purge gas is recommended and is essential for operation at subambient temperatures.
6.1.9 Data Collection Device, to provide a means of acquiring, storing, and displaying measured or calculated signals, or both.
The minimum output signals required for thermomechanical analysis are a change in linear dimension, temperature and time.
6.2 Cooling Capability, to sustain a subambient specimen temperature (if subambient measurements are to be made) or to hasten
cool down of the specimen from elevated temperatures.
6.3 Micrometer, or other length-measuring device with a range of up to 10 mm to determine specimen dimensions to within 625
μm.
7. Test Specimens
7.1 Specimens shall be between 2 mm and 10 mm in length and have flat and parallel ends to within 625 μm. Lateral
dimensions shall not exceed 10 mm.
NOTE 2—Specimens of other dimensions may be used but dimensions shall be reported.
NOTE 3—It has been found with some materials that this level of flatness and parallelness cannot be attained. Specimens that do not meet these
requirements may result in increased imprecision.
7.2 The specimens are ordinarily measured as received. Where some heat or mechanical treatment is applied to the specimen
prior to test, this should be noted in the report.
E831 − 19
NOTE 4—Some materials, particularly composites, may require heat treatment to condition the specimen prior to test to relieve stresses or distortions.
Such heat treatment must be included in the report.
8. Calibration
8.1 Prepare the instrument for operation according to the procedures in the manufacturer’s operation manual.
8.2 Calibrate the temperature signal using Test Method E1363.
8.3 Calibrate the length change signal using Test Method E2113 at the same heating rate as that to be used for the test specimens.
The observed expansion must be corrected for the difference in expansion between the specimen holder and probe obtained from
a blank run in which no sample or a specimen of the material of construction of the probe is run (see 10.1).
9. Procedure
9.1 Measure the initial specimen length in the direction of the expansion test to 625 μm at 20 °C to 25°C.25 °C.
NOTE 5—Direct readout of zero position and specimen length using the analyzer sensing element, where available, with a sufficient range has been
found to be an accurate means of length determination.
9.2 Place the specimen in the specimen holder under the probe. Place the specimen temperature sensor in contact with the
specimen or as near to the specimen as possible.
9.3 Move the furnace to enclose the specimen holder. If measurements at subambient temperature are to be made, cool the
specimen to at least 20°C 20 °C below the lowest temperature of interest. The refrigerant used for cooling shall not come into direct
contact with
...
NOTICE: This standard has either been superseded and replaced by a new version or withdrawn.
Contact ASTM International (www.astm.org) for the latest information
Designation: E831 − 19
Standard Test Method for
Linear Thermal Expansion of Solid Materials by
Thermomechanical Analysis
This standard is issued under the fixed designation E831; the number immediately following the designation indicates the year of
original adoption or, in the case of revision, the year of last revision. A number in parentheses indicates the year of last reapproval. A
superscript epsilon (´) indicates an editorial change since the last revision or reapproval.
1. Scope 2. Referenced Documents
2.1 ASTM Standards:
1.1 This test method determines the technical coefficient of
D696 Test Method for Coefficient of Linear Thermal Expan-
linear thermal expansion of solid materials using thermome-
sion of Plastics Between −30°C and 30°C with a Vitreous
chanical analysis techniques.
Silica Dilatometer
1.2 This test method is applicable to solid materials that
D3386 Test Method for Coefficient of Linear Thermal Ex-
exhibit sufficient rigidity over the test temperature range such
pansion of Electrical Insulating Materials (Withdrawn
that the sensing probe does not produce indentation of the 2005)
specimen. E228 Test Method for Linear Thermal Expansion of Solid
Materials With a Push-Rod Dilatometer
1.3 The recommended lower limit of coefficient of linear
E473 Terminology Relating to Thermal Analysis and Rhe-
thermal expansion measured with this test method is 5 µm/
ology
(m·°C). The test method may be used at lower (or negative)
E1142 Terminology Relating to Thermophysical Properties
expansion levels with decreased accuracy and precision (see
E1363 Test Method for Temperature Calibration of Thermo-
Section 11).
mechanical Analyzers
E2113 Test Method for Length Change Calibration of Ther-
1.4 This test method is applicable to the temperature range
momechanical Analyzers
from −120 °C to 900 °C. The temperature range may be
extended depending upon the instrumentation and calibration
3. Terminology
materials used.
3.1 Definitions—Thermal analysis terms in Terminologies
1.5 The values stated in SI units are to be regarded as
E473 and E1142 shall apply to this test method, including
standard. No other units of measurement are included in this
coeffıcient of linear thermal expansion, thermodilatometry, and
standard.
thermomechanical analysis.
1.6 This standard does not purport to address all of the
3.2 Definitions of Terms Specific to This Standard:
safety concerns, if any, associated with its use. It is the
3.2.1 mean coeffıcient of linear thermal expansion, (α ),
m
responsibility of the user of this standard to establish appro-
n—the change in length, relative to the specimen length at
priate safety, health, and environmental practices and deter-
ambient temperature, accompanying a unit change in tempera-
mine the applicability of regulatory limitations prior to use. ture identified by the midpoint temperature of the temperature
range of measurement.
1.7 This international standard was developed in accor-
dance with internationally recognized principles on standard-
4. Summary of Test Method
ization established in the Decision on Principles for the
Development of International Standards, Guides and Recom-
4.1 This test method uses a thermomechanical analyzer or
mendations issued by the World Trade Organization Technical similar device to determine the linear thermal expansion of
Barriers to Trade (TBT) Committee. solid materials when subjected to a constant heating rate.
1 2
This test method is under the jurisdiction of ASTM Committee E37 on Thermal For referenced ASTM standards, visit the ASTM website, www.astm.org, or
Measurements and is the direct responsibility of Subcommittee E37.10 on contact ASTM Customer Service at service@astm.org. For Annual Book of ASTM
Fundamental, Statistical and Mechanical Properties. Standards volume information, refer to the standard’s Document Summary page on
Current edition approved April 1, 2019. Published April 2019. Originally the ASTM website.
approved in 1981. Last previous edition approved in 2014 as E831 – 14. DOI: The last approved version of this historical standard is referenced on
10.1520/E0831-19. www.astm.org.
Copyright © ASTM International, 100 Barr Harbor Drive, PO Box C700, West Conshohocken, PA 19428-2959. United States
E831 − 19
4.2 The change of the specimen length is electronically signals, or both. The minimum output signals required for
recorded as a function of temperature. The coefficient of linear thermomechanical analysis are a change in linear dimension,
thermal expansion can be calculated from these recorded data. temperature and time.
6.2 Cooling Capability, to sustain a subambient specimen
5. Significance and Use
temperature (if subambient measurements are to be made) or to
5.1 Coefficients of linear thermal expansion are used, for
hasten cool down of the specimen from elevated temperatures.
example, for design purposes and to determine if failure by
6.3 Micrometer, or other length-measuring device with a
thermal stress may occur when a solid body composed of two
range of up to 10 mm to determine specimen dimensions to
different materials is subjected to temperature variations.
within 625 µm.
5.2 This test method is comparable to Test Method D3386
for testing electrical insulation materials, but it covers a more
7. Test Specimens
general group of solid materials and it defines test conditions
7.1 Specimens shall be between 2 mm and 10 mm in length
more specifically. This test method uses a smaller specimen
and have flat and parallel ends to within 625 µm. Lateral
and substantially different apparatus than Test Methods E228
dimensions shall not exceed 10 mm.
and D696.
NOTE 2—Specimens of other dimensions may be used but dimensions
5.3 This test method may be used in research, specification
shall be reported.
acceptance, regulatory compliance, and quality assurance.
NOTE 3—It has been found with some materials that this level of
flatness and parallelness cannot be attained. Specimens that do not meet
6. Apparatus
these requirements may result in increased imprecision.
6.1 Thermomechanical Analyzers (TMA)—The essential in-
7.2 The specimens are ordinarily measured as received.
strumentation required providing minimum thermomechanical
Where some heat or mechanical treatment is applied to the
analytical or thermodilatometric capability for this test method
specimen prior to test, this should be noted in the report.
includes:
NOTE 4—Some materials, particularly composites, may require heat
6.1.1 Rigid Specimen Holder, of inert, low coefficient of
treatment to condition the specimen prior to test to relieve stresses or
expansion material (≤0.5 µm/(m·°C)) to center the specimen in
distortions. Such heat treatment must be included in the report.
the furnace and to fix the specimen to mechanical ground.
8. Calibration
6.1.2 Rigid Expansion Probe, of inert, low coefficient of
expansion material (≤0.5 µm/(m·°C)) that contacts the speci-
8.1 Prepare the instrument for operation according to the
men with an applied compressive force.
procedures in the manufacturer’s operation manual.
6.1.3 Sensing Element, linear over a minimum range of 2
8.2 Calibrate the temperature signal using Test Method
mm to measure the displacement of the rigid expansion probe
E1363.
to within 650 nm resulting from changes in length of the
specimen. 8.3 Calibrate the length change signal using Test Method
6.1.4 Weight or Force Transducer, to generate a constant E2113 at the same heating rate as that to be used for the test
force of 1 mN to 100 mN (0.1 g to 10 g) that is applied through specimens. The observed expansion must be corrected for the
the rigid expansion probe to the specimen. difference in expansion between the specimen holder and probe
obtained from a blank run in which no sample or a specimen of
6.1.5 Furnace, capable of providing uniform controlled
heating (cooling) of a specimen to a constant temperature or at the material of construction of the probe is run (see 10.1).
a constant rate between 2 °C/min and 10 °C/min within the
9. Procedure
applicable temperatures range of between –150 °C and 1000
°C.
9.1 Measure the initial specimen length in the direction of
6.1.6 Temperature Controller, capable of executing a spe-
the expansion test to 625 µm at 20 °C to 25 °C.
cific temperature program by operating the furnace between
NOTE 5—Direct readout of zero position and specimen length using the
selected temperature limits at a rate of temperature change of
analyzer sensing element, where available, with a sufficient range has been
2 °C/min to 10 °C/min constant to within 60.1 °C/min or at an
found to be an accurate means of length determination.
isothermal temperature constant to 60.5 °C.
9.2 Place the specimen in the specimen holder under the
6.1.7 Temperature Sensor, that can be attached to, in contact
probe. Place the specimen temperature sensor in contact with
with, or reproducibly positioned in close proximity to the
the specimen or as near to the specimen as possible.
specimen capable of indicating temperature to 60.5 °C.
9.3 Move the furnace to enclose the specimen holder. If
6.1.8 A means of sustaining an environment around the
measurements at subambient temperature are to be made, cool
specimen of inert gas at a purge gas rate of 10 mL/min to 50
the specimen to at least 20 °C below the lowest temperature of
mL/min.
interest. The refrigerant used for cooling shall not come into
NOTE 1—Typically, greater than 99 % pure nitrogen, argon, or helium
direct contact with the specimen.
is used when oxidation in air is a concern. Unless effects of moisture are
to be studied, use of dry purge gas is recommended and is essential for
9.4 Apply an appropriate load force to the sensing probe to
operation at subambient temperatures.
ensure that it is in contact with the specimen. Depending on the
6.1.9
...


Questions, Comments and Discussion
Ask us and Technical Secretary will try to provide an answer. You can facilitate discussion about the standard in here.