ASTM D1044-19
(Test Method)Standard Test Method for Resistance of Transparent Plastics to Surface Abrasion by the Taber Abraser
Standard Test Method for Resistance of Transparent Plastics to Surface Abrasion by the Taber Abraser
SIGNIFICANCE AND USE
4.1 Transparent plastic materials, when used as windows or enclosures, are subject to wiping and cleaning; hence the maintenance of optical quality of a material after abrasion is important. It is the purpose of this test method to provide a means of estimating the resistance of such materials to this type and degree of abrasion.
4.2 Although this test method does not provide fundamental data, it is suitable for grading materials relative to this type of abrasion in a manner which correlates with service.
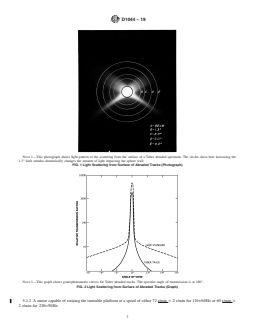
4.3 Comparison of interlaboratory data or the specification of a “haze” value has no significance if the hazemeter requirements given in 5.4 are not used. This is because light diffused from the surface of a Taber track is scattered at a narrow angle (Fig. 1 and Fig. 2) while light diffused internally by a specimen is scattered at a wide angle. In many hazemeters, when a diaphragm is inserted to limit the light beam to the width of the abraded track, the specular beam at the exit port becomes smaller. The dark annulus will then be greater than the 0.023 rad ± 0.002 rad (1.3° ± 0.1°) requirements of Test Method D1003. Since a large percentage of the narrow-angle forward-scattered light will not impinge on the sphere wall, “haze” readings become smaller. For hazemeters that have not been properly adjusted, the magnitude of this reduction is dependent both on the integrating sphere diameter and the reduction of the entrance beam.
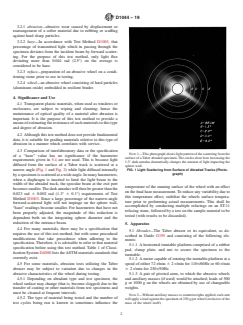
FIG. 1 Light Scattering from Surface of Abraded Tracks (Photograph)
Note 1: This photograph shows light pattern of the scattering from the surface of a Taber abraded specimen. The circles show how increasing the 1.3° dark annulus dramatically changes the amount of light impacting the sphere wall.
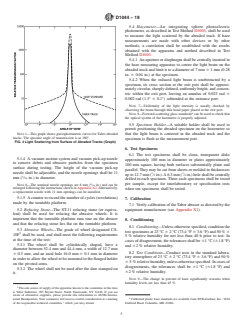
FIG. 2 Light Scattering from Surface of Abraded Tracks (Graph)
Note 1: This graph shows goniophotometric curves for Taber abraded tracks. The specular angle of transmission is at 180°.
4.4 For many materials, there may be a specifi...
SCOPE
1.1 This test method describes a procedure for estimating the resistance of transparent plastics to one kind of surface abrasion by measuring the change in optical properties.
1.2 Abrasive damage is numerically quantified by calculating the difference in haze percentage in accordance with Test Method D1003 between an abraded and unabraded specimen.
1.3 The values stated in SI units are to be regarded as standard. The values given in parentheses are for information only.
Note 1: This test method is equivalent in the measurement of resistance to abrasion of ISO 3537, Section 8 and ISO 15082, Section 11, but is not equivalent in any other measurement or section. This test method is not equivalent to ISO 9352, and results cannot be directly compared between the two methods.
Note 2: This test method is similar to SAE J3097Z26, Test 12.
Note 3: Prior attempts to employ the Taber Abraser for volume loss determinations of various plastics2 have been unsuccessful because of excessively large coefficients of variation attributed to the data. Insufficient agreement among the participating laboratories has rendered the use of volume loss procedure inadvisable as an ASTM test method.
Note 4: For determining the resistance to abrasion of organic coatings by weight loss, reference is made to Test Method D4060, which uses more aggressive CS-10 or CS-17 abrasive wheels.
1.4 This standard does not purport to address all of the safety concerns, if any, associated with its use. It is the responsibility of the user of this standard to establish appropriate safety, health, and environmental practices and determine the applicability of regulatory limitations prior to use.
1.5 This international standard was developed in accordance with internationally recognized principles on standardization established in the Decision on Principles for the Development of International Standards, Guides and Recommendations issued by the Wor...
General Information
- Status
- Published
- Publication Date
- 31-Aug-2019
- Technical Committee
- D20 - Plastics
- Drafting Committee
- D20.10 - Mechanical Properties
Relations
- Replaces
ASTM D1044-13 - Standard Test Method for Resistance of Transparent Plastics to Surface Abrasion - Effective Date
- 01-Sep-2019
- Effective Date
- 01-Feb-2024
- Effective Date
- 01-Nov-2023
- Effective Date
- 01-Apr-2022
- Effective Date
- 01-Jan-2020
- Effective Date
- 01-Aug-2019
- Effective Date
- 15-Apr-2019
- Effective Date
- 01-Feb-2019
- Effective Date
- 01-Dec-2018
- Effective Date
- 01-Nov-2018
- Effective Date
- 01-Oct-2017
- Effective Date
- 01-Oct-2017
- Effective Date
- 15-Aug-2017
- Effective Date
- 15-Nov-2013
- Effective Date
- 15-Nov-2013
Overview
ASTM D1044-19: Standard Test Method for Resistance of Transparent Plastics to Surface Abrasion by the Taber Abraser is a widely used test method developed by ASTM International. This standard provides a procedure for estimating the resistance of transparent plastics (such as acrylic or polycarbonate) to surface abrasion, specifically by assessing changes in the optical property known as haze, after exposure to controlled abrasion with a Taber Abraser.
Maintaining the optical quality of transparent plastics is critical where these materials are used as windows, lenses, or enclosures. Since these surfaces are subjected to routine wiping, cleaning, and exposure to particulate matter, evaluating their abrasion resistance ensures they maintain clarity and functionality over time. ASTM D1044-19 allows manufacturers and product developers to compare materials for abrasion resistance under standardized conditions.
Key Topics
- Resistance to Surface Abrasion: The standard describes how to measure the change in haze percentage of a transparent plastic before and after abrasion, quantifying loss of optical clarity.
- Test Methodology: Utilizes the Taber Abraser, an instrument that subjects the plastic specimen to defined abrasive actions via rotating abrasive wheels and calibrated weights. Transparent specimens are measured both before and after testing using a hazemeter.
- Haze Measurement: Haze is defined as the percentage of transmitted light that deviates by forward scattering as per ASTM D1003, directly correlating to the surface condition after abrasion.
- Significance for Service Life: This method provides a comparative means of grading transparent plastics for applications where clarity must be retained in service.
- Lab Testing and Consistency: Testing includes precise conditioning, calibration, and cleaning steps to ensure reproducibility. The standard emphasizes not handling test surfaces directly and describes proper specimen cleaning.
Applications
ASTM D1044-19 is primarily applied in industries and fields where transparent plastics are used for optical purposes, including:
- Automotive and Aerospace: Evaluating glazing materials for windows, sunroofs, instrument covers, and light lenses.
- Consumer Electronics: Testing plastic covers or display windows for wear resistance.
- Architectural Glazing: Assessing skylights, partitions, and transparent barriers for clarity maintenance.
- Medical Devices: Ensuring clear-view components retain transparency after repeated cleaning and handling.
- Industrial Equipment: Testing viewports, shields, and instrument enclosures exposed to mechanical wear.
Manufacturers, laboratories, and product designers use this standard for material specification, quality control, product improvement, and comparative assessment of different formulations or surface treatments.
Related Standards
ASTM D1044-19 references and correlates with several other important standards in the field of plastics testing and optical property evaluation:
- ASTM D1003 - Test Method for Haze and Luminous Transmittance of Transparent Plastics (used for haze measurement in D1044).
- ASTM D4060 - Test Method for Abrasion Resistance of Organic Coatings by the Taber Abraser.
- ISO 3537 - Road Vehicles-Safety Glazing Materials-Mechanical Tests (measurement of resistance to abrasion).
- ISO 15082 - Road Vehicles-Tests for Rigid Plastic Safety Glazing Materials.
- ANSI/SAE Z26.1 / SAE J3097Z26 - Safety Standard for glazing materials (similar methodology for abrasion resistance).
- ASTM G195 - Guide for Conducting Wear Tests Using a Rotary Platform Abraser.
- ASTM D883 - Terminology Relating to Plastics.
- ASTM E691 - Practice for Conducting an Interlaboratory Study to Determine the Precision of a Test Method.
Practical Value
By following ASTM D1044-19, organizations ensure that transparent plastic components meet durability and clarity requirements for demanding environments. The standard provides a reliable, consistent framework for assessing product quality, addressing customer expectations for visibility and appearance, and supporting regulatory and safety compliance. Integrating this test into product qualification reduces warranty issues and enhances the confidence of end-users in applications where optical performance is critical.
Keywords: ASTM D1044-19, abrasion resistance, transparent plastics, Taber Abraser, haze measurement, optical clarity, plastic windows, surface abrasion test, standards compliance.
Buy Documents
ASTM D1044-19 - Standard Test Method for Resistance of Transparent Plastics to Surface Abrasion by the Taber Abraser
REDLINE ASTM D1044-19 - Standard Test Method for Resistance of Transparent Plastics to Surface Abrasion by the Taber Abraser
Get Certified
Connect with accredited certification bodies for this standard

Smithers Quality Assessments
US management systems and product certification.

DIN CERTCO
DIN Group product certification.
Sponsored listings
Frequently Asked Questions
ASTM D1044-19 is a standard published by ASTM International. Its full title is "Standard Test Method for Resistance of Transparent Plastics to Surface Abrasion by the Taber Abraser". This standard covers: SIGNIFICANCE AND USE 4.1 Transparent plastic materials, when used as windows or enclosures, are subject to wiping and cleaning; hence the maintenance of optical quality of a material after abrasion is important. It is the purpose of this test method to provide a means of estimating the resistance of such materials to this type and degree of abrasion. 4.2 Although this test method does not provide fundamental data, it is suitable for grading materials relative to this type of abrasion in a manner which correlates with service. 4.3 Comparison of interlaboratory data or the specification of a “haze” value has no significance if the hazemeter requirements given in 5.4 are not used. This is because light diffused from the surface of a Taber track is scattered at a narrow angle (Fig. 1 and Fig. 2) while light diffused internally by a specimen is scattered at a wide angle. In many hazemeters, when a diaphragm is inserted to limit the light beam to the width of the abraded track, the specular beam at the exit port becomes smaller. The dark annulus will then be greater than the 0.023 rad ± 0.002 rad (1.3° ± 0.1°) requirements of Test Method D1003. Since a large percentage of the narrow-angle forward-scattered light will not impinge on the sphere wall, “haze” readings become smaller. For hazemeters that have not been properly adjusted, the magnitude of this reduction is dependent both on the integrating sphere diameter and the reduction of the entrance beam. FIG. 1 Light Scattering from Surface of Abraded Tracks (Photograph) Note 1: This photograph shows light pattern of the scattering from the surface of a Taber abraded specimen. The circles show how increasing the 1.3° dark annulus dramatically changes the amount of light impacting the sphere wall. FIG. 2 Light Scattering from Surface of Abraded Tracks (Graph) Note 1: This graph shows goniophotometric curves for Taber abraded tracks. The specular angle of transmission is at 180°. 4.4 For many materials, there may be a specifi... SCOPE 1.1 This test method describes a procedure for estimating the resistance of transparent plastics to one kind of surface abrasion by measuring the change in optical properties. 1.2 Abrasive damage is numerically quantified by calculating the difference in haze percentage in accordance with Test Method D1003 between an abraded and unabraded specimen. 1.3 The values stated in SI units are to be regarded as standard. The values given in parentheses are for information only. Note 1: This test method is equivalent in the measurement of resistance to abrasion of ISO 3537, Section 8 and ISO 15082, Section 11, but is not equivalent in any other measurement or section. This test method is not equivalent to ISO 9352, and results cannot be directly compared between the two methods. Note 2: This test method is similar to SAE J3097Z26, Test 12. Note 3: Prior attempts to employ the Taber Abraser for volume loss determinations of various plastics2 have been unsuccessful because of excessively large coefficients of variation attributed to the data. Insufficient agreement among the participating laboratories has rendered the use of volume loss procedure inadvisable as an ASTM test method. Note 4: For determining the resistance to abrasion of organic coatings by weight loss, reference is made to Test Method D4060, which uses more aggressive CS-10 or CS-17 abrasive wheels. 1.4 This standard does not purport to address all of the safety concerns, if any, associated with its use. It is the responsibility of the user of this standard to establish appropriate safety, health, and environmental practices and determine the applicability of regulatory limitations prior to use. 1.5 This international standard was developed in accordance with internationally recognized principles on standardization established in the Decision on Principles for the Development of International Standards, Guides and Recommendations issued by the Wor...
SIGNIFICANCE AND USE 4.1 Transparent plastic materials, when used as windows or enclosures, are subject to wiping and cleaning; hence the maintenance of optical quality of a material after abrasion is important. It is the purpose of this test method to provide a means of estimating the resistance of such materials to this type and degree of abrasion. 4.2 Although this test method does not provide fundamental data, it is suitable for grading materials relative to this type of abrasion in a manner which correlates with service. 4.3 Comparison of interlaboratory data or the specification of a “haze” value has no significance if the hazemeter requirements given in 5.4 are not used. This is because light diffused from the surface of a Taber track is scattered at a narrow angle (Fig. 1 and Fig. 2) while light diffused internally by a specimen is scattered at a wide angle. In many hazemeters, when a diaphragm is inserted to limit the light beam to the width of the abraded track, the specular beam at the exit port becomes smaller. The dark annulus will then be greater than the 0.023 rad ± 0.002 rad (1.3° ± 0.1°) requirements of Test Method D1003. Since a large percentage of the narrow-angle forward-scattered light will not impinge on the sphere wall, “haze” readings become smaller. For hazemeters that have not been properly adjusted, the magnitude of this reduction is dependent both on the integrating sphere diameter and the reduction of the entrance beam. FIG. 1 Light Scattering from Surface of Abraded Tracks (Photograph) Note 1: This photograph shows light pattern of the scattering from the surface of a Taber abraded specimen. The circles show how increasing the 1.3° dark annulus dramatically changes the amount of light impacting the sphere wall. FIG. 2 Light Scattering from Surface of Abraded Tracks (Graph) Note 1: This graph shows goniophotometric curves for Taber abraded tracks. The specular angle of transmission is at 180°. 4.4 For many materials, there may be a specifi... SCOPE 1.1 This test method describes a procedure for estimating the resistance of transparent plastics to one kind of surface abrasion by measuring the change in optical properties. 1.2 Abrasive damage is numerically quantified by calculating the difference in haze percentage in accordance with Test Method D1003 between an abraded and unabraded specimen. 1.3 The values stated in SI units are to be regarded as standard. The values given in parentheses are for information only. Note 1: This test method is equivalent in the measurement of resistance to abrasion of ISO 3537, Section 8 and ISO 15082, Section 11, but is not equivalent in any other measurement or section. This test method is not equivalent to ISO 9352, and results cannot be directly compared between the two methods. Note 2: This test method is similar to SAE J3097Z26, Test 12. Note 3: Prior attempts to employ the Taber Abraser for volume loss determinations of various plastics2 have been unsuccessful because of excessively large coefficients of variation attributed to the data. Insufficient agreement among the participating laboratories has rendered the use of volume loss procedure inadvisable as an ASTM test method. Note 4: For determining the resistance to abrasion of organic coatings by weight loss, reference is made to Test Method D4060, which uses more aggressive CS-10 or CS-17 abrasive wheels. 1.4 This standard does not purport to address all of the safety concerns, if any, associated with its use. It is the responsibility of the user of this standard to establish appropriate safety, health, and environmental practices and determine the applicability of regulatory limitations prior to use. 1.5 This international standard was developed in accordance with internationally recognized principles on standardization established in the Decision on Principles for the Development of International Standards, Guides and Recommendations issued by the Wor...
ASTM D1044-19 is classified under the following ICS (International Classification for Standards) categories: 83.080.01 - Plastics in general. The ICS classification helps identify the subject area and facilitates finding related standards.
ASTM D1044-19 has the following relationships with other standards: It is inter standard links to ASTM D1044-13, ASTM D883-24, ASTM D883-23, ASTM E456-13a(2022)e1, ASTM D883-20, ASTM D883-19c, ASTM D883-19a, ASTM D883-19, ASTM D883-18a, ASTM D883-18, ASTM E456-13A(2017)e3, ASTM E456-13A(2017)e1, ASTM D883-17, ASTM E456-13ae3, ASTM E456-13a. Understanding these relationships helps ensure you are using the most current and applicable version of the standard.
ASTM D1044-19 is available in PDF format for immediate download after purchase. The document can be added to your cart and obtained through the secure checkout process. Digital delivery ensures instant access to the complete standard document.
Standards Content (Sample)
This international standard was developed in accordance with internationally recognized principles on standardization established in the Decision on Principles for the
Development of International Standards, Guides and Recommendations issued by the World Trade Organization Technical Barriers to Trade (TBT) Committee.
Designation: D1044 − 19
Standard Test Method for
Resistance of Transparent Plastics to Surface Abrasion by
the Taber Abraser
This standard is issued under the fixed designation D1044; the number immediately following the designation indicates the year of
original adoption or, in the case of revision, the year of last revision. A number in parentheses indicates the year of last reapproval. A
superscript epsilon (´) indicates an editorial change since the last revision or reapproval.
This standard has been approved for use by agencies of the U.S. Department of Defense.
1. Scope* 2. Referenced Documents
1.1 This test method describes a procedure for estimating 2.1 ASTM Standards:
the resistance of transparent plastics to one kind of surface D883 Terminology Relating to Plastics
abrasion by measuring the change in optical properties. D1003 Test Method for Haze and Luminous Transmittance
of Transparent Plastics
1.2 Abrasive damage is numerically quantified by calculat-
D4000 Classification System for Specifying Plastic Materi-
ing the difference in haze percentage in accordance with Test
als
Method D1003 between an abraded and unabraded specimen.
D4060 Test Method for Abrasion Resistance of Organic
1.3 The values stated in SI units are to be regarded as
Coatings by the Taber Abraser
standard. The values given in parentheses are for information
E456 Terminology Relating to Quality and Statistics
only.
E691 Practice for Conducting an Interlaboratory Study to
Determine the Precision of a Test Method
NOTE 1—This test method is equivalent in the measurement of
resistance to abrasion of ISO 3537, Section 8 and ISO 15082, Section 11,
G195 Guide for Conducting Wear Tests Using a Rotary
but is not equivalent in any other measurement or section. This test
Platform Abraser
method is not equivalent to ISO 9352, and results cannot be directly
2.2 ISO Standards:
compared between the two methods.
NOTE 2—This test method is similar to SAE J3097Z26, Test 12. ISO 3537 Road Vehicles—Safety Glazing Materials—
NOTE 3—Prior attempts to employ the Taber Abraser for volume loss
Mechanical Tests
determinations of various plastics have been unsuccessful because of
ISO 9352 Plastics—Determination of Resistance to Wear by
excessively large coefficients of variation attributed to the data. Insuffi-
Abrasive Wheels
cient agreement among the participating laboratories has rendered the use
ISO 15082 Road Vehicles—Tests for Rigid Plastic Safety
of volume loss procedure inadvisable as an ASTM test method.
NOTE 4—For determining the resistance to abrasion of organic coatings
Glazing Materials
byweightloss,referenceismadetoTestMethodD4060,whichusesmore
2.3 ANSI Standards:
aggressive CS-10 or CS-17 abrasive wheels.
SAE J3097Z26 Standard for Safety Glazing Materials for
1.4 This standard does not purport to address all of the
Glazing Motor Vehicles and Motor Vehicle Equipment
safety concerns, if any, associated with its use. It is the
Operating on Land Highways—Safety Standard
responsibility of the user of this standard to establish appro-
priate safety, health, and environmental practices and deter-
3. Terminology
mine the applicability of regulatory limitations prior to use.
3.1 Definitions—Definitions used in this test method are in
1.5 This international standard was developed in accor-
accordance with Terminology D883, unless otherwise speci-
dance with internationally recognized principles on standard-
fied. For terms relating to precision and bias and associated
ization established in the Decision on Principles for the
issues, the terms used in this test method are defined in
Development of International Standards, Guides and Recom-
accordance with Terminology E456.
mendations issued by the World Trade Organization Technical
Barriers to Trade (TBT) Committee.
3.2 Definitions:
This test method is under the jurisdiction ofASTM Committee D20 on Plastics
and is the direct responsibility of Subcommittee D20.10 on Mechanical Properties. For referenced ASTM standards, visit the ASTM website, www.astm.org, or
Current edition approved Sept. 1, 2019. Published September 2019. Originally contact ASTM Customer Service at service@astm.org. For Annual Book of ASTM
approved in 1949. Last previous edition approved in 2013 as D1044 - 13. DOI: Standards volume information, refer to the standard’s Document Summary page on
10.1520/D1044-19. the ASTM website.
2 4
Supporting data are available fromASTM Headquarters. Request RR:D20-48 Available fromAmerican National Standards Institute (ANSI), 25 W. 43rd St.,
and RR:D20-1090. 4th Floor, New York, NY 10036, http://www.ansi.org.
*A Summary of Changes section appears at the end of this standard
Copyright ©ASTM International, 100 Barr Harbor Drive, PO Box C700, West Conshohocken, PA19428-2959. United States
D1044 − 19
3.2.1 abrasion—abrasive wear caused by displacement or
rearrangement of a softer material due to rubbing or scuffing
against hard sharp particles.
3.2.2 haze—In accordance with Test Method D1003, that
percentage of transmitted light which in passing through the
specimen deviates from the incident beam by forward scatter-
ing. For the purpose of this test method, only light flux
deviating more than 0.044 rad (2.5°) on the average is
considered to be haze.
3.2.3 reface—preparation of an abrasive wheel on a condi-
tioning stone prior to use in testing.
3.2.4 wheel—an abrasive wheel consisting of hard particles
(aluminum oxide) embedded in resilient binder.
4. Significance and Use
4.1 Transparent plastic materials, when used as windows or
enclosures, are subject to wiping and cleaning; hence the
maintenance of optical quality of a material after abrasion is
important. It is the purpose of this test method to provide a
meansofestimatingtheresistanceofsuchmaterialstothistype
and degree of abrasion.
4.2 Although this test method does not provide fundamental
data, it is suitable for grading materials relative to this type of
abrasion in a manner which correlates with service.
4.3 Comparison of interlaboratory data or the specification
NOTE 1—This photograph shows light pattern of the scattering from the
of a “haze” value has no significance if the hazemeter
surface of aTaber abraded specimen.The circles show how increasing the
requirements given in 5.4 are not used. This is because light
1.3° dark annulus dramatically changes the amount of light impacting the
diffused from the surface of a Taber track is scattered at a
sphere wall.
narrow angle (Fig. 1 and Fig. 2) while light diffused internally
FIG. 1 Light Scattering from Surface of Abraded Tracks (Photo-
graph)
byaspecimenisscatteredatawideangle.Inmanyhazemeters,
when a diaphragm is inserted to limit the light beam to the
width of the abraded track, the specular beam at the exit port
temperature of the running surface of the wheel with an effect
becomessmaller.Thedarkannuluswillthenbegreaterthanthe
onthefinalhazemeasurement.Toreduceanyvariabilitydueto
0.023 rad 6 0.002 rad (1.3° 6 0.1°) requirements of Test
this temperature effect, stabilize the wheels surface tempera-
Method D1003. Since a large percentage of the narrow-angle
ture prior to performing actual measurements. This shall be
forward-scattered light will not impinge on the sphere wall,
accomplished by conducting multiple refacings on an ST-11
“haze” readings become smaller. For hazemeters that have not
refacing stone, followed by a test on the sample material to be
been properly adjusted, the magnitude of this reduction is
tested (with results to be discarded).
dependent both on the integrating sphere diameter and the
reduction of the entrance beam.
5. Apparatus
4.4 For many materials, there may be a specification that
5.1 Abrader—The Taber abraser or its equivalent, as de-
requires the use of this test method, but with some procedural
scribed in Guide G195 and consisting of the following ele-
modifications that take precedence when adhering to the
ments:
specification. Therefore, it is advisable to refer to that material
5.1.1 Ahorizontal turntable platform comprised of a rubber
specification before using this test method. Table 1 of Classi-
pad, clamp plate, and nut to secure the specimen to the
fication System D4000 lists theASTM materials standards that
turntable.
currently exist.
5.1.2 Amotor capable of rotating the turntable platform at a
4.5 For some materials, abrasion tests utilizing the Taber speed of either 72 r/min 6 2 r/min for 110v/60Hz or 60 r/min
abraser may be subject to variation due to changes in the 6 2 r/min for 230v/50Hz.
abrasive characteristics of the wheel during testing. 5.1.3 A pair of pivoted arms, to which the abrasive wheels
4.5.1 Depending on abradant type and test specimen, the and auxiliary masses (if used) would be attached; loads of 500
g or 1000 g on the wheels are obtained by use of changeable
wheel surface may change (that is, become clogged) due to the
transfer of coating or other materials from test specimens and weights.
must be cleaned at frequent intervals.
NOTE5—Withoutauxiliarymassesorcounterweightsapplied,eacharm
4.5.2 The type of material being tested and the number of
willapplyaloadagainstthespecimenof250gperwheel(exclusiveofthe
test cycles being run is known to sometimes influence the mass of the wheel itself).
D1044 − 19
5.4 Hazemeter—An integrating sphere photoelectric
photometer, as described in Test Method D1003, shall be used
to measure the light scattered by the abraded track. If haze
measurements are made with other devices or by other
methods, a correlation shall be established with the results
obtained with the apparatus and method described in Test
Method D1003.
5.4.1 Anapertureordiaphragmshallbecentrallyinsertedin
the haze measuring apparatus to center the light beam on the
abraded track and limit it to a diameter of 7 mm 6 1 mm (0.28
in. 6 0.04 in.) at the specimen.
5.4.2 When the reduced light beam is unobstructed by a
specimen, its cross section at the exit port shall be approxi-
mately circular, sharply defined, uniformly bright, and concen-
tric within the exit port, leaving an annulus of 0.023 rad 6
0.002 rad (1.3° 6 0.1°) subtended at the entrance port.
NOTE 7—Uniformity of the light intensity is usually checked by
observing the beam through thin bond paper placed at the exit port.
NOTE 8—Forward-scattering glass standards can be used to check that
the optical system of the hazemeter is properly adjusted.
5.5 Specimen Holder—A suitable holder shall be used to
permit positioning the abraded specimen on the hazemeter so
NOTE 1—This graph shows goniophotometric curves for Taber abraded
that the light beam is centered in the abraded track and the
tracks. The specular angle of transmission is at 180°.
specimen is flush at the measurement port.
FIG. 2 Light Scattering from Surface of Abraded Tracks (Graph)
6. Test Specimens
6.1 The test specimens shall be clean, transparent disks
5.1.4 Avacuum suction system and vacuum pick-up nozzle
approximately 100 mm in diameter or plates approximately
to remove debris and abrasive particles from the specimen
100 mm square, having both surfaces substantially plane and
surface during testing. The height of the vacuum pick-up
parallel.They may be cut from sheets or molded in thicknesses
nozzle shall be adjustable, and the nozzle openings shall be 11
1 1
upto12.7mm( ⁄2in.).A6.3mm( ⁄4in.)holeshallbecentrally
mm ( ⁄16 in.) in diameter.
drilled in each specimen. Three such specimens shall be tested
per sample, except for interlaboratory or specification tests
NOTE 6—The nominal nozzle openings are 8 mm ( ⁄16 in.) and can be
enlarged following the instructions shown in Appendix X2.Alternatively,
when ten specimens shall be tested.
a replacement nozzle with 11 mm openings can be installed.
5.1.5 Acounter to record the number of cycles (revolutions)
7. Calibration
made by the turntable platform.
7.1 Verify calibration of theTaber abraser as directed by the
5.2 Refacing Stone—The ST-11 refacing stone (or equiva-
equipment manufacturer (see Appendix X1).
lent) shall be used for refacing the abrasive wheels. It is
important that the turntable platform runs true on the abraser
8. Conditioning
and that the refacing stone lies flat on the turntable platform.
8.1 Conditioning—Unlessotherwisespecified,conditionthe
5.3 Abrasive Wheels—The grade of wheel designated CS-
test specimens at 23 °C 6 2 °C (73.4 °F 6 3.6 °F) and 50 % 6
10F shall be used, and shall meet the following requirements
5 % relative humidity for not less than 40 h prior to test. In
at the time of the test:
cases of disagreement, the tolerances shall be 61°C(61.8 °F)
5.3.1 The wheel shall be cylindrically shaped, have a
and 62 % relative humidity.
diameter between 52.4 mm and 44.4 mm, a width of 12.7 mm
8.2 Test Conditions—Conduct tests in the standard labora-
6 0.3 mm, and an axial hole 16.0 mm 6 0.1 mm in diameter
tory atmosphere of 23 °C 6 2 °C (73.4 °F 6 3.6 °F) and 50 %
in order to allow the wheel to be mounted to the flanged holder
65 %relativehumidity,unlessotherwisespecified.Incasesof
on the pivoted arms.
disagreements, the tolerances shall be 61°C (61.8 °F) and
5.3.2 The wheel shall not be used after the date stamped on
62 % relative humidity.
it.
NOTE 9—The change in percent of haze significantly worsens when
humidity levels are less than 45 %.
The sole source of supply of the apparatus known to the committee at this time
is Taber Industries, 455 Bryant Street, North Tonawanda, NY 14120. If you are
aware of alternative suppliers, please provide this information to ASTM Interna-
tional Headquarters.Your comments will receive careful consideration at a meeting Calibrated plastic haze standards are available from BYK-Gardner, Inc., 9104
of the responsible technical committee, which you may attend. Guilford Road, Columbia, MD 21046.
D1044 − 19
NOTE 11—The fine side of the ST-11 refacing stone has a limited life
9. Standardization of Abrading Wheels
and must be replaced after 7500 cycles (approximately 300 refacings).
9.1 To ensure that the abrading function of the wheels is
9.2.1 A thin fin of wheel material will sometimes form on
maintained at a constant level, prepare the abrading wheels
the left hand edge of the wheel as the main body of the wheel
prior to each test.
wearsdown.
...
This document is not an ASTM standard and is intended only to provide the user of an ASTM standard an indication of what changes have been made to the previous version. Because
it may not be technically possible to adequately depict all changes accurately, ASTM recommends that users consult prior editions as appropriate. In all cases only the current version
of the standard as published by ASTM is to be considered the official document.
Designation: D1044 − 13 D1044 − 19
Standard Test Method for
Resistance of Transparent Plastics to Surface Abrasion by
the Taber Abraser
This standard is issued under the fixed designation D1044; the number immediately following the designation indicates the year of
original adoption or, in the case of revision, the year of last revision. A number in parentheses indicates the year of last reapproval. A
superscript epsilon (´) indicates an editorial change since the last revision or reapproval.
This standard has been approved for use by agencies of the U.S. Department of Defense.
1. Scope*
1.1 This test method describes a procedure for estimating the resistance of transparent plastics to one kind of surface abrasion
by measuring the change in optical properties.
1.2 Abrasive damage is visually judged and numerically quantified by calculating the difference in haze percentage in
accordance with Test Method D1003 between an abraded and unabraded specimen.
1.3 CS-10F wheels manufactured between October 2002 and September 2004 have been found to give different results than
historical values. Comparisons of data using these wheels should be made with caution. Results using wheels made after September
2004 have agreed with those obtained before October 2002.
1.3 The values stated in SI units are to be regarded as standard. The values given in parentheses are for information only.
NOTE 1—This test method is equivalent in the measurement of resistance to abrasion of ISO 3537,ISO 3537, Section 78 and ISO 15082,ISO 15082,
Section 11, but is not equivalent in any other measurement or section. This test method is not equivalent to ISO 9352,ISO 9352, and results cannot be
directly compared between the two methods.
NOTE 2—This test method is similar to ANSI/SAE Z26.1,SAE J3097Z26, Test 17.12.
NOTE 3—Prior attempts to employ the Taber Abraser for volume loss determinations of various plastics have been unsuccessful because of excessively
large coefficients of variation attributed to the data. Insufficient agreement among the participating laboratories has rendered the use of volume loss
procedure inadvisable as an ASTM test method.
NOTE 4—For determining the resistance to abrasion of organic coatings by weight loss, reference is made to Test Method D4060, which uses more
aggressive CS-10 or CS-17 abrasive wheels.
1.4 This standard does not purport to address all of the safety concerns, if any, associated with its use. It is the responsibility
of the user of this standard to establish appropriate safety safety, health, and healthenvironmental practices and determine the
applicability of regulatory limitations prior to use.
1.5 This international standard was developed in accordance with internationally recognized principles on standardization
established in the Decision on Principles for the Development of International Standards, Guides and Recommendations issued
by the World Trade Organization Technical Barriers to Trade (TBT) Committee.
2. Referenced Documents
2.1 ASTM Standards:
D883 Terminology Relating to Plastics
D1003 Test Method for Haze and Luminous Transmittance of Transparent Plastics
D4000 Classification System for Specifying Plastic Materials
D4060 Test Method for Abrasion Resistance of Organic Coatings by the Taber Abraser
E456 Terminology Relating to Quality and Statistics
E691 Practice for Conducting an Interlaboratory Study to Determine the Precision of a Test Method
G195 Guide for Conducting Wear Tests Using a Rotary Platform Abraser
This test method is under the jurisdiction of ASTM Committee D20 on Plastics and is the direct responsibility of Subcommittee D20.10 on Mechanical Properties.
Current edition approved Sept. 1, 2013Sept. 1, 2019. Published September 2013September 2019. Originally approved in 1949. Last previous edition approved in 20082013
ϵ1
as D1044 - 08D1044 - 13. . DOI: 10.1520/D1044-13.10.1520/D1044-19.
Supporting data are available from ASTM Headquarters. Request RR:D20-48 and RR:D20-1090.
For referenced ASTM standards, visit the ASTM website, www.astm.org, or contact ASTM Customer Service at service@astm.org. For Annual Book of ASTM Standards
volume information, refer to the standard’s Document Summary page on the ASTM website.
*A Summary of Changes section appears at the end of this standard
Copyright © ASTM International, 100 Barr Harbor Drive, PO Box C700, West Conshohocken, PA 19428-2959. United States
D1044 − 19
2.2 ISO Standards:
ISO 3537 Road Vehicles—Safety Glazing Materials—Mechanical Tests
ISO 9352 Plastics—Determination of Resistance to Wear by Abrasive Wheels
ISO 15082 Road Vehicles—Tests for Rigid Plastic Safety Glazing Materials
2.3 ANSI Standards:
ANSI/SAE Z26.1SAE J3097Z26 Standard for Safety Glazing Materials for Glazing Motor VehicleVehicles and Motor Vehicle
Equipment Operating on Land Highways—Abrasion Resistance, Test 17 (Plastics)Highways—Safety Standard
3. Terminology
3.1 Definitions—Definitions used in this test method are in accordance with Terminology D883, unless otherwise specified. For
terms relating to precision and bias and associated issues, the terms used in this test method are defined in accordance with
Terminology E456.
3.2 Definitions:
3.2.1 abrasion—abrasive wear caused by displacement or rearrangement of a softer material due to rubbing or scuffing against
hard sharp particles.
3.2.2 haze—In accordance with Test Method D1003, that percentage of transmitted light which in passing through the specimen
deviates from the incident beam by forward scattering. For the purpose of this test method, only light flux deviating more than
0.044 rad (2.5°) on the average is considered to be haze.
3.2.3 reface—preparation of an abrasive wheel on a conditioning stone prior to use in testing.
3.2.4 wheel—an abrasive wheel consisting of hard particles (aluminum oxide) embedded in resilient binder.
4. Significance and Use
4.1 Transparent plastic materials, when used as windows or enclosures, are subject to wiping and cleaning; hence the
maintenance of optical quality of a material after abrasion is important. It is the purpose of this test method to provide a means
of estimating the resistance of such materials to this type and degree of abrasion.
4.2 Although this test method does not provide fundamental data, it is suitable for grading materials relative to this type of
abrasion in a manner which correlates with service.
4.3 Comparison of interlaboratory data or the specification of a “haze” value has no significance if the hazemeter requirements
given in 5.4 are not used. This is because light diffused from the surface of a Taber track is scattered at a narrow angle (Fig. 1 and
Fig. 2) while light diffused internally by a specimen is scattered at a wide angle. In many hazemeters, when a diaphragm is inserted
to limit the light beam to the width of the abraded track, the specular beam at the exit port becomes smaller. The dark annulus will
then be greater than the 0.023 rad 6 0.002 rad (1.3(1.3° 6 0.1°) requirements of Test Method D1003. Since a large percentage
of the narrow-angle forward-scattered light will not impinge on the sphere wall, “haze” readings become smaller. For hazemeters
that have not been properly adjusted, the magnitude of this reduction is dependent both on the integrating sphere diameter and the
reduction of the entrance beam.
4.4 For many materials, there may be a specification that requires the use of this test method, but with some procedural
modifications that take precedence when adhering to the specification. Therefore, it is advisable to refer to that material
specification before using this test method. Table 1 of Classification System D4000 lists the ASTM materials standards that
currently exist.
4.5 For some materials, abrasion tests utilizing the Taber abraser may be subject to variation due to changes in the abrasive
characteristics of the wheel during testing.
4.5.1 Depending on abradant type and test specimen, the wheel surface may change (that is, become clogged) due to the transfer
of coating or other materials from test specimens and must be cleaned at frequent intervals.
4.5.2 The type of material being tested and the number of test cycles being run is known to sometimes influence the temperature
of the running surface of the wheel with an effect on the final haze measurement. To reduce any variability due to this temperature
effect, stabilize the wheels surface temperature prior to performing actual measurements. This shall be accomplished by conducting
multiple refacings on an ST-11 refacing stone, followed by a test on the sample material to be tested (with results to be discarded).
5. Apparatus
5.1 Abrader—The Taber abraser or its equivalent, as described in Guide G195 and consisting of the following elements:
5.1.1 A horizontal turntable platform;platform comprised of a rubber pad, clamp plate, and nut to secure the specimen to the
turntable.
Available from American National Standards Institute (ANSI), 25 W. 43rd St., 4th Floor, New York, NY 10036, http://www.ansi.org.
D1044 − 19
NOTE 1—This photograph shows light pattern of the scattering from the surface of a Taber abraded specimen. The circles show how increasing the
1.3° dark annulus dramatically changes the amount of light impacting the sphere wall.
FIG. 1 Light Scattering from Surface of Abraded Tracks (Photograph)
NOTE 1—This graph shows goniophotometric curves for Taber abraded tracks. The specular angle of transmission is at 180°.
FIG. 2 Light Scattering from Surface of Abraded Tracks (Graph)
5.1.2 A motor capable of rotating the turntable platform at a speed of either 72 r/min 6 2 r/min for 110v/60Hz or 60 r/min 6
2 r/min for 230v/50Hz.
D1044 − 19
5.1.3 A pair of pivoted arms, to which the abrasive wheels and auxiliary masses (if used) would be attached; loads of 500 g or
1000 gfg on the wheels are obtained by use of changeable weights.
NOTE 5—Without auxiliary masses or counterweights applied, each arm will apply a load against the specimen of 250 gfg per wheel (exclusive of the
mass of the wheel itself).
5.1.4 A vacuum suction system and vacuum pick-up nozzle to remove debris and abrasive particles from the specimen surface
during testing. The height of the vacuum pick-up nozzle shall be adjustable, and the nozzle openings shall be 11 mm ( ⁄16 in.) in
diameter.
NOTE 6—The nominal nozzle openings are 8 mm ( ⁄16 in.) and can be enlarged following the instructions shown in Appendix X2. Alternatively, a
replacement nozzle with 11 mm openings can be installed.
5.1.5 A counter to record the number of cycles (revolutions) made by the turntable platform.
5.2 Refacing Stone—The ST-11 refacing stone (or equivalent) shall be used for refacing the abrasive wheels. It is important that
the turntable platform runs true on the abraser and that the refacing stone lies flat on the turntable platform.
5.3 Abrasive Wheels—The grade of wheel designated CS-10F shall be used, and shall meet the following requirements at the
time of the test:
5.3.1 The wheel shall be 12.7 6 0.3 mm wide and have an external diameter of 51.9 6 0.5 mm when new, and in no case less
than 44.4 mm, andcylindrically shaped, have a diameter between 52.4 mm and 44.4 mm, a width of 12.7 mm 6 0.3 mm, and an
axial hole 16.0 mm 6 0.1 mm in diameter in order to allow the wheel to be mounted to the flanged holder on the pivoted arms.
5.3.2 The wheel shall not be used after the date stamped on it.
5.4 Hazemeter—An integrating sphere photoelectric photometer, as described in Test Method D1003, shall be used to measure
the light scattered by the abraded track. If haze measurements are made with other devices or by other methods, a correlation shall
be established with the results obtained with the apparatus and method described in Test Method D1003.
5.4.1 An aperture or diaphragm shall be centrally inserted in the haze measuring apparatus to center the light beam on the
abraded track and limit it to a diameter of 7 mm 6 1 mm (0.28 in. 6 0.04 in.) at the specimen.
5.4.2 When the reduced light beam is unobstructed by a specimen, its cross section at the exit port shall be approximately
circular, sharply defined, uniformly bright, and concentric within the exit port, leaving an annulus of 0.023 rad 6 0.002 rad
(1.3(1.3° 6 0.1°) subtended at the entrance port.
NOTE 7—Uniformity of the light intensity is usually checked by observing the beam through thin bond paper placed at the exit port.
NOTE 8—Forward-scattering glass standards can be used to check that the optical system of the hazemeter is properly adjusted.
5.5 Specimen Holder—A suitable holder shall be used to permit positioning the abraded specimen on the hazemeter so that the
light beam is centered in the abraded track and the specimen is flush at the measurement port.
6. Test Specimens
6.1 The test specimens shall be clean, transparent disks approximately 100 mm in diameter or plates approximately 100 mm
square, having both surfaces substantially plane and parallel. They may be cut from sheets or molded in thicknesses up to 12.7
1 1
mm ( ⁄2 in.). A 6.3-mm 6.3 mm ( ⁄4-in.) in.) hole shall be centrally drilled in each specimen. Three such specimens shall be tested
per sample, except for interlaboratory or specification tests when ten specimens shall be tested.
7. Calibration
7.1 Verify calibration of the Taber abraser as directed by the equipment manufacturer (see Appendix X1).
8. Conditioning
8.1 Conditioning—Unless otherwise specified, condition the test specimens at 2323 °C 6 2°C (73.42 °C (73.4 °F 6
3.6°F)3.6 °F) and 5050 % 6 5 % relative humidity for not less than 40 h prior to test. In cases of disagreement, the tolerances shall
be 61°C (61.8°F)61 °C (61.8 °F) and 62 % relative humidity.
8.2 Test Conditions—Conduct tests in the standard laboratory atmosphere of 2323 °C 6 2°C (73.42 °C (73.4 °F 6 3.6°F)3.6 °F)
and 5050 % 6 5 % relative humidity, unless otherwise specified. In cases of disagreements, the tolerances shall be 61°C
(61.8°F)61 °C (61.8 °F) and 62 % relative humidity.
NOTE 9—The change in percent of haze significantly worsens when humidity levels are less than 45 %.
The sole source of supply of the apparatus known to the committee at this time is Taber Industries, 455 Bryant Street, North Tonawanda, NY 14120. If you are aware
of alternative suppliers, please provide this information to ASTM International Headquarters. Your comments will receive careful consideration at a meeting of the responsible
technical committee, which you may attend.
Calibrated plastic haze standards are available from BYK-Gardner, Inc., 9104 Guilford Road, Columbia, MD 21046.
D1044 − 19
9. Standardization of Abrading Wheels
9.1 To ensure that the abrading function of the wheels is maintained at a constant level, prepare the abrading wheels prior to
each test.
9.1.1 Mount the wheels on their respective flange holders, taking care not to handle them by their abrasive surfaces.
9.1.2 Select the load to be used and affix it to the abraser. If no load is specified, use a load of 500 gf (per wheel).
9.1.3 Mount an ST-11 refacing stone (or equivalent) on the turntable, and secure using the nut.
1 1
9.1.4 Lower the vacuum nozzle and adjust its height to within 0.80.8 mm to 1.6 mm ( ⁄32 in. to ⁄16 in.) of the refacing stone.
Set the vacuum suction force to 100.
9.1.5 Lower the arms so the wheels contact the surface of the ST-11 refacing stone.
9.2 Before abrading each specimen, reface the wheels for 25 cycles on the ST-11 refacing stone. After refacing, use a soft bristle,
anti-static brush to lightly brush the wheel surfaces to remove any loose particulate matter before abrading a specimen.
(Warning—Do not touch the running surface of the wheels after they are refaced. New wheels or wheels trued using a diamond
tool refacer, must first be broken in with 100 cycles on the ST-11 refacing stone followed by a test on the material to be evaluated
(results to be discarded).)
NOTE 10—A brush found suitable for this purpose has been described
...
Questions, Comments and Discussion
Ask us and Technical Secretary will try to provide an answer. You can facilitate discussion about the standard in here.
Loading comments...