ASTM C148-00(2011)
(Test Method)Standard Test Methods for Polariscopic Examination of Glass Containers
Standard Test Methods for Polariscopic Examination of Glass Containers
SIGNIFICANCE AND USE
These two test methods are provided for evaluating the quality of annealing. These test methods can be used in the quality control of glass containers or other products made of similar glass compositions, where the degree of annealing must be verified to ensure quality products. These test methods apply to glass containers manufactured from commercial soda-lime-silica glass compositions.
SCOPE
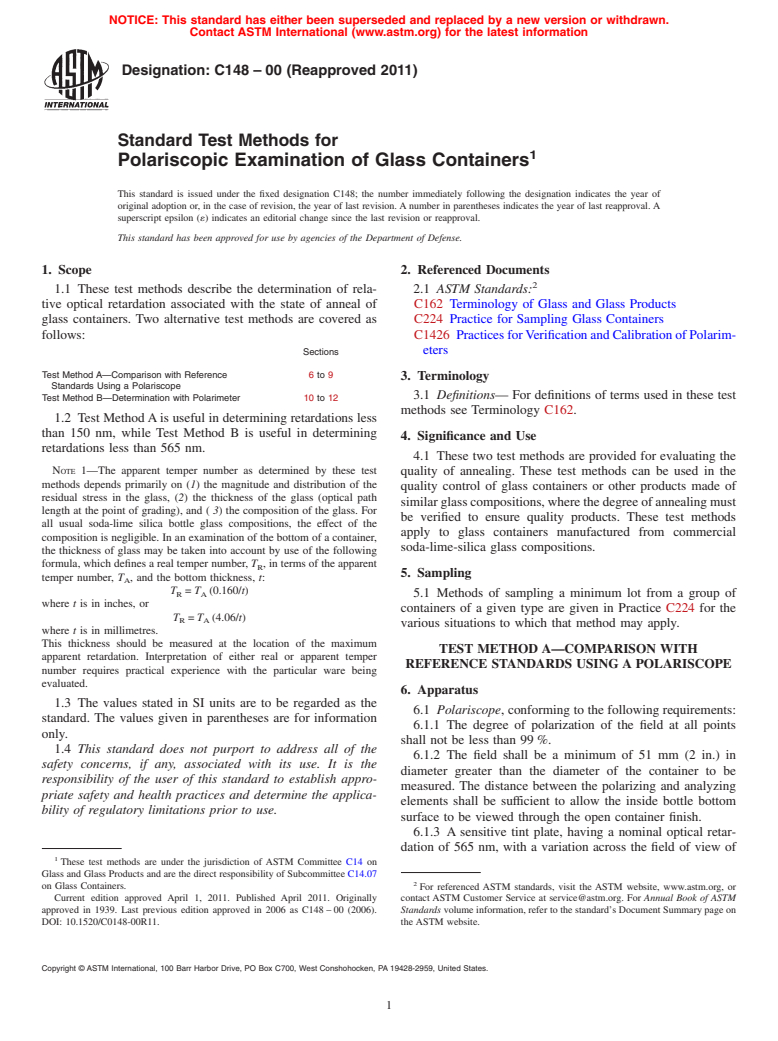
1.1 These test methods describe the determination of relative optical retardation associated with the state of anneal of glass containers. Two alternative test methods are covered as follows:
General Information
Relations
Standards Content (Sample)
NOTICE: This standard has either been superseded and replaced by a new version or withdrawn.
Contact ASTM International (www.astm.org) for the latest information
Designation:C148–00 (Reapproved 2011)
Standard Test Methods for
Polariscopic Examination of Glass Containers
This standard is issued under the fixed designation C148; the number immediately following the designation indicates the year of
original adoption or, in the case of revision, the year of last revision. A number in parentheses indicates the year of last reapproval. A
superscript epsilon (´) indicates an editorial change since the last revision or reapproval.
This standard has been approved for use by agencies of the Department of Defense.
1. Scope 2. Referenced Documents
2.1 ASTM Standards:
1.1 These test methods describe the determination of rela-
tive optical retardation associated with the state of anneal of C162 Terminology of Glass and Glass Products
glass containers. Two alternative test methods are covered as C224 Practice for Sampling Glass Containers
follows: C1426 PracticesforVerificationandCalibrationofPolarim-
eters
Sections
Test Method A—Comparison with Reference 6 to 9
3. Terminology
Standards Using a Polariscope
3.1 Definitions— For definitions of terms used in these test
Test Method B—Determination with Polarimeter 10 to 12
methods see Terminology C162.
1.2 Test MethodAis useful in determining retardations less
than 150 nm, while Test Method B is useful in determining
4. Significance and Use
retardations less than 565 nm.
4.1 These two test methods are provided for evaluating the
NOTE 1—The apparent temper number as determined by these test quality of annealing. These test methods can be used in the
methods depends primarily on (1) the magnitude and distribution of the
quality control of glass containers or other products made of
residual stress in the glass, (2) the thickness of the glass (optical path
similarglasscompositions,wherethedegreeofannealingmust
length at the point of grading), and ( 3) the composition of the glass. For
be verified to ensure quality products. These test methods
all usual soda-lime silica bottle glass compositions, the effect of the
apply to glass containers manufactured from commercial
composition is negligible. In an examination of the bottom of a container,
soda-lime-silica glass compositions.
the thickness of glass may be taken into account by use of the following
formula, which defines a real temper number, T , in terms of the apparent
R
5. Sampling
temper number, T , and the bottom thickness, t:
A
T = T (0.160/t)
R A 5.1 Methods of sampling a minimum lot from a group of
where t is in inches, or
containers of a given type are given in Practice C224 for the
T = T (4.06/t)
R A
various situations to which that method may apply.
where t is in millimetres.
This thickness should be measured at the location of the maximum
TEST METHOD A—COMPARISON WITH
apparent retardation. Interpretation of either real or apparent temper
REFERENCE STANDARDS USING A POLARISCOPE
number requires practical experience with the particular ware being
evaluated.
6. Apparatus
1.3 The values stated in SI units are to be regarded as the
6.1 Polariscope, conforming to the following requirements:
standard. The values given in parentheses are for information
6.1.1 The degree of polarization of the field at all points
only.
shall not be less than 99 %.
1.4 This standard does not purport to address all of the
6.1.2 The field shall be a minimum of 51 mm (2 in.) in
safety concerns, if any, associated with its use. It is the
diameter greater than the diameter of the container to be
responsibility of the user of this standard to establish appro-
measured. The distance between the polarizing and analyzing
priate safety and health practices and determine the applica-
elements shall be sufficient to allow the inside bottle bottom
bility of regulatory limitations prior to use.
surface to be viewed through the open container finish.
6.1.3 A sensitive tint plate, having a nominal optical retar-
dation of 565 nm, with a variation across the field of view of
These test methods are under the jurisdiction of ASTM Committee C14 on
Glass and Glass Products and are the direct responsibility of Subcommittee C14.07
on Glass Containers. For referenced ASTM standards, visit the ASTM website, www.astm.org, or
Current edition approved April 1, 2011. Published April 2011. Originally contact ASTM Customer Service at service@astm.org. For Annual Book of ASTM
approved in 1939. Last previous edition approved in 2006 as C148 – 00 (2006). Standards volume information, refer to the standard’s Document Summary page on
DOI: 10.1520/C0148-00R11. the ASTM website.
Copyright © ASTM International, 100 Barr Harbor Drive, PO Box C700, West Conshohocken, PA 19428-2959, United States.
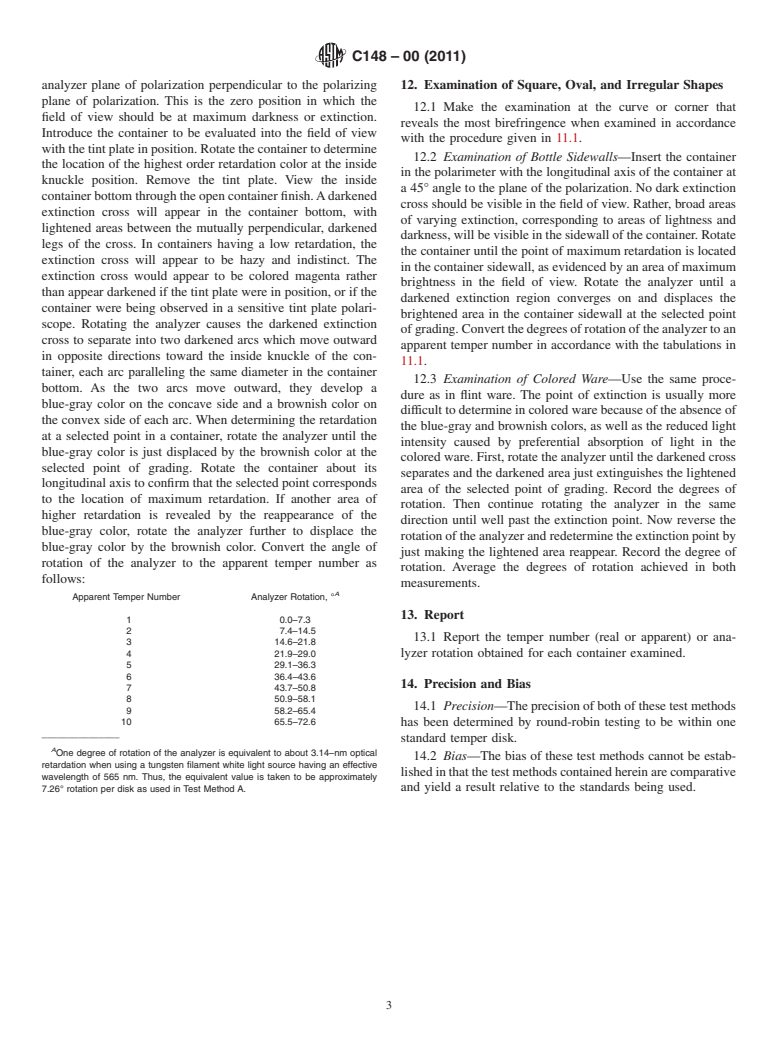
C148–00 (2011)
less than 5 nm and with its slow axis at 45° to the plane of with the maximum retardation color at the calibration point of
polarization, shall be used. Such an orientation will produce a the standard reference disks, and record the apparent temper
magenta background in the field of view. The brightness of the number in accordance with the procedure outlined in 8.1.1.
polarized field illuminating the sample shall be a minimum of 8.4 Examination of Colored Ware—Using the polariscope
300 cd/m . with the tint plate in the field of view, rotate the container to
determine the location of the highest order retardation color at
NOTE 2—Color discrimination remains satisfactory with retardations
the inside knuckle position. View the bottom of the container
between 510 and 580 nm, but optimum conditions are attained at 565 nm.
through the open container finish and select as a reference area
7. Calibration and Standardization the darkest appearing area of the container bottom having
minimum retardation, usually found at the center of the
7.1 A set of not less than five standardized glass disks of
container bottom. Then, with the tint plate in position, hold a
known retardation stress shall be used to cover the range of
standard reference disk under the reference area in the bottom
commercial container annealing. Such disks shall be circular
of the container such that the calibration point on the disk is
plates of glass not less than 76 mm (3 in.) nor more than 102
directly under the reference area in the center bottom of the
mm (4 in.) in diameter. Each disk shall have a nominal
container. Compare the retardation color of the reference area
retardation at the calibration point, 6.4 mm (0.25 in.) from the
in the container center bottom as modified by the standard
outer circumference of the disk, corresponding to not less than
reference disk with the maximum retardation color as normally
21.8 nm nor more than 23.8 nm of optical retardation.
observed at the inside knuckle of the container bottom. If this
8. Procedure color is greater than the modified color of the reference area,
use two or more disks and grade the annealing in accordance
8.1 Examination of the Bottom of Cylindrical Flint
with the procedure outlined in 8.1.1.
Containers—View the inside bottom of the container through
the open container finish. Rotate the container to determine the
9. Report
location of the highest order of retardation color at the inside
9.1 Report the temper number (real or apparent) obtained
knuckle position. Compare the highest order retardation color
for each container.
observed at the bottom of the container to the retardation color
seen at the calibration point in various numbers of the standard TEST METHOD B—DETERMINATION WITH
disks stacked one on top of the other and held parallel to the POLARIMETER
surface of the polarizer. Determine whether the maximum
10. Apparatus
order of retardation color in the container bottom is less than
10.1 Polarimeter, conforming to the following require-
that in one disk, less than that in two and greater than one, less
ments:
than that in three and greater than two, and so forth. It is
10.1.1 The degree of polarization of the field shall be at all
seldom possible to obtain an exact match of the order of
points not less than 99 %.
retardation color scheme in the container with the reference
10.1.2 The field shall be a minimum of 51 mm (2 in.) in
standards. Accordingly, record the temper number of the
diameter greater than the diameter of the container to be
container using the following procedure:
measured. The distance between the polarizing and analyzing
8.1.1 Temper Number Determination—When a maximum
elements shall be su
...


Questions, Comments and Discussion
Ask us and Technical Secretary will try to provide an answer. You can facilitate discussion about the standard in here.