ASTM E925-09
(Practice)Standard Practice for Monitoring the Calibration of Ultraviolet-Visible Spectrophotometers whose Spectral Slit Width does not Exceed 2 nm
Standard Practice for Monitoring the Calibration of Ultraviolet-Visible Spectrophotometers whose Spectral Slit Width does not Exceed 2 nm
SIGNIFICANCE AND USE
This practice permits an analyst to compare the performance of an instrument to the manufacturer's supplied performance specifications and to verify its suitability for continued routine use. It also provides generation of calibration monitoring data on a periodic basis, forming a base from which any changes in the performance of the instrument will be evident.
SCOPE
1.1 This practice covers the parameters of spectrophotometric performance that are critical for testing the adequacy of instrumentation for most routine tests and methods within the wavelength range of 200 to 700 nm and the absorbance range of 0 to 2. The recommended tests provide a measurement of the important parameters controlling results in spectrophotometric methods, but it is specifically not to be inferred that all factors in instrument performance are measured.
1.2 This practice may be used as a significant test of the performance of instruments for which the spectral bandwidth does not exceed 2 nm and for which the manufacturer's specifications for wavelength and absorbance accuracy do not exceed the performance tolerances employed here. This practice employs an illustrative tolerance of ±1 % relative for the error of the absorbance scale over the range of 0.2 to 2.0, and of ±1.0 nm for the error of the wavelength scale. A suggested maximum stray radiant power ratio of 4 × 10⁻⁴ yields 1 % absorbance bias at an absorbance of 2. These tolerances are chosen to be compatible with many chemical applications while comfortably exceeding the uncertainty of the certified values for the reference materials and typical manufacturer's specifications for error in the wavelength and absorbance scales of the instrument under test. The user is encouraged to develop and use tolerance values more appropriate to the requirements of the end use application. This procedure is designed to verify quantitative performance on an ongoing basis and to compare one instrument's performance with that of other similar units. Refer to Practice E275 to extensively evaluate the performance of an instrument.
1.3 This practice should be performed on a periodic basis, the frequency of which depends on the physical environment within which the instrumentation is used. Thus, units handled roughly or used under adverse conditions (exposed to dust, chemical vapors, vibrations, or combinations thereof) should be tested more frequently than those not exposed to such conditions. This practice should also be performed after any significant repairs are made on a unit, such as those involving the optics, detector, or radiant energy source.
1.4 The values stated in SI units are to be regarded as standard. No other units of measurement are included in this standard.
1.5 This standard does not purport to address all of the safety concerns, if any, associated with its use. It is the responsibility of the user of this standard to establish appropriate safety and health practices and determine the applicability of regulatory limitations prior to use.
General Information
Relations
Buy Standard
Standards Content (Sample)
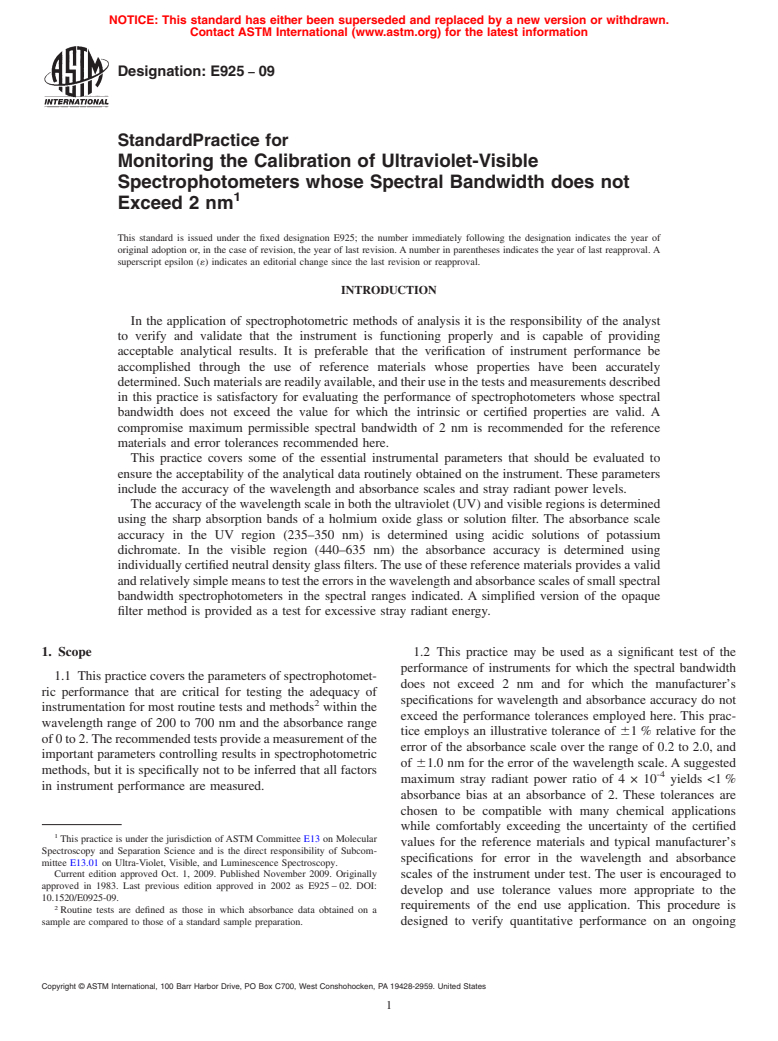
NOTICE: This standard has either been superseded and replaced by a new version or withdrawn.
Contact ASTM International (www.astm.org) for the latest information
Designation: E925 − 09
StandardPractice for
Monitoring the Calibration of Ultraviolet-Visible
Spectrophotometers whose Spectral Bandwidth does not
1
Exceed 2 nm
This standard is issued under the fixed designation E925; the number immediately following the designation indicates the year of
original adoption or, in the case of revision, the year of last revision.Anumber in parentheses indicates the year of last reapproval.A
superscript epsilon (´) indicates an editorial change since the last revision or reapproval.
INTRODUCTION
In the application of spectrophotometric methods of analysis it is the responsibility of the analyst
to verify and validate that the instrument is functioning properly and is capable of providing
acceptable analytical results. It is preferable that the verification of instrument performance be
accomplished through the use of reference materials whose properties have been accurately
determined.Suchmaterialsarereadilyavailable,andtheiruseinthetestsandmeasurementsdescribed
in this practice is satisfactory for evaluating the performance of spectrophotometers whose spectral
bandwidth does not exceed the value for which the intrinsic or certified properties are valid. A
compromise maximum permissible spectral bandwidth of 2 nm is recommended for the reference
materials and error tolerances recommended here.
This practice covers some of the essential instrumental parameters that should be evaluated to
ensure the acceptability of the analytical data routinely obtained on the instrument. These parameters
include the accuracy of the wavelength and absorbance scales and stray radiant power levels.
Theaccuracyofthewavelengthscaleinboththeultraviolet(UV)andvisibleregionsisdetermined
using the sharp absorption bands of a holmium oxide glass or solution filter. The absorbance scale
accuracy in the UV region (235–350 nm) is determined using acidic solutions of potassium
dichromate. In the visible region (440–635 nm) the absorbance accuracy is determined using
individuallycertifiedneutraldensityglassfilters.Theuseofthesereferencematerialsprovidesavalid
andrelativelysimplemeanstotesttheerrorsinthewavelengthandabsorbancescalesofsmallspectral
bandwidth spectrophotometers in the spectral ranges indicated. A simplified version of the opaque
filter method is provided as a test for excessive stray radiant energy.
1. Scope 1.2 This practice may be used as a significant test of the
performance of instruments for which the spectral bandwidth
1.1 Thispracticecoverstheparametersofspectrophotomet-
does not exceed 2 nm and for which the manufacturer’s
ric performance that are critical for testing the adequacy of
specifications for wavelength and absorbance accuracy do not
2
instrumentation for most routine tests and methods within the
exceed the performance tolerances employed here. This prac-
wavelength range of 200 to 700 nm and the absorbance range
tice employs an illustrative tolerance of 61% relative for the
of0to2.Therecommendedtestsprovideameasurementofthe
error of the absorbance scale over the range of 0.2 to 2.0, and
important parameters controlling results in spectrophotometric
of 61.0 nm for the error of the wavelength scale.Asuggested
methods, but it is specifically not to be inferred that all factors
-4
maximum stray radiant power ratio of4×10 yields <1%
in instrument performance are measured.
absorbance bias at an absorbance of 2. These tolerances are
chosen to be compatible with many chemical applications
while comfortably exceeding the uncertainty of the certified
1
This practice is under the jurisdiction ofASTM Committee E13 on Molecular
values for the reference materials and typical manufacturer’s
Spectroscopy and Separation Science and is the direct responsibility of Subcom-
specifications for error in the wavelength and absorbance
mittee E13.01 on Ultra-Violet, Visible, and Luminescence Spectroscopy.
Current edition approved Oct. 1, 2009. Published November 2009. Originally
scales of the instrument under test. The user is encouraged to
approved in 1983. Last previous edition approved in 2002 as E925–02. DOI:
develop and use tolerance values more appropriate to the
10.1520/E0925-09.
2 requirements of the end use application. This procedure is
Routine tests are defined as those in which absorbance data obtained on a
sample are compared to those of a standard sample preparation. designed to verify quantitative performance on an ongoing
Copyright © ASTM International, 100 Barr Harbor Drive, PO Box C700, West Conshohocken, PA 19428-2959. United States
1
---------------------- Page: 1 ----------------------
E925 − 09
basis and to compare one instrument’s performance with that ISOGuide34General Requirements for the Competence of
of other similar units. Refer to Practice E275 to extensively Reference Material Producers
evaluate the performance of an inst
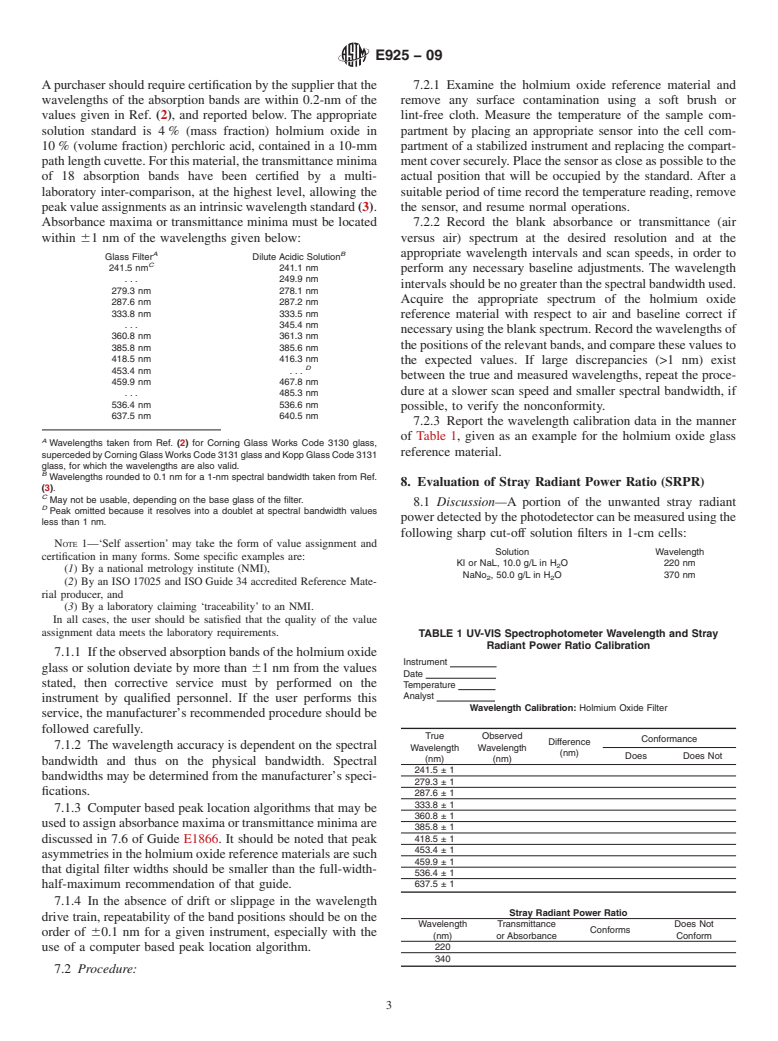
...
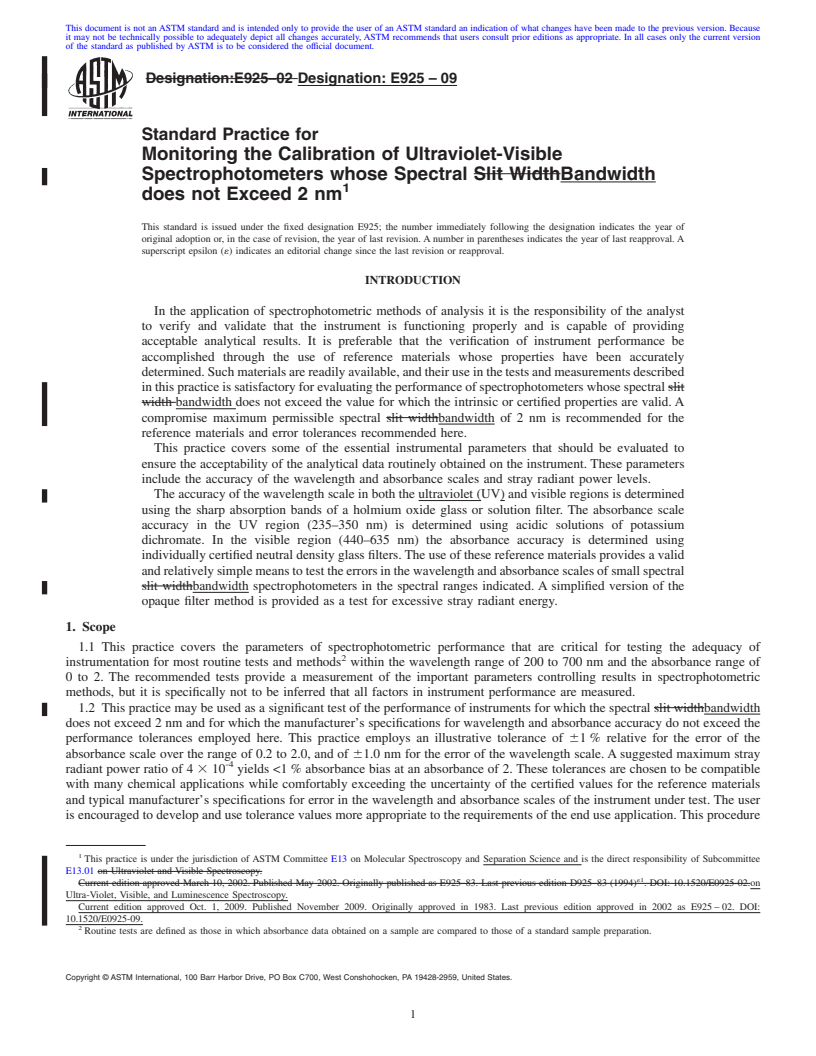
This document is not anASTM standard and is intended only to provide the user of anASTM standard an indication of what changes have been made to the previous version. Because
it may not be technically possible to adequately depict all changes accurately, ASTM recommends that users consult prior editions as appropriate. In all cases only the current version
of the standard as published by ASTM is to be considered the official document.
Designation:E925–02 Designation:E925–09
Standard Practice for
Monitoring the Calibration of Ultraviolet-Visible
Spectrophotometers whose Spectral Slit WidthBandwidth
1
does not Exceed 2 nm
This standard is issued under the fixed designation E925; the number immediately following the designation indicates the year of
original adoption or, in the case of revision, the year of last revision. A number in parentheses indicates the year of last reapproval. A
superscript epsilon (´) indicates an editorial change since the last revision or reapproval.
INTRODUCTION
In the application of spectrophotometric methods of analysis it is the responsibility of the analyst
to verify and validate that the instrument is functioning properly and is capable of providing
acceptable analytical results. It is preferable that the verification of instrument performance be
accomplished through the use of reference materials whose properties have been accurately
determined.Suchmaterialsarereadilyavailable,andtheiruseinthetestsandmeasurementsdescribed
inthispracticeissatisfactoryforevaluatingtheperformanceofspectrophotometerswhosespectralslit
width bandwidth does not exceed the value for which the intrinsic or certified properties are valid.A
compromise maximum permissible spectral slit widthbandwidth of 2 nm is recommended for the
reference materials and error tolerances recommended here.
This practice covers some of the essential instrumental parameters that should be evaluated to
ensure the acceptability of the analytical data routinely obtained on the instrument. These parameters
include the accuracy of the wavelength and absorbance scales and stray radiant power levels.
The accuracy of the wavelength scale in both the ultraviolet (UV) and visible regions is determined
using the sharp absorption bands of a holmium oxide glass or solution filter. The absorbance scale
accuracy in the UV region (235–350 nm) is determined using acidic solutions of potassium
dichromate. In the visible region (440–635 nm) the absorbance accuracy is determined using
individually certified neutral density glass filters.The use of these reference materials provides a valid
andrelativelysimplemeanstotesttheerrorsinthewavelengthandabsorbancescalesofsmallspectral
slit widthbandwidth spectrophotometers in the spectral ranges indicated. A simplified version of the
opaque filter method is provided as a test for excessive stray radiant energy.
1. Scope
1.1 This practice covers the parameters of spectrophotometric performance that are critical for testing the adequacy of
2
instrumentation for most routine tests and methods within the wavelength range of 200 to 700 nm and the absorbance range of
0 to 2. The recommended tests provide a measurement of the important parameters controlling results in spectrophotometric
methods, but it is specifically not to be inferred that all factors in instrument performance are measured.
1.2 This practice may be used as a significant test of the performance of instruments for which the spectral slit widthbandwidth
does not exceed 2 nm and for which the manufacturer’s specifications for wavelength and absorbance accuracy do not exceed the
performance tolerances employed here. This practice employs an illustrative tolerance of 61 % relative for the error of the
absorbance scale over the range of 0.2 to 2.0, and of 61.0 nm for the error of the wavelength scale.Asuggested maximum stray
-4
radiant power ratio of 4 3 10 yields <1 % absorbance bias at an absorbance of 2. These tolerances are chosen to be compatible
with many chemical applications while comfortably exceeding the uncertainty of the certified values for the reference materials
and typical manufacturer’s specifications for error in the wavelength and absorbance scales of the instrument under test. The user
is encouraged to develop and use tolerance values more appropriate to the requirements of the end use application.This procedure
1
This practice is under the jurisdiction of ASTM Committee E13 on Molecular Spectroscopy and Separation Science and is the direct responsibility of Subcommittee
E13.01 on Ultraviolet and Visible Spectroscopy.
´1
Current edition approved March 10, 2002. Published May 2002. Originally published as E925–83. Last previous edition D925–83 (1994) . DOI: 10.1520/E0925-02.on
Ultra-Violet, Visible, and Luminescence Spectroscopy.
Current edition approved Oct. 1, 2009. Published November 2009. Originally approved in 1983. Last previous edition approved in 2002 as E925 – 02. DOI:
10.1520/E0925-09.
2
Routine tests are defined as those in which
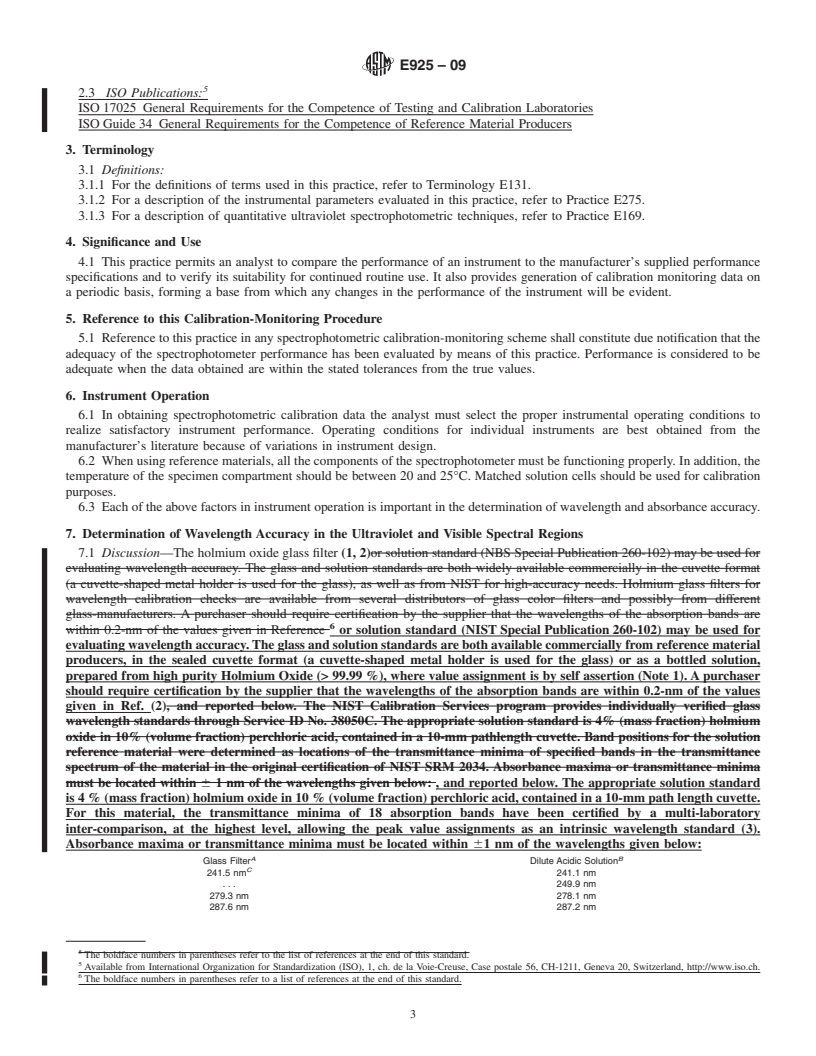
...


Questions, Comments and Discussion
Ask us and Technical Secretary will try to provide an answer. You can facilitate discussion about the standard in here.